Transcription
AdministratorUser GuideAdmin Control Panel Overview4Organization5 Managing Your Logo6 Managing Your Brand Logo (s)7Interview Questions8 Adding an Interview Question9 Removing an Interview Question9 Editing an Interview Question9Locations10 Modifying Location Information11 Creating Location Groups12Pay Ranges15Policies (Onboarding Customers Only)16 View an Existing Policy (1)16 Removing an Existing Policy (2)17 Modifying an Existing Policy17 Adding a New Policy19Rehire Eligibility Overriding Do Not Rehire StatusUsers202222 Modifying an Existing User23 Adding a New User2 7Reports29 Running a Report29 Standard Reports32 Overview Reports3 3 Compliance Reports3 4Appendix - Employer Email Notifications39 Apply3 8 Transfer3 8 Hire3 8 Termination39 TNC39For more information, contact support@snagajob.comUpdated 02.10.2020 - 2
AdministratorUser GuideAs an administrative user of your Snagajob account, you have the ability to make changes to information within youraccount. This document will provide instructions on how to use these features to modify your company’s information asneeded.Before we begin, be sure to consider the following: Making changes within your account may affect the system across your organization. If you have a question orconcern about a change you are about to make, please don’t hesitate to contact us for clarification on the changeand how it will affect your account. You can contact us at support@snagajob.com or send us a question by clicking the H elp link in the upperright corner of each page. There are tips displayed as blue question marks throughout your control panel to help you when you are makingchanges to your location(s). When in doubt, you can refer to these helpful tips to learn what specific fields meanand how they may affect your account. Example:For more information, contact support@snagajob.comUpdated 02.10.2020 - 3
AdministratorUser GuideAdmin Control Panel OverviewAll users that have an Administrator role within your account will have access to view and modify specific accountsettings.There are two ways to access the Admin Control Panel. Click M anage Admin settings on the Dashboard, orNover over your name in the upper right corner of the toolbar and select A dmin settings .The Control Panel gives you access to the below information:FeatureDescriptionOrganization DetailsView the account name and doing business as name.LocationsView and modify account locations.Interview QuestionsView, modify, or add company specific interview questions.Pay rangesAdd pay ranges for positions that restrict managers from hiringsomeone outside of the set pay range.Policies*View, modify or add company specific policies to the onboardingworkflow.Rehire EligibilityUpload a list of former employees to the Do Not Hire list.UsersView and modify existing users & add new users to your account. *Onboarding Customers OnlyIn the following sections, we’ll discuss each feature in detail and give instructions on how to modify information.For more information, contact support@snagajob.comUpdated 02.10.2020 - 4
AdministratorUser GuideOrganizationThis section will provide you the ability to view the current O rganization name and Doing business as (DBA) n ame thatSnagajob has on file for your company. The organization information appears at the top of the Admin Settings page. The Organization name is typically your company’s legal name. If your company is using the Snagajob Onboarding product, this name will display on the I-9 unlessspecified otherwise at the locational level.The Doing business as name (DBA) is the brand name that is displayed to your applicants on the application (ifdifferent from your company’s legal name).If a change needs to be made to either of these fields, please contact support@snagajob.com and we will modifythe information. Managing Your LogoNOTE : Only managers and other admin will see this logo internally. To edit your company logo, hover the current logo and click.For more information, contact support@snagajob.comUpdated 02.10.2020 - 5
AdministratorUser Guide A pop up will appear and you will click C hoose File to upload your image. After you choose your file, you can clickUpload logo . After clicking Save , you will see your newly uploaded logo in place of the icon. If in the future you want to changeyour logo, you will simply follow these same steps. Managing Your Brand LogoNOTE : this logo will display externally on postings. From the account management menu click B rands .For more information, contact support@snagajob.comUpdated 02.10.2020 - 6
AdministratorUser Guide Click on the brand that you would like to edit. Click the Upload Logo button to add image Upload the image. Use the slider below to center and size your logo and then click S ave .For more information, contact support@snagajob.comUpdated 02.10.2020 - 7
AdministratorUser Guide The brand will display successfully and revert back to the brands list.Interview Questions As an administrator, you have the ability to view, edit and/or remove any company interview questions by clickingthe Interview questions icon.You may add up to 30 interview questions that will display on all applications.For more information, contact support@snagajob.comUpdated 02.10.2020 - 8
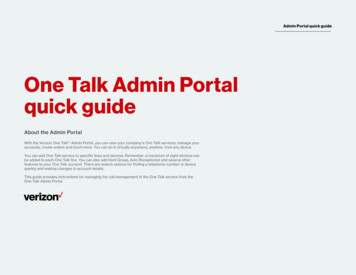
AdministratorUser Guide Adding an Interview Question To add a question click the New question button at the top left.A new question text box will display at the bottom of the page, which allows you to enter the text for the newquestion.Click S ave t o add the new question to your question pool. Removing an Interview Question Click r emove beneath the question you wish to remove.This will delete the question from all applications. Editing an Interview Question To modify an existing interview question, click into the textbox of the question you wish to modify.Click the Save button beneath the question to save your edits.For more information, contact support@snagajob.comUpdated 02.10.2020 - 9
AdministratorUser GuideLocationsThe Locations page provides you access to view a listing of your active locations, modify location information, and createLocation Groups, which can limit the access managers have to locations and each other. To view your locations, click the Locations icon from the Control Panel home page. From this list you are able to search for a specific location using the S earch for location bar at the top of thelocations list. You may search by any information listed on the page including location number, name, or groupassociated with the location and location address. The location you are currently viewing will display with a star to the left of the location name. As you type, the system will search for and filter through text to display matching results. For example, if you start to type “Glen”, the Glen Allen location and any other matches willdisplay in the results. By default, your list will display all of the locations at your company that are active and able to use the Snagajobsystem.For more information, contact support@snagajob.comUpdated 02.10.2020 - 10
AdministratorUser Guide If you’d like to view any locations that are no longer active in your account, click the Inactive link to the left of thepage.To view a location’s information, click on the location name in blue. Modifying Location InformationYou have the ability to modify certain fields on the location level.IMPORTANT: P lease be careful if you decide to change location data. We use this data to determine which policyworkflow new hires should go through, to facilitate any payroll integration processes, and the location output ongovernment forms such as tax credit forms, onboarding documents, etc. If you have any questions about this, pleasecontact support@snagajob.com . Once you have made any modifications you need to make at the location level, click S ave at the bottom of thepage to save your changes.See table for a description of each location field.For more information, contact support@snagajob.comUpdated 02.10.2020 - 11
AdministratorUser GuideField NameDescriptionNameThis is like a nickname for each store. Can be address, store number,county or mall the location is in, etc. This name is displayed to internalusers only. Name will not be visible to any of your applicants.Legal NameIf anything is in this field, it will override the organization name on theI-9 and W-4 (typically used if your company operates with multipleFEINs).Federal EmployerIdentification Numbers(FEIN)Currently only used for tax credits.Location Name to beUsed on ApplicationThis value is shown to job applicants when they begin the applicationprocess. We have provided a best practice that organizes your locationby state, city, and then street address (e.g., VA – Richmond 1234 MainStreet).NumberIf a location has a number or ID, it would be visible here. If you do notclassify your locations by numbers, they will be labeled by count (e.g., Ifyou have only 1 location, it would be labeled #1).GroupLocation group.PhoneLocation phone number.Address Line 1Location street address.Address Line 2Additional address information.CityCity your location is located in.StateState your location is located in.Zip CodePostal code for that location. Creating Location Groups A Location Group is a collection of locations placed together for the purpose of user management. LocationGroups allow you to no longer be limited to districts and regions for company structure, prevent managers fromseeing each other as well as manager applications, and provide managers temporary access to a location.By creating Location Groups you will be able to create a hierarchy which can limit the access managers have tolocations and each other. Location Groups are placed in a hierarchy by assigning Parent Groups which serve as levels in thehierarchy. Any Location Group can serve as a Parent Group.For more information, contact support@snagajob.comUpdated 02.10.2020 - 12
AdministratorUser Guide To access your Location Groups, click Location Groups from the Locations list. The Location Groups page will display the name and Parent Group for each Location Group.To create a new Location Group, click New location group on the left side of the page. You will name the Location Group and choose a Parent Group if applicable. When creating a Location Group the default is for a Parent Group not to be assigned. You do have the option to select a Parent Group to build hierarchy; however, it is not required so simplykeep the blank line selected if you don’t want hierarchy.Click S ave to create the Location Group. For more information, contact support@snagajob.comUpdated 02.10.2020 - 13
AdministratorUser Guide Parent Groups allow you to create hierarchy within your location setup.Click V iew hierarchy for a view of your Location Groups and their hierarchy, similar to an Org Chart.The Hierarchy view displays the hierarchy you have created for your managers and admin users in the Snagajobsystem. Hovering over a Location Group in the Hierarchy highlights all the groups within the hierarchy in blue. Users assigned to a Location Group have access to all locations within that Location Group as well as anylocations assigned to the Location Group within the Hierarchy.To assign a location to the Location Group, click on the location name from the Location list.When editing the location information, the new Group field is available at the bottom of the page. Note: All groups created under Location Groups are listed here for assignment; however, assigning aLocation Group is not required.Once you assign a group, click Save at the bottom. To manage user’s access using Location Groups, see page 20 on modifying existing users.For more information, contact support@snagajob.comUpdated 02.10.2020 - 14
AdministratorUser GuidePay Ranges The pay range functionality allows you to specify certain pay ranges for positions at your organization.When a pay range is set, the range will display to the hiring manager when they hire a new employee in theSnagajob system. If a wage is entered for a new employee that is out of the range specified, the system will not allow themanager to save the record. The manager will be asked to enter a new wage.To set the Pay range, click P ay ranges from the A ccount Management page. Select your brand from the dropdown Select the position Choose whether you would like to require this range for all locations or for certain locations Enter the d efault minimum pay rate and the default maximum pay rate Click Save to complete the entryFor more information, contact support@snagajob.comUpdated 02.10.2020 - 15
AdministratorUser GuidePolicies (Onboarding Customers Only) If your company is using the Snagajob Onboarding product, you will have the ability to view, modify and addpolicy documents that are specific to your company.To see active policy information, click the P aperwork: Read and Sign Policies icon.This will display a listing of all of the policies that are active within your Snagajob account. View an Existing Policy (1) To view an existing policy, click the policy title.This will display the actual policy that employees are able to view. Removing an Existing Policy (2) To remove an active policy, click the red D eactivate button to the right of the policy you wish to move to inactivestatus.For more information, contact support@snagajob.comUpdated 02.10.2020 - 16
AdministratorUser Guide Modifying an Existing Policy To update a policy document, click the e dit link to the right of the policy name. You are now able to view the policy settings and make modifications.For more information, contact support@snagajob.comUpdated 02.10.2020 - 17
AdministratorUser Guide 1.Policy/document title (Required) This is the policy title that will display to your employees and how it will be displayed when viewingpolicy information on the Paperwork tab.2.Description of instructions This is the descriptive text that will be shown above the document itself.3.Document acquisition (Required) Employee digitally signs This option is used for any document that is review & acknowledge only. Any form that needs to be filled out, initialed, etc. should not be uploaded using this selection. Manager scans and attaches This option is used for any document that needs to be filled out, initialed, etc. This allows the manager to print the form during the Manager Review so that they employeemay fill out and sign the form manually. The manager will upload the completed form back into the system at the end of the process.4.Policy In this section you will see the current policy title, created date and type of document. To update the document with a new version, click U pdate with newer version . All documents must be in PDF format. Other document types will not display properly. Once you have clicked the U pdate with newer version link, you will receive a modal that allowsyou to browse for the new PDF document and upload by clicking U pdate policy .5.Require this policy for all positions? This will default to Yes. Choose the N o option if you’d like to set this policy for specific positions only.6.Require this policy for all locations? This will default to Yes. Choose Select by states to show this document to employees working in specific states. Choose Select by locations to show this document to only certain locations.For more information, contact support@snagajob.comUpdated 02.10.2020 - 18
AdministratorUser Guide Adding a New Policy Completeall fields on the new policy form for your new policy document.To view instructions for each section, see pages 14-16. Note: All policy files must be in a PDF format. Any other format will not display properly to the employee.Rehire Eligibility Rehire Eligibility can be used to alert managers of any new applicants who have previously worked at yourcompany and are not eligible to be rehired. Note : Rehire eligibility is based on SSN.This feature will not work unless the applicant’s Social Security number (SSN) is a required fieldon your Snagajob application. If SSN is required on your application, you may upload a list of all former employees who are not eligible forrehire using the .csv and .txt templates available on the Rehire Eligibility page. CSV TemplateFor more information, contact support@snagajob.comUpdated 02.10.2020 - 19
AdministratorUser GuideThe table on the next page will provide an explanation of the information to be entered in the Rehire Eligibility template.FieldSSNTerm DateRehire EligibilityData to enterEnter the employee’s SSN excluding anydashes or spaces. e.g., 123456789Enter the employee’s termination date. MM/DD/YYYYEnter the employee’s rehire eligibilityusing T or F. T Eligible for rehire Notes Enter any optional notes you would like todisplay regarding the employee’stermination.To upload the completed file, click C hoose File t o select the saved file from your computer. F Not eligible for rehireCheck the Overwrite Existing List box if this is a full replace.Leave Overwrite Existing List unchecked if you are simply uploading any new terminations.Click S ave to update the Rehire Eligibility list.For more information, contact support@snagajob.comUpdated 02.10.2020 - 20
AdministratorUser Guide In addition to the list that is uploaded via the Rehire Eligibility page, any termination made within the system andmarked as ineligible for rehire will also be included in the Rehire Eligibility list. Note: Checking Overwrite Existing List will not overwrite any terminations made within the Snagajobsystem. This will only override any list you’ve previously uploaded in the Rehire Eligibility section of theAdmin Settings. Overriding Do Not Rehire Status When a candidate is marked Do Not Rehire, the manager or district/area/region manager will not have thecapability to click H ire . As an administrator, you will see a Hire option when looking at the candidate’sapplication.To override the status and hire the employee, you will first need to collect the following information: Position for which the new employee will be hiredWork Status: Part-time, full-time, seasonal, or salariedHire Date & Start DateStarting Wage & Pay RateAfter receiving this information on the new hire, you as the Administrator may click H ire on the candidate’sapplication, enter the information obtained regarding the candidate’s employment, and click Hire again to savethe record.Once this record has been saved, the manager will see the newly hired employee within their Employees tab andmay handle any new hire tasks such as onboarding, etc.Users To view and modify user information, click the U sers icon.From this view you are able to see a listing of all users in youraccount, their assigned username, and their role permission.The list will default to show all active users within your Snagajobaccount.For more information, contact support@snagajob.comUpdated 02.10.2020 - 21
AdministratorUser Guide To view users that no longer have access, click the Inactive link to the left of the page. Modifying an Existing User Click the user’s name in blue on the list to open the user information.For more information, contact support@snagajob.comUpdated 02.10.2020 - 22
AdministratorUser GuideSee the table on the next page for more information on modifying existing user information.For more information, contact support@snagajob.comUpdated 02.10.2020 - 23
AdministratorUser Guide User FieldDescriptionFirst/Last NameFirst and last name of the user; if your company uses SnagajobOnboarding, this will be the electronic signature name of the users on thesigned documents.Email AddressEmail address associated with this user; will be used if a password needsto be reset.RoleDefines if the user is able to make changes within the account.Location AccessDefines which location(s) the user is able to see when viewing yourSnagajob account; you may assign access to all locations or specificlocations at your organization.Location GroupAccessDefines which location group(s) the user is able to see when viewing yourSnagajob account.Positions AccessDefines if the user is able to see all positions or specific positions/positiongroups.From this page, you may send a reset password email to a user at your company by clicking the S end email toreset password button at the top of the page.If any information is modified on the page, click Save at the bottom to complete the changes. Note : You are not able to change the assigned username.The user’s current email notifications that are turned on will be listed under Notifications . To edit these settings, click e dit next to Notifications.This page will display a list of each notification type (e.g., Apply, Transfer, Hire, etc.) that you may turn onor off as well as the location(s) the user will receive notifications for.Note: Users may turn these on or off from his or her My account page.For more information, contact support@snagajob.comUpdated 02.10.2020 - 24
AdministratorUser Guide To turn on a notification, slide the Activate button to the left so that it displays O N .To turn off a notification, slide the Activate button to the right so that it displays O FF .A notification displaying ON indicates that the user is receiving that type of notification for the location(s) listed atthe bottom of the page. For example, the screenshot above displays a user that is receiving email notifications when a candidateapplies to her location.You may also filter a notification by positions by clicking edit . For example, you may select which specific positions the manager should receive notifications for.The table below will give information on each notification type and what it means.For more information, contact support@snagajob.comUpdated 02.10.2020 - 25
AdministratorUser GuideNotification TypeDefinitionApplySends an email notification when an a pplication is r eceived at alocation.TransferSends an email notification when an a pplication is t ransferredfrom a location.HireSends an email notification when an e mployee is h ired at alocation.TerminationSends an email notification when an e mployee is t erminated ata location.Tnc*Sends an email notification when an employee receives aTentative Nonconfirmation status from E-Verify.I9: Section 3Sends an email notification when section 3 of the I9 documentis complete.I9: Upcoming ReverificationSends a 90-day advance email notification when an employeehas a verification document that will soon expire.*Tnc notifications are only available for customers using E-Verify through the Snagajob system.See A ppendix for notification verbiage.For more information, contact support@snagajob.comUpdated 02.10.2020 - 26
AdministratorUser Guide Adding a New User All administrators have the ability to add new users to your account. T o add the new user click the New User button to the left of the user list and follow the steps below. Create a unique username. E nter the user’s first name, last name and email address.Create a password for the user.Confirm the temporary password for the user. Note : The user can change their password upon initial sign in.Note : Please be sure to enter the user’s actual first and last name.You should never create generic user credentials as this will cause onboarding electronicsignatures to be invalid.Select the Role type that this user should have in the system. See the table on the next page for guidance.For more information, contact support@snagajob.comUpdated 02.10.2020 - 27
AdministratorUser GuideRole TypeDefinitionManagerThis role should be given to any user that should not be able to makechanges to the account (location level managers, district managers,regional managers).AdministratorThis role should be given to any user that should be able to make changesto the account.Next you will define which location(s) and position(s) will be viewable for each user. Choose if this user should have access to all locations. If the user should have access to all locations, select Yes .If the user should only have access to specific locations and/or location groups, select N o, assignlocations and/or location groups. If you select No, assign locations and/or location groups, Location access and Locationgroup access dropdowns will appear below. You may add locations and location groupsfrom the dropdowns. As you type, the system will search for and filter through text to displaymatching results.Choose if this user should have access to all positions. If the user should have access to all positions, select Y es . If the user should only have access to specific positions and/or position groups, select No, assignpositions and/or position groups. Once you select, Position access and Position group access dropdowns will appear. Youmay add positions and position groups from t he dropdowns. As you type, the system will search for and filter through text to display matching results.For more information, contact support@snagajob.comUpdated 02.10.2020 - 28
AdministratorUser GuideReports To locate the reports, find the Company info section of yourDashboard and click the reports link i n the upper right corner ofthe Company info area. This will direct you to the Reports page. Running a Report 1 . To access your data, click on the specific report you wish to view. By default, the information will display for the past 28 days.2 . To change your timeframe, select the appropriate start and end dates from the calendar dropdowns on the leftside of the page.3 . Click R un Report a nd the report data will change.4 . To customize a report ( Full Applicant, Drop- Off and Time-To-Fill are the only customizable reports): Select the fields you wish to display and unselect the fields you would like to remove from the report. Note : There is a 15 column maximum and a 3 column minimum on all reports.For more information, contact support@snagajob.comUpdated 02.10.2020 - 29
AdministratorUser Guide Click Run Report and that data will change to display only the columns you have selected.5. T o save a customized report, click save Name your report something that is easy for you to remember. If you have administrative access, you may choose to share your report with the organization. This will allow any user within your company to access the new report from the Custom Reportslist. Note: Data pulled by another user will show the report but only for the location(s) thatthey directly oversee.6. T o filter a report to view specific information, begin typing your keyword in the Search filter field.7. T o export report data into a Microsoft Excel spreadsheet, click E xport . A Microsoft Excel spreadsheet will open with the data from the report. You may then save the document and share with others in your organization.For more information, contact support@snagajob.comUpdated 02.10.2020 - 30
AdministratorUser Guide Standard Reports Full Applicant Report Pulls data on the applicant pool for a specific timeframe. Information is ordered by location, position, and source. From this report you will also receive data on the following fields: Applicant Qty: The number of applications started during the specified timeframe. Application Completed Qty: The number of applications completed during the specifiedtimeframe. Hired Qty: The number of hires made from the applications submitted during the specifiedtimeframe. Termination Qty: The number of terminations marked from the hires made during the specifiedtimeframe. Drop Off Qty: The number of applicants who started the application but did not complete thesubmission process during the specified timeframe. Percentages for Completed Applications, Hires, and Terminations Turnover Ratio: Turnover percentage for the data given in the specific report.Drop-OffFor more information, contact support@snagajob.comUpdated 02.10.2020 - 31
AdministratorUser Guide Analyzes common location points in the application process where candidates do no complete theapplication.From this report you will receive data on: Position The source of the application Application type The section of the application in which the candidate discontinued completion The number of applicant drop-offs per application The percentage of applicant drop-offs per application Time-to-Fill Analyzes data pertaining to the average time it takes to complete actions with applications for a specifictimeframe. Information is ordered by location and position. User Activity Report Displays data on a user’s activity for the specific timeframe.For more information, contact support@snagajob.comUpdated 02.10.2020 - 32
AdministratorUser Guide From this report you will receive data on the following fields: User Identification (user name and full name) Last action made in the account (Hire, Interview, Decline, etc.) How many actions have been made during the specific timeframe You may click the number to view all actions made during the timeframeLogin Report Displays a user’s login activity during the specified timeframe. From this report you will receive data on the following fields: User Identification (user name and full name) Last Login Date How many times the user has logged in during the specified timeframe Overview Reports Dashboard Report Displays 30 days of account activity at a user’s location. Note : User will only have access to the locations in which they have permissions to view. Select the Dashboard Report from the list of Overview Reports .For more information, contact support@snagajob.comUpdated 02.10.2020 - 33
AdministratorUser Guide Select a l ocation and position from
Click remove beneath the question you wish to remove. This will delete the question from all applications. Editing an Interview Question To modify an existing interview question, click into the textbox of the question you wish to modify. Click the Save button beneath the question to save your edits.