Transcription
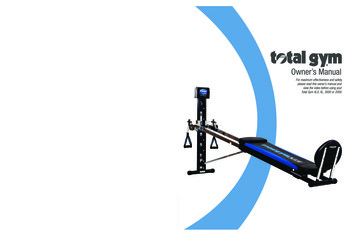
Owner’s ManualDEDICATION TO QUALITYWe warrant this product to be free from alldefects in material and workmanship when usedaccording to the manufacturer’s instructions.See Limited Warranty Card for details.Save your sales receipt.You may wish to staple into this manual. 2019, 2007, 1998 Total Gym Fitness, LLC. All rights reserved. Total Gym is a registered trademark.No part of this booklet may be reproduced in any form, by any means, electronic,mechanical or otherwise, without the express written consent of the copyright holder.BH7481Bring your workouts to the next level with optional attachments.Learn more at TotalGymDirect.comFor maximum effectiveness and safety,please read this owner’s manual andview the video before using yourTotal Gym XLS, XL, 3000 or 2000.
TOTAL GYM XLS, XL, 3000 AND 2000 OWNER’S MANUALTOTAL GYM XLS, XL, 3000 AND 2000 OWNER’S MANUAL PARTS OVERVIEW & LISTTotal Gym Parts List and Overview PART #PART DESCRIPTION16TDH1Lanyard w/ Safety Hitch Pin1117CT1488Training Deck Cards1Tube Cap - 50mm218TFC3500Training Deck Holder115600Rubber Stop31940950HNylon Strap Handles2514200Tube Cap - 25mm x 50mm62041000Quick Link2EQUIPMENT WARNING/CAUTION LABELS & SAFETY INSTRUCTIONS. 3612750Tube Roller2NOT SHOWN 16500Accessory Hitch Pin (short)3PRODUCT SPECIFICATIONS. 4716200Eyebolt - 8mm x 93mm2NOT SHOWN (OPTIONAL)SET UP .5-6817100Washer - 8mm - Flat6PPBPress Up Bar Set1917901Nylock Nut - 8mm2LPARLeg Pull Accessory11017700Tube Cap - 25mm Round2DBSDip Bar Set11140950Pulley Line Assembly128800Weight Bar Kit112S350Glideboard Assembly1PILSPilates Kit113363000Wheel4S217Pilates Toe Bar114WA2Wing Attachment1PILS24Pilates 24-inch Rope11540300Accessory Hitch Pin (long)2ALBOTWater Bottle1Table of ContentsOPTIONAL ACCESSORIES.7-9Hitch Pin Locations . 7Wing Attachment. 7Press Up Bars. 7Dip Bars. 7Weight Bar. 8Leg Pull. 8AbCrunch. 8Pilates Kit. 9QTYKEY #Tube Cap - 32mm2S250Oval Squat Stand3152004KEY #PART #PART DESCRIPTION1213002QTYSTARTING OUT. 9INSPECTION AND MAINTENANCE .10-11LIMITED LIFETIME WARRANTY. 11TOTAL GYM STARTER PROGRAM.12-13 WORKOUT PROGRESS CHARTS.14-15TOTAL GYM PARTS LIST & OVERVIEW . 16 XLS model shown on coverTo order optional accessories, please go to TotalGymDirect.comTo order optional accessories, please go to TotalGymDirect.com 16
TOTAL GYM XLS, XL, 3000 AND 2000 OWNER’S MANUALCongratulations on purchasing your new Total Gym With this product in your home, you have everything you need to start your own workout program, to tone and strengthen the importantmuscle groups of your upper and lower body. This is vital for all of us, regardless of age, sex, or fitness level, and regardless of whetheryour primary goal is body sculpting, weight loss, health maintenance, or more energy for daily activities.Strength training not only tones and conditions the muscles we use every day to stand, walk, lift, and turn; it can actually transform ourbody composition. By reducing body fat and increasing the proportion of lean muscle in our bodies, strength training can effectively turn upour metabolic thermostat, so that we burn calories all the time, no matter what we’re doing.It’s easy - all you have to do is spend 15 to 20 minutes a day, 3 to 4 days per week on your Total Gym to start realizing the benefits. Be sure to read through this Owner’s Manual carefully. It is the authoritative source of information about your Total Gym . CUSTOMER SERVICE QUESTIONSIf you have questions about your Total Gym , please call Customer Service at 1.800.501.4621, Monday through Thursday, 8:30 am to5:00 pm, EST. ORDERING REPLACEMENT PARTSWhen ordering parts, please contact our Parts Department, toll free at 1.800.501.4621, Monday through Thursday, 8:30 am to5:00 pm, EST.IMPORTANT: You must have your serial number and this manual ready when calling for parts.Serial #:PLEASE ALSO PROVIDE THE FOLLOWING INFORMATION:1. Name, Mailing Address and Telephone Number2. Date of Purchase3. Where Product was Purchased4. Model Number5. Part Order Number and DescriptionTo order optional accessories, please go to TotalGymDirect.com 2
TOTAL GYM XLS, XL, 3000 AND 2000 OWNER’S MANUAL EQUIPMENT WARNINGS / CAUTION LABELS & SAFETY INSTRUCTIONSEquipment Warning / Caution LabelsSee page 4 for placement of the following warning/caution labels on your unit.WARNING LABEL 1WARNING LABEL 2! WARNINGWARNING LABEL 3! WARNINGFAILURE TO READ AND FOLLOWTHE SAFETY INSTRUCTIONSSTATED IN THE OWNER’S MANUALMAY RESULT IN POSSIBLESERIOUS INJURY OR DEATH. KEEPCHILDREN AWAY. MAXIMUM USERWEIGHT 400 LBS. REPLACE THISLABEL IF DAMAGED, ILLEGIBLE ORREMOVED. FOR HOUSEHOLD USEONLY. CALL CUSTOMER SERVICEAT 1.800.501.4621 FORREPLACEMENT LABEL, MANUALOR QUESTIONS.FAILURE TO INSTALL THE HITCHPIN IN THE SAFETY HOLE (LOCATEDJUST TO THE LEFT OF THIS DECAL)MAY CAUSE THE MACHINE TOCOLLAPSE, RESULTING IN SERIOUSOR FATAL INJURY.BOTTOM HOLE IN SUPPORT COLUMNIS FOR STORAGE ONLY. ATTEMPTINGTO EXERCISE WITH THE HEIGHTADJUSTMENT PIN IN THIS BOTTOMPOSITION WILL CAUSE THE SUPPORTCOLUMN TO COLLAPSE FORWARD ANDCOULD RESULT IN SERIOUS INJURY.CRUSH HAZARDKEEP HANDS CLEAR DURING FOLDING.WARNING LABEL 5! WARNINGCRUSH HAZARDKEEP HANDSCLEAR DURINGFOLDING.! WARNINGTO AVOID SERIOUS INJURY FROM COLLAPSING SUPPORT COLUMN – DO NOTUSE BOTTOM HOLE IN SUPPORT COLUMN DURING EXERCISE. THIS HOLE ISFOR STORAGE ONLY. MOVE THE HEIGHT ADJUSTMENT SLIDE MECHANISM UPONE OR MORE HOLES TO EXERCISE.WHEN BOTTOM HOLE IS IN USE, SUPPORT COLUMN MUST BE FOLDED DOWN.DO NOT PUT WEIGHT ON THE GLIDEBOARD WITH BOTTOM HOLE IN USE,SUPPORT COLUMN WILL COLLAPSE.CAUTION LABEL 3! CAUTIONKEEP HAIR, FINGERS, LOOSE CLOTHING, PETS, AND CHILDREN AWAY FROM HINGES AND OTHERMOVING PARTS TO AVOID SERIOUS INJURY. ALSO, BE SURE TO HAVE ALL PINS LOCKED IN PLACEBEFORE GETTING ON YOUR TOTAL GYM TO AVOID SEVERE INJURY.REMOVE WINGATTACHMENTFROM FRAMEWHEN NOTREQUIRED FORTHE SPECIFICEXERCISE.! WARNING! WARNINGCAUTION LABEL 1 CAUTION LABEL 2! CAUTIONWARNING LABEL 4 Two sizes, 3 locations! CAUTIONREMOVE SQUAT STAND FROMFRAME WHEN NOT REQUIRED FORTHE SPECIFIC EXERCISE.Located on Squat StandLocated onWing AttachmentSafety InstructionsBefore beginning this or any exercise program, consult a physician or health professional, who can assist you in planning aprogram appropriate for your age and physical condition. This is especially important if you are over age 35 or have pre-existing healthproblems.Do not overexert yourself. Stop exercising immediately and consult your doctor if you experience pain or tightness in your chest, irregularheart beat, shortness of breath, or if you feel faint, nauseous, or dizzy.This product is designed for home use only. It is not intended for commercial or institutional use. Use only as instructed.Do not stand on the product.The Total Gym is not intended for use by children. Keep this and all fitness equipment out of the reach of children. Keep fingers, loose clothing, and hair away from moving parts.Inspect your exerciser before each use to ensure proper operation. Do not use this equipment unless all moving parts, includingcables and pulleys are working properly. See page 10 for details on Inspection and Maintenance.The exerciser should only be used on a mat or carpeted surface to prevent unexpected movement of the unit.Use only the accessory items recommended by the manufacturer.To avoid serious injury, care should be taken at all times when getting on and off this or any exercise equipment.3 To order optional accessories, please go to TotalGymDirect.com
TOTAL GYM XLS, XL, 3000 AND 2000 OWNER’S MANUAL PRODUCT SPECIFICATIONSProduct SpecificationsSAFETY HITCH PINS (SHORT) 2(XLS shown) 1 in Literature Pack. Use in storage hole when storing unit. 1 connected with a lanyard to height adjustment slidemechanism. Use in safety hole during exercise.Leg Pull BracketSupport ColumnHeight AdjustmentSlide Mechanism(Includes the HeightAdjustment Lever)Total GymTraining Deck(optional)WARNINGLABEL 1Requires 2 longhitch pinsHitch Pin(Connected with a lanyard toheight adjustment column)SafetyHolePulley AssemblyWARNINGLABEL 2WARNINGLABEL 3Wing Attachment(optional)CAUTIONLABEL 1WARNINGLABEL 4GlideboardSquat Stand(optional)CableInner RailHandleSquat StandReceptaclesWARNINGLABEL 4Outer RailWARNINGLABEL 5Center Support RailBack CrossbarHole for optional Weight BarCAUTIONLABEL 2RollersStorage HoleFront CrossbarLENGTHHEIGHTFolded. 51.5”In Use. 90”Folded. 8.875”In Use. 43”Width. 18.5”Weight. 68 lbs.Maximum User Weight. 400 lbs.Optional Accessories Available for PurchaseLEG PULL ACCESSORYPRESS UP BARSFoot Harness (2)Requires2 shorthitch pinsO-ringClipRequires 2 short hitch pinsABCRUNCHPILATES ACCESSORY KITWeight Bar accessory also available.DIP BARSPulley/D-RingAssemblyRopeCAUTIONLABEL 3TOTAL GYM CYCLO TRAINERPilates Toe BarFootHarness (2)24-inch leg pulleyrope extensionTo order optional accessories, please go to TotalGymDirect.com 4
TOTAL GYM XLS, XL, 3000 AND 2000 OWNER’S MANUAL SET UPSet up your Total Gym in 5 easy steps.T! WARNINGDOO REFULNOFULLY ASSEMBLED! NO TOOLS REQUIRED!ASSEMBLYDLESet UpLS REQUIKEEP HAIR, FINGERS, LOOSE CLOTHING, CHILDREN AND PETS AWAY FROM HINGES AND OTHER MOVINGPARTS TO AVOID SERIOUS INJURY. ALSO, BE SURE TO HAVE THE HEIGHT ADJUSTMENT LEVER PIN ANDSAFETY HITCH PIN LOCKED IN PLACE BEFORE GETTING ON YOUR TOTAL GYM TO AVOID SEVERE INJURY.STEP 1.Lay shipping box flat and open carton top.STEP 3.Lift gym up from opposite end of squat stand. Make sure that itrests solidly on the squat stand. Remove the two accessories fromunder the bench.STEP 2.Remove corner tape from the carton bottom (as indicated by theX’s). Remove all packaging materials, including cardboard inserts,from your Total Gym . Remove the squat stand (optional) from underthe gym (as shown to the right) and install on opposite end intoreceptacles. STEP 4.Extend Total Gym out in the following manner: 4A. Place one hand on the edgeof the frame. With yourother hand, take hold of thesupport column and begin topull it out until the frame islying flat on the floor.Be sure to support the framein the center to avoid havingthe product drop suddenlyonto the floor.4B. The spring-loaded pin on theright rail will automaticallyengage during set-up. Thispin prevents the supportcolumn from collapsing whenthe height adjustment pinis locked into the bottomstorage hole.5 To order optional accessories, please go to TotalGymDirect.comBackCrossbarSupport ColumnCenter RailSpringLoaded PinRight RailHitchPin andLanyard
TOTAL GYM XLS, XL, 3000 AND 2000 OWNER’S MANUAL SET UPSTEP 5.Raise the Total Gym to the desired incline level by positioning onefoot on the back crossbar to keep the product from lifting off the floor. 5D. Insert the Training Deck holder into the two holes located on thetop of the support column.Total Gym TrainingDeck and Holder5A. With one hand on a side rail, grasp the height adjustment leveron the height adjustment slide mechanism and raise to one ofthe lower levels.HeightAdjustmentLever! WARNING5B. Push the lever back to its original position (it should be flatagainst the support column). Slide the frame until you hear thelever pin snap into place. Look on the inside of the supportcolumn to make sure the lever pin is through the hole andlocked into place. Never sit or exercise on Total Gymwithout the adjustment lever and safety hitch pin securelylocked into place. BOTTOM HOLE IN THE SUPPORT COLUMN IS FOR STORAGE ONLY.ATTEMPTING TO EXERCISE WITH THE HEIGHT ADJUSTMENTLEVER PIN IN THIS BOTTOM HOLE POSITION WILL CAUSE THESUPPORT COLUMN TO COLLAPSE FORWARD AND COULD RESULTIN SERIOUS INJURY.FAILURE TO SECURELY LOCK THE HEIGHT ADJUSTMENT PIN ANDSAFETY HITCH PINS INTO PLACE MAY RESULT IN SERIOUS INJURYOR EVEN DEATH.SET UP IS COMPLETE!HeightAdjustmentLeverBegin using Total Gym at a low incline. As your fitness levelincreases, raise the incline to increase the intensity of your workoutand improve your muscle strength. If you have questions about your Total Gym , please callCustomer Service at 1.800.501.4621. 5C. Insert the safety hitch pin connected to the lanyard throughthe safety hole on the side of the height adjustment slidemechanism until it is through the support column. Never sit orexercise on Total Gym without the adjustment lever andsafety hitch pin securely locked into place. Be sure to check out the instructionalvideo entitled “Total Gym: Start It Up!” ontv.TotalGymDirect.com, which is full ofvaluable tips to get the most out of yournew Total Gym .Safety HoleHeight AdjustmentSlide MechanismHitch PinConnected with alanyard to heightadjustment columnTo order optional accessories, please go to TotalGymDirect.com 6
TOTAL GYM XLS, XL, 3000 AND 2000 OWNER’S MANUAL ATTACHMENTS: HOW TO’S & OPTIONAL ACCESSORIESOptional AccessoriesPRESS UP BARS (OPTIONAL)Follow the instructions below on how to attach the optionalaccessories to your Total Gym . ALL HITCH PIN LOCATIONSPress Up Bars2 short hitch pinsPress Up Bars One (1) short pin and two (2) long pins are held within the TotalGym Training Deck holder. One (1) short pin is connected by a lanyard to the heightadjustment slide mechanism on the support column.! WARNINGFAILURE TO SECURELY LOCK THESAFETY HITCH PINS INTO PLACEMAY RESULT IN SERIOUS INJURY OREVEN DEATH.WING ATTACHMENT (OPTIONAL)PULL UPSHitch Pin placementFollow small arrows1. Locate the holes at the topof the right and left rails onthe support column end ofthe unit.2. With the attachmentangled toward theglideboard, line up thebrackets on the attachment with the holes on the rails.3. Insert the 2 long hitch pins through the holes on the attachmentbrackets and the hole on the rails as indicated by arrows inimage.4. You are now ready to perform pull up and chin up exercises towork the arms, lats and back.Press Up Bar hole1. Attach each press up bar to the frame with the short hitch pinsincluded with your Total Gym .Note: Hitch pins are included with the press up bars.Simply line up each bar with the holes at the bottom ofthe frame. 2. Slide one short hitch pin through the hole of one of the pressup bars and through frame. Repeat Steps 1 and 2 for attachingthe other press up bar. Make sure to securely attach eachpress up bar to each side of the frame before using.See Total Gym: Start It Up! video on tv.TotalGymDirect.com fortips on how to utilize the press up bars.DIP BARS (OPTIONAL)Dip Bars2 short hitch pinsDip BarsLEG PULL, CRUNCHES, AND SIT UPS1. Locate the holes at the top of the right and left rails on thesupport column end of the unit.2. With the attachment angled awayfrom the glideboard, line up thebrackets on the attachment withthe holes on the rails.3. Insert the 2 long hitch pinsthrough the holes on theattachment brackets and the holeon the rails, as indicated by arrow in image.4. Insert feet under each angled “wing” of the attachment. You arenow ready to perform leg pulls, crunches and sit up exercisesto work the abdominals, waist and legs.Dip Bar holeHitch Pin1. Attach each dip bar to the frame with the short hitch pinsincluded with your Total Gym .Note: Hitch pins are included with the dip bars. Simplyline up each bar with the holes in the upper portion of thebottom frame. 2. Slide one short hitch pin through the hole of one of the dip barsand through frame. Repeat Steps 1 and 2 for attaching theother dip bar. Make sure to securely attach each dip bar toeach side of the frame before using.REMOVE ALL ACCESSORIES WHEN YOU ARE NOT EXERCISING WITH THEM.7 To order optional accessories, please go to TotalGymDirect.com
TOTAL GYM XLS, XL, 3000 AND 2000 OWNER’S MANUAL OPTIONAL ACCESSORIESWEIGHT BAR (OPTIONAL)4. Attach the foot harness to one ofyour feet by placing your foot inthe harness so the sewn-in-ringis on the bottom of your foot. Pulltightly on the belt so the harness issecure.Weight BarSlide through here1. Slide weight bar through the hole near the bottom of the TotalGym glideboard rails.2. Add free weights equally and evenly to both sides of the weightbar when stacking weights. Weight clips must be installedon each side to prevent the weights from slipping off the bar.Weights and clips not included.LEG PULL (OPTIONAL)Pulley/D-RingAssemblyRopeFoot Harness (2)O-ringClip5. Position yourself on the glideboardcorrectly for the specific exerciseyou want to perform. See TotalGym: Start It Up! video ontv.TotalGymDirect.com for tipson how to utilize the Leg Pullaccessory.O-ringStirrupClipO-ringConnect the clip on the end of the rope to an O-ring on theharness attached to your foot. Depending on the exercise youare performing, connect the clip to the proper O-ring.You are now ready to exercise using the leg pull accessory.ABCRUNCH (OPTIONAL)ASSEMBLY1. Match AbCrunch Handle labeled to theElbow Pad labeled .1. Detach the pulley mechanism from the hook on the undersideof the glideboard.2. Insert Handle into Elbow Pad bracket andattach by inserting short hitch pin.2. Connect the D-ring/pulley combination of your leg pullaccessory to the leg pull bracket on the support column.3. Repeat for left side.Leg Pull BracketRopeD-ring / pulley combination3. Next, connect the O-ring (the one that is connected to the rope)to the hook on the underside of the glideboard.O-ringINSTALLATION – HOW TO INSTALL THE ABCRUNCH1. Locate the holes at the top of theright and left rails on the supportcolumn end of the unit.2. Install the AbCrunch arm labeled onto the right side rail with thehandle facing the support column.Bracket3. Insert the short hitch pin throughthe holes on the attachment bracketand through the hole on the right rail as indicated by arrows inimage.4. Repeat for left AbCrunch arm.You are now ready to perform all of the AbCrunch exercises.REMOVE ALL ACCESSORIES WHEN YOU ARE NOT EXERCISING WITH THEM.To order optional accessories, please go to TotalGymDirect.com 8
TOTAL GYM XLS, XL, 3000 AND 2000 OWNER’S MANUAL OPTIONAL ACCESSORIES & STARTING OUTStarting OutPILATES KIT (OPTIONAL)Pilates Toe BarFootHarness (2)24-inch legpulley ropeextensionPulley/D-RingAssemblyWear athletic shoes and comfortable light clothing when exercisingon your Total Gym . Do not exercise barefoot. Check your exerciserbefore use to ensure that all the parts are in place and workingproperly (see page 10 for details of the inspection process). Adult supervision is required whenever a child is on or nearthis exerciser.To begin your Pilates Exercise Program carefully follow theassembly instructions below.1. Insert Pilates Toe Bar into squat stand receptacles2. Assemble Pilates 24-inch leg pulley rope extensionA. Detach the pulleymechanism from the hookon the underside of theglideboard.B.Next, connect the D-ring/pulley combination of yourleg pull accessory to theleg pull bracket on thesupport column.C. Attach the foot harnessesto your feet by placingyour foot in the harness sothe sewn-in-ring is on thebottom of your foot. Pulltightly on the belt so theharness is secure.D. Connect the clip on theend of the leg pulley ropeto the O-ring on one of thefoot harnesses.E. Connect one end of thePilates 24-inch rope to theO-ring on the leg pulleyrope.F. Next, connect the otherend of the Pilates 24-inchrope to the O-ring on theother foot harness.You are now ready to begin your Pilates exercise program.9 To order optional accessories, please go to TotalGymDirect.comBegin using the product at a low incline. As your fitness levelprogresses, increase the incline to increase the intensity andimprove your muscle strength. Don’t be in a hurry to exercise at ahigh intensity level; start out easily and build gradually. Total Gymis as easy as 1-2-3 to use, so read on. 1. Important Things to Remember When Using Total Gym Always have control of the glideboard before getting on andoff the exerciser. Keep your feet on the floor when getting on and off theexerciser. Only remove them from the floor for the duration ofthe exercise. If you are using the handles, hold onto them as you get onand off the glideboard. Be sure to have plenty of free space - at least 2-3 feet ofclearance around the exerciser - so that performing on theTotal Gym, as well as getting on and off, is convenient andsafe.2. Exercising with the Handles OnlyGrasp the handles which are attached to the cable and slide theglideboard to a position in which you can comfortably sit or laydown on when performing the desired exercise. Be sure to keepyour feet on the floor until you are in the correct position for thespecific exercise. Then, if the exercise calls for your feet to beoff the floor, place your feet as specified in the instructions.3. Exercising with the Squat Stand OnlySlide the glideboard to a position in which you can comfortablysit or lay down on when performing the desired exercise. Keepyour feet on the ground until you are in the correct position andfeel comfortable. Then, place your feet in the proper positionand begin to exercise. When starting your exercise program, begin with the basicexercises in the Training Deck included with your Total Gym tofamiliarize yourself with the movements. Use the lowest inclinelevel to start with—you can work up to a higher incline level in theweeks and months to come. For the specific Total Gym exercises and programs, follow theexercises in the Total Gym Training Deck included with yourTotal Gym .
TOTAL GYM XLS, XL, 3000 AND 2000 OWNER’S MANUAL INSPECTION AND MAINTENANCEInspection and MaintenanceINSPECT YOUR TOTAL GYM PRIOR TO EACH USEBefore using your Total Gym for your workout session, be sure tomake the following inspection: Make sure the equipment is fully opened and sitting on a solidlevel surface with plenty of clearance on all sides. Check that the pulley is attached securely to the hook on thefront underside of the glideboard, as well as the uprights on thesupport column. Make sure that the eyebolts are securely fastened to eachupright on the support column. Check that the cables are traveling correctly in the groove ofeach pulley. Make sure the cable is securely fastened to each hand grip. Check the cable for signs of wear and tear. Check that the squat stand is installed correctly in the squatstand receptacles. Make sure the glideboard is gliding smoothly along the frame. Make sure all the safety hitch pins and height adjustment pinare securely in place and locked into position. ROUTINE MAINTENANCE Wipe down your Total Gym after each use with a clean, damp(not wet) cloth. Do not leave towels or workout clothing laying orhanging on the equipment. Periodically check the following parts for signs of fraying orother wear: the cable, the pulleys, the wheels, the glideboard,the squat stand and the frame. If a part needs replacement, donot use the equipment until it is repaired or replaced. Periodically remove the glideboard to clean rails and glideboardwheels. See “To Remove the Glideboard” (on page 11) fordetails. Never user lubricant such as WD-40 or Armor All to lubricateor clean the unit. Use only 3-in-1 oil or machine oil to lubricatethe axles of the wheels or pulley, not the roller surface. TO STORE YOURTOTAL GYM 3. Position one foot on back crossbar to keep the product fromlifting off the floor. A. With one hand on the frame, grasp theheight adjustment lever and lower the frame until it rests onthe back crossbar. B. Then, push the lever back to its originalposition. It should be flat against the support column.A.Support ColumnB.Support ColumnFrameHeightAdjustmentLeverBack CrossbarFrame4. Pull the spring-loaded pin (red knob) to disengage it and lowerthe support column onto the center rail.Support ColumnSpring-loaded Pin (red knob)Hitch Pinand LanyardCenter Rail5. With caution, to avoid pinched fingers or hands, lift up at thecenter of the frame and fold the exerciser together.When it is completely folded, the exerciser should be at a 90degree angle with the floor. The exerciser will rest on the squatstand for support. Squat stand is an optional accessory.Weight Bar HoleSquat Stand(optional)6. You can store the exerciser in a closet or against the wall. Tostore it under a bed, simply lower the exerciser to the floor,remove the squat stand, and roll under the bed.Follow these easy steps tostore your Total Gym properly: 1. First, remove allaccessories andattachments.Hitch Pin2. Install a safety hitch pin (short) into the storage hole on theglideboard.! CAUTIONUSE CAUTION WHEN FOLDING THEEXERCISER—SERIOUS INJURYCOULD RESULT FROM PINCHEDFINGERS OR HANDS.To order optional accessories, please go to TotalGymDirect.com 10
TOTAL GYM XLS, XL, 3000 AND 2000 OWNER’S MANUAL INSPECTION AND MAINTENANCE & WARRANTYTO REMOVE THE GLIDEBOARDYou can also remove the glideboard if you need to fit theexerciser under a narrow space (between 6” and 8”).1. Remove the short safety hitch pin from the storage hole.2. Disconnect the pulley from the hook on the underside ofthe glideboard.3. Next, lift up the glideboard and slide it off the frame ofthe exerciser. When the bench is completely off theexerciser, set it aside.Squat Stand(optional)Short Safety Hitch Pin4. Next, lower the exerciser to the floor, remove the squatstand, and roll the exerciser under the desired area.Squat stand is an optional accessory.! CAUTIONTHE GLIDEBOARD WEIGHS APPROXIMATELY 22 LBS. USECAUTION WHEN LIFTING IT OFF OF THE EXERCISER. LIFTINGINCORRECTLY MAY RESULT IN USER INJURY.Limited Lifetime WarrantyTotal Gym Fitness, LLC warrants that under normal, personal, residentialuse, Total Gym is free from defects in material or workmanship. Theduration of coverage of this warranty varies depending on the part ofequipment that is determined to be defective (see chart below), at TotalGym Fitness LLC’s sole discretion. This warranty is effective from thedate of original purchase. THIS WARRANTY IS VALID ONLY FOR THEORIGINAL OWNER OF THIS EXERCISER AND IS NOT ace frame that is structurally defectivewith a new frame or replace the entire unit.All other parts6 monthsRepair or replace defective part or product.(includes wheels,pulleys, cables)(Optional Extended2-Year Warranty)The Total Gym Fitness, LLC obligation under this warranty is limited toreplacing the defective part(s); or, at its option, repairing or replacing (orrefund in its sole discretion) the product. For service on this equipment,call 1-800-501-4621. Warranty coverage is void for defects ordamage caused by the use of unauthorized parts or service.This warranty does not cover product damage attributable to misuse,abuse, neglect, accidental damage, damage in return transit, unauthorizedalterations, failure to follow manufacturer’s directions for use or storage,improper maintenance, vandalism, usage for commercial or rentalpurposes, or “ordinary wear and tear”. Cost of return shipping must bepaid by you unless otherwise agreed upon by Total Gym Fitness, LLC. Thiswarranty does not cover any separately sold items, parts, or accessories.Except for other written warranties issued by Total Gym Fitness, LLCapplicable to new Total Gym Fitness, LLC product or parts, no otherexpress warranty is given or authorized by Total Gym Fitness, LLC. Anyimplied warranty of merchantability or fitness for a particularpurpose is limited to the duration of this warranty. No agent orretailer of Total Gym Fitness, LLC has authority to modify this warranty inany respect.TOTAL GYM FITNESS, LLC MAY NOT BE HELD LIABLE FORINDIRECT OR CONSEQUENTIAL DAMAGES ARISING OUT OF USEOR PERFORMANCE OF THIS PRODUCT. These include—but
from your Total Gym . Remove the squat stand (optional) from under the gym (as shown to the right) and install on opposite end into receptacles. STEP 3. Lift gym up from opposite end of squat stand. Make sure that it rests solidly on the squat stand. Remove the two accessories from under the bench. S
