Transcription
Embedded Home Security SystemDesign, implementations, and overviewShawn JohnsonEric FryComputer Science, College of Natural SciencesColorado State UniversityFort Collins, United StatesComputer Science, College of Natural SciencesColorado State UniversityFort Collins, United Statesefry@rams.colostate.eduAbstract—An exploration of feasible and practical options toinstantiate an integrated home security system with viablecommunication options.Keywords-component; home-security, arduino, motion sensor,remote monitoring.I.MOTIVATIONS AND LIMITATIONSUnfortunately during tough economic times the burglaryrates tend to increase. While one would like to believe that ourhomes are sanctuaries and that nothing bad could happen to us;that’s simply not how the world works. We wanted to providean affordable system to deter a would-be intruder. In order toachieve this there are a few steps. First the perpetrator must beaware that there is a system in place, second there must besome alert to inform the home owner to allow them to make adecision about the situation. Finally there must be a recordingdevice to track what has happened, this can later be used to aidpolice efforts to locate the valuables you undoubtedly wish torecover. While it may seem like there are already a slew ofoptions in the field of security systems we realized how oftenthese systems were absurdly expensive either having extremehook-up fees or forcing the owner into a monthly contractwhich becomes very expensive with time. We want toimplement a system that is both inexpensive and a onetime costand feel there is a real market for a solution such as ours. Onefinal motivation was that Eric’s mother had mentioned it wouldbe something she would be interested in. A limitation of thissystem that some may consider paranoid is our decision to haveall the components directly related to security to be strictlywired. The reasoning for this is that there are options out thereto scramble a large array of channels and using wireless forcameras for instance could be disrupted if someone wererunning a Linux flashed wireless N router broadcasting freely.into our prototype it is still something that we wish toimplement on our own at some point in the future. We alsowould have liked to have had user control over which sensorsthe system monitored. A keypad would have been beneficial inall removing the computer requirement, but our concern wasthat people have difficulties setting their thermostat and oursystem obviously would have more functions. We designed aGUI on the computer to allow the user easy access to systemdetails. This also benefited the system by allowing remoteaccess using Remote Desktop Connection for example.III.PROTOTYPEWe wanted to have a working model that we could show, itneeded to be portable, and needed to operate in the sameoverall fashion as the final product we hope to have at somepoint.The components we used in our prototype are as follows:A. Arduino MegaThe Arduino Mega is the driver behind our entire project,not only does it receive and interpret signals from our sensordevices, but it also allowed us to run the program entirely on it(lacking the benefits of the GUI and inexpensive cameras ofcourse). Our reasoning for picking the Mega was that we knewfor our prototype it would supply ample configurability and wewould not have to be concerned with running out ofconnectors. This microcontroller uses 3.3V and 5V to powerits related devices and is itself powered either by USB 500mAor can be powered via an external source up to 12V. Wedecided to power using USB partially due to convenience andalso the added benefit of limiting harm done to the system byany mistakes we could potentially make in connections. TheMegaisaffordableatroughlysixtydollars.II. EASE OF USEOne of the major pitfalls of home security systems is thatthey are only valuable if used regularly and used properly. Wewanted to keep this relatively simple idea in our mindthroughout the design of this project to ensure that it will betruly useful. We had hoped we would have schedulingcompleted where one could input the hours they expected to beout of the house and the alarm would engage and disengageitself automatically. While this functionality did not make itArduino Mega
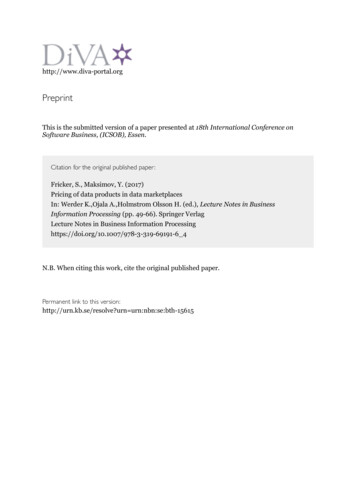
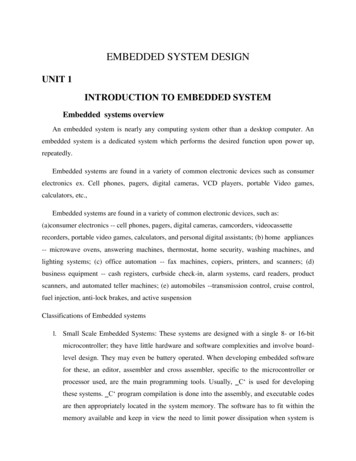
B. Computer Used to create a more user friendly connection to oursystem. Allowed our project to stay very inexpensive by usingthe computer to control cameras. Provided an interface which we could use to presentthe different sensors reporting for our demonstration. Gave a very polished look to our system using Swingto generate not only a GUI but also a taskbar icon. Send our e-mail alerts without needing to get a LANattachment for our Arduino.devices and each keypad can be used with up to 10 receivers.In the presented prototype we had last minute issues with thepower building up and creating false positives when set withthe Arduino, essentially lacking the proper resistor to allow thecharge to drop to ground if it was not enabled. We didhowever get these items working with an LED to showcasetheir basic function and that they interacted appropriately. Theadvantage this system offered was that the wireless keypads orremote keys could be used anywhere in the house or have onein the bedroom, one in the garage and one at the front door.Initially we had thought of using the panic receiver as a way ofswitching the system state but concerns of setting the alarmwhen intending to disarm and vice-versa arose. We were ableto get these at about fifteen dollars each and had 3 of them toaccommodate the functions we desired.C. Parallax PIRThis sensor is your typical passive infrared device. Itdetects motion at a distance of about 20 feet. This unit isrelatively simple and has two output modes to choose from.We chose to use the high signal when motion was present.These have a retail cost of about ten dollars. We decided to usetwo to show the sensors picking up different sides of the room.Skylink receiver and keypadParallax PIRD. Normally Closed Magnetic SwitchThis very simple object is a key component in almost everyhome security system found. Essentially while the door orwindow that you are monitoring is closed the current will flowthrough the switch. If however one opens the window or doorthe current will stop and we can act appropriately. The rangeon prices is quite large anywhere from two dollars to tendollars with shipping and order quantity tending to be thelimitations.Normally Closed Magnetic SwitchE. SkyLink Universal garage door remote controlThis was an attempt to create a simple control scheme forthe basic arm and disarm capabilities. These are easilyconfigurable as buttons which we had planned to use 1 receiverto arm, one to disarm and finally one that would act as a panicswitch. Each receiver is able to communicate with manyF. BuzzerWe used a basic 3V buzzer to be used to give an audibleresponse to the user without requiring them to use the GUI onthe computer. Predominantly for allowing the user to knowwhen the alarm is being armed or disarmed and giving anaudible alert with a timer before setting the alarm to give theuser time to lock the facility if they are leaving. This item canbe found at your local electronics store for under five dollarsG. CamerasFor our prototype we opted to go with webcams while thesedo not support the final goals of our project they do make itextremely viable as a cheap alternative. To get a real camerasystem that was able to record the way we wanted would havebeen at a minimum of one-hundred dollars. We used athirteen dollar webcam and a webcam that was borrowed inorder to implement two control styles. In total we spentthirteen dollars on our webcam.Our prototype had the following functionality: It was able to detect using all 4 sensors, which couldbe monitored via our GUI on the computer. Using java and system calls we enabled the system tosend e-mail alerts if an intrusion was detected, whichcan be forwarded to cellular telephones. The alarm could be enabled or disabled from eitherthe toolbar icon or from the application window.
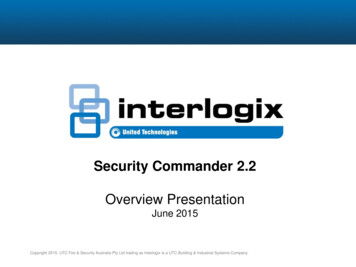
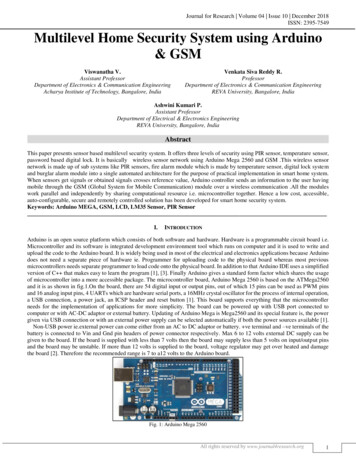
Webcam implementations; one was an always onmotion detector taking still images. The other wasset up using a command prompt implementation thatwould allow up to twenty minutes of video and audioto be recorded.IV. DIFFICULTIESBeing computer science majors an obvious difficulty wasthe lack of working knowledge of circuits and the practice ofbalancing proper voltage. This became apparent more thanonce throughout this project when we learned about how to usepull up and pull down resistors. Another obstacle was thescript that we ran contacted an SMTP mail server directlywhich was not permitted by the firewall at our university wherethe demonstration was given, we overcame this by usingremote desktop connection to demonstrate the ability of ourbatch files of running the webcams or sending e-mails. Settingup the serial connection from our java program to the properCOM port to be able to send and receive messages wasdefinitely a learning experience and required us to add a libraryto our java folder (rxtx). The motion detectors seemed to be aconstant struggle for us and regrettably something we put waytoo much time into. At first we felt that they worked, or atleast appeared to work however; we realized that it was simplyour perception that they were picking up ambient temperaturechanges since the window was open. These sensors require acalibration period of about sixty seconds which can becomequite a nuisance when you are constantly resetting them andtrying a new configuration to hope that a resistor you justplaced will fix your problems. Eventually we got themworking on an LED but when we set them back to the Arduinowe would once again receive a period signal after the firsttrigger. After asking the class and looking over the breadboardrepeatedly we discovered that our use of the transistor for ourbuzzer was incorrect and when the was to go off it was sendingthe voltage intended for the buzzer to ground, which I believewas able to draw enough mA to turn off the motion detector,which stopped the grounding which in turn started the cycleagain. So we fixed this and adapted some code that wassupplied with the motion detector to help us set the sensitivityof the motion detectors. After that fiasco we assumed we wererelatively in the clear and all else would go as planned; alldevices had previously been tested and shown to work. But asany project manager knows there will always be delays even onthe most basic of tasks. Next while implementing the garagedoor keypads we discovered that they were not properly gettinggrounded if the connection was supposed to be incomplete andso charge would build up and eventually have enough tocircumvent the button and complete the circuit enablingdisabling or panicking the system periodically. We hadencountered an issue like this before when first learning how toprogram on the Arduino and practicing with a simple button.To solve this issue we added a resistor from the powered sideof the button to ground. Unfortunately this didn’t work forsome reason when we were finishing up the project. Weattempted to change the resistance between the buttons andground but either ended up sending the signal to ground alwaysor encountering the same period issue. These issues definitelyset us back on time and prevented us from being able to presentas much as we had wanted.V. GRAPHICAL USER INTERFACEThe GUI we designed was to allow us to showcase ourcurrent system and also support future implementations andenhancements. We kept with standard practices making sure tokeep common buttons in the same places among differentscreens shown in Figures 1 and 2 of the following page, and wealso made sure that the user had ample notifications if they hadbeen attempting to exit the program to minimize the likelihoodof accidentally closing the program shown in Figure 3 again onthe following page. We knew that users would not like to havetheir alarm as an open program with its own window all thetime so we tried something we hadn’t done before which wasto implement a task tray icon which the user could leaverunning in the background unhindered which is shown inFigure 4 on the following page. Some things we couldimprove of the overall appearance would be to use the toolkitHardware Diagram
to find the resolution of the monitor that the application wasbeing displayed on and set the startup position based on thatinformation. Another cosmetic idea is that we are able to useany picture file that we would like to be our task icon and thatwe could potentially create a logo and use it there.VI.Writing the code for this project was an interestingexperience and something that we could have improvedupon especially given our experience as Computer Sciencemajors. First we will talk about our Java programmingthat was done for this project. We picked Java for itscross-platform capabilities and also because it was afamiliar language with tools that we could use to debugissues that arose.A.Figure 1. Main menuFigure 2. Status ScreenJava CodingAfter taking 3 years of computer science courses I wassurprised to find how much the coding practices that we havebeen taught so fundamentally were ignored as we tried toscrape the pieces together to accomplish this task in time. Thefundamentally difficult thing here was the amount of code thatwe had to forge together. The main application had beenadapted from a program we wrote in another class and theserial communication was adapted from the rxtx example.The serial code was built as a hello world style program andwe needed to change that to interface with not only the mainprogram but the task icon as well. Initially this caused lots ofgrief as we learned how to proper initialize the class to startthe connection and not call the class again while still returningthe class. Luckily once we had the connection it wasrelatively easy to send data back and forth and to use a switchst
an affordable system to deter a would-be intruder. In order to achieve this there are a few steps. First the perpetrator must be aware that there is a system in place, second there must be some alert to inform the home owner to allow them to make a decision about the situation. Finally there must be a recording