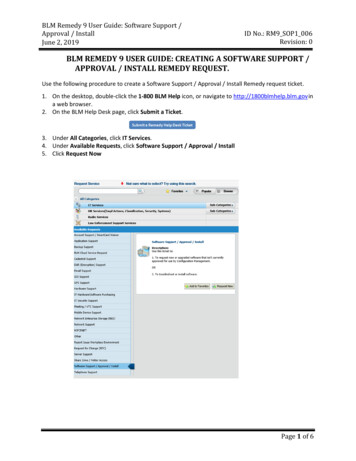
Transcription
GuestPoint User GuideUser GuideVersion 7.0GuestPoint QuickSteps – December 2010www.guestpoint.com
GuestPoint User GuideContentsIntroduction . 5Introduction to the Reservations Tab . 9Making New Reservations . 10Making Changes to Reservations . 17The Reservation Card . 17Cancelling Reservations . 24Making Group Reservations. 26Changing Group Reservations . 33Managing a Group Account . 35Checking-in a Group Reservation. 37Checking-out a Group Reservation . 38Cancelling Group Reservations . 39Deposits . 40Confirmations . 41Guest Check-in . 45Undo Check-in . 47Move Room . 48Group Check-in . 49Add an Additional Person to a Reservation . 50Split Accounts. 52Adding Room Charges . 57To add a Standard Entry charge to a Room Account: . 58To add an Extra Entry charge to a Room Account: . 58To add a Tax Adjustment to a Room Account: . 60Splitting Charges . 60Room Account Payments . 62Transfer Charges to Debtor. 65Transfer Charges to an Agent . 68Check-out Guests . 70Express Action Menu . 73Out of Service Rooms. 73GuestPoint 7.0 User Guide – January 2016Page 1
GuestPoint User GuideReservation Plan Control Panel . 75Today At-a-Glance. 81To Do List. 102Legend . 103Holidays and Events . 104Introduction to the Customers Tab . 106Customer Folders . 107Emailing Customers . 109Exporting Customers . 110Merge/Delete Records . 110Customer Statistics . 111Introduction to the Accounts Tab . 115Debtors Summary . 115Non-Residential Accounts Summary. 115Non-Residential Account Card . 116Gift Card Management . 117Daily Summary and Payment Summary. 122Accounts Folder . 123Debtors. 124Debtors Card . 125Current and Past Transactions . 127Send Debtors Statements . 133Non-Residential Accounts . 134Historic Debtors Balance Report . 134Debtors Invoice Report . 135Agent Commission Report . 136Daily Transactions Report . 137View Trial Daily Balance . 139View Previous Daily Balance . 140Property Statistics . 141Introduction to the Management Tab . 143Daily Tasks . 144Enter Bulk Charges . 145GuestPoint 7.0 User Guide – January 2016Page 2
GuestPoint User GuideExtras Report. 146Housekeeping . 148Mobile Housekeeping App . 151Configuration: . 151Enabling the Mobile Housekeeping App:. 151Housekeeping Login: . 152Management Login: . 154Shift Change . 156Roll Over. 156Deposit Follow Up . 162Gift Cards Expiring. 163Send Invoices . 164Print Arrival Forms . 165Review Credit Card Log . 166Review Change Log . 168Reports . 169Customer Reports . 170Reservation Reports. 171Transaction Reports . 173Set Up . 174Standard Rates . 176Extras. 180Promotions. 182Dynamic Rates. 184Online Inventory . 189RevenueMaximizer . 193Channels . 195Configuration . 197Loyalty Program . 198Corporate Customers . 201Create and Manage Users & Rights . 209Email Merge Templates . 211Virtual Rooms. 214GuestPoint 7.0 User Guide – January 2016Page 3
GuestPoint User GuideAdditional Clean Types. 217Introduction to the Dashboard . 218Occupancy Graph . 219Revenue Graph . 220Revenue per Room Type . 221Cumulative Revenue Graph . 222RevPAR Graph . 223Booking Source Graph . 224Sales Analyzer . 225Average Occupancy Gauge . 226Average Revenue Per Available Room . 227Average Revenue Per Day . 228Average Revenue Per Room Used . 228Revenue Statistics . 229GuestPoint 7.0 User Guide – January 2016Page 4
GuestPoint User GuideIntroductionWelcome to the GuestPoint User Guide. The aim of this document is to explain the features ofGuestPoint in a simple to understand way and get you up and running with GuestPoint as quicklyas possible.To start GuestPoint , just click the GuestPoint icon on your desktop or in your Start Menu.You will now see the GuestPoint Login Screen.Before you log in, you need to check that you are operating GuestPoint in the correct mode. Youcan change mode by clicking on the Mode indicator, located in the bottom left corner.Sync Mode – this is the mode that the main GuestPoint PC at yourproperty should be running in. The PC in Sync Mode will communicate withGuestPoint 7.0 User Guide – January 2016Page 5
GuestPoint User Guidethe Centium server and download web bookings and update your onlineinventory and rates. This PC will also automatically back your data upsecurely to the Centium server. If this PC is not running GuestPoint , yourproperty will not be communicating with the Centium server.Workstation Mode – this is the mode that the all PCs except themain GuestPoint PC at your property should be running in.Web Mode – if you have GuestPoint installed on a PC or laptopexternal to your property, you can run GuestPoint in Web Mode. This willget all of the data directly from your backup data stored on the Centiumserver. No data is required to be stored locally.Offline Mode – if you have temporarily lost your Internetconnection, GuestPoint will continue to function normally in Offline Mode.You can still perform all day to day activities. If you select Offline Modewhen you start GuestPoint , it will remain in Offline Mode. If you are inSync Mode and you lose your Internet connection, GuestPoint willautomatically switch to Offline Mode. When your Internet connection isrestored, GuestPoint will automatically return to Sync Mode and downloadany new web bookings, update your online inventory and update yourbackup on the Centium server.Most likely you will be in Sync Mode if your PC is the main PC; or, Workstation Mode if you connectto the main GuestPoint Sync PC.GuestPoint will remember the mode you select for the next time you start GuestPoint .Log in using the user name and password you have been supplied. Do not use the same user nameand password on multiple computers at the same time. This will confuse GuestPoint .GuestPoint 7.0 User Guide – January 2016Page 6
GuestPoint User GuideGuestPoint opens on the Reservation Plan.GuestPoint is divided into 5 main sections. You can access each of these sections by clicking on thetabs on the right of the screen.The Reservations tab contains:Reservation Plan – grid showing all reservations for each room on each dayToday and Tomorrow At-a-Glance – real time key statistics about yourreservationsTo Do list – check list of tasksThe Customers tab contains:Customer Statistics – useful information about your customersCustomer Files – contact details, past bookings, email toolThe Accounts tab contains:Debtors Information – view invoices, send statements, make paymentsNon-Residential Accounts – for functions, restaurant etc Financial Reports – Daily Balances, statisticsGuestPoint 7.0 User Guide – January 2016Page 7
GuestPoint User GuideThe Management tab contains:Daily Tasks – bulk charges, housekeeping, roll over, sending invoicesReports – Reservation, Customer and Transaction based reportsSetup – property setup, standard rates, dynamic rates, Revenue MaximizerTM, onlinechannelsThe Dashboard tab contains:Useful Graphs – occupancy, revenue, booking sources, sales analysisGauges – average occupancy, daily revenue, RevPARGuestPoint is easy to learn. As you become familiar with GuestPoint you will find it simple tooperate.This User Guide will take you through all of the functionality of each of the 5 tabs in GuestPoint .GuestPoint 7.0 User Guide – January 2016Page 8
GuestPoint User GuideRESERVATIONS TABIntroduction to the Reservations TabThe Reservation Plan is a visual grid showing all of your rooms down the screen and dates across thetop. To move around the Reservation Plan, you can:1. Hold the left mouse button down then move your mouse left or right. The faster you moveyour mouse, the further the plan will move2. Click anywhere on the Reservation Plan and use your arrow keys to move around3. Click anywhere on the Reservation Plan and use your Page Up and Page Down keys to moveone week at a time4. Click into the Date field in the top left corner of the Reservation Plan and select a date. TheReservation Plan will jump to that date.GuestPoint 7.0 User Guide – January 2016Page 9
GuestPoint User Guide5. Click the ‘Today’ button to jump back to today.TIP: To quickly access our online GuestPoint training material you can click on Client Portal at thetop of any of the main tabs.Making New ReservationsMaking new reservations in GuestPoint is easy. There are a number of ways you can make newbookings. The way you choose depends on your preference and the result will be the same.To create a New Reservation, either: Click ‘New Reservation’ near the top left corner of the Reservation Plan Double click on a cell in a room type on the Reservation Plan For multiple nights, hold the Shift Key down then click on the start date and roomyou want, then drag your mouse across the number of nightsWhen you do any of these three options, GuestPoint will open a New Reservation Card. Now, justfollow the steps to complete the new reservation.Step 1 – Dates & RoomSet the dates your guests will check-in and check-out. For multiple room bookings simply increasethe number of rooms. You can also mark this reservation as tentative by selecting ‘TentativeReservation’. Tentative reservations appear with shading on the Reservation Plan.GuestPoint 7.0 User Guide – January 2016Page 10
GuestPoint User GuideStep 2 – Room RequirementsFor each room, enter the number of Adults and Children. If you’re using GuestPoint Premium youcan also record the number of infants. Please contact GuestPoint Support to enable this feature. Ifyou clicked on the New Reservation button to create your new booking, GuestPoint willautomatically list only Room Types that are available during the selected dates. You can see all ofyour Room Types by selecting ‘Show All’. Once you select a Room Type, GuestPoint will show youthe ‘best fit’ Room Allocation. You can easily change this to another room number or set it to‘Unallocated’ and allocate a room number later. If you choose ‘Do Not Move’ this booking will not beable to be moved to a different room (to remove the ‘Do Not Move’ you will need to come back intothe reservation and untick ‘Do Not Move’).Step 3 – Guest DetailsIf the guest is with a company, put in the details. If the company has stayed before the auto searchwill give you matches to select from. If this is the first time the company is used GuestPoint willremember the company details for next time. Complete the guest’s name, again, auto search willshow matches to select from if the guest has stayed previously. You can also press the Search buttonand find a past guest by phone number, email etc Note: When you select a guest or company from the Suggestions list GuestPoint will auto fill theinformation from that record for you. If the guest or company has stayed before and you do notselect it from the list a duplicate record will be created.Where a reservation has a company recorded on it, GuestPoint will create a split account forcharges to be added to the individual or the company.GuestPoint 7.0 User Guide – January 2016Page 11
GuestPoint User GuideIf the guest has stayed before and provided a credit card, GuestPoint will give you the option ofselecting the card to use to secure the new booking.Step 4 – RatesSelect the pre-set room rate from the drop down list and add a promotion code if relevant.GuestPoint will automatically fill in the charges for extra adults and children, based on the rateselected. You can adjust these as required. You can also apply a discount – either a dollar value orpercentage – just be sure to click ‘Re-calculate’ to apply the discount. One advantage of applying adiscount is this amount will appear on the Room Account, so the guest knows they have received adiscount. If you only change the room charge, the discount amount will not display on the RoomAccount.GuestPoint will automatically fill in the nightly Room Charge for you. This is based on the StandardRate you have selected, unless you have set a Dynamic Rate for any of the nights. Dynamic Ratestake precedence. You can easily adjust the rate of any night within the reservation by modifying therate within the rate grid or you can add a discount.When operating in Exclusive Tax Mode (as in the US) the subtotal of the room charges, tax and totalare displayed below the grid. Clicking on ‘Estimated Tax’ displays the breakdown of the tax amounts.To mark a reservation as tax exempt simply tick the box in Step 7 and select the specific taxes thatapply. GuestPoint will automatically mark long term reservations as tax exempt for reservationsreaching the designated transient thresholds. These thresholds are entered in Transaction Accounts& Tax in the Setup book on the Management tab.The Rate, Extra Charges and Promotion Codes are set up within the Management tab.GuestPoint 7.0 User Guide – January 2016Page 12
GuestPoint User GuideStep 5 – Future ChargesYou can add any Future Charges for the reservation and these will be posted on the relevant day ofthe guest’s stay. Just click Room and the list of optional Extras is displayed, simply select thecheckbox for any that apply to this reservation. You can of course add Extras at a later stage fromthe Future Charges tab once you have saved the reservation.Extras are set up within the Setup Book on the Management tab.Step 6 – Additional InformationGuestPoint 7.0 User Guide – January 2016Page 13
GuestPoint User GuideComplete the company and guest details. If the company or guests are repeat guests, existinginformation is automatically filled in for you. Any Guest Profile fields you have set up will display andcan be completed if they are applicable for this guest. Profile fields are set up within the Setup Bookon the Management tab.Add any Housekeeping notes (e.g. roll away bed required). These will appear on the Housekeepingreport the day the guest is checking-in. Customer Card Notes will be added permanently to thecustomer record, and will automatically display for future stays.Select your Booking Source (e.g. Telephone or Walk In) and if applicable, select an Agent. Agents areonline booking channels (e.g. hotels.com, booking.com) or travel agents (e.g. Corporate Traveller).When a reservation is linked to an Agent, charges can be invoiced directly to the agent.You can also record any booking notes (e.g. quiet room requested). These notes will appear on theguest confirmation document.GuestPoint 7.0 User Guide – January 2016Page 14
GuestPoint User GuideWith GuestPoint Premium you have the option of having Profile fields related to the reservation,e.g. Reason for Stay.Step 6 – Payment OptionsWhen making a new reservation, GuestPoint offers you 4 ways to secure the booking:1. Request a deposit and set a due date. You can then use the Deposit Follow Up on theManagement tab to keep track of these.2. You can enter a Purchase Order number which will appear on the Room Account.3. Add a credit card into the Credit Card Vault by clicking the ‘Add Card to Vault’ button. This isthe Reservation Guarantee Credit Card. GuestPoint also lets to add another credit cardwhen the guest checks-in, in the case where one card is provided to secure the booking, butthe guest provides a different card at check-in.4. Make a payment using the ‘Make Payment’ button. This payment will be treated as a futuredeposit until the guest checks in. You can indicate the reservation is a prepaid booking byselecting the Prepaid Booking checkbox. When the guest is checked in all of their roomcharges will be added to their Room Account.Non refundable reservations are flagged by selecting the Non Refundable checkbox.GuestPoint will prompt you to confirm the refund payment for non refundable reservations ifyou wish to process a refund for these reservations.GuestPoint 7.0 User Guide – January 2016Page 15
GuestPoint User GuideStep 8 – Automatic Charges PolicyAutomatic charges are the nightly room charges and any pre-selected Extras (e.g. breakfast).GuestPoint posts these charges for you. You simply select which account you want the charges sentto by selecting the Automatic Charge Policy for this reservation from the drop down list.Step 9 – ConfirmationIn the final step, select whether you want to print or email the confirmation. If you select email, theEmail Services window will pop up. Remember, the guest must have an email address entered forthis option to be available.You can also print an Arrival Form and a Pre-stay Invoice.Don’t forget to click ‘Save’. The reservation will then appear in the Reservation Plan.TIP: To make a multi-room reservation hold down the Shift key then click on the rooms and datesyou want. When you release the Shift key the Reservation Card will open with the selected rooms.This is ideal for rooms with the same dates. If the dates differ you’ll n
Set the dates your guests will check-in and check-out. For multiple room bookings simply increase the number of rooms. You can also mark this reservation as tentative by selecting Tentative Reservation [. Tentative reservations appear with shading on the Reservation Plan.

