Transcription
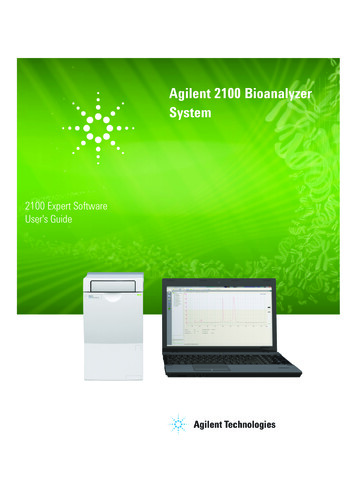
Agilent 2100 BioanalyzerSystem2100 Expert SoftwareUser's GuideAgilent Technologies
Notices Agilent Technologies, Inc. 2000-2020WarrantyNo part of this manual may be reproducedin any form or by any means (includingelectronic storage and retrieval or translation into a foreign language) without prioragreement and written consent from Agilent Technologies, Inc. as governed byUnited States and international copyrightlaws.The material contained in this document is provided “as is,” and is subject to being changed, without notice,in future editions. Further, to the maximum extent permitted by applicablelaw, Agilent disclaims all warranties,either express or implied, with regardto this manual and any informationcontained herein, including but notlimited to the implied warranties ofmerchantability and fitness for a particular purpose. Agilent shall not beliable for errors or for incidental orconsequential damages in connectionwith the furnishing, use, or performance of this document or of anyinformation contained herein. ShouldAgilent and the user have a separatewritten agreement with warrantyterms covering the material in thisdocument that conflict with theseterms, the warranty terms in the separate agreement shall control.Document NumberSD-UF0000050 Rev. D.00Edition02/2020Published in GermanyAgilent TechnologiesHewlett-Packard-Strasse 876337 WaldbronnFor Research Use OnlyNot for use in diagnostic proceduresreceive no greater than Restricted Rights asdefined in FAR 52.227-19(c)(1-2) (June1987). U.S. Government users will receiveno greater than Limited Rights as defined inFAR 52.227-14 (June 1987) or DFAR252.227-7015 (b)(2) (November 1995), asapplicable in any technical data.Safety NoticesC AU T I O NA CAUTION notice denotes ahazard. It calls attention to anoperating procedure, practice, orthe like that, if not correctly performed or adhered to, couldresult in damage to the productor loss of important data. Do notproceed beyond a CAUTIONnotice until the indicated conditions are fully understood andmet.Technology LicensesThe hardware and/or software described inthis document are furnished under alicense and may be used or copied only inaccordance with the terms of such license.Restricted Rights LegendIf software is for use in the performance ofa U.S. Government prime contract or subcontract, Software is delivered and licensedas “Commercial computer software” asdefined in DFAR 252.227-7014 (June 1995),or as a “commercial item” as defined inFAR 2.101(a) or as “Restricted computersoftware” as defined in FAR 52.227-19(June 1987) or any equivalent agency regulation or contract clause. Use, duplicationor disclosure of Software is subject to Agilent Technologies’ standard commerciallicense terms, and non-DOD Departmentsand Agencies of the U.S. Government willWA R N I N GA WARNING notice denotes ahazard. It calls attention to anoperating procedure, practice,or the like that, if not correctlyperformed or adhered to, couldresult in personal injury ordeath. Do not proceed beyond aWARNING notice until the indicated conditions are fullyunderstood and met.2100 Expert Software User Guide
In This Guide.In This Guide.Welcome to the User’s Guide for the Agilent 2100 Expert Software. Thismanual provides beginners and advanced users with information needed tosuccessfully run electrophoretic assays with the 2100 Bioanalyzer system. The2100 Expert Software allows the control of the 2100 Bioanalyzer instrument(including diagnostic functions) and, in combination with an analysis kit, theacquisition, interpretation and result presentation of data generated duringthe analysis of DNA, RNA, and proteins.1 Typographic conventions in this ManualThis chapter shows you how to make efficient use of this manual.2 Quick StartThis chapter is meant for experienced users. It briefly summarizes thenecessary steps to prepare and run an assay. Please note that in terms of the2100 Expert Software, a method resembles an extended assay, which alsoincludes additional administrative data such as operator, instrument,reporting, and workflow settings. These additional functions are unlockedwith the 2100 Expert Security Pack.3 Looking at 2100 Expert SoftwareBefore you start running methods/assays on the Agilent 2100 Bioanalyzersystem, you should familiarize yourself with the 2100 Expert Software. Thischapter shows how to get started with the 2100 Expert Software, and outlinesits main operational possibilities.4 Running and Evaluating Electrophoretic Methods/AssaysThis chapter explains how electrophoretic measurements are made using the2100 Bioanalyzer system, gives detailed descriptions of all steps necessary torun electrophoretic assays, and shows how to analyze and evaluate resultsusing electropherograms and gel-like images.2100 Expert Software User Guide3
In This Guide.5 Working with Chip Data and Methods/AssaysThis chapter shows you what to do to open, save, import and export files, andhow to print the results.6 Administering System Functions and the Security PackThis chapter is your guideline for configuring the 2100 Expert Software.7 Running Instrument DiagnosticsThis chapter shows how to use the diagnostic tests to check the 2100Bioanalyzer instrument for proper functioning.8 Performing VerificationsThis chapter describes how you can validate your 2100 Bioanalyzer system.9 Products, Spare Parts, and AccessoriesThis chapter lists all parts and accessories—including reorder numbers.42100 Expert Software User Guide
ContentsContents1 Typographic conventions in this Manual2 Quick Start79Preparing the Agilent 2100 Bioanalyzer Instrument 10Switching on the Agilent 2100 Bioanalyzer 11Running a Measurement 12During the chip run 20Viewing the Measurement Results 21What You Can do When the Measurement is Finished 233 Looking at 2100 Expert Software25Introduction to the Key Features of the 2100 Expert SoftwareStarting the 2100 Expert Software 272100 Expert Software Work Area 29Closing 2100 Expert Software 37The 2100 Expert Security Pack 384 Running and Evaluating Electrophoretic Methods/Assays2651Principles of Nucleic Acid and Protein Analysis on a Chip 53Preparing and Running an Electrophoretic Method or Assay 57Analyzing and Evaluating the Results of an Electrophoretic Method or AssayResult Flagging 1455 Working with Chip Data and Methods/Assays157Working with Chip Data and Methods/Assays 1582100 Export Data Overview 159Handling Methods 162Handling Chip Data 166Organizing, Backing up, and Archieving 2100 Expert DataImporting Data 169Exporting Data 173Printing Reports 180Configuring Tables 1872100 Expert Software User Guide851675
Contents6 Administering System Functions and the Security PackAdministering System Functions and the Security PackAccess Control 193Pre-configurations for the 2100 Expert Software 198Configuring the 2100 Expert Software 207Exporting and Importing Multiple Data Files 215Archieving Data 217Using Log Books 2207 Running Instrument DiagnosticsPerforming VerificationsVerifications 2352302332349 Products, Spare Parts, and AccessoriesProducts, Spare Parts, and Accessories6192227Running Instrument Diagnostics 228How to Run Instrument Diagnostics Test8 Performing Verifications1912432442100 Expert Software User Guide
2100 Expert Software User Guide1Typographic conventions in this ManualThis chapter shows you how to make efficient use of this manual.Agilent Technologies7
1Typographic conventions in this ManualIn This Guide.This manual uses convenient online navigation features and follows certaintypographic conventions.Table 1Typographic conventionsHighlightItalic Emphasis Example: Right-click the .Term Example: Dot plots show events as dots.Reference to another documentExample: Refer to the Agilent 2100 Bioanalyzer System Troubleshooting andMaintenance Guide.Blue Cross-reference or hyperlinkExamples:“Introduction to the Key Features of the 2100 Expert Software” on page : . the command line parameter-port 2 .Courierbold User inputExample: Enter50 MB.BoldOn-screen elementExample: . the OK button.If you have any questions this manual cannot answer, please contact Agilentfor addtional support ectrophoresis/bioanalyzer-systems.82100 Expert Software User Guide
2100 Expert Software User Guide2Quick StartPreparing the Agilent 2100 Bioanalyzer InstrumentSwitching on the Agilent 2100 BioanalyzerRunning a MeasurementDuring the chip run10111220Viewing the Measurement Results21What You Can do When the Measurement is Finished23This chapter is meant for experienced users. It briefly summarizes thenecessary steps to prepare and run an assay. Please note that in terms of the2100 Expert Software, a method resembles an extended assay, which alsoincludes additional administrative data such as operator, instrument, reporting,and workflow settings. These additional functions are unlocked with the 2100Expert Security Pack.Agilent Technologies9
2Quick StartPreparing the Agilent 2100 Bioanalyzer InstrumentPreparing the Agilent 2100 Bioanalyzer Instrument1 Make sure a clean electrode cartridge is installed.2 If you want to change the cartridge, follow the instructions in “Loading theElectrophoresis Chip into the 2100 Bioanalyzer Instrument” on page 63 .102100 Expert Software User Guide
Quick StartSwitching on the Agilent 2100 Bioanalyzer2Switching on the Agilent 2100 Bioanalyzer1 Make sure the 2100 Bioanalyzer instrument is connected to line power andconnected to the PC.2 Turn on the line switch at the rear of the instrument.The status LED at the front of the 2100 Bioanalyzer instrument should lightup./LG6WDWXV /('The status LED shows you the current status of the instrument.SignalMeaningGreen lightInstrument is switched on and ready for measurement.Green blinkingMeasurement is running.Orange blinkingInstrument is busy (running self-diagnostic, for example).Red lightInstrument is not ready for measurement. Switch theinstrument off and on again. If the problem persists,contact Agilent service.2100 Expert Software User Guide11
2Quick StartRunning a MeasurementRunning a Measurement1 To start the 2100 Expert Software on the connected PC, go to your desktopand double-click the following icon:2 The 2100 Environment Checker (see “The 2100 Environment Checker” onpage 28) will validate computer settings in the background. You might haveto acknowledge these warnings before the software will start.3 The access to the 2100 Expert Software and its functionality is controlledby the installed Security Pack. You need to authenticate yourself with youruser name and password.For more information on the user management of 2100 Expert Software,see section Looking at 2100 Expert Software.122100 Expert Software User Guide
Quick StartRunning a Measurement2After startup of the software, you enter the Instrument context:2100 Expert Software User Guide13
2Quick StartRunning a MeasurementThe Instrument tab shows you the status of the 2100 Bioanalyzer instrument:IconsMeaningInstrument detected, lid is open.Instrument detected. Lid is closed, but no chip is inserted.No instrument has been detected.Check the COM Port setting (see figure under step 3), the RS 232 connection cable, thepower cable or the USB connection, and the power switch. For details on how to set upthe 2100 Bioanalyzer system and connect it to a PC, see Agilent 2100 Bioanalyzer SystemInstallation and Safety Guide.NOTE14If you started 2100 Expert Software for the first time after installation, you first need toactivate the different software modules with your license keys. See “How to ActivateSoftware Licenses” on page 213 for details.2100 Expert Software User Guide
2Quick StartRunning a Measurement4 Make sure that an instrument has been detected before continuing.5 Select an assay/method for the chip run. On the Instrument tab, click theAssays/Methods button.ORClick the Assays/Methods menu.Both will open a menu, allowing you to select an assay/method for themeasurement.NOTEYou can also select File Open File to Run. This opens a dialog box allowing you to loadeither an assay/method (.xsy) or a chip data file (.xad).6 Prepare the samples and the chip. Edit destination and data acquisitionparameters such as number of samples, and insert sample information inthe chip summary table. For detailed information on sample and chippreparation refer to: Kit Guides that are available for each kit (see Agilent 2100 BioanalyzerHelp Desk)NOTEWhen preparing chip and samples, pay attention to the essential measurement practicesdescribed in “Essential Measurement Practices (Electrophoretic Methods/Assays)” onpage 61 or as described in the respective Kit Guide.2100 Expert Software User Guide15
2Quick StartRunning a Measurement7 Insert the chip in the 2100 Bioanalyzer instrument:a Open the lid.The status of the instrument is updated on the Instrument tab.b Check that the cartridge is inserted properly. For details, please refer to“Loading the Electrophoresis Chip into the 2100 BioanalyzerInstrument” on page 63 .c Place the chip into the receptacle.Figure 1Electrode cartridge inserted in the instrument (graphic shows anexample).The chip fits only one way. Do not force it into place.C AU T I O NDo not force the lid closed.This can damage the cartridge. If the lid does not close without force, check that chip is inserted correctly. Whenthe software recognizes an inserted chip, the chip is shown on the Instrument tab.If you have closed the lid, and the software has not recognized the chip, verify thatthe cartridge is properly installed into the instrument. Close the lid.162100 Expert Software User Guide
Quick StartRunning a Measurement2d Carefully close the lid.The electrodes in the cartridge fit into the wells of the chip.When the chip is detected, the image on the Instrument tab changes to achip.If the chip is not detected, open and close the lid again.NOTEThe chip that is displayed depends on the assay that was selected in the software, not onthe actual chip that was inserted in the bioanalyzer.8 On the Instrument tab, click2100 Expert Software User Guide.17
2Quick StartRunning a Measurement9 Before the chip run starts, you are prompted to confirm this action withyour electronic signature. This action is then recorded and will be availablefor reviewing in the signature log and the audit trail.The chip run starts. The Raw Signals sub-tab shows an electropherogram ofthe currently measured sample. The name of the sample is displayed abovethe graph. The graph is a “live” plot of the migration time againstfluorescence units (raw data, including background fluorescence, forexample).182100 Expert Software User Guide
2Quick StartRunning a MeasurementThe number of the sample that is currently being measured is indicated onthe information bar:The status bar at the bottom of the window shows the measurementprogress for the chip run and the COM port number used for dataacquisition.NOTEThe signature must be saved with the correct setting in the Meaning field. If this settingcannot be pre-selected by 2100 Expert Software, you must do this selection manually.NOTEThe 2100 Expert Software Security Pack restricts access to data and functionality to userswho are logged in with certain roles. See User Role Modelfor details (“Access Control” onpage 39).2100 Expert Software User Guide19
2Quick StartDuring the chip runDuring the chip run1 View the chip data file in the Data context by clicking on the name of theData File.During the chip run, you can do the following: Switch to any other context. For example, you can evaluate any chip datafile in the Data context, or compare samples in the Comparison context. If necessary, abort the chip run by clicking on the Stop button. You needto confirm this action with your electronic signature.All data that was collected up to the stop point will be saved.2 Switch to any other context. For example, you can evaluate any chip datafile in the Data context, or compare samples in the Comparison context.3 If necessary, abort the chip run by clicking on the Stop button. You need toconfirm this action with your electronic signature.All data that was collected up to the stop point will be saved.202100 Expert Software User Guide
Quick StartViewing the Measurement Results2Viewing the Measurement ResultsTo view the results, switch to the Data context. The data file that has just beengenerated by your chip run is displayed. The Chip Summary tab showsinformation on your chip data file, and lets you modify or enter commentsregarding chip, samples, and study.2100 Expert Software User Guide21
2Quick StartViewing the Measurement Results1 In the tree view panel, click any sample name or the ladder.This selects the Electropherogram tab, which displays a data plot ofsize/migration time versus fluorescence intensity.Peaks have automatically been detected, and their characteristics such assize, concentration, purity, or molarity have been calculated and are shownin the Peak Table at the bottom of the window.222100 Expert Software User Guide
2Quick StartWhat You Can do When the Measurement is FinishedWhat You Can do When the Measurement is FinishedWhen the measurement is finished, you can: Document your chip run by entering or modifying sample names, chipcomments, and study information, for example. Evaluate the measurement results by analyzing gel-like images,electropherograms and result flagging. “Analyzing and Evaluating the Results of an Electrophoretic Method orAssay” on page 85 Print the results to document them on paper or an electronic format, suchas HTML or PDF.See “Printing Reports” on page 180. Export the results or parts of them for further evaluation in otherapplications.See “Exporting Data” on page 173. Compare the results with the results of other chip runs in the Comparisoncontext. See “Comparing Samples from Different Electrophoretic ChipRuns” on page 139. Pass the results through the predefined workflow.See “Workflow Control” on page 50 Insert the next chip in the 2100 Bioanalyzer instrument and start a newchip run.2100 Expert Software User Guide23
224Quick StartWhat You Can do When the Measurement is Finished2100 Expert Software User Guide
2100 Expert Software User Guide3Looking at 2100 Expert SoftwareIntroduction to the Key Features of the 2100 Expert Software26Starting the 2100 Expert Software 27The 2100 Environment Checker 282100 Expert Software Work AreaOperating Modes 30Closing 2100 Expert Software2937The 2100 Expert Security Pack 38Access Control 39Data Integrity 42Handling of Electronic SignaturesWorkflow Control 5043Before you start running methods/assays on the Agilent 2100 Bioanalyzersystem, you should familiarize yourself with the 2100 Expert Software. Thischapter shows how to get started with the 2100 Expert Software, and outlinesits main operational possibilities.Agilent Technologies25
3Looking at 2100 Expert SoftwareIntroduction to the Key Features of the 2100 Expert SoftwareIntroduction to the Key Features of the 2100 Expert SoftwareThe Agilent 2100 Expert Software is characterized by the following keyfeatures: 2100 Expert Software provides a single software platform with a commonuser interface for running, analyzing, evaluating, presenting, andcomparing DNA, RNA, and protein parameters. 2100 Expert Software provides an optional Security Pack that needs to beordered separately as G2949CA and is then activated with a license key.This Security Pack activates user management functions and electronicsignature to meet the Food and Drug Administration (FDA) requirements(21 CFR Part 11). 2100 Expert Software provides detailed installation verification and systemverification tests on the 2100 Bioanalyzer system. 2100 Expert Software allows having multiple chip data and/ormethod/assay files open at the same time. 2100 Expert Software features an data evaluation tool (Comparison context)allowing comparison of measurement results (of same method/assay class)from different chips. 2100 Expert Software offers the RNA Integrity Number (RIN), a reliable toolto automatically compare integrity of RNA samples. 2100 Expert Software features improved integration including manualintegration (available for DNA and Protein methods/assays only). 2100 Expert Software allows color-coded result flagging with pre-defined orcustom result flagging rules. Flagging rules can be applied to measurementresults. 2100 Expert Software has customizable result tables and gel-like images. 2100 Expert Software allows to control two 2100 Bioanalyzer instrumentsfrom one PC. It is possible to run measurements on two 2100 Bioanalyzerinstruments at the same time. 2100 Expert Software has improved printing and reporting functions. 2100 Expert Software has extended instrument diagnostics functionality.262100 Expert Software User Guide
Looking at 2100 Expert SoftwareStarting the 2100 Expert Software3Starting the 2100 Expert Software1 Go to your desktop and double-click the following icon:ORFrom the Windows Start menu, select All Programs Agilent 2100 Bioanalyzer 2100 Expert.2 The 2100 Environment Checker (see “The 2100 Environment Checker” onpage 28) will validate computer settings in the background. You might haveto acknowledge these warnings before the software will start.3 The access to the 2100 expert and its functionality is controlled by theinstalled Security Pack. You need to authenticate yourself with your username and password.For more information on the user management of 2100 Expert Software,see “The 2100 Expert Security Pack” on page 38.The 2100 Expert Software application window appears. “2100 ExpertSoftware Work Area” on page 29 gives an overview of the applicationwindow.2100 Expert Software User Guide27
3Looking at 2100 Expert SoftwareStarting the 2100 Expert SoftwareThe 2100 Environment CheckerAt startup of the 2100 Expert Software a few parameters, such as regionalsettings, setup of a printer and printer margins are checked automatically.Eventually, a pop-up window will appear that indicates warnings and errors:NOTEFor Security Pack users: All changes to above settings have to be performed for thegeneric 2100 System user account. Please login with this Windows user account andmake the according changes. Setup a default printer (“Setup a default printer” on page 198) Default printer margins (“Default Printer margins” on page 199) Configure regional settings (“Configure regional settings” on page 202) Display settings (“Display settings” on page 205) USB Configuration (“USB-to-Serial adapter configuration” on page 206)282100 Expert Software User Guide
Looking at 2100 Expert Software2100 Expert Software Work Area32100 Expert Software Work AreaThe 2100 Expert Software has standard elements such as pull-down menusand toolbars, and the main working area, which contains several tabs, some ofwhich have sub-tabs. The 2100 Expert Software area has the following regions(demonstrated at the Data context):7LWOH %DU0HQX %DU7RROEDU,QIR %DU&RQWH[W %DU7UHH 9LHZ7DEV6XE WDEV/RZHU 3DQHO6WDWXV %DU6HWSRLQW ([SORUHU2100 Expert Software User Guide29
3Looking at 2100 Expert Software2100 Expert Software Work AreaOperating ModesThe 2100 Expert Software can be operated in six modes, called "contexts": Instrument Context Data Context Verification Context Comparison Context Method or Assay Context System ContextNOTEThe contexts work independent from each other regarding their data. This means, forexample, that you can review data and run measurements at the same time. Please notethat in terms of the 2100 Expert Software, a method resembles an extended assay, whichalso includes additional administrative data such as operator, instrument, reporting, andworkflow settings.Using the Contexts bar, the Context menu, or the selection list in the toolbar, youcan switch between the contexts:NOTEMenus, toolbars, the tree view, and the main working area (tabs) significantly changewhen you switch between the contexts.An introduction to the six contexts is given in the following.302100 Expert Software User Guide
Looking at 2100 Expert Software2100 Expert Software Work Area3Instrument ContextOn startup, 2100 Expert Software enters the Instrument context, where you canrun DNA, RNA or protein methods/assays by selecting a method/assay file andstarting the chip run—provided that the 2100 Bioanalyzer instrument isproperly connected, a chip is inserted, and the lid is closed.NOTEIf two 2100 Bioanalyzer instruments are connected to your PC, you can run both in parallel.During the chip run(s), you can view the status of the instrument(s):information and real time acquisition data.2100 Expert Software User Guide31
3Looking at 2100 Expert Software2100 Expert Software Work AreaIn the Instrument context, it is also possible to run hardware diagnostic tests onall connected instruments. Refer to “Running Instrument Diagnostics” onpage 227 for details.Data ContextIn the Data context, you can view, analyze, and evaluate the results of your chip runs that are presentedas electropherograms, gel-like images, histograms, dot plots, and resulttables. export and print the results of your chip runs.The measurement data is stored in.xad files.322100 Expert Software User Guide
Looking at 2100 Expert Software2100 Expert Software Work Area3Verification ContextThe Verification context is used to run and document qualification tests.For the 2100 Bioanalyzer instrument and the Expert Software, tests can berun for: Installation Verification System VerificationVerification results are automatically saved in .xvd files. You can re-open .xvdfiles to review verification results.For details, refer to “Performing Verifications” on page 233.2100 Expert Software User Guide33
3Looking at 2100 Expert Software2100 Expert Software Work AreaComparison ContextIn the Comparison context, you can open multiple electrophoretic chip datafiles and compare samples of the same assay class (DNA 1000, for example). Itis possible to overlay electropherograms and compare the results.Comparison results can be saved in .xac files. You can re-open .xac files toreview the comparison results and to add further samples for comparison.342100 Expert Software User Guide
3Looking at 2100 Expert Software2100 Expert Software Work AreaMethod/Assay ContextIn the Method/Assay context, you can create your own methods/assays basedon Agilent templates by modifying certain data (e. g. data analysis setpoints,sample names or result flagging). Within a method/assay, you also definegeneral settings, which include the instrument(s) to be used, the relevantstudy, the workflow to be followed, and the reporting elements.Methods/Assays are stored as .xsy files.2100 Expert Software User Guide35
3Looking at 2100 Expert Software2100 Expert Software Work AreaSystem ContextIn the System context, you can define System Wide Settings for the 2100 Expert Software such as settings fordefault file names and directories, signal colors, auto export functions, ordefault export directories view the contents of the System Log Book add or delete users and assign the required roles to the users (available toadministrators only) make use of the import/export and archiving functions (available toadministrators and backup operators only)362100 Expert Software User Guide
Looking at 2100 Expert SoftwareClosing 2100 Expert Software3Closing 2100 Expert Software1 From the File menu, select Exit.If a chip run is in progress, the following message appears:2 Click OK and wait until the chip run is complete.NOTEThis dialog box may also appear if you try to switch between contexts while there isunsaved data.3 If the currently open file has not yet been saved, 2100 Expert Software asksfor your electronic signature in order to save the file.HINTWhen opening a saved data file later, you can always load earlier versions of the file ifrequired.After you have confirmed the messages, 2100 Expert Software quits.2100 Expert Software User Guide37
3Looking at 2100 Expert SoftwareThe 2100 Expert Security PackThe 2100 Expert Security PackThe 2100 Expert Software with the Security Pack license providesfunctionality for Access Control (“Access Control” on page 39) Data Integrity (“Data Integrity” on page 42) Handling of Electronic Signatures (“How to Sign your Work Steps” onpage 43) Workflow Control (“Workflow Control” on page 50)With access control functionality, only authenticated and authorized users canaccess and modify data, i.e. any electronic record created or managed by 2100Expert Security Pack. It is part of the concept to guarantee the security andintegrity of all analytical data created with the 2100 Bioanalyzer instrumentand managed by the 2100 Expert Software on a validated PC system. This datasecurity protects all raw data, methods/assays, and results from unauthorizedaccess. Together with the functionality provided for handling of electronicsignatures and workflow managment, the security pack renders the 2100Expert Software compliant to the regulations and guidelines of the Food andDrug Administration (FDA) for electronic records and electronic signature, 21CFR Part 11.With the workflow management functions, only dedicated users can performmeasurements and create result data. This data must then be reviewed in away that is configurable, but always requires a 4-eyes principle in order toapprove results. The review levels are configurable regarding to who will beallowed to perform them, but also regarding to how many levels of reviewshave to be accomplished for a certain method/assay.382100 Expert Software User Guide
3Looking at 2100 Expert SoftwareThe 2100 Expert Security PackAccess ControlThe 2100 Expert Security Pack provides configurable access control and usermanagement functionality to ensure that only authorized users can access t
accordance with the terms of such license. Restricted Rights Legend If software is for use in the performance of a U.S. Government prime contract or sub- . practice, or the like that, if not correctly per-formed or adhered to, could . For more information on the user management of 2100 Expert Software, see section Looking at 2100 Expert .