Transcription
City and County of San FranciscoElectronic Plan Review (EPR)Applicant Procedure6/24/2020CCSF Electronic Plan Review ProcessApplicant Procedure12/09/2019
CCSF Permit CenterOffice of the City AdministrationElectronic Plan Review (EPR) Procedure for ApplicantsPurposeThis procedure facilitates the City and County of San Francisco’s (CCSF’s) electronic plan review processusing Bluebeam Studio Projects and Sessions. This document will introduce the Applicant to the stepsrequired to submit, view, coordinate and respond to CCSF’s EPR comments in Bluebeam Studio Sessionsfrom the start of the project through submittal to the CCSF.Please note that if the Applicant chooses to use the optional EPR workflow for plan review, special softwarewill be needed. Following this procedure requires: 1) Optical Character Recognition (OCR) function onscanned documents, and 2) Page Labeling function for the preparation of drawing documents. i.e.Bluebeam Revu or Bluebeam Revu eXtreme 2019, 2018, or 2017. Screenshots and instructions useBluebeam 2018/2019.CCSF Electronic Plan Review ProcessApplicant Procedure6/24/2020Page i
CCSF Permit CenterOffice of the City AdministrationTable of ContentsTable of Contents . iiSection A – Registration Process . 1Using this Procedure . 1Account Setup for Bluebeam Studio . 1Create a New Studio Account . 1Set Required User Naming Conventions for Studio Account . 1Section B – Document Submission Process . 3Prepare Drawing Documents for Submittals . 3Resources for Best Practice PDF Creation from Authoring Software . 3Document Naming Conventions for Document Submittals . 3Sheet Count and Drawing Index . 3Blank Areas on Cover Page and in Title Block for Stamps . 4Document Size and Volumes . 5Document Scale . 5Scanned Document Prep . 5Convert JPG Image files Back to PDF . 6Run Optical Character Recognition (OCR) on Scanned PDF files . 8Create Page Labels in Thumbnails . 9Create Bookmarks. 12Nesting Bookmarks . 12Set Scale on Floor Plans . 14Remove Layers . 15Create Drawing Call-Out Hyperlinks . 16Flatten Document . 18Prepare Additional Files for Submittals . 19Specifications Prep. 19Other Supporting Document Prep . 19Submit Documents to CCSF for Electronic Plan Review (EPR) . 20Submitting files via the CCSF City website (sf.gov) . 20Submitting files directly into a Bluebeam Studio Session (as applicable). 20Submitting files directly into a Bluebeam Studio Project (as applicable) . 21Intake of Applicant Submittal Files. 23Section C – Plan Review Process . 24Initial Electronic Plan Review Process . 24Incorporate CCSF Review Comments . 24CCSF Electronic Plan Review ProcessApplicant Procedure6/24/2020Page ii
CCSF Permit CenterOffice of the City AdministrationJoining the Bluebeam Studio Session via Email Link . 24Joining a Bluebeam Studio Session via Session ID . 24Navigating Documents & Review Comments . 25Filtering Comments . 26Applicant Response to CCSF Reviewers’ Comments – Incorporating Comments . 26Add an additional “Reply” to comments . 28Applicant Response to CCSF Reviewers’ Comments – Not Incorporating Comments . 28Subsequent Submittals . 30Submit Subsequent Files via the CCSF City Website (sf.gov) . 30Submit Subsequent Files Directly to a Studio Session or Project (if directed by CCSF) . 30Intake of Applicant Subsequent Submittal files . 31Subsequent Electronic Plan Review Process . 31Stamp-Out and Approval . 31Appendix 1: Bluebeam Versions and Use for Applicants . 32Table 1: Identification of Paid (Licensed) or Free (Unlicensed) Version Requirements of BluebeamRevu - Specific to Procedure Items from the EPR Applicant Procedure . 32CCSF Electronic Plan Review ProcessApplicant Procedure6/24/2020Page iii
CCSF Permit CenterOffice of the City AdministrationSection A – Registration ProcessUsing this ProcedureNote: This workflow is for customers comfortable using Bluebeam & Bluebeam Studio software. Analternative workflow will be developed for customers inexperienced with Bluebeam. Noteworthyworkflow steps explained in this procedure include: creating a Bluebeam Studio Account, preppingPDF files for submittal/resubmittal using Bluebeam, submitting files, and Applicant response to CCSFreview comments inside a Bluebeam Session.Prior to each submittal to CCSF, the Applicant must first format all PDF plans and documents followingthe steps outlined in this procedure.The Applicant will then submit formatted plans and documents electronically. The Electronic PlanReview (EPR) Support Staff generates a Bluebeam Studio Project specific to the Project’s PermitApplication digital submission. The Bluebeam Studio Project serves as CCSF’s online storage locationfor all digital files related to the Permit Application. The EPR Support Staff will then perform a QAQCverification of the documents.Once the Applicant’s submittal files have been accepted, the EPR Support Staff creates a BluebeamStudio Session for the City and County of San Francisco (CCSF) review. The Bluebeam StudioReview Session is an online location for digital plan review.Once the initial CCSF electronic review is complete, the Applicant will receive an email invitation to jointhe Bluebeam Studio Session to review and incorporate CCSF review comments.Account Setup for Bluebeam StudioNote: For the Applicant to use EPR in Bluebeam, the Applicant must use Bluebeam Studio and createa Bluebeam Studio account. Bluebeam Studio is a cloud-enabled system that is built into Bluebeam,that allows CCSF to store files and perform simultaneous plan review of PDFs with the Applicant.Using Studio requires the creation of a Studio Account. Although the Studio Account will not beneeded until review reconciliation, it should be the very first item completed within this procedure.Account setup does not require a paid version of Bluebeam.Create a New Studio AccountLocate and click the “Studio” buttonWithin the Studio tab click the “Sign In” buttonBluebeam Studio accountto sign in or to create a newNote: When creating an account for the first time, be sure to enter the Display Name inthe following manner:First Last – Company (ex: Mary Smith – XYZ Architects). If Applicant cannot list acompany name, add the word “Applicant” instead (ex: Mary Smith – Applicant).Set Required User Naming Conventions for Studio AccountNote: Applicant name information shall abide by the following protocol:First Last – Company (ex: Mary Smith – XYZ Architects). If Applicant cannot list acompany name, add the word “Applicant” instead (ex: Mary Smith – Applicant).CCSF Electronic Plan Review ProcessApplicant Procedure6/24/2020Page 1
CCSF Permit CenterOffice of the City AdministrationOnce an Applicant has signed into Bluebeam, the user Display Name must be correctlyentered in the following locations within the Preferences Dialog (found in the Revu pulldown menu, or press Ctrl K)Bluebeam Preferences dialog: The “User” field, located in the “General” tabBluebeam Preferences dialog: The “Display Name” field, located in the “Studio”tab in the “Server” sectionIn a web browser, enter “studio.bluebeam.com” and log in with the Bluebeam Studiologin username and password.Select the “My Profile” tab on the leftVerify the name located in the “Default Name” boxCorrect the name and click the “Update Profile” buttonLog out and then back into Bluebeam Studio once all changes have been madeCCSF Electronic Plan Review ProcessApplicant Procedure6/24/2020Page 2
CCSF Permit CenterOffice of the City AdministrationSection B – Document Submission ProcessPrepare Drawing Documents for SubmittalsNote: All documents, including drawing documents, that require CCSF review and/or review commentsmust be PDF file type. Follow the steps outlined in this procedure to prepare applicable PDF files priorto submittal to CCSF.Many of the steps for preparing a PDF documents require a paid version of Bluebeam.Resources for Best Practice PDF Creation from Authoring SoftwareNote: Applicant is to ensure all best practices for PDF creation are used as applicable.CCSF Exhibit F: General PDF Creation Guidelines.PDF creation guidelines: found in the “Format your PDFs” section within the “How tocreate PDFs of your plans or addenda” page on the CCSF City (sf.gov) -your-plans-or-addendaA note on Cross-Hatch fills:Avoid the use of dense crossed-line fills within drawings, as use of dense (i.e. less than1/8” apart on the plotted page) cross-line hatching can lead to rendering issues onPDFs. Dot patterns, earth patterns, and brick patterns are okay, as lines within thosehatch patterns do not typically cross. Solid fill patterns are also generally okay if thesolid pattern is not made from crossed lines. Use parallel lines instead.A note on Digital Signatures:Do not add certificate-type digital signatures on submittal documents. Files submitted toCCSF must be unlocked/unrestricted to editing, and applying a digital signature restrictschanges to the file. Use only scanned graphic-type signatures if required.Document Naming Conventions for Document SubmittalsEnsure all documents are named per Exhibit B: Document Naming Table for ApplicantSubmissions. Naming instructions can also found in the “Name your PDFs” section ofthe “How to create PDFs” page on the CCSF City (sf.gov) -your-plans-or-addendaSheet Count and Drawing IndexNote: This aligns with CCSF procedures. Ensure set is coordinated prior to creating PDF ofdocument.In drafting software, list total sheet count on drawing sheet index pageCCSF Electronic Plan Review ProcessApplicant Procedure6/24/2020Page 3
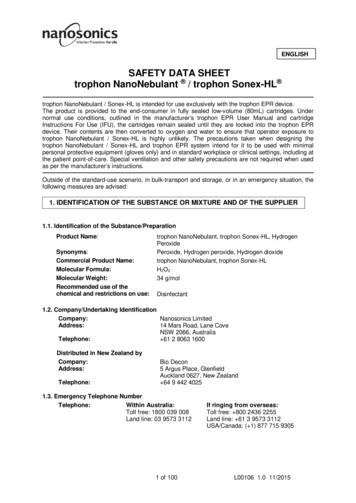
CCSF Permit CenterOffice of the City AdministrationVerify sheet count on the sheet index matches total PDF document sheet count.Blank Areas on Cover Page and in Title Block for StampsNote: Each drawing page must have a space reserved for CCSF approval stamps as specified in the“How to create PDFs of your plans or addenda” section of the CCSF City (sf.gov) website. Areasstated here are just examples, to be superseded by direction of blank space areas on the CCSF City(sf.gov) website. See ans-or-addenda for fullinstructions. Areas defined must be completely blank.Provide a blank area within the title block. This reserved blank area must be in the samelocation for every page in the plan set.Provide an additional blank area adjacent to the title block - in the same location forevery page in the plan set.CCSF Electronic Plan Review ProcessApplicant Procedure6/24/2020Page 4
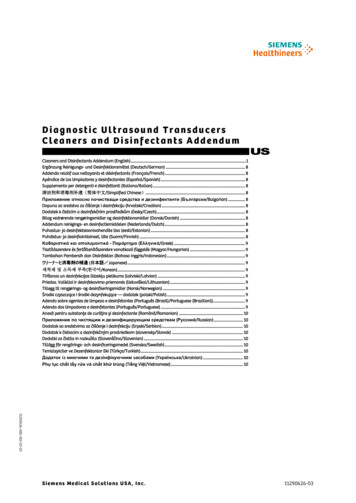
CCSF Permit CenterOffice of the City AdministrationDocument Size and VolumesIf file size exceeds 1 GB, the document shall be broken up into volumes by discipline orconsistent number of sheets.Document ScalePDF Drawings shall be plotted/printed at Full 1:1 Scale from authoring software. Do not“Scale to Fit” or reduce the PDF page size to be smaller than the original printed pagesize.Scanned Document PrepNote: Scanned documents are slow to regenerate in Bluebeam – typically defined as takingmore than 5 seconds per-page to regenerate. All scanned documents or pages that are slow toregenerate are required to go through this scanned document preparation section. It is notrecommended that documents are scanned dots (raster) – ideally they should be “printed” lines(vector). See below.Printed documentScanned DocumentOpen the scanned PDF fileFrom the File Menu (located at the top of the Bluebeam screen), select “Export”Click “JPEG”CCSF Electronic Plan Review ProcessApplicant Procedure6/24/2020Page 5
CCSF Permit CenterOffice of the City AdministrationBrowser window will openBrowse to save to a local folder (ideally a new folder). Note the folder locationSelect “Save”Convert JPG Image files Back to PDFFrom the File menu, select “Create”Click “From Multiple Files”Browser window will openLocate folder containing JPEGs saved from previous sectionSelect image filesSelect OpenStapler dialog will openCCSF Electronic Plan Review ProcessApplicant Procedure6/24/2020Page 6
CCSF Permit CenterOffice of the City AdministrationSelect “Advanced ” ButtonSelect 96 dpi from the resolution image drop downSelect OKCCSF Electronic Plan Review ProcessApplicant Procedure6/24/2020Page 7
CCSF Permit CenterOffice of the City AdministrationAdd a file name to the “One Output File”’ fieldSelect “Use source file folder”Click OKRun Optical Character Recognition (OCR) on Scanned PDF filesNote: this OCR Section requires the Bluebeam eXtreme software version. It is optionalfor Applicants who do not have the eXtreme version of Bluebeam.From the “Batch” pull-down menu, select “OCR”CCSF Electronic Plan Review ProcessApplicant Procedure6/24/2020Page 8
CCSF Permit CenterOffice of the City AdministrationConfirm All Pages are selectedSet Document Type to CAD DrawingsCheck “Detect Vertical Text”Check “Detect text in pictures and drawings”Uncheck all other optionsClick OKCreate Page Labels in ThumbnailsFrom any page, zoom into the area containing the sheet’s page number and labelGo to Thumbnails iconClick the Create Page Labels icon to the right of the Thumbnails drop-downCCSF Electronic Plan Review ProcessApplicant Procedure6/24/2020Page 9
CCSF Permit CenterOffice of the City AdministrationSelect Page Range Select All PagesSelect Page Region Click SelectSelect Region of Page Label Sheet NumberNote: Draw a window around the Sheet Number as big as possible while staying insidethe titleblock lines. Avoid selecting additional text besides the Sheet Number. Notice thewindow being sketched within the area highlighted with the red box.Enter a space, a hyphen, and a space after [Region 1]Click add to select a second region for the bookmarkSelect Region of Page Label Sheet NameCCSF Electronic Plan Review ProcessApplicant Procedure6/24/2020Page 10
CCSF Permit CenterOffice of the City AdministrationNote: Draw a window around the Sheet Title as big as possible while staying inside thetitleblock lines. Avoid selecting additional text besides the Sheet Name. Notice thewindow being sketched within the area highlighted with the red box.Review AutoMark Preview and Click OK. Page Labels will generateReview in the Thumbnails tab to verify the sheet number and sheet name have beencaptured properlyIf incorrect, double left-click and change incorrect title(s), or redo Page LabelsCCSF Electronic Plan Review ProcessApplicant Procedure6/24/2020Page 11
CCSF Permit CenterOffice of the City AdministrationCreate BookmarksNote: Bookmarks can be created directly from Page Labels. Verify all Page Labels are completeand correct before creating BookmarksGo to Bookmarks TabClick the “Create Bookmarks” iconSelect Page Labels and verify Page Range Click OKPage Label content will appear in the Bookmarks tabClick the Bookmarks icon and select “Audit Bookmarks” from drop-down menu toconfirm no broken bookmarks are foundNesting BookmarksNote: Before Nesting Bookmarks, verify all Bookmarks contain correct page label namesmatching the names in the Thumbnails (which match drawing sheet numbers & labels)Go to ‘Bookmarks’ TabSelect the first sheet in each sectionCCSF Electronic Plan Review ProcessApplicant Procedure6/24/2020Page 12
CCSF Permit CenterOffice of the City AdministrationRight-click Click “Add” Select “Add Before ”Name new bookmark by section - Example: ELECTRICALSelect all “E” sheets and nest by pulling the documents over to the right under theELECTRICAL bookmarkRepeat for all disciplines and other applicable documents (i.e. specifications whichcontain bookmarked sections)CCSF Electronic Plan Review ProcessApplicant Procedure6/24/2020Page 13
CCSF Permit CenterOffice of the City AdministrationSet Scale on Floor PlansNote: In addition to PDF plotting at Full 1:1 Scale, all Floor Plan Sheets should contain an appropriatemeasurement Scale that is stored in the PDF page.Locate the Floor PlansVerify a scale is listed in the title of the Floor Plan. Applicants must include a scaleidentification on all Floor PlansWithin the “Measurements” panellocate the Page Scale sectionSet Precision to 1/2Manually enter the Scale to match the Scale of the Floor Plan, or select the scale fromthe “Preset” Scales (Bluebeam 2019)Bluebeam 2019Bluebeam 2018Once the scale has been applied on a page, that scale is stored in the page. InBluebeam 2018, the “Store Scale in Page” option is checked. In Bluebeam 2019, theCCSF Electronic Plan Review ProcessApplicant Procedure6/24/2020Page 14
CCSF Permit CenterOffice of the City Administrationpage scale is listed within the Thumbnail. Check “Page Scale” in the Bluebeam 2019Label Options.Repeat for all Floor PlansNote: Once a Scale is set on one page, it will become the default to set other pages inBluebeam 2018 - by checking “Store Scale in Page”. In Bluebeam 2019, use the “Applyto Page Range” button to set multiple pages.Remove LayersGo to Layers TabSelect layers listedNote: To select all quickly, select the top layer of the list, hold the shift key and selectthe bottom layer simultaneously.Right-click on highlighted layers and select Delete from the drop-down menuCCSF Electronic Plan Review ProcessApplicant Procedure6/24/2020Page 15
CCSF Permit CenterOffice of the City AdministrationUncheck all optionsClick DeleteCreate Drawing Call-Out HyperlinksNote: this Hyperlinks Section requires the Bluebeam eXtreme software version. It is optional forApplicants who do not have the eXtreme version of Bluebeam.From the Batch pull-down menu, select Link NewSelect “Add Open Files” uncheck any files that are not drawing filesCCSF Electronic Plan Review ProcessApplicant Procedure6/24/2020Page 16
CCSF Permit CenterOffice of the City AdministrationClick NextSelect SettingsSelect Filter Mode: “First from start”Select Filter Character. “’Space”Click OKClick Link OptionsCheck Include Appearance PropertiesSelect a light-yellow colorSet Style to HighlightClick OKCCSF Electronic Plan Review ProcessApplicant Procedure6/24/2020Page 17
CCSF Permit CenterOffice of the City AdministrationSelect Page LabelClick “Generate”Search Terms will generateClick run to create hyperlinksOnce the hyperlinks are created, click “Finish and Close”Flatten DocumentFrom the “Document” pull-down menu, select “Flatten”CCSF Electronic Plan Review ProcessApplicant Procedure6/24/2020Page 18
CCSF Permit CenterOffice of the City AdministrationIn the “Flatten Markups” dialog, check “All Markups”Verify ‘Allow Markup Recovery (Unflatten)’ is uncheckedClick FlattenSave DocumentsPrepare Additional Files for SubmittalsNote: Additional document such as Specifications, Calculations, and other supporting files must beprepared in addition to the drawings to allow for proper review by CCSF. Files requiring review and/orcomments by CCSF must be PDF file type. Reference files may be other typical file types (Word,Excel, etc.)Preparation for non-drawings PDFs typically does not require a paid version of Bluebeam.Specifications PrepSpecifications shall contain bookmarks identifying Specification DivisionsSpecifications shall be free of LayersSpecifications shall be FlattenedOther Supporting Document PrepAll additional supporting documents shall be free of LayersAll additional supporting documents shall be FlattenedCCSF Electronic Plan Review ProcessApplicant Procedure6/24/2020Page 19
CCSF Permit CenterOffice of the City AdministrationSubmit Documents to CCSF for Electronic Plan Review (EPR)Submitting files via the CCSF City website (sf.gov)Note: Once the Applicant has prepared and correctly formatted the PDF files, the Applicant willupload the files to the “Building Permits” section of the sf.gov website using the instructionsfound within the “Apply for a Building Permit” and “How to create PDFs of your plans oraddenda” sf.gov webpages.Ensure all documents are correctly formatted as defined within this procedure.Improperly formatted documents will be rejected by CCSFOpen a web browser, and enter the following web te the “Apply for a Building Permit” sectionhttps://sf.gov/apply-building-permitFollow the instructions to verify Forms and Project Qualifications. The section containsadditional instructions for document creation, and an “Apply Now” button to submitprepared documentsSubmitting files directly into a Bluebeam Studio Session (as applicable)Note: In most cases, the Applicant will submit files via the CCSF City (sf.gov) website, notdirectly into Bluebeam Studio.In rare cases CCSF may determine that the Applicant will upload directly to the BluebeamSession. The Applicant will receive, as part of their invitation & link to the Studio Session,instructions to “resubmit the entire set of drawing plans by uploading the revised set to theSession”. The Applicant should only attempt to submit directly to the Session if they receivethese specific instructions.Uploading files directly to a Bluebeam Studio Session requires a paid version of Bluebeam.Access to a Bluebeam Studio Session requires a Bluebeam Studio Account. Refer to the“Account Setup for Bluebeam Studio” section located within this Procedure for instructions onsetting up a Studio account and required display name conventions for Studio accounts. TheAccount and display name must be set prior to submitting.In addition to a link, the Bluebeam Studio Session can also be joined using a (BluebeamStudio Project) Studio ID, which will be included in the invite email. The Studio ID is a randomnine-digit code provided by CCSF. It is unrelated to the Application number or project address,etc.Ensure all documents are named and formatted as defined within this procedure.Improperly formatted documents will be rejected by CCSFOpen Bluebeam SoftwareVerify connection to Bluebeam StudioOpen the Bluebeam Studio Session(i.e. the icon is “plugged in”)Refer to the sections titled “Joining the Bluebeam Studio Session via EmailLink” and/or “Joining a Bluebeam Studio Session via Session ID” located in the“Incorporate CCSF Review Comments” Section of this document (Section 8.0)CCSF Electronic Plan Review ProcessApplicant Procedure6/24/2020Page 20
CCSF Permit CenterOffice of the City AdministrationOnce the Session is opened, locate the “Documents” area in the Session tabClick the “Add File” buttonwithin the “Documents” areaNote: If the “Add File” button is missing, it indicates the “Add Documents” Sessionpermission has not been granted to the email address used by the Applicant to sign intoBluebeam Studio. Verify with the CCSF EPR Support Staff that the email address usedby the Applicant to access the Studio Session has the “Add Documents” Sessionpermission.Browser window will openSelect the PDF file (Hold Ctrl or Shift to select Multiple files)Select Open to add the filesNotify CCSF EPR Support StaffOnce all submittal files have been successfully added to the Studio Session,notify CCSF EPR Support Staff of Bluebeam Session submittal via email.Submitting files directly into a Bluebeam Studio Project (as applicable)Note: In most cases, the Applicant will submit files via the CCSF City (sf.gov) website, notdirectly into Bluebeam Studio.In rare cases CCSF may determine that the Applicant will upload directly to the BluebeamProject. The Applicant will receive an invitation to submit to the Studio Project and a link to theStudio Project via email. This invitation will be separate from the invitation to join the StudioSession.Uploading files directly to a Bluebeam Studio Project requires a paid version of Bluebeam.Access to a Bluebeam Studio Project requires a Bluebeam Studio Account. Refer to the“Account Setup for Bluebeam Studio” section located within this Procedure for instructions onsetting up a Studio account and required display name conventions for Studio accounts. TheAccount and display name must be set prior to submitting.A Bluebeam Studio Project can also be joined using a (Bluebeam Studio Project) Studio ID,which will be included in the invite email. The Bluebeam Studio Project ID is a random nine-digitcode provided by CCSF. It is unrelated to the Application number or project address, etc.CCSF Electronic Plan Review ProcessApplicant Procedure6/24/2020Page 21
CCSF Permit CenterOffice of the City AdministrationEnsure all documents are named and formatted as defined within this procedure.Improperly formatted documents will be rejected by CCSFOpen Bluebeam SoftwareVerify connection to Bluebeam Studio(i.e. the icon is “plugged in”)Open the Bluebeam Studio Project by clicking the link included in the email invitation(provided by CCSF). As long as the Applicant is connected to Bluebeam Studio, thelink will open the Studio Project tab automatically.If a link is not available or not working, the Applicant may also open the Studio Projectmanually if they have been invited and have the Studio Project IDNote: The Bluebeam Studio Project ID is a random nine-digit code provided by CCSF. Itis unrelated to the Application number or project address, etc.Click the Studio Projects buttonUnder Studio drop-down menu select . The “Join” dialog box appears.Enter the nine-digit Bluebeam Studio Project IDClick OK. The Bluebeam Project tab will openOnce the Studio Project tab is open, locate the CCSF EPR folders. In the PERMITSUBMITTAL folder, locate the sub folder titled 3. DOCUMENTS FOR REVIEWCCSF Electronic Plan Review ProcessApplicant Procedure6/24/2020Page 22
CCSF Permit CenterOffice of the City AdministrationRight click on folderSelect Upload Files IconBrowser window will openSelect the file to upload (Hold Ctrl or Shift to select Multiple files)Select Open to upload the filesNotify CCSF EPR Support StaffOnce all submittal files have been successfully uploaded to Studio Project,notify CCSF EPR Support Staff of Bluebeam Project submittal via email.Intake of Applicant Submittal FilesNote: Once CCSF EPR Support Staff receives the Applicant submission, the EPR Support Staff willperform a QAQC review of the submitted files. If document prepa
Review (EPR) Support Staff generates a Bluebeam Studio Project specific to the Project's Permit Application digital submission. The Bluebeam Studio Project serves as CCSF's online storage location for all digital files related to the Permit Application. The EPR Support Staff will then perform a QAQC verification of the documents.