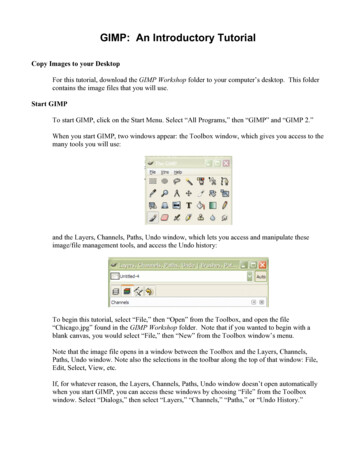
Transcription
GIMP Mosaic TutorialCreating Mercury Mosaics with Projected ImagesStudent Planetary Investigator (MESSENGER)
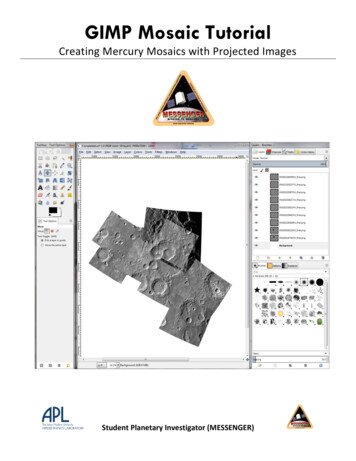
IntroductionYou will be using projected images from USGS’s projection on the web (POW) service to create a mosaic of images ofMercury’s surface. It is assumed that you have some experience with USGS’s PILOT image lookup service, and their POWservice. You will be guided through the process required to find images that are suitable for a mosaic, but are expectedto justify the section of Mercury that you choose to mosaic. By the end of this project, you should be able to discuss theadvantages of your high-resolution mosaic over the lower-resolution ones available on Quickmap.NOTE: Because this tutorial utilizes the USGS/NASA PDS PILOT site, please complete the tutorial: “PDSTutorial: Using NASA’s Planetary Data System (PDS) to Find Mercury Pictures”.Pre-ActivityWe will be using a free photo-editing tool called GIMP for this activity. You will need to check with your NetworkAdministrators to make sure you can download this software. Follow these instructions for download before you begin: You can download GIMP here: http://www.gimp.org/downloads/ , or if that link has changed for somereason, it is pretty easy to find with Google.Go through the installation steps and start GIMP.On startup, GIMP should have three panes and look similar to this:Once you have installed and open GIMP, we will next look for images using the PILOT website.Student Planetary Investigator (MESSENGER)
Part 1This part will quickly review looking up images on the PILOT website http://pilot.wr.usgs.gov/ and discuss preparingimages for mosaicking.Looking Up Images with PILOT: Remember that the MESSENGER cameras will be more useful for our work, using mapped images. Next, select the “Map” tab. Here you will see a map of the surface of Mercury. In the lower left of the map, make sure the “bounding box” is selected. This will allow you to create a box on the map to select a specific area for images. You can also inputlong/lat coordinates to find your location.Make sure your coordinate system is set correctly Next, we will need to set the resolution for our area. Click on the “Advanced” tab next to the Map tab.For a mosaic, you want as clear an image as possible. For my area, images with a mean ground resolution aslow as 100 meters / pixel were available.When setting resolution settings in the “Advanced” tab, make sure to adjust settings for both the WAC andNAC.Remember that a lower m/pixel “mean ground resolution” translates into a high resolution image. It can bea bit confusing because lower numbers yield greater pixel amounts.Student Planetary Investigator (MESSENGER)
Start your search at higher mean ground resolution, and work your way down by steps until you have about20 photos, as seen below. Once you have about 20 images, use the view all footprints button to see the area that the imagesencompass.You could use one low-resolution image to see all the areas that these twenty images encompass, andsometimes that is good enough, depending on what you want to do. But in this case, we want really goodimages.Now you have to decide if the area that you want to study is sufficiently covered. My images only cover thecenter of my red box. If there is nothing on the right side of the box that I want to look at closely, this mightwork for me.But most of the time you will want to cover your entire region. Down below, I have lowered my resolutionand found footprints that cover my entire region. Student Planetary Investigator (MESSENGER)
However, 120 images are far more than you need. Remove all footprints, and then place footprintsindividually using the globe icon next to each thumbnail. Make sure to place a checkmark at each image thatyou place footprint. As a reference, you can see the kind of information that is included in the individual frames:Click here for more informationabout the picture, camera, etc. Ifyou want to check yourresolution, click here.This will download an IMG file,which you don’t want right now.This will place orremove a footprintof this imageIf you want a picture of the image withoutany projections, click this, then right click“Save Image As ” when the larger imageappears. Usually saving as JPG or PNG is mostcommon and easily viewed.Student Planetary Investigator (MESSENGER)
NOTE: For this next part, you will need to be logged into the USGS ce http%3a%2f%2fastrocloud.wr.usgs.gov%2f). When you press the download arrow, a window pops up: When you hit the Go! button, you will see another window pop up: When you hit the submit button, you will then be taken to the USGSwebsite and given a list of options for Map Projection on the Web Processing. Submit your images, but make sure to keep your PILOT tab open. At the USGS site, you will need to set some parameters for your image download. Navigate to the image options tab. It is very important thatthe output resolution of all your images are the same oryou can’t mosaic them together.Student Planetary Investigator (MESSENGER)
Navigate back to the PILOT websiteYou want to find a good average resolution for all your images. Select the info button on oneof your images. Look through the info pane until you find “meanground resolution.” (If you use the searcher tool(Control F), it should make it easier to find.)Do this for several of your images, and take anaverage. Set this average as your outputresolution. This means your higher resolutionimages will be less clear, and your lower oneswill be slightly pixelated. However, pixilationshould be minor and not a problem. You canalways re-project your images later with a lowerresolution.Now navigate back to the USGS site and type inthe average resolution you just calculated in theImage Options window.Select your projection settings as shown in thePDS assignment. Output in a PNG.Your images may take between 20 min and 24 hours to process. Once you have your processed images, proceed toPart 2.Student Planetary Investigator (MESSENGER)
Part 2 For this part, you will use the GIMP photo-editing freeware to mosaic your images. Once your images are finished, download the zip file, and extract it into a folder of your choice. Open the GIMP program if you haven’t already done so.Click FILE - NewThis should pop up a New Image window. I like starting with a 4000 by 3000 background because it gives mea lot of room. You can start with a smaller background if you have a slow computer; it just makes themosaicking a little more cramped.Student Planetary Investigator (MESSENGER)
Next click FILE- Open as Layers Use Control Click to select all your PNG images and hit okay. They will all be layered into a pile, so I like to spread them out for better visualization.Use this tool to move images. If you are having trouble selectingan image with the tool, switch to the “Move the active layer”setting, and select the image in the layers panel. If you think that your background layer won’t fit your entire mosaic, close your new file and create a biggerbackground, then open as layers again. Be patient while it loads.PUZZLE TIME! You may really enjoy puzzles and begin mosaicking from here. I like to have a bit of atemplate. If you go back to your PILOT tab, you can look at the footprints again to get a general idea ofwhere the images go. Student Planetary Investigator (MESSENGER)
You can select an image to make thefootprint orange. Next, hold your mouseover the thumbnail to get its name(usually the last 4 letters are sufficient) Go back to GIMP and drag the image withthat name into the general area of thefootprint. You can get it more exact in alittle bit. You can use the “eye”button to hideor reveal images while you are working. Here I have quickly put my first 5 images in the correct location and hidden the other images. I have not yetlined up any of the images to fit together.Student Planetary Investigator (MESSENGER)
Here I have put all my images in the generally correct position. It is still pretty easy to see that they don’tline up very well. Now it is time to start lining everything up. Hide all but two of your images.I find that 50% opacity works best for me when I am lining up the images, so set it to 50% for now.Select your two visible layers, and then use the opacity scroll bar above the layers panel. You can alsodouble click the bar, type in 50, and pressenter.If you are working and find that 40%, 60%, etc. is nicer on your eyes, feel free to adjust.Sometimes I like setting the back layer to 100%, and the front to 50%.Remember that your images may have been taken under different angles/shadow conditions, and won’t lineup completely perfectly.Tap your arrow keys repeatedly for fine movements. Tapping works better than holding the arrow keys,since each new tap repositions the image. When you hold the arrow keys, the image doesn’t move until youlet go, and makes it harder to make fine adjustments.Here are my first 2 images lined up. I returned them to full opacity when I finished. I can also drag my layersin different orders to decide which is on top. Student Planetary Investigator (MESSENGER)
Notice that I used Control Scroll Wheel to zoom closer to the above images (also accomplished with zoomnumber at bottom of pane).You may have noticed the alignment tool next to the move tool. I tried aligning images using this, and wasn’ttoo impressed. I prefer to use the arrow keys. Feel free to try it out; you may like it more than I did. The lineup won’t be perfect.Always remember that shadowconditions will make perfectionnearly impossible. Do the bestyou can, but don’t spend tenminutes trying to line up 2images. Now move onto the third image. You may accidentally move one ofyour 2 lined-up images while youare adjusting the third. Don’tscream in frustration and rip yourshirt. Use Control Z or EDIT - UNDO to undo the adjustment.Continue with an intact shirt. Here are my first 8 imagesmosaicked together. Notice how there are clear lines where some photos intersect. Hopefully you can limitthe visibility of these lines, but don’t worry too much about them.If you notice that your mosaicis too large for yourbackground, you may want tomake a larger background.Just go to the layers panel onthe right, right click - AddNew Layer Choose the size you need,then delete the oldbackground layer with rightclick - Delete LayerFor this mosaic I started with5000 by 4000 but it was alittle small for working withall the photos.Student Planetary Investigator (MESSENGER)
You will also have to adjust the canvas size so click Image - Canvas Size Set the canvas size to the same dimensions as your new background. You can also just select Fit Canvas toLayers A little more adjusting and the mosaic is now complete! Now that everything is close and lined up, the large working background is just extra white space.Student Planetary Investigator (MESSENGER)
Crop out the extra space using the crop tool.Just draw a box around the mosaic part and double click. Now try comparing your mosaic with Quickmap.Brian will write some cool science questions here.Student Planetary Investigator (MESSENGER)
NOTE: Because this tutorial utilizes the USGS/NASA PDS PILOT site, please complete the tutorial: "PDS Tutorial: Using NASA's Planetary Data System (PDS) to Find Mercury Pictures". Pre-Activity We will be using a free photo-editing tool called GIMP for this activity. You will need to check with your Network