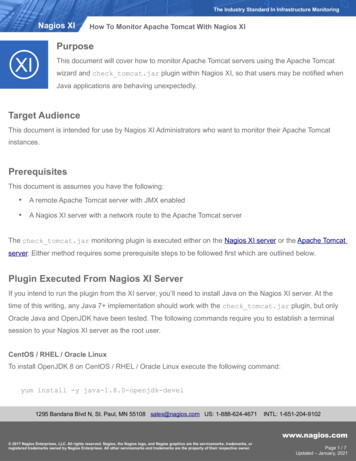
Transcription
tomcat#tomcat
Table of ContentsAbout1Chapter 1: Getting started with tomcat2Remarks2Versions2Examples2Installation or Setup2Installing Tomcat as a service on Ubuntu21. Install the Java Runtime Environment (JRE)22. Install Tomcat:33. Making Tomcat boot at startup3Changing classpath or other Tomcat related environment variables:4Chapter 2: CAC enabling Tomcat for Development PurposesExamples55Creating the Keystores and configuring Tomcat5Chapter 3: Configuring a JDBC ng a server-wide JNDI referenceUsing a JNDI reference as a JDBC Resource in ContextChapter 4: Configuring a JNDI CP vs Tomcat JDBC Connection Pool13Reference Documentation13Examples13JNDI Datasource for PostgreSQL & MySQL13JNDI Encrypted credentials14Chapter 5: Embedding into an application19
Examples19Embed tomcat using maven19Chapter 6: Https configuration20ExamplesSSL/TLS ConfigurationChapter 7: Tomcat Virtual Hosts202025Remarks25Examples25Tomcat Host Manager Web Application25Adding a Virtual Host via the Tomcat Host Manager Web Application25Adding a Virtual Host to server.xml26Chapter 8: Tomcat(x) Directories StructuresExamplesDirectory Structure in Ubuntu (Linux)Credits28282831
AboutYou can share this PDF with anyone you feel could benefit from it, downloaded the latest versionfrom: tomcatIt is an unofficial and free tomcat ebook created for educational purposes. All the content isextracted from Stack Overflow Documentation, which is written by many hardworking individuals atStack Overflow. It is neither affiliated with Stack Overflow nor official tomcat.The content is released under Creative Commons BY-SA, and the list of contributors to eachchapter are provided in the credits section at the end of this book. Images may be copyright oftheir respective owners unless otherwise specified. All trademarks and registered trademarks arethe property of their respective company owners.Use the content presented in this book at your own risk; it is not guaranteed to be correct noraccurate, please send your feedback and corrections to info@zzzprojects.comhttps://riptutorial.com/1
Chapter 1: Getting started with tomcatRemarksThis section provides an overview of what tomcat is, and why a developer might want to use it.It should also mention any large subjects within tomcat, and link out to the related topics. Since theDocumentation for tomcat is new, you may need to create initial versions of those related PICReleased6.0.x5 2.52.12.1n/an/a2006-12-017.0.x6 3.02.22.21.1n/a2010-06-028.0.x7 3.12.33.01.1n/a2013-08-058.5.x7 3.12.33.01.11.12016-06-139.0.x8 4.02.43.11.21.12016-06-13ExamplesInstallation or SetupDetailed instructions on getting tomcat set up or installed.Installing Tomcat as a service on UbuntuThis example demonstrates how to install Tomcat as a service on Ubuntu using the *.tar.gzreleases of both Tomcat as well as Java.1. Install the Java Runtime Environment (JRE)1. Download the desired jre .tar.gz release2. Extract to /opt/This will create a directory /opt/jre1.Xxxx/3. Create a symbolic link to the java home directory:cd /opt; sudo ln -s jre1.Xxxxx java4. add the JRE to the JAVA HOME environment variable:sudo vim /etc/environmentJAVA HOME "/opt/java"https://riptutorial.com/2
2. Install Tomcat:1. Download tomcat in a .tar.gz (or similiar) release.2. Create a tomcat system user:sudo useradd -r tomcat3. Extract to /opt/This will create a directory /opt/apache-tomcat-XXXXassign this directory to the tomcat system user and group:sudo chown -R tomcat ./*sudo chgrp -R tomcat ./*4. Create the CATALINA HOME environment variable:sudo vim /etc/environmentCATALINA HOME "/opt/tomcat"5. Add admin user in tomcat-users.xmlsudo vim /opt/tomcat/conf/tomcat-users.xmland add something like <user username "admin" password "adminpw"between the <tomcat-users . /tomcat-users tagsroles "manager-gui" 3. Making Tomcat boot at startupAdd a script in /etc/init.d called tomcat and make it executable. The content of the script can looksomething like:RETVAL ?CATALINA HOME "/opt/tomcat"case " 1" instart)if [ -f CATALINA HOME/bin/startup.sh ];thenecho "Starting Tomcat"sudo -u tomcat CATALINA HOME/bin/startup.shfi;;stop)if [ -f CATALINA HOME/bin/shutdown.sh ];thenecho "Stopping Tomcat"sudo -u tomcat CATALINA HOME/bin/shutdown.shfi;;*)echo "Usage: 0 {start stop}"exit 1;;esacexit RETVALTo make it start on boot, run: sudoupdate-rc.d tomcat defaultsYou can also add a bash line to /etc/rc.local for example servicehttps://riptutorial.com/tomcat start3
Changing classpath or other Tomcat related environmentvariables:Edit the file CATALINA HOME/bin/setenv.sh and add the properties in here, for example:CLASSPATH /additional/class/directoriesRead Getting started with tomcat online: startedwith-tomcathttps://riptutorial.com/4
Chapter 2: CAC enabling Tomcat forDevelopment PurposesExamplesCreating the Keystores and configuring TomcatThis writeup walks though steps to configure Tomcat to request CAC certificates from the client. Itis focused on setting up a development environment, so some features that should be consideredfor production are not here. (For example it shows using a self-signed certificate for https and itdoesn’t consider checking for revoked certificates.)Create Keystore for enabling HTTPS connectionsThe first step is to set up SSL on tomcat. This is documented on the tomcat website howto.html for completeness the steps to set it upwith a self-signed certificate are listed below:We need to create a keystore file that holds the SSL certificate for the server. The certificate iswhat is required to create an https connection and doesn’t have anything to do with making theserver request CAC certificates from the client but https connections are required for clientcertificate authentication. For a development environment creating a self-signed certificate is okbut it’s discouraged for production. Java comes packaged with a utility called keytool ols/windows/keytool.html) that is used tomanaged certificates and keystores. It can be used to create a self signed certificate and add it toa keystore. To do that you can issue the following command from a command prompt:keytool -genkey -alias tomcat -keyalg RSA -keystore \path\to\my\keystore -storepasschangeitYou will be prompted for various bits of information and then a keystore file named“\path\to\my\keystore” with a password of ‘changeit’ will be created and it will contain the generateself-signed certificate.Create truststore containing DoD root certificatesThe next thing that is needed is to create a truststore that will contain the DoD root certificates.The certificates in this truststore will be considered as trusted by tomcat and it will only acceptclient certificates that have one of the trusted certs in their certificate chain.To create the truststore we need to get a copy of the DoD root certificates. To do this download“InstallRoot 5.0” from http://militarycac.com/dodcerts.htm. Install it and run then run it. Expand theInstall DoD Certificates pane and click on the Certificate tab:https://riptutorial.com/5
Next select the three DoD Root CA certs from the list of certificates and click “PEM” under Exporttool group:After clicking the “PEM” export button choose a location to export the certificates to and click OK.This should have created three .cer files in the directory you selected. Open up a commandprompt and navigate to that directory.Here we will use the keytool command to import the certificates into a truststore. Run the followinghttps://riptutorial.com/6
commands to import the three certificates:keytool -importcert -file DoD Root CA 2 0x05 DoD Root CA 2.cer -aliasDODRoot2 -keystore truststore.jks -storepass changeitkeytool -importcert -file DoD Root CA 3 0x01 DoD Root CA 3.cer -aliasDODRoot3 -keystore truststore.jks -storepass changeitkeytool -importcert -file DoD Root CA 4 0x01 DoD Root CA 4.cer -aliasDODRoot4 -keystore truststore.jks -storepass changeitThis will create a truststore.jks file with a password of ‘changeit’ in the current working directory. Itwill contain the three DoD Root Certs, you can see this by running:keytool -list -keystore truststore.jksWhich should list out something like:Your keystore contains 3 entriesdodroot4, Sep 23, 2016, trustedCertEntry, Certificate fingerprint 7:17:23:F2:D0:26 dodroot3, Sep 23,2016, trustedCertEntry, Certificate fingerprint 4:67:D7:CE:97:FB dodroot2, Sep 23,2016, trustedCertEntry, Certificate fingerprint 2:52:B4:C9:B5:61Configure Tomcat to use the Keystore and TruststoreWe now have the keystore and truststore files we need, next is to configure tomcat to use them.To do this we must change the /conf/server.xml file. Open the file in add a connector definition likethe following: ConnectorclientAuth "true"keystoreFile "path/to/keystore.jks"keystorepass "changeit"keystoreType "jks"truststoreFile "path/to/truststore.jks"truststoreType "jks"truststorepass "changeit"maxThreads "150"port "8443"protocol "org.apache.coyote.http11.Http11NioProtocol"scheme "https"secure "true"sslProtocol "TLS"SSLEnabled "true"/ You can go here for further definition of all of the attributes: .htmlhttps://riptutorial.com/7
Once this is all done start up tomcat. From a computer that has a CAC reader with a CAC insertedbrowse to the https://:8443/ url and if everything is configured properly you should be prompted topick a certificate from the CAC card.Read CAC enabling Tomcat for Development Purposes /riptutorial.com/8
Chapter 3: Configuring a JDBC DatasourceIntroductionIn order to utilize a JDBC datasource, we must first set up a JNDI reference in Tomcat. After theJNDI reference is made, JDBC datasources can be used within our Tomcat server andapplications using shared or independent references (Great for dev/staging/prod setup, or removingconnection strings/credentials from committed code).RemarksUtilizing JNDI and JDBC also affords you to use ORMs like Hibernate or platforms like JPA todefine "persistence units" for object and table mappExamplesConfiguring a server-wide JNDI referenceInside of your {CATALINA HOME}/conf/ folder exists a server.xml and context.xml file. Each one ofthese contains similar code, but references different parts of Tomcat to complete the sametask.is server-wide configuration. This is where you can set up HTTPS, HTTP2, JNDIResources, etc.server.xmlcontext.xmlis specific to each context in Tomcat, taken from Tomcat's documentation it explainsthis well:The Context element represents a web application, which is run within a particularvirtual host. Each web application is based on a Web Application Archive (WAR) file, ora corresponding directory containing the corresponding unpacked contents, asdescribed in the Servlet Specification (version 2.2 or later). For more information aboutweb application archives, you can download the Servlet Specification, and review theTomcat Application Developer's Guide.Essentially, it's application-specific configuration.In order to operate correctly, we'll need to set up a Resource in server.xml and a reference to thatresource inside of context.xml.Inside of server.xml's GlobalNamingResources element, we'll append a new Resource which will beour JNDI reference: GlobalNamingResources !-JNDI Connection Pool for AS400https://riptutorial.com/9
Since it uses an older version of JDBC, we have to specify a validationQueryto bypass errornous calls to isValid() (which doesn't exist in older JDBC)-- Resource name "jdbc/SomeDataSource"auth "Container"type "javax.sql.DataSource"maxTotal "100"maxIdle "30"maxWaitMillis "10000"username "[databaseusername]"password "[databasepassword]"driverClassName ery "Select 1 from LIBRARY.TABLE"url "jdbc:as400://[yourserver]:[port]"/ In this example, we're using a rather particular datasource (an IBMi - running DB2), which requiresa validationQuery element set since it's using an older version of JDBC. This example is given asthere is very little examples out there, as well as a display of the interoperability that a JDBCsystem affords you, even for an antiquated DB2 system (as above). Similar configuration would bethe same for other popular database systems: Resource name "jdbc/SomeDataSource"auth "Container"type "javax.sql.DataSource"username "[DatabaseUsername]"password "[DatabasePassword]"driverClassName "com.mysql.jdbc.Driver"url "maxActive "15"maxIdle "3"/ Inside of context.xml we'll need to configure a "pointer" towards our jdbc datasource (which wemade with a JNDI reference): Context . ResourceLink name "jdbc/SomeDataSource"global "jdbc/SomeDataSource"type "javax.sql.DataSource" / /Context Utilizing ResourceLink inside of context.xml allows us to reference the same datasource acrossapplications and have it configured at the server level for multiple-database systems. (Although italso works just as well with one database)Using a JNDI reference as a JDBC Resource in Contextpublic void test() {Connection conn null;Statement stmt null;try {Context ctx (Context) new InitialContext().lookup("java:comp/env");conn ((DataSource) ;https://riptutorial.com/10
stmt conn.createStatement();//SQL data fetch using the connectionResultSet rs stmt.executeQuery("SELECT * FROM TABLE");while (rs.next()) e();conn null;}catch(Exception e){e.printStackTrace();}finally {if (stmt ! null conn ! null) try {assert stmt ! null;stmt.close();} catch (SQLException ex) {// ignore -- as we can't do anything about it hereex.printStackTrace();}}}Read Configuring a JDBC Datasource online: inga-jdbc-datasourcehttps://riptutorial.com/11
Chapter 4: Configuring a JNDI datasourceParametersAttributeDetailsauth(String) Specify whether the web Application code signs on to thecorresponding resource manager programmatically, or whether theContainer will sign on to the resource manager on behalf of theapplication. The value of this attribute must be Application or Container.This attribute is required if the web application will use a resource-refelement in the web application deployment descriptor, but is optional ifthe application uses a resource-env-ref instead.driverClassName(String) The fully qualified Java class name of the JDBC driver to beused. The driver has to be accessible from the same classloader as thedatabase connection pool jar.factory(String) Full class path to the connection datasource factory.initialSize(int)The initial number of connections that are created when the pool isstarted. Default value is 10maxIdle(int) The minimum number of established connections that should bekept in the pool at all times. The connection pool can shrink below thisnumber if validation queries fail. Default value is derived from initialSizeof 10maxTotal /maxActive(int) The maximum number of active connections that can be allocatedfrom this pool at the same time. The default value is 100. Note that thisattribute name differs between pool implementations and documentationis often incorrect.maxWaitMillis /maxWait(int) The maximum number of milliseconds that the pool will wait (whenthere are no available connections) for a connection to be returnedbefore throwing an exception. Default value is 30000 (30 seconds). Notethat this attribute name differs between pool implementations anddocumentation is often incorrect.name(String) Name used to bind to JNDI context.password(String) DB connection password.url(String) (String) JDBC connection URL.username(String) DB connection username.https://riptutorial.com/12
AttributeDetailstestOnBorrow(boolean) The indication of whether objects will be validated before beingborrowed from the pool. If the object fails to validate, it will be droppedfrom the pool, and we will attempt to borrow another. NOTE - for a truevalue to have any effect, the validationQuery or validatorClassNameparameter must be set to a non-null string. In order to have a moreefficient validation, see validationInterval. Default value is false.validationQuery(String) The SQL query that will be used to validate connections fromthis pool before returning them to the caller. If specified, this query doesnot have to return any data, it just can't throw a SQLException. Thedefault value is null. Example values are SELECT 1(mysql), select 1from dual(oracle), SELECT 1(MS Sql Server)RemarksAttributesThe list of available attributes is extensive and fully covered in Tomcat's JDBC Connection Poolreference documentation. Only the attributes used in the examples above are covered in theparameters section here.DBCP vs Tomcat JDBC Connection PoolMany locations in reference documentation refer to use of DBCP connection pools. The history onwhich connection pool implementation is actually being used in Tomcat, by default, is complex andconfusing. It depends on specific version of Tomcat being used. It's best to specify the factoryexplicitly.Reference Documentation Tomcat 8 JDNI Resources HOW-TO - JDBC Data SourcesTomcat 8 JNDI Datasource HOW-TO - ExamplesTomcat 8 JDBC Connection Pool ReferenceTomcat 8 Context Resource Links ReferenceExamplesJNDI Datasource for PostgreSQL & MySQLDeclare JNDI resource in tomcat's server.xml, using the Tomcat JDBC connection pool: GlobalNamingResources Resource name "jdbc/DatabaseName"https://riptutorial.com/13
factory h "Container"type "javax.sql.DataSource"username "dbUser"password "dbPassword"url "jdbc:postgresql://host/dbname"driverClassName "org.postgresql.Driver"initialSize "20"maxWaitMillis "15000"maxTotal "75"maxIdle "20"maxAge "7200000"testOnBorrow "true"validationQuery "select 1"/ /GlobalNamingResources And reference the JNDI resource from Tomcat's web context.xml: ResourceLink name "jdbc/DatabaseName"global "jdbc/DatabaseName"type "javax.sql.DataSource"/ If using MySQL, change URL, driver, and validation query:url "jdbc:mysql://host:3306/dbname"driverClassName "com.mysql.jdbc.Driver"validationQuery "/* ping */ SELECT 1"JNDI Encrypted credentialsIn the JNDI declaration you may want to encrypt the username and password.You have to implement a custom datasource factory in order to be able to decrypt the credentials.In server.xml replace factory "org.apache.tomcat.jdbc.pool.DataSourceFactory" byfactory "cypher.MyCustomDataSourceFactory"Then define your custom factory :package cypher;import java.util.Enumeration;import ngRefAddr;import ;public class MyCustomDataSourceFactory extends BasicDataSourceFactory {//This must be the same key used while encrypting the datahttps://riptutorial.com/14
private static final String ENC KEY "aad54a5d4a5dad2ad1a2";public MyCustomDataSourceFactory() {}@Overridepublic Object getObjectInstance(final Object obj, final Name name, final Context nameCtx,final Hashtable environment) throws Exception {if (obj instanceof Reference) {setUsername((Reference) obj);setPassword((Reference) obj);}return super.getObjectInstance(obj, name, nameCtx, environment);}private void setUsername(final Reference ref) throws Exception {findDecryptAndReplace("username", ref);}private void setPassword(final Reference ref) throws Exception {findDecryptAndReplace("password", ref);}private void findDecryptAndReplace(final String refType, final Reference ref) throwsException {final int idx find(refType, ref);final String decrypted decrypt(idx, ref);replace(idx, refType, decrypted, ref);}private void replace(final int idx, final String refType, final String newValue, finalReference ref) throws Exception {ref.remove(idx);ref.add(idx, new StringRefAddr(refType, newValue));}private String decrypt(final int idx, final Reference ref) throws Exception {return new CipherEncrypter(ENC ;}private int find(final String addrType, final Reference ref) throws Exception {final Enumeration enu ref.getAll();for (int i 0; enu.hasMoreElements(); i ) {final RefAddr addr (RefAddr) enu.nextElement();if (addr.getType().compareTo(addrType) 0) {return i;}}throw new Exception("The \"" addrType "\" name/value pair was not found" " inthe Reference object. The reference Object is" " " ref.toString());}}Of course you need an utility to encrypt the username and password ;package cypher;import java.io.UnsupportedEncodingException;import riptutorial.com/15
import pec;javax.crypto.spec.PBEParameterSpec;public class CipherEncrypter {Cipher ecipher;Cipher dcipher;byte[] salt {(byte) 0xA9, (byte) 0x9B, (byte) 0xC8, (byte) 0x32, (byte) 0x56, (byte) 0x35,(byte) 0xE3, (byte) 0x03};int iterationCount 19;/*** A java.security.InvalidKeyException with the message "Illegal key size or defaultparameters" means that the cryptography strength is limited; the unlimited strengthjuridiction policy files are not in the correct location. In a JDK,* they should be placed under {jdk}/jre/lib/security** @param passPhrase*/public CipherEncrypter(final String passPhrase) {try {// Create the keySecretKeyFactory factory eySpec spec new PBEKeySpec(passPhrase.toCharArray(), salt, 65536, 256);SecretKey tmp factory.generateSecret(spec);//SecretKey secret new SecretKeySpec(tmp.getEncoded(), "AES");// Create the ciphersecipher Cipher.getInstance(tmp.getAlgorithm());dcipher Cipher.getInstance(tmp.getAlgorithm());final AlgorithmParameterSpec paramSpec new (Cipher.ENCRYPT MODE, tmp, paramSpec);dcipher.init(Cipher.DECRYPT MODE, tmp, paramSpec);}catch (Exception e) {e.printStackTrace();}}public String encrypt(final String str) {try {final byte[] utf8 str.getBytes("UTF8");byte[] ciphertext ecipher.doFinal(utf8);return new sun.misc.BASE64Encoder().encode(ciphertext);}catch (final javax.crypto.BadPaddingException e) {https://riptutorial.com/16
//}catch (final IllegalBlockSizeException e) {//}catch (final UnsupportedEncodingException e) {//}catch (Exception e) {//}return null;}public String decrypt(final String str) {try {final byte[] dec new sun.misc.BASE64Decoder().decodeBuffer(str);return new String(dcipher.doFinal(dec), "UTF-8");}catch (final//TODO}catch (final//TODO}catch (final//TODO}catch (final//TODO}return null;javax.crypto.BadPaddingException e) {IllegalBlockSizeException e) {UnsupportedEncodingException e) {java.io.IOException e) {}public static void main(final String[] args) {if (args.length ! 1) {System.out.println("Error : you have to pass exactly one argument.");System.exit(0);}try {//This key is used while decrypting.final CipherEncrypter encrypter new CipherEncrypter("aad54a5d4a5dad2ad1a2");final String encrypted rypted :" encrypted);final String decrypted ecrypted :" decrypted);}catch (final Exception e) {e.printStackTrace();}}}When you have encrypted values for username and password, replace the clear ones inhttps://riptutorial.com/17
server.xml.Note that the encrypter should be in an obfuscated jar to keep the private key hidden (or you canalso pass the key as an argument of the programm).Read Configuring a JNDI datasource online: inga-jndi-datasourcehttps://riptutorial.com/18
Chapter 5: Embedding into an applicationExamplesEmbed tomcat using maven plugin groupId org.apache.tomcat.maven /groupId artifactId tomcat7-maven-plugin /artifactId version 2.1 /version executions execution id tomcat-run /id goals goal exec-war-only /goal /goals !--This phase is for creating jar file.You can customize configuration -- phase package /phase configuration path /WebAppName /path enableNaming false /enableNaming finalName WebAppName.jar /finalName /configuration /execution /executions !--This configuration is for running application in your ide-- configuration port 8020 /port path /webappName /path !--These properties are optional-- systemProperties CATALINA OPTS -Djava.awt.headless true -Dfile.encoding UTF-8-server -Xms1536m -Xmx1536m-XX:NewSize 256m -XX:MaxNewSize 256m -XX:PermSize 256m-XX:MaxPermSize 512m -XX: DisableExplicitGC-XX: UseConcMarkSweepGC-XX: CMSIncrementalMode-XX: CMSIncrementalPacing-XX:CMSIncrementalDutyCycleMin 0-XX:-TraceClassUnloading /CATALINA OPTS /systemProperties /configuration /plugin You can run the above tomcat in your ide using goal tomcat:run. If you run package goal it willcreate a jar file in your target folder which can create tomcat instance itself and run.Using /CATALINA OPTS you can specify properties like permgen max and min size, GarbageCollection mechanism etc.which are completely optional.Read Embedding into an application online: ginto-an-applicationhttps://riptutorial.com/19
Chapter 6: Https configurationExamplesSSL/TLS ConfigurationHTTPSHTTPS (also called HTTP over TLS,[1][2] HTTP over SSL,[3] and HTTP Secure[4][5]) is a protocolfor secure communication over a computer network which is widely used on the Internet. HTTPSconsists of communication over Hypertext Transfer Protocol (HTTP) within a connection encryptedby Transport Layer Security or its predecessor, Secure Sockets Layer. The main motivation forHTTPS is authentication of the visited website and protection of the privacy and integrity of theexchanged data.SSLImage result for what is ssl SSL (Secure Sockets Layer) is the standard security technology forestablishing an encrypted link between a web server and a browser. This link ensures that all datapassed between the web server and browsers remain private and integral. SSL is a securityprotocol. Protocols describe how algorithms should be used.TLSTransport Layer Security (TLS) and its predecessor, Secure Sockets Layer (SSL), both of whichare frequently referred to as 'SSL', are cryptographic protocols designed to providecommunications security over a computer network.SSL CertificateAll browsers have the capability to interact with secured web servers using the SSL protocol.However, the browser and the server need what is called an SSL Certificate to be able to establisha secure connection.SSL Certificates have a key pair: a public and a private key. These keys work together to establishan encrypted connection. The certificate also contains what is called the “subject,” which is theidentity of the certificate/website owner.How Does the SSL Certificate Create a Secure Connection1. When a browser attempts to access a website that is secured by SSL, the browser and theweb server establish an SSL connection using a process called an “SSL Handshake”2. Essentially, three keys are used to set up the SSL connection: the public, private, andsession keys.Steps to Establish a Secure Connectionhttps://riptutorial.com/20
1. Browser connects to a web server (website) secured with SSL (https). Browser requests thatthe server identify itself.2. Server sends a copy of its SSL Certificate, including the server’s public key.3. Browser checks the certificate root against a list of trusted CAs and that the certificate isunexpired, unrevoked, and that its common name is valid for the website that it is connectingto. If the browser trusts the certificate, it creates, encrypts, and sends back a symmetricsession key using the server’s public key.4. Server decrypts the symmetric session key using its private key and sends back anacknowledgement encrypted with the session key to start the encrypted session.5. Server and Browser now encrypt all transmitted data with the session key.SSL/TLS and TomcatIt is important to note that configuring Tomcat to take advantage of secure sockets is usually onlynecessary when running it as a stand-alone web server.And if running Tomcat primarily as a Servlet/JSP container behind another web server, such asApache or Microsoft IIS, it is usually necessary to configure the primary web server to handle theSSL connections from users.CertificatesIn order to implement SSL, a web server must have an associated Certificate for each externalinterface (IP address) that accepts secure connections.Certificate as a "digital driver's license".1. This "driver's license" is cryptographically signed by its owner, and is therefore extremelydifficult for anyone else to forge2. Certificate is typically purchased from a well-known Certificate Authority (CA) such asVeriSign or ThawteIn many cases, however, authentication is not really a concern. An administrator may simply wantto ensure that the data being transmitted and received by the server is private and cannot besnooped by anyone who may be eavesdropping on the connection. Fortunately, Java provides arelatively simple command-line tool, called keytool, which can easily create a "self-signed"Certificate. Self-signed
these contains similar code, but references different parts of Tomcat to complete the same task. server.xml is server-wide configuration. This is where you can set up HTTPS, HTTP2, JNDI Resources, etc. context.xml is specific to each context in Tomcat, taken from Tomcat's documentation it explains this well:
