Transcription
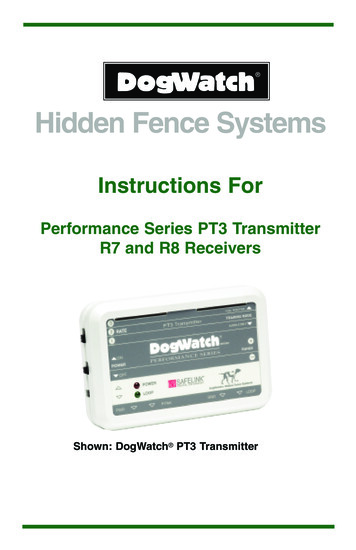
Hidden Fence SystemsInstructions ForPerformance Series PT3 TransmitterR7 and R8 ReceiversShown: DogWatch PT3 Transmitter
Thank you for purchasing aDogWatch Hidden Fence System!INSTRUCTIONS FORPerformance Series PT3 Transmitter andR7 and R8 ReceiverYou have purchased the most technologically advancedhidden fence system available, thanks to ourpatented SafeLink FM digital technology, AUTOMEMORY and FastReact Pet Friendly features.Our extensive research and testing has resulted in a productthat will help improve the relationship between you and your dog.We are also pleased to provide you with a solution that’scost-effective and has no impact to the aesthetics of your property.The DogWatch system offers you great flexibility.Not only can you contain your dog in your yard, you can alsokeep him out of your garden, rose bushes or swimming pool.It can even be attached to an existing fence tokeep your pet from jumping over or digging under it.To assure that yourDogWatch Hidden Fence System works properly,please follow the training procedures outlined in this manual.Any shortcuts may affect the performance of the system andcould be unsafe to your pet.If you have any questions,please contact your local authorized DogWatch Dealer.Surrounding Pets With Freedom Since 1990. i
Table Of ContentsImportant Safeguards. . . . . . . . . . . . . . . . . . . . . . . . . . . . . . . . . . . . . . . 1Product DescriptionsPerformance Series Transmitter. . . . . . . . . . . . . . . . . . . . . . . . . . . 2 - 4Performance Series R7 Receiver. . . . . . . . . . . . . . . . . . . . . . . . . . . . . .4Performance Series R8 Receiver. . . . . . . . . . . . . . . . . . . . . . . . . .4Changing the BatteriesR7 Receiver. . . . . . . . . . . . . . . . . . . . . . . . . . . . . . . . . . . . . . . . . . . 4R8 Receiver . . . . . . . . . . . . . . . . . . . . . . . . . . . . . . . . . . . . . . . . . . 4Receiver Features.R7 and R8 Receiver. . . . . . . . . . . . . . . . . . . . . . . . . . . . . . . . . . . . . . . . 5 - 8Changing the Receiver Training LevelsR7 and R8 Receiver. . . . . . . . . . . . . . . . . . . . . . . . . . . . . . . . . . . . . . . . 5 - 8How The System Works. . . . . . . . . . . . . . . . . . . . . . . . . . . . . . . . . . . . . . 9How The System Is Installed. . . . . . . . . . . . . . . . . . . . . . . . . . . . . . . . 10Important Reminders. . . . . . . . . . . . . . . . . . . . . . . . . . . . . . . . . . . . . . . . 11Troubleshooting. . . . . . . . . . . . . . . . . . . . . . . . . . . . . . . . . . . . . . . . . . . . 11Replacement Batteries & Collars. . . . . . . . . . . . . . . . . . . . . . . . . . . . 12Getting Help. . . . . . . . . . . . . . . . . . . . . . . . . . . . . . . . . . . . . . . . . . . . . . . . . 12System Maintenance Record. . . . . . . . . . . . . . . . . . . . . . . . . . . . . . . . 13WarrantiesWarranty Registration. . . . . . . . . . . . . . . . . . . . . . . . . . . . . . . . . . . . . . . . . 14Manufacturer’s Warranty. . . . . . . . . . . . . . . . . . . . . . . . . . . . . . . . . . . . . . 14ii
Important SafeguardsDOGWATCH STRONGLY RECOMMENDS THAT YOU REMOVE THE COLLAR ATNIGHT WHILE YOUR DOG IS INSIDE Please read all the literature included with your DogWatch Hidden FenceSystem before turning the system on or beginning training. Do not attempt to shortcut the complete training of your dog. In the event your system requires servicing, please contact your localAuthorized DogWatch Dealer. Attempting to service the system yourself mayinvalidate the warranty.The DogWatch Hidden Fence System is intended for the purpose of containingdomestic dogs. Use for any other purpose is at system owner’s risk.To contact your local dealer, please call DogWatch at:800-793-3436 or go to our Web Site at www.dogwatch.com. The DogWatch Hidden Fence System is recommended for dogs six (6) monthsor older. Your Dealer will recommend if a puppy under 6 months old is ready. Keep the collar and the transmitter out of the reach of children. This product is only intended for use with trained domestic dogs. If your dog isaggressive or violent and could cause harm to itself or others outside thefenced premises, you should take other measures to restrain your dog suchas traditional fencing.Never adjust the transmitter or receiver when your dog is wearing the collar.It is recommended that you unplug your transmitter from the wall outlet anddisconnect the loop wire during lightning storms or when it is left unused forextended periods. This will prevent possible damage from lightning andpowerline surges. 1
Product DescriptionPerformance Series TransmitterThe transmitter sends a coded digital FM radio signal through the boundary wire.This signal can be adjusted, allowing you to control the “hidden fence” aroundyour property. It operates on a standard 110 volt outlet.7Training Mode64Pulse RateRange1Power On/Off810Loop PlugModel SwitchLeave in UPposition at alltimesPower Pak Power Supply9Ground Wire32InsetPOWER Light:Steady Red light when power is on.LOOP Light:Steady green light indicates boundary loopis operating properly.NOTE: On earlier transmitter models, the greenlight will blink.LOOP Light will go off when a wire breakoccurs. An audible warning will also sound.2
Performance Series Transmitter Features1. Power On/Off: This switch gives you easy access to turn the transmitter on or off.The red Power indicator light on the front panel lets you know that it is operating.2. Power Supply: The transmitter is powered through a power supply that isplugged into a properly grounded 110 volt outlet. The adapter is plugged into thetransmitter jack labeled “PWR.”3. Ground Wire: The green ground wire is plugged into the transmitter at the location labeled “GND.” The round connector on the green ground wire is attachedunder the screw on the outlet faceplate. It will, however, only be effective if youroutlet is properly grounded. If you have any questions about having a properlygrounded outlet, consult your local electrician.4. Range /-: The radio signal is transmitted from the boundary wire in all directions.The signal is adjusted by the range control on the transmitter to create a signalfield on each side of the wire. The recommended width is 6-10 feet. YourDogWatch Dealer will adjust the radio signal distance according to the personality and traits of your dog. Consult your DogWatch Dealer first before making anyadjustments yourself.Never adjust the transmitter while your dog is wearing the receiver collar.5. Signal Field: The signal field has two areas. When your dog first enters the signalfield, he will receive an audible warning. If he continues further into the signal field,he will receive a correction. The audible area is approximately the first 10% of thetotal signal field. To prevent your dog from entering the signal field and remainingin the audible area causing depletion of the battery, the receiver will transition froman audible warning to a short warning correction after a period of 10 seconds. Thiswill activate regardless of the mode switch setting, but will not activate if the receiver is in the “Audible Only” Training Level (see Phase 1: page 15).6. Rate: This adjusts to three levels (1-slow, 2-medium, 3-fast). When your dog getsa correction, he receives it in a series of pulses. Increasing the Rate means that hewill receive a greater number of pulses per second.7. Mode: This turns the stimulation on and off. If your dog enters the signal field withthe Mode “on,” (Full Function) he will receive an audible warning followed by a correction. When the Mode is “off,” (Audible Only) he receives an audible only warning (see “Signal Field” description above). The Mode should only be turned off ifyour dog has been thoroughly trained with the Mode “on” and consistentlyresponds to the audible warning alone. We recommend that the Mode be left inthe “on” or “Full Function” position.8. Loop Plug: Your system comes with zip cord with a plug on one end. This plug fitsinto the hole marked “Loop” on the bottom of the transmitter. This is the beginningof the boundary wire. Once your boundary wire has been properly installed andplugged into the transmitter, the green Loop indicator light will turn on. If theboundary wire is broken or the signal is interrupted, the Loop indicator light will goout and an audible warning will sound. If the Loop light is out, consult your Dealer.You should also check around your property for a visible broken wire.3
9. PowerPak : Optional battery back-up system keeps the transmitter operating in theevent of a power failure. When transmitter is being powered by battery back-up, thered power light will remain off. PowerPak plugs into the transmitter at “P-PAK”.10. Model Switch: This switch sets your transmitter to work with your specific receiver(s).Your DogWatch Dealer will set the switch in the “up” position. The Transmitter mustbe turned off when setting or changing this switch.Performance Series R7 and R8 ReceiversThe lightweight radio receiver worn by the dog identifies the coded FM radio signalfrom the boundary wire. It creates an audible warning followed by stimulation if hecomes too close to the boundary wire. It operates on a replaceable battery and iswaterproof when the battery cap is securely fastened.Battery Insertion InstructionsImportant: You must reset the “Battery Reminder” Feature when you change thebattery. See “Battery Replacement Reminder on page 6.R7 Battery: The Performance Series receiver is powered by a 3 volt 1/3 N lithium battery. The receiver is designed for a 6 month battery life. The positive ( ) end of thebattery must be inserted up. (Figure 1)R8 Battery: The R8 battery is powered by a 3.6 volt lithium battery. The receiver isdesigned for long battery life of up to two years. The positive ( ) end of the batterymust be inserted down. (Figure 2)Figure 2Figure 1Insert R7 Battery Positive End UP.Insert R8 Battery Positive End DOWN.Battery Plans: Ask your DogWatch Dealer about a battery plan. If your DogWatchDealer does not have a battery plan, you can join the DogWatch Battery Program,where a new battery is mailed to you every 6 or 24 months. Call DogWatch at 800-7933436 or join through the DogWatch Web Site at www.dogwatch.com.Important: When you remove the receiver collar from your dog at night, do not storeit near or on a television. Please note battery handling instructions marked on the battery and on the diagram above.4
R7 and R8 Receiver FeaturesContact PostsAdjustable Nylon CollarMetal Lock WasherBlack Plastic WasherTest LightBattery CapMagnetHold Magnet Between Two Lines3.6 Volt BatteryAdjustable Collar: Both the R7 and R8 receivers come fitted to an adjustable nylon collar. The collar should be positioned above the dog’s regular collar. The collar should beadjusted to insure that the contact posts touch the skin on the dog’s neck. Check the fitfor the first few days of wear to insure that the collar is not too tight or causing irritationto your pet’s neck.* * * IMPORTANT * * *DogWatch recommends that you remove the collar at night while your pet is inside.Safelink Digital FM Design: Our patented FM design allows the DogWatch receiverto recognize and activate only to our unique radio signal. This protects your pet fromunintentional correction caused by stray radio signals which may be emitted by otherelectronic devices.Automatic Shutdown: The DogWatch system is designed to protect your dog from anover-correction in the unlikely event that your dog gets caught in the signal field. If yourdog does not exit the signal field, the receiver will automatically stop correcting after 15seconds – protecting your dog from over-correction. The receiver will automaticallyreset once the dog leaves the signal field.Contact Posts: The receiver comes with a set of contact posts. Your DogWatch Dealerwill determine the correct set based on your dog’s neck shape, coat, and skin sensitivity. The posts must make contact with the skin in order for the dog to feel the correction. In certain cases, your dealer may recommend clipping some of the hair around thecontact posts so that they can touch the skin more easily. Use care if you find it necessary to tighten the contact posts with the collar wrench, as over-tightening couldcause damage to the receiver.Antenna: The receiver incorporates an omni-directional antenna design. Utilizing multiple antennas on the receiver assures optimal reception from the signal field.5
Test Light: The test light allows you to test the receiver. Holdthe test light over the contact posts as shown in Figure 3 andcarry the receiver into the signal field a few feet from theground. When the receiver picks up the signal from theboundary wire, the audible warning will sound and the testlight will come on when you enter the correction zone.Status Light: Both the R7 and R8 include a status lightto help you with the operation of your receiver.Figure 3. Start-Up:When you first insert the battery into your receiver, thestatus light will flash. This indicates that the receiver hasstarted properly. In the event that the lights do not flash,check the battery to be sure that it has been insertedproperly (see Page 4). Correction Level Indicator:When programming the correction level of your receiver,the status light will flash green (in conjunction with theaudible beeps) the number of flashes will equal thecorrection level you have chosen.R7 Receiver Signal Field Indicator:When testing the receiver in the signal field the statuslight will flash green when the receiver is in the audiblezone and will flash green and red when the receiver isin the correction zone.R8 Receiver Battery Replacement Reminder:The status light will flash red approximately every 10 seconds when it is time tochange the battery. Each time you change your battery it is important to reset the“Battery Reminder” feature.To reset the receiver:1. Remove the old battery.2. Using your test light, hold the magnet in the programming position (without abattery in the receiver) for 30 seconds to fully discharge the unit. If you havemisplaced the test light, let the receiver sit for 5 minutes without a battery.3. Insert a new battery and the Reminder feature will automatically reset for 6months for the R7 or 24 months for the R8. (See page 4 for proper batteryinsertion.)FastReact TimeThe DogWatch R7 and R8 receivers offer the fastest reaction time available in a petcontainment receiver. If your dog were to run full speed to the boundary, the DogWatchreceiver would react - and correct - within .125 (1/8) seconds.User Programmable: When you combine the transmitter “Rate” and the receiver training levels, you can customize the receiver to one of 12 training settings, as outlined inthe chart on page 8. For example: If the receiver is on Level 1 and the Transmitter Rateis on Level 1, your dog is receiving the lowest level of correction and the least numberof pulses per second.6
Setting The Transmitter: The Transmitter Rate switch adjusts to three settings:(1 – slow, 2 – medium, 3 – fast). When your dog gets a correction, he receives it in a seriesof pulses per second. Increasing the rate means that he will receive a greater number ofpulses per second. Rate 1 is the slowest pulse rate per second; 3 is the fastest.Setting The Receiver: Both R7 and R8 Receivers provide six training levels that allowyou to customize the training setting to your dog’s individual needs: Audible Only, Level1(low), Level 2 (medium), Level 3 (medium high), Level 4 (high), and Level 5 (extrahigh). When the receiver is first turned on (from the manufacturer) it will automaticallybe set to Training Level 2 (Medium).Changing the R7 and R8 Receiver SettingsYour Dogwatch Dealer will start the training on the appropriate level according to yourdog’s personality and traits. If you need to change the training level on the receiver,hold your test light magnet to the two raised lines on the side of the receiver (Figures4 and 5.) Hold the magnet steady and you will hear a series of beeps that indicate thecurrent (set) training level. The Training Level will continue to advance as long as themagnet is held in position. For example, Level One is one beep, Level 2 is two beeps,etc. The beeps (or Receiver Tones) represent the Training Level the receiver is set at.See Chart on Page 8.Figure 4: R7 Receiver SettingsFigure 5: R8 Receiver SettingsWhen you reach the desired training level setting, pull the magnet away from thereceiver. The receiver is now set. Note: Any time the magnet activates the receiver, itwill first tell you what level the receiver is set to and as long as the magnet is held inplace, it will advance the receiver to the next training level and continue to cyclethrough the settings in the order shown in the chart on Page 8.AUTOMEMORY Correction:The R7 and R8 Receivers includes an AUTOMEMORY feature on training levels 2, 3 and4. When the correction level is set to any of these three settings, and the dog challengesthe boundary, the AUTOMEMORY feature will enable as the dog leaves the audible zoneand returns to the Safety Zone. The receiver will then advance to the next highest“Receiver Training Level”. The “rate” will remain in the existing “1, 2, 3 setting but willjump to the next level per the chart on the page 8. If the dog challenges the boundaryagain within 24 hours, he will receive that next highest correction level. The receiver willnot advance to any higher level.7
Receiver Levels and TransmitterSettingsTRANSMITTERRATE SETTINGSRECEIVER TRAINING LEVELSAudible Only1 Low2 MediumAUTOMEMORY3 Medium-High AUTOMEMORY4 HighAUTOMEMORY*5* tXX-fast*When the Receiver Training Level is set to audible, 4 or 5, it will override the transmitter “Rate” Setting and remain constant. The audible warning will precede the correction except in Level 5 where the audible warning and correction will react simultaneously.Recommended Settings:The majority of dogs respond well to Transmitter Rate Setting 2 or 3 and a receiverTraining Level 2 , 3 or 4. Sensitive or small dogs that train easily respond best to lowerrate settings and lower training levels. If your dog is not responding to training, yourDogWatch Dealer will adjust your system to a higher training level.If Your Dog Is Hard To Train:Training Levels 4 and 5 of your R7 and R8 receivers are specifically designed to meet theneeds of hard to train or stubborn dogs. These setting will provide the extra correction thatsome dogs need as part of their training.Multiple Dogs:R7 and R8 receivers allow you to select Audible Only as your training level setting on eachindividual receiver – allowing you to conduct training with one dog while the other is still protected with the correction feature enabled. It is recommended that the Audible Only settingbe used only during supervised training sessions.*** IMPORTANT ***Never change the Receiver Training Levels when your dog is wearing the collar.8
How The DogWatch System WorksThe boundary wire creates the perimeter for the DogWatch Hidden Fence System, andcan enclose any area up to 200 acres. It is buried at least 3 - 4” beneath the surface ofthe yard or can lie on top of the ground (e.g.: in wooded or rocky areas). It can also beinstalled around gardens or swimming pools, or attached to an existing fence to preventyour dog from digging under or jumping over it.Twisted WireTransmitter& SurgeProtectorBoundary WireSignal FieldGarden LoopBoundary Wire: The boundary wire carries the coded radio signal around the perimeter ofyour property. It is rated for underground burial.Signal Field: The radio signal is transmitted from the boundary wire in all directions. It canbe used to keep dogs in or out of an area. The signal is adjusted by the Range control onthe Transmitter to create a signal field on each side of the wire. Your Dealer has installedthe wire to the recommended width of 8-10 feet and has carefully configured the corners toavoid sharp angles.Continuous Loop: In order for the system to work properly, the boundary wire mustform a continuous loop. Any break in the wire will cancel the signal field. If the boundary wire is broken or unplugged, the green Loop indicator light will go out and an audible warning will sound. Most breaks are caused by lawn/garden equipment. If you cannot visibly locate the break, contact your Authorized Dealer for service.Surge Protector: For maximum protection against power surges, DogWatch offersboth internal an external surge protection. It is important that the surge protector beproperly grounded. This part of the system protects the transmitter from damage dueto lightning power surges. Your Dealer has attached it to the existing electrical sourcehouse ground or a grounding rod and then connected it to the twisted wire between thetransmitter and the boundary wire.After a lightning storm, check to be sure your transmitter is working properly.Do not let your dog outside until you know the system is operating.9
How The DogWatch System is Installed:Inside WallTransmitterOutside WallSurge ProtectorZip CordPowerSupplyGround WireGroundWireTwisted WireBoundary Wire10GroundRod
Important Reminders:u Keep the transmitter and receiver collar out of reach of children.u Never attempt to service the receiver or transmitter yourself.u Be sure your transmitter and surge protector are properly grounded. (Page 9, 10)u Fit the collar snugly around your dog’s neck.(Page 14)u Make sure that battery is fresh and is inserted correctly. (Pages 4-5)u Train your dog as outlined in this manual.(Pages 13-21)u Never adjust the transmitter while your dog is wearing the receiver collar.Troubleshooting The SystemIf your dog is not staying within the boundary created by the DogWatch HiddenFence System, check the following:u Did you and your dog complete the 6-Phasetraining program?u Is the battery in the receiver collar depleted?u Is the battery installed properly?See Containment Training on Page 13.See Test Light on Page 7.See Battery Insertion on Page 4 and 5.u Is the receiver collar too loose?See Adjusting the Collar on Page 14.u Is the receiver operating properly?u Is the transmitter on and adjusted properly?u Is the signal field too narrow?See Test Light on Page 7.See Power On/Off on Page 3.See Signal Range on Page 3.u Is the Rate level too low?u Is the Mode switch in the proper position?u Is the boundary wire unplugged?See Rate on Page 3.See Mode on Page 3.See Illustration on Page 2.u Is the boundary wire broken?See Boundary Loop on Page 10.Other troubleshooting tips are available on line at www.dogwatch.com. If you areunable to determine the cause of the problem, please contact your Authorized Dealer.11
Replacement Batteries and CollarsFor replacement batteries and nylon collars, contact your Authorized DogWatchDealer. Visit our web site at www.dogwatch.com - click on “Locate a Dealer”.* * * IMPORTANT * * *The use of any battery other than a battery authorized by DogWatch Inc. cancause erratic operation of the Receiver or could cause permanent damage.The use of any unauthorized battery will void the warranty on the receiver.Your Authorized DogWatch Dealer:Phone Number:If your dealer’s information is not listed above, please contact CustomerService at 800-793-3436, x622 or visit the DogWatch Web Site at:www.dogwatch.com and click on “Locate a Dealer.”DogWatch products are protected under U.S. Patent Nos.:5,353,744; 6,079,367; 6,467,435; 6,360,698; 6,575,120; 5,465,687 and D,491,4815.This device complies with Part 15 of the FCC Rules.DogWatch products are manufactured and maintained under ISO:9001:2000to guarantee highest quality standard.DogWatch, the DogWatch logo, and SafeLink are registered trademarks of DogWatch Inc.Performance Series, PowerPak, AutoMemory, Pet Friendly, andSurrounding Pets With Freedom Since 1990are trademarks of DogWatch Inc.295001 Rev. A 1/05 2005 Printed in USA. All rights reserved.12
SYSTEM MAINTENANCE RECORDR7 - 6 MONTH BATTERYR8 - 2 YEAR BATTERYR7 Batteries must be replaced every 6 months.Replacement battery: 3.0 Volt 1/3 N Lithium.R8 Batteries must be replaced every 24 months.Replacement battery: 3.6 Volt Lithium.R3000 Batteries: Replace once a year.PT3 TRANSMITTER SETTINGSRATERANGERECEIVER SETTINGSDOG 1SETTINGDOG 2SETTINGDOG 3SETTINGDOG 4SETTINGDOG 5SETTING13
Warranty RegistrationYour Warranty Registration card must be complete for your warranty to be activated.Fill out the enclosed Warranty Registration card and mail back to DogWatch withinseven (7) days. For your convenience, you can also complete your warranty registration online at www.dogwatch.com.Manufacturer’s Warranty1. WARRANTY: DogWatch Inc., subject to the terms and conditions set forth hereunder, hereby warrantsthat it will repair or replace, at its own discretion, without charge for parts or labor, the Product or any partthereof (other than insulated wire) which is found by DogWatch Inc. to be defective by reason of improper workmanship and/or materials for the warranty period from the original date of sale hereunder. Warrantyclaims may be subject to dealer service charges and/or manufacturer shipping and handling charges.EXCEPT FOR THE EXPRESS WARRANTY STATED ABOVE, DOGWATCH INC. DISCLAIMS ALLEXPRESS AND IMPLIED WARRANTIES OR MERCHANTABILITY OR FITNESS FOR A PARTICULARPURPOSE. As a condition of this warranty, Customer must (a) mail the warranty card provided with theproduct to DogWatch Inc, 10 Michigan Drive, Natick, MA 01760, (800) 793-3436, or complete warrantyregistration on line at www.dogwatch.com, within seven (7) days after purchase hereunder, (b) notifyDogWatch Inc. within the warranty period after the purchase hereunder of a claimed defect, and (c) mailproduct back, insurance and postage prepaid, to DogWatch Inc. at the address above. DOGWATCHINC.’S SOLE LIABILITY UNDER THIS WARRANTY WILL BE TO REPAIR OR REPLACE, AT ITSOPTION, ANY PRODUCT OR PART WHICH DOGWATCH INC. DETERMINES TO BE DEFECTIVE. INNO EVENT WILL DOGWATCH INC. BE LIABLE FOR ANY SPECIAL, INDIRECT, OR CONSEQUENTIALDAMAGES ARISING OUT OF THE PURCHASE OR USE OF THE PRODUCT. IN NO EVENT SHALLDOGWATCH INC.’S LIABILITY EXCEED THE PURCHASE PRICE OF THE PRODUCT.2. DEALER-INSTALLED WARRANTY: Any transmitter installed by an authorized dealer, equipped with aDogWatch Lightning Surge Protector and grounded to Dogwatch Inc. specifications, will be warrantied foras long as the original owner owns the system. For this additional coverage to be in effect, the installingDealer and Customer must sign the Customer Order Form and forward it to DogWatch within seven (7)days of purchase.3. INSTALLATION AND MAINTENANCE: Dealer shall, for a non-refundable installation fee, install theProduct in accordance with DogWatch Inc.’s installation manual. In no event shall Dealer or DogWatch Inc.be responsible for damage to underground pipes, wires, lines, or other items, nor shall Dealer or DogWatchInc. be responsible for restoring Customer’s premises to its original condition.4. WARNING: YOU MUST TRAIN YOUR DOG IN ACCORDANCE WITH THE TRAINING MANUAL FORTHIS SYSTEM TO BE EFFECTIVE. THE SYSTEM IS NOT INTENDED FOR USE WITH DOGS WITH AHISTORY OF AGGRESSIVE BEHAVIOR. BY SIGNING THE DEALER ORDER FORM, CUSTOMERACKNOWLEDGES THAT THEIR DOG(S) HAVE NO SUCH HISTORY. THE PRODUCT WILL NOT KEEPALL DOGS WITHIN THE FENCED PREMISES IN ALL INSTANCES. IF CUSTOMER’S DOG(S) COULDCAUSE HARM TO ITSELF OR OTHERS INSIDE OR OUTSIDE THE FENCED PREMISES, CUSTOMER SHOULD TAKE ADDITIONAL MEASURES TO RESTRAIN THE DOG(S). DogWatch Inc.10 Michigan Drive Natick MA 01760800-793-3436 www.dogwatch.com 2005 DogWatch Inc. Printed in USA. All rights reserved.14
1 Please read all the literature included with your DogWatch Hidden Fence System before turning the system on or beginning training. Do not attempt to shortcut the complete training of your dog. The DogWatch Hidden Fence System is intended for the purpose of containing domestic dogs. Use for any other purpose is at system owner's risk. In the event your system requires .
