Transcription
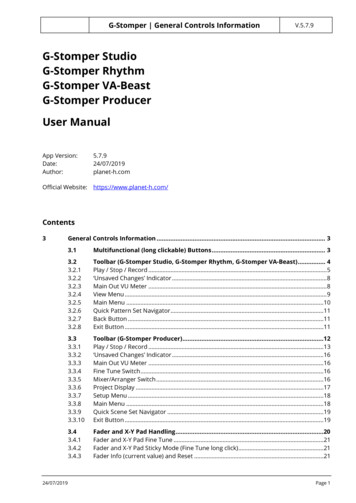
G-Stomper General Controls InformationV.5.7.9G-Stomper StudioG-Stomper RhythmG-Stomper VA-BeastG-Stomper ProducerUser ManualApp icial Website: l Controls Information . 33.1Multifunctional (long clickable) Buttons . r (G-Stomper Studio, G-Stomper Rhythm, G-Stomper VA-Beast) . 4Play / Stop / Record . 5‘Unsaved Changes’ Indicator . 8Main Out VU Meter . 8View Menu . 9Main Menu . 10Quick Pattern Set Navigator .11Back Button . 11Exit Button . 3.3.10Toolbar (G-Stomper Producer) .12Play / Stop / Record .13‘Unsaved Changes’ Indicator .16Main Out VU Meter .16Fine Tune Switch .16Mixer/Arranger Switch .16Project Display .17Setup Menu . 18Main Menu . 18Quick Scene Set Navigator .19Exit Button . 193.43.4.13.4.23.4.3Fader and X-Y Pad Handling .20Fader and X-Y Pad Fine Tune .21Fader and X-Y Pad Sticky Mode (Fine Tune long click) .21Fader Info (current value) and Reset .21Page 1
G-Stomper General Controls Information3.524/07/2019V.5.7.9Quick Nav Bar (G-Stomper Studio, G-Stomper Rhythm, G-Stomper VA-Beast) .22Page 2
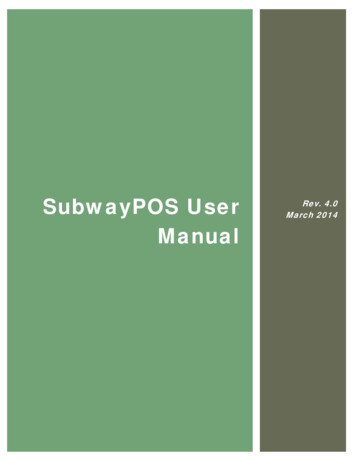
G-Stomper General Controls Information3General Controls Information3.1Multifunctional (long clickable) ButtonsV.5.7.9Notice that some of the buttons have a little triangle mark at the upper left corner.All buttons with this mark have a secondary function which can be accessed by long pressing thebutton.Long click these buttons to access their secondary function.24/07/2019Page 3
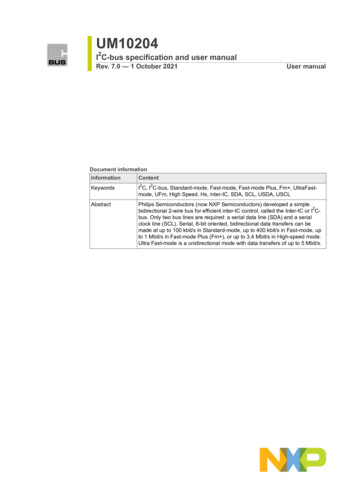
G-Stomper General Controls Information3.2V.5.7.9Toolbar (G-Stomper Studio, G-Stomper Rhythm, G-Stomper VA-Beast)The toolbar is located on top of each view and provides global and screen related controls.The following global controls are available on every screen:- The Exit button on the Main Screen aka Back Button on all other screens- The Main menu which is the main entry point for most operations (Load, Save, Export, Share, etc.)- The View menu which is used to navigate through the application- The Play/Stop/Record controls, the ‘Unsaved Changes’ indicator and the Main Out VU MeterAll other controls on the toolbar are related to the particular view, which means these can vary acrossthe screens.24/07/2019Page 4
G-Stomper General Controls Information3.2.1V.5.7.9Play / Stop / RecordThe Play / Stop / Record controls are available on all screens and are used to start, pause, stop theSequencer and to turn Recording ON/OFF.Furthermore, Play / Stop / Record provide each an extended long click menu to access closely relatedfunctions and settings.3.2.1.1PlayShort ClickLong Click: Play/Pause: Show the extended Play menu (the global sequencer menu)Tempo / BPM controls:Quick access to the Sequencer Tempo(More detailed Tempo/BPM controls can be found on the Timing & Measure Vview)Tempo-Lock:Turns the Tempo-Lock ON/OFF.The Tempo Lock does lock the tempo at the current value (as long as the Sequencer is running). Thiscan be very useful when you’re working with different Patterns within a set, and you want them in thesame Tempo, even if the patterns have all different BPM settings.Ableton Link controls:Enable/Disable Ableton Link and Ableton Link Start/Stop Sync, and adjust the Latency Compensation.24/07/2019Page 5
G-Stomper General Controls Information3.2.1.2V.5.7.9StopShort ClickLong Click: Stop (and currently playing sounds): Show the extended Stop menuStop Audio Session Recorder:Stop the running Audio Recording Session.(This button is disabled, if no recording session is running)The Audio Session Recorder lets you record the Master Out Signal as .wav in real-time. This makes itvery easy to capture the audio while you’re doing live jams.(for details see Chapter: Audio Export & Bouncing Audio Session Recorder / Real-Time Audio Export)Stop-Lock:Turns the Stop-Lock ON/OFF.The Stop Lock allows you to run the Sequencer even if you lock the screen of your device (whichnormally stops the Sequencer). This is useful for musicians who want to practice an instrument withtheir headphones and keep the device in the pocket while it’s running.24/07/2019Page 6
G-Stomper General Controls Information3.2.1.3V.5.7.9RecordShort ClickLong Click: Record: Show the extended Record menuStart Audio Session Recorder:Start a new Audio Recording Session.The Audio Session Recorder lets you record the Master Out Signal as .wav in real-time. This makes itvery easy to capture the audio while you’re doing live jams.(for details see Chapter: Audio Export & Bouncing Audio Session Recorder / Real-Time Audio Export)Record Sample from Microphone:Start a new (empty) Audio Editor, ready to record a new Sample.(for details see Chapter: Audio Editor Capture/Record Samples)Metronome:Turns the Metronome Click ON/OFF.Metronome Volume:Adjust the Volume of the Metronome Click.24/07/2019Page 7
G-Stomper General Controls Information3.2.2V.5.7.9‘Unsaved Changes’ IndicatorThe ‘Unsaved Changes’ Indicator keeps track of all changes you make in your current composition.The indicator turns red, if there are any unsaved changes in the current composition.Note:Depending on the app, the scope of the tracking is different.G-Stomper StudioG-Stomper VA-Beast (standalone)G-Stomper Rhythm3.2.3: Complete Pattern Set (not a single Pattern): Single Pattern: Single PatternMain Out VU MeterThe Main Out VU Meter shows the output level at the very end of the signal chain (where the signal ispassed underlying audio driver and finally to the speakers).24/07/2019Page 8
G-Stomper General Controls Information3.2.4V.5.7.9View MenuThe View menu gives you access to all available modules in G-Stomper.Short click : Show up the View menuThen select the view you want to show up.Note: The currently active screen is highlighted.Depending on the particular view, there are additional quick access buttons to directly related modules.All sequencers for example provide quick access to the FX and Mixer modules.24/07/2019Page 9
G-Stomper General Controls Information3.2.5V.5.7.9Main MenuThe Main menu is the main entry point for all essential operations to load, save, export and share yourwork.Short click : Show up the Main menu24/07/2019Page 10
G-Stomper General Controls Information3.2.6V.5.7.9Quick Pattern Set NavigatorNotice the little triangle mark at the upper left corner of the Main menu button. This mark indicatesthat the button has a secondary function which can be accessed by long pressing the button.(see Chapter: Multifunctional (long clickable) Buttons)Long click : Show up the Quick Pattern Set NavigatorThe Quick Pattern Set Navigator is a quick access to the to all basic Pattern Set operations including thelong press menu. Furthermore it allows you to switch between different Patterns without navigating tothe actual UI section.(for details see Chapter: Pattern Set & Song Arranger Quick Pattern Set Navigator)3.2.7Back ButtonThe Back Button (in LandScape Orientation) navigates to the previously opened screen.3.2.8Exit ButtonThe Exit Button exits the application.24/07/2019Page 11
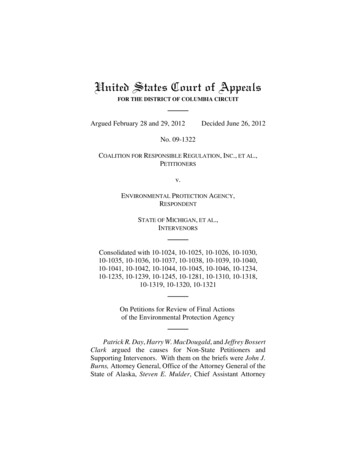
G-Stomper General Controls Information3.3V.5.7.9Toolbar (G-Stomper Producer)The toolbar in G-Stomper Producer is always present on top of the screen.It provides various global controls:- The Exit button- The Main menu which is the main entry point for most operations (Load, Save, Export, Share, etc.)- The Setup menu which is used to change all sort of app settings- The Project info display- The Mixer/Arranger switch to toggle between the two main views in the app- The Fine Tune Switch (see Chapter: Fader and X-Y Pad Fine Tune)- The Play/Stop/Record controls, the ‘Unsaved Changes’ indicator and the Main Out VU Meter24/07/2019Page 12
G-Stomper General Controls Information3.3.1V.5.7.9Play / Stop / RecordThe Play / Stop / Record controls are available on all screens and are used to start, pause, stop theSequencer and to turn Recording ON/OFF.Furthermore, Play / Stop / Record provide each an extended long click menu to access closely relatedfunctions and settings.3.3.1.1PlayShort ClickLong Click: Play/Pause: Show the extended Play menu (the global sequencer menu)Tempo / BPM controls:Quick access to the Sequencer Tempo(More detailed Tempo/BPM controls can be found on the Timing & Measure Vview)Global Quantum (beats per global loop cycle):Change the Global Quantum, the beats per cycle of the global sequencer.The Global Quantum is used to synchronize the different Track Sequencers with the global timing aswell as to synchronize the app over Ableton Link.Ableton Link controls:Enable/Disable Ableton Link and Ableton Link Start/Stop Sync, and adjust the Latency Compensation.24/07/2019Page 13
G-Stomper General Controls Information3.3.1.2V.5.7.9StopShort ClickLong Click: Stop (and currently playing sounds): Show the extended Stop menuStop Audio Session Recorder:Stop the running Audio Recording Session.(This button is disabled, if no recording session is running)The Audio Session Recorder lets you record the Master Out Signal as .wav in real-time. This makes itvery easy to capture the audio while you’re doing live jams.(for details see Chapter: Audio Export & Bouncing Audio Session Recorder / Real-Time Audio Export)Stop-Lock:Turns the Stop-Lock ON/OFF.The Stop Lock allows you to run the Sequencer even if you lock the screen of your device (whichnormally stops the Sequencer). This is useful for musicians who want to practice an instrument withtheir headphones and keep the device in the pocket while it’s running.24/07/2019Page 14
G-Stomper General Controls Information3.3.1.3V.5.7.9RecordShort ClickLong Click: Record: Show the extended Record menuStart Audio Session Recorder:Start a new Audio Recording Session.The Audio Session Recorder lets you record the Master Out Signal as .wav in real-time. This makes itvery easy to capture the audio while you’re doing live jams.(for details see Chapter: Audio Export & Bouncing Audio Session Recorder / Real-Time Audio Export)Record Sample from Microphone:Start a new (empty) Audio Editor, ready to record a new Sample.(for details see Chapter: Audio Editor Capture/Record Samples)Metronome:Turns the Metronome Click ON/OFF.Metronome Volume:Adjust the Volume of the Metronome Click.24/07/2019Page 15
G-Stomper General Controls Information3.3.2V.5.7.9‘Unsaved Changes’ IndicatorThe ‘Unsaved Changes’ Indicator keeps track of all changes you make in your current project.The indicator turns red, if there are any unsaved changes in the current project.3.3.3Main Out VU MeterThe Main Out VU Meter shows the output level at the very end of the signal chain (where the signal ispassed underlying audio driver and finally to the speakers).3.3.4Fine Tune SwitchUse this button to turn the Fine Tune mode ON/OFF.With fine tune enabled, all rotary knobs, faders and X-Y pads move 15 times slower than the movingpointer (your finger).(for details see Chapter: Fader and X-Y Pad Fine Tune)3.3.5Mixer/Arranger SwitchUse this button to switch between the Mixer and Arranger view. On the mixer you’ll see the Arrangerbutton, and on the Arranger you’ll see the Mixer buttonNote: Long press this button to toggle between Pattern and Song operation24/07/2019Page 16
G-Stomper General Controls Information3.3.6V.5.7.9Project DisplayThe Project Display in the Toolbar on top provides the following information:The Project Name:The RAM usage in relation to the available RAM per app:A numeric and graphical interpretation of the global phase:Note: The global phase shows the global timing, which surrounds all track sequencers. The globaltiming is required (as G-Stomper Producer offers an individual timing per track) to keep all tracksequencers in sync and to organize the song structure. Each track sequencer gets automaticallysynchronized with the global timing. To change the global quantum (the number of beats per globalloop cycle), short press the project display (or likewise long press the play button).The current Operation Mode:Click that spot to toggle between Pattern and Song operation mode.Note: Clicking any other spot inside the project display shows up the global sequencer menu.24/07/2019Page 17
G-Stomper General Controls Information3.3.7V.5.7.9Setup MenuThe Setup menu is the main entry point for all global app settings, such as audio system, sampler andsynthesizer configuration, MIDI setup, and more.Short click : Show up the Setup menu3.3.8Main MenuThe Main menu is the main entry point for all essential operations to load, save, export and share yourwork.Short click : Show up the Main menu24/07/2019Page 18
G-Stomper General Controls Information3.3.9V.5.7.9Quick Scene Set NavigatorNotice the little triangle mark at the upper left corner of the Main menu button. This mark indicatesthat the button has a secondary function which can be accessed by long pressing the button.(see Chapter: Multifunctional (long clickable) Buttons)Long click : Show up the Quick Scene Set NavigatorThe Quick Scene Set Navigator is a quick access to the to all basic Scene Set operations including thelong press menu. Furthermore it allows you to switch between different Scenes without navigating tothe actual UI section.3.3.10Exit ButtonThe Exit Button exits the application.24/07/2019Page 19
G-Stomper General Controls Information3.4V.5.7.9Fader and X-Y Pad HandlingAll faders and X-Y pads in the G-Stomper apps have 2 main operation modes:Absolute (default):When you touch a fader or X-Y pad in absolute mode, then the value gets set immediately to the touchposition. When you touch the pan fader at its max position (on top) for example, then it jumpsimmediately to the max value.Relative:In relative mode, a fader or X-Y pad just moves when you move the pointer (your finger), relatively to itsbase position, depending on the movement. If you touch the pan fader at its max position (on top) forexample, then it sticks in the middle as long as you don’t make any movement. Only when you moveyour finger, pull it down for example, then the fader moves relatively to its base positionThe main fader behaviour can be changed in the General UI section of the Setup dialog.To switch to relative behaviour, enable the checkbox in the General UI section.Note:While moving a fader in Absolute mode, the fader tooltip that is shown right above the fader thumb,might be hidden under your finger. If that is the case, simply move the finger away from the fader whilekeep touching the screen. You’ll then still be locked on the fader and have a clear view to the tooltip.24/07/2019Page 20
G-Stomper General Controls Information3.4.1V.5.7.9Fader and X-Y Pad Fine TuneIn addition to the global absolute and relative fader and X-Y pad behaviour, you can temporary enablethe fine tune mode.With fine tune enabled, all faders and X-Y pads move 15 times slower than the moving pointer (yourfinger).This allows you to make very precise settings.Note: Long press the fine tune button to turn the Sticky Mode ON/OFF(see Chapter: Fader and X-Y Pad Sticky Mode)The fine tune mode can be turned ON/OFF in use of the dedicated buttons, found on various locationsacross the application:3.4.2Fader and X-Y Pad Sticky Mode (Fine Tune long click)With the Fader and X-Y Pad Sticky Mode you can stick all Faders and X-Y Pads to their current position.If enabled, you can move the Faders and X-Y Pads like normal, but if you release them, they jump backto their original (sticky) position. This is very useful to mess around with parameters without having theheadache to fiddle back to the original position.Long press the fine tune button(s) to turn the Sticky Mode ON/OFF3.4.3Fader Info (current value) and ResetThere are two more important things you should know about the G-Stomper faders.Show the current fader value:Short click the label below the fader shows a tooltip with the current fader value.Reset the fader to its default position:Long click the label below the fader resets the fader to its default position (e.g. pan:50,pitch:50: volume:85, etc.).24/07/2019Page 21
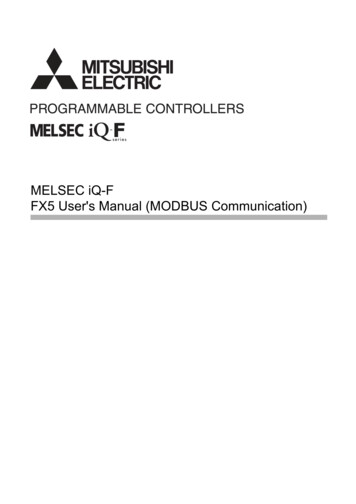
G-Stomper General Controls Information3.5V.5.7.9Quick Nav Bar (G-Stomper Studio, G-Stomper Rhythm, G-Stomper VABeast)The G-Stomper App layout is generally built for screen aspect ratios from 16:9 to 16:10. Screens whichexceed that limit will get black letterbox bars either in horizontal or vertical direction. In Landscapeorientation, if the letterboxed space is large enough, then a Quick Navigation Bar is displayed instead ofthe black bars. This is the case on devices with screen aspect ratios of 4:3 or 18:9 for example.24/07/2019Page 22
User Manual . App Version: 5.7.9 Date: 24/07/2019 Author: planet-h.com . Official Website: . very easy to capture the audio while you're doing live jams. . Enable/Disable Ableton Link and Ableton Link Start/Stop Sync, and adjust the Latency Compensation.