Transcription
AF100SeriesOWNER’S GUIDEAIR FRYERninjakitchen.com
ENGLISHTHANK YOUCONTENTSfor purchasing the Ninja Air FryerImportant Safeguards . . . . . . . . . . . . . . . . . . . . . . . . . . . . . . . . . . 3Parts . . . . . . . . . . . . . . . . . . . . . . . . . . . . . . . . . . . . . . . . . . . . . . . . . 5Getting to Know Your Air Fryer . . . . . . . . . . . . . . . . . . . . . . . . . 6Function Buttons . . . . . . . . . . . . . . . . . . . . . . . . . . . . . . . . . . . . . . . . . 6Operating Buttons . . . . . . . . . . . . . . . . . . . . . . . . . . . . . . . . . . . . . . . . 6Before First Use. . . . . . . . . . . . . . . . . . . . . . . . . . . . . . . . . . . . . . . 6REGISTER YOUR PURCHASEUsing Your Air Fryer. . . . . . . . . . . . . . . . . . . . . . . . . . . . . . . . . . . . 7Using the Cooking Functions. . . . . . . . . . . . . . . . . . . . . . . . . . . . . . . 7Air Fry . . . . . . . . . . . . . . . . . . . . . . . . . . . . . . . . . . . . . . . . . . . . . . . 7Roast . . . . . . . . . . . . . . . . . . . . . . . . . . . . . . . . . . . . . . . . . . . . . . . . 9Reheat. . . . . . . . . . . . . . . . . . . . . . . . . . . . . . . . . . . . . . . . . . . . . . 10Dehydrate. . . . . . . . . . . . . . . . . . . . . . . . . . . . . . . . . . . . . . . . . . . . 11registeryourninja.comScan QR code using mobile deviceRECORD THIS INFORMATIONModel Number: Serial Number: Date of Purchase: (Keep receipt)Store of Purchase: TIP: You can find the model and serialnumbers on the QR code label located onthe back of the unit by the power cord.Cleaning & Maintenance . . . . . . . . . . . . . . . . . . . . . . . . . . . . . . . 12Cleaning Your Air Fryer. . . . . . . . . . . . . . . . . . . . . . . . . . . . . . . . . . . 12Helpful Tips . . . . . . . . . . . . . . . . . . . . . . . . . . . . . . . . . . . . . . . . . . 12Replacement Parts . . . . . . . . . . . . . . . . . . . . . . . . . . . . . . . . . . . . 12Troubleshooting Guide . . . . . . . . . . . . . . . . . . . . . . . . . . . . . . . . 13Warranty. . . . . . . . . . . . . . . . . . . . . . . . . . . . . . . . . . . . . . . . . . . . . 14TECHNICAL SPECIFICATIONSVoltage:120V, 60HzWatts:1550W1ninjakitchen.comninjakitchen.com2
ENGLISHIMPORTANT SAFEGUARDSHOUSEHOLD USE ONLY READ ALL INSTRUCTIONS BEFORE USERead all instructions before using your Ninja Air Fryer.When using electrical appliances, basic safety precautions should always befollowed, including the following: WARNING1 DO NOT use an extension cord.A short power-supply cord isused to reduce the risk of childrengrabbing the cord or becomingentangled and to reduce the risk ofpeople tripping over a longer cord.2 This appliance has a polarizedplug (one blade is wider thanthe other). To reduce the riskof electric shock, this plug isintended to fit into a polarizedoutlet only one way. If the plugdoes not fit fully into the outlet,reverse the plug. If it still does notfit, contact a qualified electrician.DO NOT attempt to modify theplug in any way.3 To eliminate a choking hazardfor young children, remove anddiscard the protective coverfitted on the power plug of thisappliance.4 ALWAYS ensure the appliance isproperly assembled before use.5 DO NOT touch hot surfaces.Appliance surfaces are hotduring and after operation. Toprevent burns or personal injury,ALWAYS use protective hot padsor insulated oven mitts and useavailable handles and knobs.6 Intended for countertop use only.DO NOT place the appliance nearthe edge of a countertop duringoperation. Ensure the surface islevel, clean, and dry.7 DO NOT place on or near a hotgas or electric burner or in aheated oven.3ninjakitchen.com8 xtreme caution must be usedEwhen moving an appliancecontaining hot oil or other hotliquids.9 To protect against electrical shockDO NOT immerse cord, plugs,or main unit housing in water orother liquid.10 Unplug from outlet when not inuse and before cleaning. Allow tocool before putting on or takingoff parts.11 Extreme caution must be usedwhen the appliance contains hotfood. Improper use may result inpersonal injury.12 Extreme caution must be usedwhen moving an appliancecontaining hot oil or other hotliquids.13 DO NOT use this appliance fordeep-frying with oil.14 ALWAYS ensure basket isproperly closed before operating.15 DO NOT allow young children tooperate the appliance or use as atoy. Close supervision is necessarywhen any appliance is usednear children.16 Regularly inspect the applianceand power cord. DO NOT usethe appliance if there is damageto the power cord or plug. Ifthe appliance malfunctions orhas been damaged in any way,immediately stop use and callCustomer Service. Return theappliance to SharkNinja OperatingLLC for examination, repair,or adjustment.17 T he use of accessory attachmentsnot recommended or sold bySharkNinja may cause fire,electric shock, or injury.18 This appliance is for householduse only. DO NOT use thisappliance for anything other thanits intended use. DO NOT usein moving vehicles or boats. DONOT use outdoors. Misuse maycause injury.19 DO NOT clean with abrasivecleaners, steel wool, orscouring pads.20 Spilled food can cause seriousburns. Keep appliance and cordaway from children. DO NOT letcord hang over edges of tablesor counters or touch hot surfaces.NEVER use an outlet belowcounter, and NEVER use with anextension cord.21 To prevent food contact with theheating elements, DO NOT overfillthe basket.22 DO NOT cover the air intake ventor air outlet vent while unit isoperating. Doing so will preventeven cooking and may damagethe unit or cause it to overheat.23 The crisper plate becomesextremely hot during the cookingprocess. Avoid hot steam and airwhile removing the basket fromthe appliance. ALWAYS placeplate on a heat-resistant surfaceafter removing. DO NOT touchaccessories during or immediatelyafter cooking.24 NEVER connect this applianceto an external timer switch orseparate remote-control system.25 Should the unit emit black smoke,unplug immediately and wait forsmoking to stop before removingthe cooking basket.26 Let the appliance cool forapproximately 30 minutes beforehandling, cleaning, or storing.27 When using this appliance,provide adequate space aboveand on all sides for air circulation.28 Make sure the unit is cleanbefore using.29 Please refer to the Cleaning &Maintenance section for regularmaintenance of the appliance.Return the appliance toSharkNinja Operating LLC forany other servicing.30 Outlet voltages can vary, affectingthe performance of your product.To prevent possible illness, usea thermometer to check thatyour food is cooked to thetemperatures recommendedby the Food and DrugAdministration.31 To disconnect, turn any controlto “off”, then remove plug fromwall outlet.SAVE THESE INSTRUCTIONSninjakitchen.com4
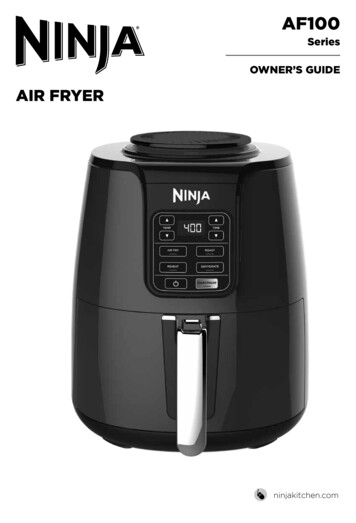
ENGLISHGETTING TO KNOW YOUR AIR FRYERPARTS & ACCESSORIESAir Intake VentStainless-Steel Multi-Layer Rack(not included with all models)Control PanelWhen setting time, the digitaldisplay shows HH:MM. Displaycurrently reads 23 minutes.FUNCTION BUTTONSOPERATING BUTTONSAIR FRY: Use this function to give your foodcrispiness and crunch with little to no oil.TEMP arrows: Use the upand downTEMP arrows to adjust the cooktemperature before or during cooking.ROAST: Use the unit as a roaster oven fortender meats, baked treats, and more.DEHYDRATE: Dehydrate meats, fruits, andvegetables for healthy snacks.REHEAT: Revive leftovers by gentlywarming them, leaving you with crispyresults.Ceramic-CoatedCrisper PlateAir Outlet Unit(located on back)and downTIME arrows: Use the upTIME arrows to adjust the cook time in anyfunction.START/PAUSE button: After selecting thetime and temperature, start cooking bypressing the START/PAUSE button. Youcan stop cooking at any time by pressingthis button again.Power button: The Power button shuts offthe unit and stops all cooking modes.STANDBY MODEAfter 10 minutes with no interactionwith the control panel, the unit will enterstandby mode. The Power button will bedimly lit.Main UnitBEFORE FIRST USECeramic-CoatedBasket5ninjakitchen.com1 Remove and discard any packaging material, promotional labels, and tape from the unit.2 Remove all accessories from the package and read this manual carefully. Please payparticular attention to operational instructions, warnings, and important safeguards toavoid any injury or property damage.3 Wash the ceramic-coated basket and crisper plate in hot, soapy water, then rinse anddry thoroughly. NEVER clean the main unit in the dishwasher.ninjakitchen.com6
USING THE COOKING FUNCTIONSTo turn on the unit, first plug the power cordinto a wall outlet. Press the power button.3 Press the TIME up and down arrowbuttons to set your desired cook time.ENGLISHUSING YOUR AIR FRYER6 When cooking is complete, the unitwill beep and END will appear on thecontrol panel display.Air Fry1 Ensure the crisper plate is in the basket.4 Place ingredients on the crisper platethat is assembled in the basket. Insert thebasket in the unit.2 Press Air Fry button. The defaulttemperature setting will display. Use theTEMP up and down arrows to set yourdesired temperature.NOTE: It is recommended to let the unitpreheat for 3 minutes before addingingredients. If preheating, skip step 4,insert the basket, and press theSTART/PAUSE button to begin.7ninjakitchen.com7 Remove ingredients by dumping themout or by using oven mitts or siliconetipped tongs/utensils.5 Press START/PAUSE to begin cooking.NOTE: To shake or toss ingredientsduring cooking, press START/PAUSEto pause cooking. Remove basketand shake it back and forth to tossingredients. Reinsert basket and pressSTART/PAUSE to resume cooking.ninjakitchen.com8
Roast1 Ensure the crisper plate is in place ifneeded. If you are using a baking dish, thecrisper plate is not needed.4 Add ingredients to the basket. Insert thebasket in the unit.Reheat1 Ensure the crisper plate is in the basket.5 Press START/PAUSE to begin cooking.2 Press the ROAST button. The defaulttemperature setting will display. Use theTEMP up and down arrow buttons to setyour desired temperature.NOTE: It is recommended to let the unitpreheat for 3 minutes before addingingredients. If preheating, skip step 4,insert the basket, and press theSTART/PAUSE button to begin.4 Add ingredients to the basket. Insert thebasket in the unit.5 Press the START/PAUSE button tobegin cooking.2 Press the REHEAT button. The defaulttemperature setting will display. Use theTEMP up and down arrow buttons setyour desired temperature.6 When cooking is complete, the unitwill beep and END will appear on thecontrol panel display.7 Remove ingredients by dumping themout or by using oven mitts or siliconetipped tongs/utensils.6 W hen cooking is complete, the unitwill beep and END will appear on thecontrol panel display.NOTE: It is recommended to let the unitpreheat for 3 minutes before addingingredients. If preheating, skip step 4,insert the basket, and press theSTART/PAUSE button to begin.3 Press the TIME up and down arrows toset your desired cook time.7 Remove ingredients by dumping themout or by using oven mitts or siliconetipped tongs/utensils.3 Press the TIME up and down arrows toset your desired cook time.9ninjakitchen.comninjakitchen.com 10ENGLISHUSING YOUR AIR FRYER – CONT.
CLEANING & MAINTENANCEDehydrate1 Place your first layer of ingredients in thebottom of the basket. Then install thecrisper plate inside the basket and seta second layer of ingredients on thecrisper plate.Cleaning Your Air Fryer5 Press the START/PAUSE button to startdehydrating.The unit should be cleaned thoroughlyafter every use.1 Unplug the unit from the wall outletbefore cleaning.NOTE: NEVER immerse the main unit inwater or any other liquid. NEVER cleanthe main unit in a dishwasher.6 When dehydrating is complete, the unitwill make a beep sound and END willappear on the control panel display.2 To clean the main unit and the controlpanel, wipe them clean with a damp cloth.HELPFUL TIPS12 Insert the basket in the unit.3 Press the DEHYDRATE button. Thedefault temperature will display. Use theTEMP up and down arrow buttons to setyour desired temperature.4 Press the TIME up and down arrowbuttons to set your desired cook time.NOTE: You can increase yourdehydrating capacity with the multilayer rack. If the rack is not includedwith your model, it is available forpurchase at ninjaaccessories.com3 The basket, crisper plate, and anyaccessories can be washed in thedishwasher.4 If food residue is stuck on the crisperplate or basket, place them in a sinkfilled with warm, soapy water and allowto soak.5 Air-dry or towel-dry all parts after use.6 Clean the heating element with acleaning brush to remove any foodresidues. or consistent browning, make sureFingredients are arranged in an evenlayer on the bottom of the basketwith no overlapping. If ingredients areoverlapping, make sure to shake themhalfway through the set cook time.2 Cook time and temperature can beadjusted at any time during cooking.Simply press the up and down TIMEor TEMP arrows to adjust the time ortemperature.3 To convert recipes from yourconventional oven, reduce thetemperature of the Air Fryer by25 F. Check food frequently toavoid overcooking.4 We recommend 3 minutes of preheating.You can use the built-in timer to set a3-minute countdown.5 Occasionally, the fan from the air fryerwill blow lightweight foods around.To alleviate this, secure foods (likethe top slice of bread on a sandwich)with toothpicks6 The crisper plate elevates ingredientsin the basket so air can circulate underand around them for even, crisp results.7 After a cooking function is selected, youcan press the START/PAUSE button tobegin cooking immediately. The unit willrun at the default temperature and time.8 For best results, remove foodimmediately after the cook time iscomplete to avoid overcooking.9 For best results with fresh vegetablesand potatoes, use at least 1 tablespoonof oil. Add more oil as desired to achievethe preferred level of crispiness.10 For best results, check progressthroughout cooking, and remove foodwhen desired level of brownness hasbeen achieved. We recommend usingan instant-read thermometer to monitorinternal temp of proteins. After thecook time is complete remove foodimmediately to avoid overcooking.REPLACEMENTPARTSTo order additional parts and accessories, visit ninjaaccessories.com or contact CustomerService at 1-877-646-5288.11ninjakitchen.comninjakitchen.com 12ENGLISHUSING YOUR AIR FRYER – CONT.
Why won’t my temperature go any higher?The max temperature is 400 F. How long does it take to preheat, and how will I know when it’s done? We recommend 3 minutes of preheating. You can use the built-in timer to seta 3-minute countdown. Should I add my ingredients before or after preheating?It is recommended to let the unit preheat for 3 minutes before adding ingredients. Do I need to defrost frozen foods before air frying?It depends on the food! Follow package instructions. How do I make the countdown pause?Press START/PAUSE. Is the basket safe to put on my countertop? The basket will heat during cooking. Use caution when handling, and placeon heat-safe surfaces only. How do I know when to use the crisper plate? Use the crisper plate when you want food to come out crispy. The crisper plate allowsfor food to be elevated in the basket allowing for air to go under the plate and evenlycrisp ingredients.ONE (1) YEARLIMITED WARRANTYThe 1-Year Limited Warranty applies to purchases made from authorized retailers ofSharkNinja Operating LLC. Warranty coverage applies to the original owner and to theoriginal product only and is not transferable.SharkNinja warrants that the unit shall be free from defects in material and workmanshipfor a period of 1 year from the date of purchase when it is used under normal householdconditions and maintained according to the requirements outlined in this instructionmanual, subject to the following conditions and exclusions.What is covered by my warranty?1. The original unit and/or non-wearable components deemed defective, in SharkNinja’ssole discretion, will be repaired or replaced for up to 1 year from the original purchasedate.2. In the rare event that a replacement unit is issued, the warranty coverage ends 6 monthsafter the receipt date of the replacement unit or the remainder of the existing warranty,whichever is greater. If the unit is replaced, SharkNinja reserves the right to replace theunit with one of equal or greater value.What is not covered by my warranty?Our Customer Service and Product Specialists are available to provide all the warrantyservice options available to you, including the possibility of upgrading to our VIPWarranty Service Options for select product categories.1. My food didn’t cook. Make sure the basket is fully inserted during cooking. For consistent browning, makesure ingredients are arranged in an even layer on the bottom of the basket with nooverlapping. Shake loose ingredients for even crispiness. Cook time and temperaturecan be adjusted at any time during cooking. Simply press the up and down TIME orTEMP arrows to adjust the time or temperature.2.3. My food is burned. For best results, check progress throughout cooking, and remove food when desiredlevel of brownness has been achieved. Remove food immediately after the cook timeis complete to avoid overcooking.5.6. Why is my food blowing around when air frying? Occasionally, the fan from the air fryer will blow lightweight foods around. To alleviatethis, secure foods (like the top slice of bread on a sandwich) with toothpicks. Can I air fry wet battered ingredients? Yes, but use the proper breading technique. It is important to coat foods first with flour,then with egg, and then with bread crumbs. Be sure to press the bread crumbs onto thefood with your hands. Because the air fryer has a powerful fan as part of its mechanism,breading can sometimes be blown off. Pressing the bread crumbs firmly on will helpthem adhere. The unit is beeping.Your food is done cooking. The screen went black.The unit is in standby mode. Press the power button to turn it back on. An “E” message appears on display screen.The unit is not functioning properly. Please contact Customer Service at 1-877-646-5288.4.7.Normal wear and tear of wearable parts (including removable basket, crisper plate,racks, and pans) that require regular maintenance and/or replacement to ensure theproper functioning of your unit are not covered by your warranty.Any unit that has been tampered with or used for commercial purposes.SharkNinja will cover the cost for the customer to send the unit to us for repair orreplacement. A fee of 19.95 for return shipping costs will be charged at the timeof return shipment of the repaired or replacement unit.Damage caused by misuse, abuse, or negligent handling, or damage due tomishandling in transit.Consequential and incidental damages.Defects caused by or resulting from damages from shipping or from repairs, service,or alteration to the product or any of its parts that have been performed by a repairperson not authorized by SharkNinja.Products purchased, used, or operated outside of North America.Problems with your unit/How to get service:If your appliance fails to operate properly while in use under normal household conditionswithin the warranty period, visit ninjakitchen.com for product care/maintenance self-help.Our Customer Service and Product Specialists are also available at 1-877-646-5288 toassist with product support and warranty service options.How to initiate a warranty claim:You can call 1-877-646-5288 to have a Customer Service Specialist assist you. Pleasenote, you must call 1-877-646-5288 to initiate a warranty claim. Return and packinginstruction information will be provided at that time.For Customer Service hours, visit ninjakitchen.com.Replacement parts are available for purchase at ninjaaccessories.com. For more informationon what are classified as wearable and non-wearable parts, visit ninjakitchen.com/warranty.This warranty gives you specific legal rights, and you may also have other rights that varyfrom state to state.Some states do not permit the exclusion or limitation of incidental or consequentialdamages, so the above may not apply to you.13 ninjakitchen.comninjakitchen.com 14ENGLISHTROUBLESHOOTINGGUIDE
SharkNinja Operating LLCUS: Needham, MA 024941-877-646-5288ninjakitchen.comIllustrations may differ from actual product. We are constantly striving to improve our products,therefore the specifications contained herein are subject to change without notice.NINJA is a registered trademark of SharkNinja Operating LLC.For SharkNinja U.S. Patent information, visit sharkninja.com/uspatents. 2018 SharkNinja Operating LLCAF100Series IB MP 180619PRINTED IN CHINA@ninjakitchen
Please make sure to read the enclosed Ninja Owner’s Guide prior to using your unit.AIR FRYERQUICKSTARTGUIDE COOKING CHARTS 10 IRRESISTIBLE RECIPES
USING YOUR AIR FRYER’S FUNCTIONSAIR FRY 101Pull crispy meals out of thin air.The Ninja Air Fryer circulates super-hot air around your food to removemoisture from its surface to give it that golden-brown, crispy finish.PREHEAT RECOMMENDATION: Let the unit preheat for 3 minutes before adding REHEATFor best cooking and crisping results,always preheat your Ninja Air Fryerfor 3 minutes.AIR FRYCrisper PlateAdjust temp as neededSet time, in minutes,and press START/PAUSEto beginROASTAdjust temp as neededSet time, in minutes,and press START/PAUSEto beginCrisper PlateAdjust temp as neededSet time, in minutes,and press START/PAUSEto beginCrisper PlateAdjust temp as neededSet time in 15-minuteincrements, and pressSTART/PAUSE to beginCRISPER PLATEThe crisper plate promotes overallbrowning. We recommend using itevery time you air fry.REHEATDEHYDRATE2NINJA AIR FRYERSHAKE OR TOSSFor best results, frequently shake yourfood or toss it with silicone-tipped tongsto get it as crispy as you’d like.ninjakitchen.c
Air Fry Cooking ChartINGREDIENTFor best resultsshake or toss ofteAMOUNTPREPARATIONTOSS IN OILTEMPCOOK TIMEAsparagus1 bunchWhole, stems trimmed2 tsp390 F8–12 minsBeets6 small or 4 large (about 2 lbs)WholeNone390 F45–60 minsBell peppers(for roasting)4 peppersWholeNone400 F25–30 minsBroccoli1 headCut in 1-inch florets1 Tbsp390 F10–12 minsBrussels sprouts1 lbCut in half, stem removed1 Tbsp390 F15–20 minsCut in 1–2-inch pieces1 Tbsp390 F20–25 minsVEGETABLESButternut squash1–11 /2lbs1 /2 -inchCarrots1 lbPeeled, cut in1 Tbsp390 F13–16 minsCauliflower1 headCut in 1-inch florets2 Tbsp390 F15–20 minsCorn on the cob4 earsWhole ears, husks removed1 Tbsp390 F12–15 minsGreen beans1 bag (12 oz)Trimmed1 Tbsp390 F8–10 minsKale (for chips)6 cups, packedTorn in pieces, stems removedNone300 F8–10 minsMushrooms8 ozRinsed, cut in quarters1 Tbsp390 F7–9 mins1 1 /2 lbsCut in 1-inch wedges1 Tbsp390 F18–20 mins1 lbHand-cut fries*, thin1 /2 –3Tbsp, canola390 F20–24 mins1 lbHand-cut fries*, thick1 /2 –3Tbsp, canola390 F23–26 mins4 whole (6–8 oz)Pierced with fork 3 timesNone390 F30–35 minsCut in 1-inch chunks1 Tbsp390 F15–20 mins4 whole (6–8 oz)Pierced with fork 3 timesNone390 F30–35 mins1 lbCut in quarters lengthwise,then cut in 1-inch pieces1 Tbsp390 F15–18 minsBone inBrushed with oil375 F25–35 minsPotatoes, russetPotatoes, sweetZucchini11 /2lbspiecesWe recommend frequentchecking your foodand shaking or tossing itensure desired results.Use these cook timesas a guide, adjustingto your preference.Shake your foodORPOULTRYChicken breasts2 breasts (3/4 –1 1 /2 lbs each)2 breasts(1 /2 –3/4BonelessBrushed with oil375 F18–22 mins4 thighs (6–10 oz each)Bone inBrushed with oil390 F22–28 mins4 thighs (4–8 oz each)BonelessBrushed with oil390 F18–22 mins2 lbsDrumettes & flats1 Tbsp390 F22–26 minsCrab cakes2 cakes (6–8 oz each)NoneBrushed with oil350 F12–15 minsLobster tails4 tails (3–4 oz each)WholeNone375 F5–8 minsSalmon fillets2 fillets (4 oz each)NoneBrushed with oil390 F10–13 minsShrimp16 largeWhole, peeled, tails on1 Tbsp390 F7–10 minsChicken thighsChicken wingslb each)FISH & SEAFOODToss withsilicone-tipped ton* After cutting potatoes, allow raw fries to soak in cold water for at least 30 minutes to remove unnecessary starch.Pat fries dry. The drier the fries the better the results.4NINJA AIR FRYERninjakitchen.c
Air Fry Cooking Chart, continuedINGREDIENTFor best resultsshake or toss ofteAMOUNTPREPARATIONTOSS IN OILTEMPCOOK TIMEBurgers4 quarter-pound patties, 80% lean1 inch thickNone375 F8–10 minsSteaks2 steaks (8 oz each)WholeNone390 F10–20 mins4 strips, cut in halfNoneNone350 F8–10 mins2 thick-cut, bone-in chops (10–12 ounces each)Bone inBrushed with oil375 F15–17 minsBEEFPORK & LAMBBaconPork chopsWe recommend frequentchecking your foodand shaking or tossing itensure desired results.Use these cook timesas a guide, adjustingto your preference.4 boneless chops (8 ounces each)BonelessBrushed with oil375 F14–17 minsPork tenderloins2 tenderloins (1–1 1 /2 lbs each)WholeBrushed with oil375 F25–35 minsSausages4 sausagesWholeNone390 F8–10 minsChicken cutlets5 cutletsNoneNone390 F18–21 minsChicken nuggets1 box (12 oz)NoneNone390 F10–13 minsShake your foodFish fillets1 box (6 fillets)NoneNone390 F14–16 minsORFish sticks18 fish sticks (11 ounces)NoneNone390 F10–13 minsFrench fries1 lbNoneNone350 F20–25 minsFrench fries2 lbNoneNone360 F28–32 minsMozzarella sticks1 box (11 oz)NoneNone375 F8–10 minsPot stickers1 bag (24 oz, 20 count)NoneNone390 F12–14 minsPizza rolls1 bag (20 oz, 40 count)NoneNone390 F12–15 minsPopcorn shrimp1 box (14–16 ounces)NoneNone390 F9–11 minsTater tots1 lbNoneNone360 F18–22 minsFROZEN FOODSToss withsilicone-tipped tonTIPS & TRICKS1 W e recommend 3 minutes of preheating. You can use the built-in timer to seta 3-minute countdown.6 Cook time and temperature can also be adjusted at any time during cooking. Simplypress the up and down TIME or TEMP arrows to adjust the time or temperature.2 To convert recipes designed for conventional ovens, reduce the temperature of theAir Fryer by 25 F. Check food frequently to avoid overcooking.7 For best results, check progress throughout cooking, and remove food whendesired level of brownness has been achieved. We recommend using an instantread thermometer to monitor the internal temperature of proteins. Remove foodimmediately after the cook time is complete to avoid overcooking.3 For best results with fresh vegetables and potatoes, use at least 1 tablespoon of oil.Add more oil as desired to achieve the preferred level of crispiness.4 Use the crisper plate when you want food to come out crispy. The crisper plate elevatesfood in the basket, allowing air to go under the plate and evenly crisp ingredients.8 Occasionally, the fan from the air fryer will blow lightweight food around. To alleviatthis, secure food (like the top slice of bread on a sandwich) with toothpicks.5 Make sure the basket is fully inserted during cooking. For consistent browning, arrangeingredients in an even layer on the bottom of the basket with no overlapping.6NINJA AIR FRYERninjakitchen.c
Dehydrate ChartINGREDIENTSPREPARATIONTEMPDEHYDRATE TIMECore removed, cut in 1/8-inch slices, rinsed in lemon water, patted dry135 F7–8 hoursFRUITS & VEGETABLESApplesAsparagusCut in 1-inch pieces, blanch135 F6–8 hrsBananasPeeled, cut in 3/8 -inch slices135 F8–10 hrsBeetsPeeled, cut in 1 /8 -inch slices135 F6–8 hrs1 /4 -inchEggplantPeeled, cut inslices, blanch135 F6–8 hrsFresh HerbsRinsed, patted dry, stems removed135 F4 hrsGinger rootCut in 3/8 -inch slices135 F6 hrsMangoesPeeled, cut in 3/8 -inch slices, pit removed135 F6–8 hrsMushroomsCleaned with soft brush (do not wash)135 F6–8 hrs3 /8 – 1 /2 -inchPineapplePeeled, cored, cut in135 F6–8 hrsStrawberriesCut in half or in 1 /2 -inch slices135 F6–8 hrsTomatoesCut in 3/8 -inch slices or grated; steam if planning to rehydrate135 F6–8 hrsCut in 1 /4 -inch slices, marinated overnight (refer to Beef Jerky recipe page 13)150 F5–7 hoursslicesMEAT, POULTRY, FISHBeef1 /4 -inchChickenCut inslices, marinated overnight (refer to Beef Jerky recipe page 13)150 F5–7 hoursTurkeyCut in 1 /4 -inch slices, marinated overnight (refer to Beef Jerky recipe page 13)150 F5–7 hours150 F3–5 hoursSalmonCut in1 /4 -inchslices, marinated overnight (refer to Beef Jerky recipe page 13)TIPS & TRICKS1 Use a kitchen mandolin slicer to slice fruits and vegetables to a consistent, thin size.2 I n most cases, fruits and vegetables should be sliced as thin as possible withoutfalling apart.3 S ome fruits, like apples and pears, will oxidize and should be soaked for 5 minutesin water with a squeeze of lemon juice. This will help them retain their color whilethey dehydrate.4 F ruits and vegetables should be patted as dry as possible before being loaded intothe dehydrator.6 M ost fruits and vegetables take between 6 and 8 hours (at 135 F) to dehydrate.When trying a new food load, start checking doneness at 6 hours and monitoruntil it is cooked to your liking.7 T o maximize longevity, store dehydrated food at room temperature in an airtightcontainer for up to 2 weeks.8 W hen dehydrating meats and fish, it is recommended to Roast at 330 F for1 minute as a final step in order to fully pasteurize the food.9 For jerky, the longer you dehydrate it, the crispier it will be.5 L ay raw food flat on bottom of basket and crisper plate. Food should be placed closetogether to optimize space but individual pieces should not overlap or be stacked.8NINJA AIR FRYERninjakitchen.c p
9 ninjakitchen .com ninjakitchen .com 10 USING YOUR AIR FRYER - CONT . ENGLISH Reheat 1 Ensure the crisper plate is in the basket. 2 Press the REHEAT button.