Transcription
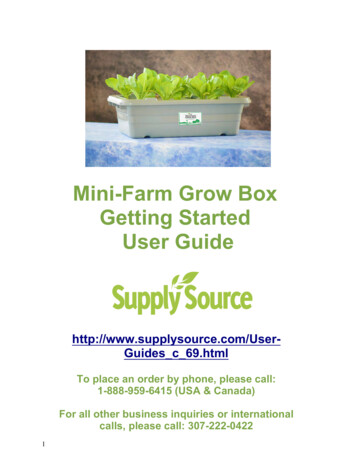
Mini-Farm Grow BoxGetting StartedUser Guidehttp://www.supplysource.com/UserGuides c 69.htmlTo place an order by phone, please call:1-888-959-6415 (USA & Canada)For all other business inquiries or internationalcalls, please call: 307-222-04221
Table of ContentsFood Rising Mini Farm Grow Box 2.0 Assembly Instructions (Starter Kit)Page 3Food Rising Mini Farm Grow Box 2.0 Assembly Instructions (Expansion Kit)Page 6Test the Water FlowPage 9Plant and Lid Selection GuidePage 11Introduction to Plant NutrientsPage 14Super Simple Plant Nutrient InstructionsPage 15Water Reservoir and Grow Box Start Up InstructionsPage 16Testing And Adjusting Your Water PH LevelPage 16Understanding Plant Nutrient BasicsPage 19Plant Nutrient MixesPage 20Advanced Plant Nutrient InformationPage 212
FOOD RISING MINI FARM GROW BOX 2.0A S S E M B LY I N S T R U C T I O N S ( S t a r t e r K i t )Congratulations on receiving your Mini-Farm Grow Box 2.0! My name is MikeAdams, and I developed this system based on the Non-Circulating Hydroponicsprinciples taught by B.A. Kratky at the University of Hawaii.This is the vastly improved and redesigned 2.0 version of this system, nowwith fewer parts and a more reliable self-watering system that avoids potentialleaks altogether.The Mini-Farm Grow Box is a self-watering system. There’s no need toconstantly add water or nutrients to the grow bin itself. Instead, you add waterand nutrients to the Water Reservoir Pail. This reservoir can feed water andnutrients to multiple grow bins. (You can also replace the pail with a largerbarrel, if you wish, to provide a larger water supply for multiple bins.)Here’s a straightforward guide for assembling your Grow Box. You do not needany special tools to assemble this system.Parts:Grow Box BinFloat Valve3Grow Box LidBlue PEX PipeWhite Valveadaptor1/4” Solid PolyMicro Tubing (PE)For Drip IrrigationSystem3.5 Gallon Pailwith lid (white)(only availablewith Starter Kits)Coconut CoirGrow Medium(650 gram)Shutoff ClampNet pots
ASSEMBLING THE TUBING:1.Screw the threadedend of the white valveadaptor into floatvalve. Thread it allthe way in, as far as itwill go. Finger-tightenfirmly. (Do not tightenwith tools or you maybreak it.)2.Insert either end of1/4” black irrigationtubing into the freeend of white valveadaptor. Make surethe connection is tightso it will not comeloose. This processcan be made easierby slightly heating theblack irrigation tubingwith a lighter for 3-5seconds to soften it.3.Feed the free end ofblack irrigation tubethrough blue PEX pipe.Affix the blue PEX pipesnugly over the freeend of the white valveadaptor by manuallypushing it on. It shouldfit snugly.4
4. Feed the free end ofthe black irrigationtubing and blue PEXpipe through hole onUNDERSIDE of thegrow box lid. It shouldfit snugly and firmly,with some resistanceon the PEX pipe. Youcan adjust the heightof the auto-wateringby sliding the PEX pipeup or down, effectivelyplacing the float valveat a different heightinside the bin.5.Place the lid on the Grow Box.6.Insert the free end of black irrigation tube into the 1/4” hole of the Water ReservoirPail. You will want to position the water reservoir a few inches higher than the levelof the float valve of your grow box. This allows the water to gravity flow down to thelevel of the float valve. To accomplish this, you may place the pail on top of an 8”block or other similarly sized object.7.Fill the white pail completely with water. You should now observe a slow trickle ofwater entering the grow box through the tiny hole in the center of the float valve.This is the desired flow you want to see. When the water level rises to the level of thefloat valve, the water flow will be shut off. This is the auto-watering feature at work.8.Note that in non-circulating hydroponic systems, plants start with a bin that’s nearlyfull of water (see instructions below). But after the initial sprouting, plants typicallyonly need 2-3 inches of water in the bottom of the bin, so you should position thefloat valve toward the bottom third of the bin for best results.ASSEMBLY IS COMPLETE! Now, you’ll simply need to plant your seeds in thecoconut coir and add nutrients to the water. For complete instructions on plantingand nutrients, refer to FoodRising.org. The following URL provides easy instructions:http://bit.ly/1Q0xOa35
FOOD RISING MINI FARM GROW BOX 2.0A S S E M B LY I N S T R U C T I O N S(Expansion Kit)Parts:6
ASSEMBLING THE TUBING:1.Screw the threadedend of the white valveadaptor into floatvalve. Thread it allthe way in, as far as itwill go. Finger-tightenfirmly. (Do not tightenwith tools or you maybreak it.)2.Insert either end of1/4” black irrigationtubing into the freeend of white valveadaptor. Make surethe connection is tightso it will not comeloose. This processcan be made easierby slightly heating theblack irrigation tubingwith a lighter for 3-5seconds to soften it.3.Feed the free end ofblack irrigation tubethrough blue PEX pipe.Affix the blue PEX pipesnugly over the freeend of the white valveadaptor by manuallypushing it on. It shouldfit snugly.7
4. Feed the free end of theblack irrigation tubing andblue PEX pipe through holeon UNDERSIDE of the growbox lid. It should fit snuglyand firmly, with someresistance on the PEX pipe.You can adjust the height ofthe auto-watering by slidingthe PEX pipe up or down,effectively placing the floatvalve at a different heightinside the bin.5.Place the lid on the Grow Box.6.Attach the new drip line you received with the expansion kit to the open nozzle onthe tee connector. The other end of this drip line connects to the float valve receiveron your new grow box.7.Remove the drip line clamp you placed on the line, allowing the water to flow freelyfrom the water reservoir to both grow boxes.8.Unwrap the plastic of the coconut coir grow media. Place the coconut coirinto a separate container or bin (such as a small pail or bucket) and add afew inches of water to the bottom of the container until the coconut coirexpands and loosens. This will take 15 - 20 minutes for the expansion.Once it is fully expanded, you can loosen it by hand to make loosecoconut coir media. This is the media which will host your garden seeds.9.Fill your net pots with coconut coir media. Compress it slightly, but not vigorously.The coconut coir should be filled all the way to the top of the net pots, but shouldnot be too tightly compressed. (Roots need loose media to grow well.)10. Place the net pots containing coconut coir into the holes of the grow box lid. Theyshould fit snugly. Place the lid to the side for now.ASSEMBLY IS COMPLETE! You now have one water reservoir feeding two growboxes with water and nutrients. If you wish, you can expand this system to as manyas 10 grow boxes from a single water reservoir.For best results, grow the same type of plants in all grow boxes that are connectedto the same reservoir. Be sure to check the pH and nutrient levels of your waterreservoir from time to time, making sure they are within the proper range.The following URL provides easy instructions:http://bit.ly/1Q0xOa38
test the water flow:The Mini-Farm Grow Box is a self-watering system. You never need to add wateror nutrients to the grow bin itself. Instead, you add water and nutrients to thewater reservoir (the 3.5 gallon pail). If you wish, you can use a larger pail or othercontainer to create a larger water reservoir. One reservoir can feed water andnutrients to 10 grow bins! Before planting seeds, it is important to test the gravityflow of automatic watering function of the grow box:1.Confirm that you have the float valve installed with the correct orientation insidethe grow bin. The float should actuate vertically (up and down) when you gently liftit with your hand. This simulates the rising of the float as the water level rises in thegrow box.2.Confirm you have the 1/4” drip line connected securely to the float valve nozzle,with the other end securely inside the water reservoir (white pail).3.Normally you will want to position the water reservoir a few inches higher thanthe level of the float valve of your grow box. This allows the water to gravity flowdown to the level of the float valve. To accomplish this, you may place a 4” brick or asimilar-sized object underneath the water reservoir (white pail).4. Fill the white pail completely with water. You should now observe a slow trickle ofwater entering the grow box through the tiny hole in the center of the float valve.This is the desired flow you want to see.5.Allow the water to fill the grow bin until the float valve rises sufficiently to block theincoming water flow. At this point, you should have approximately 2 or 3 inches ofwater in the bottom of the grow bin, and a much higher water level in your waterreservoir. Allow this state to remain for a few hours to make sure your float valvereally is blocking off the incoming water. If the water level does not rise higherin the grow bin, then you have confirmed the float valve is working to block theincoming water, just as it is designed to do.TIP: If you place your water reservoir too high, it will increase the gravity pressureof the water and may cause excess water to be pushed into your grow bin. Do notraise the water reservoir higher than approximately 6” off the level surface whereyour grow bin is also placed.6.9You have now confirmed the full function of the grow system! If you used a highquality water source to begin with, you may now add nutrients directly to the waterin the grow bin (only needed once, at the beginning of each new “crop”) and also tothe water reservoir.
TIP: Acquire a TDS meter (about 15 on Amazon.com) to test your water for TotalDissolved Solids (TDS) and Electrical Conductivity (EC).TIP: As a rule of thumb, you will add plant nutrients and CalMag formulas in abouta 1:1 ratio to the water, aiming for a TDS number of approximately 1200 - 1500.For more detailed instructions, see FoodRising.org for a comprehensive guide onhydroponic nutrients for various plants.7. You may now place the lid on the grow bin, making sure the bottom half inch or soof each net pot is immersed in the water being held in the grow bin. This assureswater reaches the coconut coir and allows your seeds to sprout. Over time, as thewater level drops in the grow bin, your plants will grow roots to follow the waterdown, extending to the bottom of the grow bin where fresh water and nutrients arefed through the float valve.8.You may now plant your favorite seeds! Make sure the system has adequatesunlight and watch Mother Nature perform its food miracles!Have a suggestion on how we can improve the system?Email us at csr@supplysource.comOrder supplies, fertilizers and expansion kits atSupplySource.comTo place an order by phone, please call:1-888-959-6415 (USA & Canada)For all other business inquiries or internationalcalls, please call: 307-222-042210
Plant and Lid Selection GuidePlantPreferred LidIdeal Temperature/Season(F)Sprout/Germination TimeSalad PackArugula9 holes40 -55 5-7 daysCress9 holes55 -75 2-7 daysChicory9 holes45 -85 7-10 daysCorn Salad9 holes50 -70 7-14 daysEndive9 holes35 -85 5-7 daysLettuce9 holes40 -85 7-14 daysParsley9 holes70 21 daysTomato PackTomatoes112 holes60 -95 6-12 days
Plant and Lid Selection Guide - ContinuedPlantPreferred LidIdeal Temperature/Season(F)Sprout/Germination TimeFamily Kitchen Herb PackItalian Basil6 holes50 -95 5 daysChives6 holes45 -95 7-21 daysCilantro4 holes60 10 daysDill6 holes60 -70 21-25 daysFennel2, 4, 6 holes50 -70 12-18 daysMarjoram2, 4, 6 holes70 8-14 daysOregano2, 4, 6 holes70 8-14 daysParsley6 holes70 21 daysRosemary2, 4, 6 holes65 -85 10-14 daysSage2, 4, 6 holes60 -75 21 daysTarragon2, 4, 6 holes65 -85 4-14 daysThyme2, 4, 6 holes70 21-28 days12
Plant and Lid Selection Guide - ContinuedPlantPreferred LidIdeal Temperature/Season(F)Sprout/Germination TimeLeafy Greens PackAmaranth4 holes60 -90 3-4 daysBroccoli Raab2 holes45 -85 4-7 daysCabbage2 holes45 -85 4-7 daysCollards4 holes40 -85 4-7 daysKale4 holes45 -85 4-7 daysKohlrabi4 holes45 -85 4-7 daysLeek4 holes45 -95 4-7 daysMustard Greens6, 9 holes45 -85 4-7 daysSpinach6, 9 holes45 -75 6-10 daysChard6, 9 holes40 -95 5-7 daysCucumbers2 holes60 -105 3-10 daysStrawberries4 holes65 -75 2-8 weeksPeppers2 holes70 -90 7-10 days13
Introduction to Plant NutrientsWelcome to the Plant Nutrition Guide for the Food Rising Mini-Farm Grow Box.My name is Mike Adams, and I developed this system based on the Non-Circulating Hydroponics principlestaught by Prof. B. Kratky at the Univ. of Hawaii.I'm also the lab director at a Forensic Food Lab where I test food, supplements and water for heavy metalcontaminants such as lead, cadmium, mercury and arsenic. This lab runs an Agilent 7700X ICP-MS instrumentwhich can detect elements with precision of 1 part per billion. (That's 1/1000th of 1 part per million!)In 2014, I conducted exhausted ICP-MS testing of off-the-shelf plant nutrition formulas purchased at commonretail stores, and I found that many of them were heavily contaminated with lead and cadmium. This concernedme greatly, as I did not want to grow my food in a nutrient formula containing alarming concentrations of toxicheavy metals. For the record, lead causes mental retardation and cadmium causes cardiovascular problems andskin disorders.Ultimately, I realized I would have to develop my own nutrient formulas using ultra-clean ingredients from thecleanest sources in the world. This led to several months of testing raw material samples from many differentcountries, including Israel, Canada, Denmark, the United States, Chile and many others.By testing these raw materials using ICP-MS instrumentation, I was able to identify the cleanest sources of plantnutrient materials available in the world today. I then combined these raw materials to create Ultra-Clean SuperPlant Food formulas which are extraordinarily low in toxic elements while boasting much higher levels ofbeneficial nutrients that nearly all people need in higher concentrations (such as zinc, which boosts immunefunction, and organic selenium, which is an anti-cancer mineral).We specifically avoided using any raw materials from China, due to China's worsening pollution andcontamination problems.The result is the world's cleanest plant nutrient formulas for hydroponics. By using these formulas correctly, youcan grow the world's most nutrient-rich plants while also avoiding toxic heavy metals that can damage yourhealth.The food you grow using these formulas will have far higher concentrations of beneficial minerals than nearly allstore-bought produce. Even growing something as simple as lettuce can produce mineral-rich foods that cansubstantially support and enhance your overall health by providing your body with the nutrients that are typicallymissing in most other foods.Everything you grow in these UltraClean Super Plant Food nutrients will be healthier, more mineral rich andcleaner than plants grown in lower grade nutrients. You will also discover that this enhances the pest resistance,disease resistance and drought resistance of the plants you're growing! Healthy minerals, after all, boost thehealth of not just humans but also the food plants that humans consume. (Mineral deficiencies lead to disease inall living systems, including plants, animals and humans.)14
SUPER SIMPLE PLANT NUTRIENT INSTRUCTIONSUltraClean Super Plant Food mixes come as per-Plant-Food c 50.html)1. The plant mix, such as a "lettuce" formula. This plant mix contains the micro nutrients (trace minerals),potassium nitrate, monopotassium phosphate and other key nutrients needed by your plant.2. The CalMag mix. This contains just three nutrients: Calcium Nitrate, Magnesium Nitrate and Iron EDTA.Rule of thumb: For every gallon of water you use in the system, you will add just slightly under 1teaspoon of plant mix 1 teaspoon of CalMag.This rule of thumb will vary significantly if you are in a very hot, dry climate, in which case you will need toadd far more water than nutrients as your plants mature, due to the fact that your plants are transpiring a lotof water but not using a proportionate quantity of nutrients.This is why you need a TDS meter to monitor the ppm (parts per million) of your nutrients. Over time, youwill gain enough experience to almost never need the TDS meter, but for first-time growers, it is a veryvaluable tool.Recommended TDS meter at Amazon.com (about 10): http://www.amazon.com/gp/product/B00M19UR4W15
INSTRUCTIONS FOR THE 3.5 GALLON WATER RESERVOIR:For the 3.5 gallon water reservoir (white pail), add water and nutrients as follows: Fill the pail 1/2 full with water. Add 3 level teaspoons of plant mix. Stir until dissolved. Add 3 levels teaspoons of CalMag mix. Stir until dissolved. Fill the remainder of the pail all the way full.This will produce a water nutrient mix with approximately 1200ppm of nutrients. A TDS tester mayshow a higher number because it is measuring the 1200ppm of the nutrients PLUS the original ppm ofyour water, added together.INSTRUCTIONS FOR THE START OF THE GROW BOX:For the grow box bin, you will nearly fill it with water when you first start new seeds. (After that, theautomatic float valve will provide self-water function.) Follow these instructions for most seedlings: Fill the bin 1/2 full with water. Add 5 level teaspoons of plant mix. Stir until dissolved. Add 5 levels teaspoons of CalMag mix. Stir until dissolved. Fill the remainder of the bin until the water level is covering the bottom third of the net potswhen the grow box lid is attached. (The net pots must be partially submersed in water in orderto wick water to the plant seeds and early roots.)This will produce a water nutrient mix with approximately 1200ppm of nutrients. A TDS tester mayshow a higher number because it is measuring the 1200ppm of the nutrients PLUS the original ppmof your water, added together.TESTING AND ADJUSTING YOUR WATER PH LEVELIt's important to also measure and adjust the pH level of your water. Fortunately, it's very simple to do:just acquire pH test strips (paper strips) from Amazon.com or any hydroponics supplier. Some peopleprefer to use liquid pH testing drops, which are also readily available and very affordable. Most plantswill survive pH ranges from 5.5 - 7.5, but you'll get better results if you narrow the pH range to fit theplants you're growing.16
Here's a list of pH ranges, found on SimplyHydro.com.Note that this is the pH *after* you add plant nutrients.Beans 6.0-6.5Broccoli 6.0-6.5Cabbage 6.5-7.5Cantaloupe 6.5-6.8Carrots 5.8-6.4Chives 6.0-6.5Cucumbers 5.8-6.0Garlic 6.0-6.5Lettuce 6.0-6.5Onions 6.5-7.0Peas 6.0-6.8Pumpkin 5.0-6.5Radish 6.0-7.0Strawberries 5.5-6.5Tomatoes 5.5-6.5Here's how to adjust the pH to achieve the proper range: If your pH is too low, it's too ACIDIC, and you need to add baking soda to make it more alkaline(to raise the pH level). Simply stir in a teaspoon of baking soda, one at a time, until you reachthe desired pH. If your pH is too high, it's too ALKALINE, and you need to add white vinegar to make it moreacidic (to lower the pH level). Simply stir in a teaspoon of white vinegar, one at a time, until youreach the desired pH.17
Recommended pH testing products (very affordable)General Hydroponics PH Test Indicator, est-Indicator-8-Ounce/dp/B003Y3F34IMicro Essential Labs pHydrion Urine and Saliva ph test paper , 15 ft roll with dispenser and chart,ph range 5.5-8.0 spenser-5-5-8-0/dp/B0001SR4NM18
UNDERSTANDING PLANT NUTRIENT BASICS:All plants share common needs for specific nutrients and minerals. The three most common nutrientsused in conventional agriculture are:N Nitrogen. This is the "fuel" that plants use as an energy source.P Phosphorous. This minerals supports crucial plant physiology functions that keep it alive.K Potassium. Without potassium plants could not transport water or even succeed withphotosynthesis (converting sunlight into plant energy).In conventional farming, these three nutrients are added to crops in large quantities. But trace mineralsare almost never added: molybdenum, boron, chromium, zinc, selenium and so on. As a result, mostconventional crops utterly lack the trace minerals which are also crucial for plant health and humanhealth.Growing healthy plants requires more than just N, P and K. True plant health comes from a full spectrumof nutrients, which includes trace minerals or "micro minerals" as they are sometimes called inhydroponics.FACT: The ocean is full of trace minerals. Sea water contains at least 92 elements. Every element hasa different function in human physiology. Some farmers use sea water concentrates on their crops toboost plant health from the trace minerals.PLANTS "EAT" MOLECULESMany of the nutritional molecules consumed by plants provide more than one element. A chemicalcompound consists of chains of atoms bonded together through principles of chemistry such as"covalent bonding." For example, the chemical compound "potassium nitrate" combines potassium andnitrogen into a complex molecule.Monopotassium Phosphate, similarly, is a simple combination of potassium and phosphate. The "mono"simple means "one." This refers to the ratio of atoms in the chemical structure of the molecule.Although this is a simplified explanation, when plant roots come into contact with these molecules, they"eat" them by assimilating the elements that the molecules are made of. Plants "eat" potassium nitrate,for example, to assimilate both the potassium and the nitrogen -- nutrients they need to survive andgrow.Plants extract carbon from the air to create physical structures such as leaves, stems and roots. Theyquite literally "grab" carbon molecules out of the air and convert them into physical objects that allow theplant to grow. This is why plants are known to consume carbon dioxide. (CO2)19
PLANT NUTRIENT MIXESUltraClean Super Plant Food mixes come as follows:1. The plant mix, such as a "lettuce" formula. This plant mix contains the micro nutrients (trace minerals),potassium nitrate, monopotassium phosphate and other key nutrients needed by your plant.2. The CalMag mix. This contains just three nutrients: Calcium Nitrate, Magnesium Nitrate and IronEDTA.NOTE: All the nutrients in UltraClean Super Plant Food are water soluble. They are designed, in otherwords, to almost completely dissolve in water and stay in solution. After adding them to a waterreservoir, you will need to vigorously stir the water to dissolve the nutrients. Over time, you may notice avery small amount of un-dissolved nutrients (about 1% of the total nutrient mass) in the bottom of thereservoir pail. This is normal and not a concern.As a rule of thumb, you will typically use these formulas together in a 1:1 ratio for more common plants.However, the ratios and concentrations of these nutrients varies considerably when growing plants thatbloom (such as strawberries or tomatoes). "Grow" and "bloom" cycles of plants have different nutrientneeds, which we will cover later.Why is the CalMag separate from the general plant mix? Calcium and magnesium often need to beadded in ratios other than 1:1. Keeping the nutrient mixes separated allows you to control the ratios thatyou add to the nutrients.TIP: If you have multiple grow boxes connected to a single water reservoir, make sure you are growingall the same type of plants. For example, if you are feeding your water reservoir lettuce mix plantnutrients, you want to make sure all the grow boxes connected to that water reservoir are growinglettuce, not something different such as green peppers.TIP: Lettuce is the easiest crop to grow, and it's the crop we recommend you begin with. It's also themost forgiving on nutrient concentrations and ratios.HOW TO MIX THE NUTRIENTS FOR SEEDLINGSTarget TDS 1200 your original water sourceStep 1) Measure the TDS of your source water. Using a TDS meter, find out the ppm (which meansthe parts per million of Total Dissolve Solids) in your source water. A lower number is better, indicating"cleaner" water.Step 2) Add 1200 to that number. This gives you a "target" ppm of TDS in your final water.Step 3) Add dry nutrients in small quantities in a 1:1 ratio of the plant formula and the CalMagformula, until the ppm of your water reaches the target ppm. (Make sure you vigorously stir the wateras you are doing this to fully dissolve the nutrients.)20
HOW TO MIX NUTRIENTS FOR MATURE PLANTSTarget TDS 1500 your original water sourceMature plants benefit from a higher nutrient concentration in the water. Use the same methoddescribed above, but aim for 1500 ppm instead of 1200.Advanced Plant Nutrient InformationThe following plant nutrition guide offers detailed guidance on nutrient concentrationsand pH levels for different types of plants as well as their growth stages.The plant nutrient recommendations below are based on adding nutrients to 10 gallons of water. Divide therecommendations by 3 if you are using a 3.5 gallon pail (water reservoir) which ships with the systems.Always test the ppm of your water nutrient solutions to keep them within a proper range. Typically,starting plants (sprouting seeds, or growing very young starts) should use a lower concentration of nutrientssuch as 1200 ppm. Mature plants usually require higher concentrations, around 1500 - 1600 ppm.21
REVIEW:ppm parts per million. You can assess the parts per million of the nutrients in your water byusing a low-cost TDS meter purchased for about 10 - 15 from Amazon.com.pH Acid/Alkaline level. Low pH is more acidic. High pH is more alkaline. Most plants prefer apH between 6.0 and 7.0, but they can usually survive in a range of 5.5 to 7.5.Units Conversion:For the CalMag Plant Food, 1 tablespoon 14 gramsFor all plant fertilizer formulas (Lettuce, Strawberry, etc.), 1 tablespoon 18 gramsLETTUCE:pH target 6.4 - 6.7 during growth stage / 6.0 - 6.5 during seeding stagesLettuce Plant Food 8-15-36: Use 45 grams per 10 gallons of water during all stages of plant growthCalMag Plant Food: Use 30 grams per 10 gallons of water during growth stage Use 40 grams per 10 gallons of water during bolting stageTOMATO:pH target 6.4 - 6.6 during growth stage / 6.1 - 6.3 during blooming (flowering) stageTomato Fertilizer 4-18-38: Use 45 grams per 10 gallons of water during all stages of plant growthCalMag Plant Food: Use 30 grams per 10 gallons of water during growth stage Use 40 grams per 10 gallons of water during blooming stagePotassium Nitrate: You may optionally add 2 grams per 10 gallons of water during the blooming stage to boostnitrogen levels22
STRAWBERRIES:pH target 6.5 - 6.8 during all stages of plant lifeStrawberry Fertilizer 8-12-32: Use 11 grams per 10 gallons of water during growth stage Use 17 grams per 10 gallons of water during blooming stageCalMag Plant Food: Use 12 grams per 10 gallons of water during growth stage Use 23 grams per 10 gallons of water during blooming stageCUCUMBER:pH target 6.4 - 6.7 during all stages of plant lifeCucumber Fertilizer 8-16-36: Use 45 grams per 10 gallons of water during all stages of plant growthCalMag Plant Food: Use 30 grams per 10 gallons of water during growth stage Use 40 grams per 10 gallons of water during bloomingCalcium Nitrate: You may optionally add 10 grams per 10 gallons of water during the blooming stagePEPPERS:pH target 6.2 - 6.5 during growth stage / 5.8 - 6.2 during blooming stagePepper and Herb Fertilizer 11-11-40: Use 23 grams per 10 gallons of water during all stagesCalMag Plant Food:23 Use 30 grams per 10 gallons of water during growth stage Use 40 grams per 10 gallons of water during blooming stage
HERBS:pH target 6.2 - 6.5 during growth stage / 5.8 - 6.2 during blooming stagePepper and Herb Fertilizer 11-11-40: Use 11 grams per 10 gallons of water during all stagesCalMag Plant Food:: Use 14 grams per 10 gallons of water during growth stage Use 23 grams per 10 gallons of water during blooming stageAdditional Nitrogen:: Recommended to add nitrogen for herbs. Can use either calcium nitrate or potassium nitrateat around 2 grams per 10 gallons of water.24
Adams, and I developed this system based on the Non-Circulating Hydroponics principles taught by B.A. Kratky at the University of Hawaii. This is the vastly improved and redesigned 2.0 version of this system, now with fewer parts and a more reliable sel