Transcription
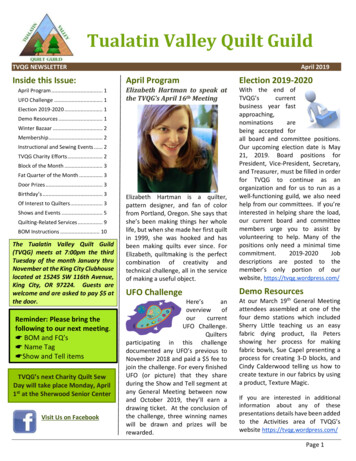
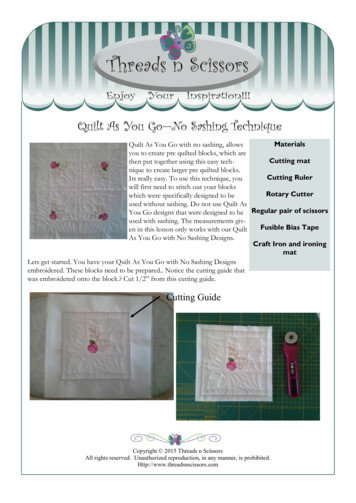
Quilt As You Go—No Sashing TechniqueMaterialsQuilt As You Go with no sashing, allowsyou to create pre quilted blocks, which areCutting matthen put together using this easy technique to create larger pre quilted blocks.Cutting RulerIts really easy. To use this technique, youwill first need to stitch out your blocksRotary Cutterwhich were specifically designed to beused without sashing. Do not use Quilt AsYou Go designs that were designed to be Regular pair of scissorsused with sashing. The measurements givFusible Bias Tapeen in this lesson only works with our QuiltAs You Go with No Sashing Designs.Craft Iron and ironingmatLets get started. You have your Quilt As You Go with No Sashing Designsembroidered. These blocks need to be prepared. Notice the cutting guide thatwas embroidered onto the block.? Cut 1/2” from this cutting guide.Cutting GuideCopyright 2015 Threads n ScissorsAll rights reserved. Unauthorized reproduction, in any manner, is prohibited.Http://www.threadsnscissors.com
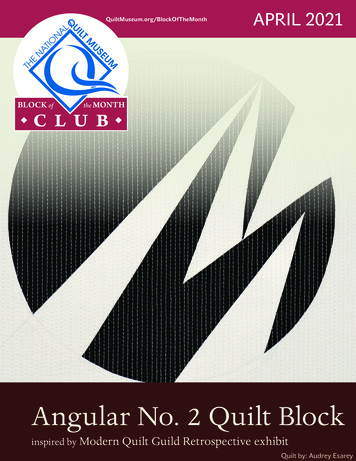
Prepare all your blocks like this. No to sew two blocks together. Place two blocks together right sides facing. You will only be sewing the front fabric - not the batting, stabilizer or backing fabric. Sew the front fabrics together with a 1/2”seam. Trim the seam back to 1/4”. Using the craft iron, press the fabric seam toone side. I alternate which way I press the seam so I don’t have thick areas to stitch through when puttingthe pieces together.Using a pair of regular scissors, trim back the batting and stabilizer to the stitch guide.Copyright 2015 Threads n ScissorsAll rights reserved. Unauthorized reproduction, in any manner, is prohibited.Http://www.threadsnscissors.com
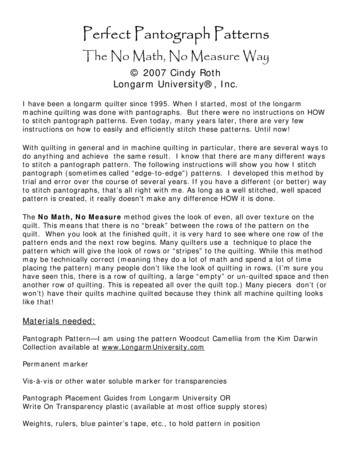
Using the craft iron, press the batting and stabilizer flat.Cut a piece of fusible bias tape the 1” short of the length of the batting/stabilizer from the top and bottomand use the craft iron to heat set the tape. The tape needs to cover the two pieces of batting and stabilizer.Copyright 2015 Threads n ScissorsAll rights reserved. Unauthorized reproduction, in any manner, is prohibited.Http://www.threadsnscissors.com
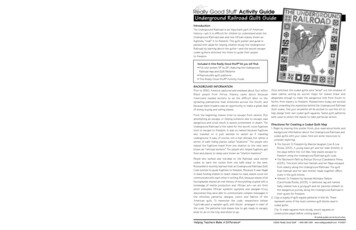
Remove the paper backing. Fold the left lining fabric over the tape and heat set in place using the craft iron.Turn in 1/4” tocreate a neatedge.Turn in 1/4”on the other piece to create a neat edge.Cut another piece of fusible tape and heat set it to the piece that has just been folded in.Copyright 2015 Threads n ScissorsAll rights reserved. Unauthorized reproduction, in any manner, is prohibited.Http://www.threadsnscissors.com
Heat press the folded edge over the bias tape.Using a stitch in the ditch foot, and sewing on the right side, sew in the ditch of the two blocks. This stitches the lining fabric flap at the back, neatly in place.Continue in this method to sew your blocks together, first in rows and then sew the rows together.Copyright 2015 Threads n ScissorsAll rights reserved. Unauthorized reproduction, in any manner, is prohibited.Http://www.threadsnscissors.com
ing. You will only be sewing the front fabric - not the batting, stabilizer or backing fabric. Sew the front fab-rics together with a 1/2”seam. Trim the seam back to 1/4”. Using the craft iron, press the fabric seam to one side. I alternate which way I press the seam so I don’t have