Transcription
Easy ErgonomicsFor Desktop Computer UsersDepartment of Industrial RelationsDivision of Occupational Safety and HealthPublications Unit
COMPUTER ERGONOMICS GUIDEEasy Ergonomics for Desktop Computer Users was developed and prepared for publication by Cal/OSHA, Division of Occupational Safety and Health, California Department of Industrial Relations(www.dir.ca.gov/DOSH/).Published by the California Department of Industrial RelationsUpdated October 2018This booklet is not meant to be a substitute for, or a legal interpretation of, the occupationalsafety and health standards. Please see the California Code of Regulations, Title 8(www.dir.ca.gov/samples/search/query.htm), or the California Labor Code for detailed andexact information, specifications, and exceptions.The display or use of particular products in this booklet is for illustrative purposes only anddoes not constitute an endorsement by the Department of Industrial Relations.
IntroductionCongratulations! You have taken the first step toward improving the way you work at yourdesktop computer.Have you ever thought of the many things you do while you are at your computer work station?What is your body posture while you are performing general computer functions, such as keying,mousing, or writing? How long do you work at your computer without taking breaks?By changing the way you interact with your computer equipment and furniture, you may be ableto reduce your risk of injury.Protect your ability to work! If you are already feeling some discomfort or pain or if you wouldlike to learn how to work safely and reduce your risk of injury, read on. This guide was writtenfor you.1
COMPUTER ERGONOMICS GUIDEUsing this bookletThis booklet is intended for use by desktop computer users. The purpose of this booklet is to helpyou reduce your chances of being injured. You will learn to identify common desktop computerwork station problems and explore some improvement goals. By understanding how you performyour job tasks, and how you use your equipment and furniture, you can work more safely,efficiently and comfortably.Each section of this booklet begins with an action goal which tells you what you need to do towork more safely and more comfortably. The action goals are summarized on pages 5 and 6, andcovered in more detail in the sections on pages 8-33.Suggestions in this booklet are made to improve your work station first by utilizing your existingfurniture and equipment. Try to do the best you can with what you’ve got. After that, suggestions aremade to improve your work station by purchasing new or replacing existing furniture andequipment. If you are unable to improve your work station without purchasing new or replacingexisting furniture or equipment, talk to your immediate supervisor. If you are already feelingdiscomfort, the table on page 4 will direct you to the sections in the booklet that address possiblecauses for your discomfort.The Checklist on page 7 serves as a way to identify computer tasks that may expose you to the risk ofinjury. If you answer YES to all the questions on the Checklist, you may not need to go any further. Thepages that follow the Checklist offer suggestions for improving your work station and your workpractices.You can also use this booklet as a training tool. Talk about these guidelines in your safety meetingsand discuss ways to make necessary improvements.No one is required to use the information in this booklet. This booklet is not intended toprovide employers or employees with information on how to comply with Cal/OSHA regulations.2
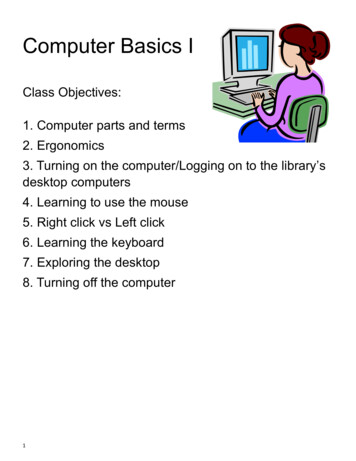
TAKE A LOOKTake a LookAs you read this booklet, sit at your computer and take a good look at what you do there. You may besurprised to learn that some things you do every day may cause you pain or discomfort over time.Learn how to change your work habits! You can ease your symptoms and learn how to work pain free.Job TasksBefore you begin to look for risk factors, it is important to understand how your job tasks maycontribute to your exposure to these risk factors. Ask yourself which tasks you performsimultaneously. For computer users, simultaneous tasks are those tasks that are performed whilekeying, and include:A. keying / mousing (generic term for using an external pointing device)B. keying / mousing / writingC. keying / mousing / writing / using the telephoneD. keying / mousing / writing / using the telephone / readingWhen simultaneous and nonsimultaneous tasks are performed in awkward postures or with extendedreaches, you increase your chances of developing an injury. If you perform simultaneous tasks, goto pages 19-25.Workstation “Handedness”Look at the direction of the work flow when performing simultaneous tasks. Generally, people aremost comfortable when they work toward their dominant side. For example, if you are right-handed,your right hand is your dominant hand, and your right side is your dominant side. Does the“handedness” of your work station fit your hand dominance? In other words, does the design of thework station promote your work to flow toward your dominant hand? The “handedness” of the workstation is determined by the location of the keyboard relative to the work area where other tasks areperformed simultaneously with keying. When this work area (often the writing surface) is to the leftof the keyboard, it is said to be a left-handed work station, and vice versa. A right-handed employeewho sits at a left-handed work station will twist, turn, and reach to get to the work area to his/herleft. The “handedness” of the work station is not always a concern, as in the case when only one taskis performed there (e.g. keying only). To learn more ways to make the work station fit yourhandedness, go to pages 22-25.Left-handed workstationRight-handed workstation3
COMPUTER ERGONOMICS GUIDERisk FactorsIn computer tasks there are certain conditions or risk factors that can contribute to the development ofmusculoskeletal disorders (MSDs) when computer users are exposed frequently to these risk factors, orfor long periods of time. The conditions for exposing a user to the risk of MSDs associated withcomputer use are as follows: Keying for long periods of time without breaks or rest Using force when striking the keyboard or when gripping the pointing device (e.g. mouse,trackball) Working with awkward neck, shoulder, elbow, wrist, or back postures Remaining in the same position for a long time with little or no movement (e.g. sitting,holding the mouse) Continuous pressure against (leaning on) the wrist rest, work surface edge, or armrest withthe wrists, forearms, or elbows; or against the front edge of the chair with the back of the legs.Do not wait until you feel pain or discomfort. Learn to change the way you work. If you understand yourbody posture in relationship to your computer equipment and furniture, you may, in fact, be able to preventthis kind of injury.If you are exposed to any of these risk factors repeatedly or for long periods, you might experience painor discomfort. If you do, refer to the pages below for improvement options. If you continue to have painor discomfort, let your immediate supervisor know.If you are having pain ordiscomfort here.It may be related to this.LOWER BACK UPPER BACK NECK ARMS / SHOULDERS FOREARMS WRISTS / HANDS VISION4 Refer to these pages.Chair adjustmentOrganization of the work station8 - 1522 - 25Chair adjustmentKeyboard heightLocation of the pointing deviceOrganization of the work stationMonitor height and distancePlacement of the document13 - 1416 - 1819 - 2122 - 2527 - 2831 - 32Organization of the work stationMonitor height and distancePlacement of the document22 - 2527 - 28Chair adjustmentKeyboard heightLocation of the pointing deviceOrganization of the work station31 - 3213 - 1416 - 1819 - 2122 - 25Keyboard heightLocation of the pointing deviceOrganization of the work station16 - 1819 - 2122 - 25Keyboard heightLocation of the pointing deviceOrganization of the work station16 - 1819 - 2122 - 25Monitor height and distanceMonitor glarePlacement of the document27- 282931 - 32
ACTION GOALSAction GoalsNow that you are aware of the job tasks you perform and the risk factors leading to MSDs, you areready to look at the setup and organization of the furniture and equipment in your work space. Theaction goals that follow will help you reduce or eliminate some of these risks. They are written tohelp you work safely.The following action goals describe the best way to work at your work station. This section will helpyou to know where to start looking for problems at your work station. After reading these goals,complete the Checklist on page 7. If you are unable to answer questions on the Checklist becauseyou need additional information about an action goal, or if you answer “NO” to any item on thechecklist, go to the page indicated where the action goal is covered in greater detail.GoalsWHEN SITTING1a-b. Your feet are resting comfortably on the floor or on a footrest,and your knees are slightly lower than your hips.2.There is a 2- to 4-inch gap between the back of your knees and thefront edge of the chair when your back is against the chair.3.The curve of the chair back fits into the deepest part of the curve inyour lower back.4. The back of the chair is upright or tilted back for comfort, andprovides upper back support.5.Armrests are adjusted so that they are just slightly below yourelbows when your shoulders are relaxed.6.Armrests do not interfere with access to the keying, mousing or writing surfaces.WHEN KEYING7a. Your shoulders are relaxed, and yourelbows are close to your body.7b. Your elbows are bent to 90 degreesor slightly greater (inner angle).7c. The tops of the “home row” keys areat the same height as your elbows,or slightly lower than your elbows.7d. Your wrists are straight (not bent).WHEN POSITIONING THE CURSOR WITH A POINTING DEVICE(using a mouse, trackball, touch pad, etc.)8. The pointing device is close to the keyboard.5
COMPUTER ERGONOMICS GUIDEGoalsWHEN ORGANIZING THE WORK SPACE9a. Reaches performed frequently are within the “near”work space (your elbows remain at your sides).9b. Reaches performed occasionally are within the “near”or “mid” work space (no more than an arm’s lengthaway).9c. You are not reaching across your body to work.WHEN VIEWING THE MONITOR10a. It is in front of you and the top line of print is at orjust below your eye level or even lower if you wearbifocal, trifocal, or progressive lenses; ANDYou are able to scan the screen from top to bottom byusing only eye movements, not head movements.10b. You can sit against the back of the chair and read themonitor screen from a comfortable distance, withoutexperiencing eye fatigue, blurred vision or headaches.10c. The monitor screen is free of glare.Viewing through bifocal lensesWHEN READING THE DOCUMENT11a. The document is off the flat work surface and in yourline of vision.11b. The document is directly next to the monitor orbetween the monitor and the keyboard.11c. The document is at the same distance as, or closerthan, the monitor.11d. You can look at the document and the monitor bymoving only your eyes, not your head.WHEN USING A NEW SOFTWARE PROGRAM OR OPERATING SYSTEM (OS)12a. You are efficient in the most common tasks you perform.12b. You reduce the stress and frustration you experience when you cannot complete a task.6
CHECKLISTInstructions:Answer the questions below to determine problems that might cause MSDs. If you answer “NO,” turn to the page indicated for improvement options. Ifyou run out of improvement options and you still have problems, contact your immediate supervisor.GOALYES NOpp. 9-33WHEN SITTINGIs the chair height adjusted so that your feet rest comfortably flat on the1a-b floor or footrest, with your knees just slightly lower than the hips?If NO, see page:92Look at the depth of the seat pan. Is there a small gap (2 to 4inches)between the back of your legs and the front edge of the seat pan?103Does the curve of the back of the chair fit into your low back?114Does the back of the chair tilt back?125With your shoulders relaxed, are the armrests slightly below your elbows,and do your arms hang comfortably at your sides?136Can you get your chair close enough to your keying, mousing, orwriting surfaces without reaching?15WHEN KEYING7a-dWith your shoulders relaxed and your fingers curved, is the home row ofkeys at the same height as your elbows or slightly below your elbows?17WHEN POSITIONING THE CURSOR WITH A POINTING DEVICE8Is the pointing device positioned close to the keyboard?20WHEN ORGANIZING THE WORK SPACE9a-cAre you able to use your work surface and equipment without overreaching or using awkward postures?23WHEN VIEWING THE MONITOR10aIs it in front of you and the top line of print is at or just below eye level oreven lower if you wear bifocal, trifocal, or progressive lenses; ANDare you able to scan the screen from top to bottom using only eyemovements, not head movements?2710bCan you sit against the back and read the monitor screen from acomfortable distance, without experiencing eye fatigue, blurred vision,or headaches?2810cIs the monitor screen free of glare?29WHEN READING THE DOCUMENTIs the document off the flat work surface and at the same distance as the11a-d monitor screen?31WHEN USING NEW SOFTWARE PROGRAMS AND OPERATING SYSTEMS12Have you been trained on the software programs and operating system youare using?337
COMPUTER ERGONOMICS GUIDEWHEN SITTINGSeat pan adjustments:Chair backLumbarcurve(low back)Seat panPull out to make seat pandeeperPush back to make seatpan shallowerAwkward seated postures and lengthy periods of sitting may increase your risk of injury. It isimportant that you are comfortable while sitting, as remaining in an awkward seated posture canincrease your fatigue level, tighten muscles, or irritate nerves. When your body is fatigued or indiscomfort, the risk of injury increases, and productivity and accuracy decrease. An awkward seatedposture is especially risky if it is combined with lengthy periods of sitting, or other awkward bodypostures, and eventually you may have trouble doing even simple tasks, such as reaching for thetelephone.When you remain in the same seated posture for a long time, your blood flow slows down and youmay begin to feel tired. The muscles in your neck, shoulders, and back become fatigued. Recognizeopportunities to get out of your chair and move around. Instead of reaching up to the overhead bin,stand up. Instead of reaching to the printer, place the printer farther away so you must get up and walkto it. Stand up to take a phone call. Moving around keeps the blood flowing and prevents musclefatigue and cramping.When your chair is properly adjusted1a-b. Your feet are resting comfortably on the floor or on a footrest, and your knees are slightlylower than your hips.2.There is a 2- 4-inch gap between the back of your knees and the front edge of the chairwhen your back is against the chair.3.The curve of the chair back fits into the deepest part of the curve in your lower back.4.The back of the chair is upright or tilted back for comfort.5.Armrests are adjusted so that they are just slightly below your elbows when your shouldersare relaxed.6.Armrests do not interfere with access to keying, mousing, or writing surfaces.8You may need to adjust the height of your chair every day, depending upon the job task, and theshoes you are wearing (the higher the heels, the higher the chair will be raised). If the seat panheight is changed, the keyboard and monitor will need to be adjusted, as well.
WHEN SITTINGACTION GOAL #1: Adjust the seat pan height so thata. Your feet rest comfortably flat on the floor,or on a footrest.b. Your knees are slightly lower than your hips.IF YOU SEE THIS . . .TRY THIS . . .ORYour feet do not restcomfortably flat on the floor.Lower the chair until your feetrest comfortably flat on thefloor.IF YOU SEE THIS . . .TRY THIS . . .Your feet rest on the floor,but your knees are higherthan your hips.Raise the chair until yourhips are slightly higherthan your knees.Use a footrest.9
COMPUTER ERGONOMICS GUIDEACTION GOAL #2: Adjust the seat pan depthso that there is a 2– 4-inch gap between the backof your knees and the front edge of the chairwhen your back is against the chair.IF YOU SEE THIS . . .TRY THIS . . .There is more than 4 inches between the frontedge of the seat pan and the back of yourknees.Slide the seat out (forward) to make it deeper andprovide more support.ORUse a chair with a seat pan that has a 2- to 4-inchgap between the back of your knees and the frontedge of the chair when your back is against thechair.** Select a chair that fits and is comfortable. Be sure that the chair provides upper and lower backsupport. Ask for a demonstration of the adjustment features of the chair.10
WHEN SITTINGACTION GOAL #3: Adjust the height of the back ofthe chair so that the curve of the back of the chair fitsinto the deepest part of the curve in your lower back.IF YOU SEE THIS . . .TRY THIS . . .The curve in the chair back is toohigh or too low and does not fit intoyour lower back.Reach back to feel the curve in yourlower back. Then raise or lower thechair back until it fits into the curveof your lower backORUse another chair that can beadjusted to fit your lower back.** Select a chair that fits and is comfortable. Be sure that the chair provides upper and lower backsupport. Ask for a demonstration of the adjustment features of the chair.11
COMPUTER ERGONOMICS GUIDEACTION GOAL #4: Adjust the tilt of the back ofthe chair so that the back of the chair is upright ortilted back for comfort.IF YOU SEE THIS . . .TRY THIS . . .The chair back doesnot tilt back slightlyand rock or lock intoposition.Use another chair that tiltsback slightly and rocks orlocks into position.** Select a chair that fits and is comfortable. Be sure that the chair provides upper and lower backsupport. Ask for a demonstration of the adjustment features of the chair.12
WHEN SITTINGACTION GOAL #5: Adjust the armrests so thata: They are slightly below your elbows when yourshoulders are relaxed.b. Your arms hang comfortably at your sides.IF YOU SEE THIS . . .TRY THIS . . .Your shoulders are raisedwhen resting on the armrests.With shoulders relaxed, lower the armreststo just slightly below your elbows.IF YOU SEE THIS . . .TRY THIS . . .You reach down to rest onthe armrests.Raise the armrests to just slightlybelow your elbows when yourshoulders are relaxed.13
COMPUTER ERGONOMICS GUIDEACTION GOAL #5 ContinuedIF YOU SEE THIS . . .TRY THIS . . .The armrests cannot beadjusted to slightly below yourelbows when your shouldersare relaxed.Use another chair with adjustablearm rests*ORRemove the armrests* Select a chair that fits and is comfortable. Be sure that the chair provides upper and lowerback support. Ask for a demonstration of the adjustment features of the chair.14
WHEN SITTINGACTION GOAL #6: Adjust thearmrests so that they do not interferewith access to keying, mousing orwriting surfaces.IF YOU SEE THIS . . .TRY THIS . . .Armrests interfere with access to keying,mousing, or writing surfaces.Adjust the armrests to theirlowest position. In this positionthey cannot be used for resting.ORRemove the armrests.15
COMPUTER ERGONOMICS GUIDEWHEN KEYINGWhen the keyboard is at the right height7a. Your shoulders are relaxed, and your elbows are close to your body.7b. Your elbows are bent to 90 degrees, or slightly greater (inner angle).7c. The tops of the “home row” keys are at the same height as your elbows,or slightly below your elbows.7d. Your wrists are straight (not bent).Home rowKeys at elbow height“Neutral” keyboardKeys slightly below elbows“Negative” keyboard tiltWhen you center your fingers on “home row”, your fingers must reach the top, bottom, and sides of thekeyboard. The fingers and wrists do all the work and they quickly tire.Try this keying technique*Instead, transfer the workload from your hands to the larger muscles of your arms, elbows, andshoulders by using arm movements rather than just finger and wrist movements while keying.You will work more comfortably and you won’t tire as quickly.Source:* “Computing Without Pain With the MouseKeyDo System,” Norman J. Kahan, MD.In this section, reference is made to the keyboard platform. The keyboard platform is mounted beneath thework surface, and allows you to raise, lower, and tilt the keyboard. For computer operators, it is recommendedthat the keyboard platform is either flat (not tilted) or tilted downwards (negative tilt). It is not recommendedthat the keyboard is tilted upwards (positive tilt), as this forces you to bend your wrists back.Negative tiltFlat or neutral (not tilted)Positive tiltMany desktop computer users still use the standard, or traditional, keyboard. For a description ofalternative keyboards, go to /keyboard/#Keyboards.16
WHEN KEYINGACTION GOAL #7: Adjust the keyboard height so that:a. Your shoulders are relaxed, and yourelbows are close to your body.b. Your elbows are bent to 90 degrees, orslightly greater (inner angle).c. The tops of the home row keys are atthe same height as your elbows orslightly below your elbows(negative tilt).d. Your wrists are straight (not bent).IF YOU SEE THIS . . .Keyboard too highThe keyboard is aboveelbow height.TRY THIS . . .Raise or lower the keyboard platform or your chairuntil the tops of the home row keys are at the sameheight as your elbows or slightly below your elbowswhen your shoulders are relaxed. Use a footrest ifnecessary.Keyboard too lowThe keyboard is too lowand your wrists are bent.Tilt the back edge of your keyboard platform slightlydownward (“negative” tilt). You arms will tilt downward, andyour elbows will open to slightly more than 900. Don’t usethe legs beneath the keyboard.17
COMPUTER ERGONOMICS GUIDEACTION GOAL #7 ContinuedIF YOU SEE THIS . . .TRY THIS . . .Use the wrist rest only for shortperiods between keying. Forlonger periods, remove your handsfrom the keyboard and rest them inyour lap.ALSO CONSIDERThe keyboard is at your elbow height, but youlean on your wrists while keying.Keyboards that allow for greater adjustments toaccommodate a more relaxed neutral hand position18"Sit-Stand" work stations thatallow users to easily go from aseated to standing position
POSITIONING THE CURSORWHEN POSITIONING THE CURSORWITH A POINTING DEVICEPointing devices, such as the mouse and trackball, can cause computer-related injuries to theshoulders, neck, elbows, wrists, and hands. Common actions associated with such devices includereaching, gripping, pivoting at the wrist, finger clicking, and holding the button when “dragging” themouse. Those actions and static arm posture (“mouse arm”) may cause problems eventually.When a pointing device is used while keying, it is important that it is accessed without overreachingor using awkward postures. To accomplish this place the pointing device as close to the keyboard aspossible.When the pointing device is in the right position8. The pointing device is close to the keyboard.There are many improvement options for positioning the pointingdevice that are not covered in this section. Other comfortable positionsfor the pointing device that promote a flat (neutral) wrist can be used.When using a mouse, try this technique:* Drop your arm and hand as one onto the mouse, with yourupper arm hanging freely from your shoulder.Drape your hand over the mouse, with your palm on thecenter of the mouse and all your fingertips hanging overthe front and sides (avoid the temptation to grip the mouse with your fingers).Make small circular motions with the mouse by making arm movements from theshoulder.Click the mouse button with the mid-section of your finger rather than your fingertip.Source:* “Computing Without Pain With the MouseKeyDo System,” Norman J. Kahan, MD.Tips for mouse or trackball: Take your hand off the mouse or trackball when you are not using it, and rest your hand inyour lap. Make sure you have enough space on the work surface to move the cursor with the mouse inone sweeping movement, rather than having to pick up and reposition the mouse.19
COMPUTER ERGONOMICS GUIDEACTION GOAL #8: Place the pointing deviceso that it is close to the keyboard.IF YOU SEE THIS . . .The pointing device is a trackball that doesnot fit on the keyboard platform.TRY THIS . . .Use a keyboard that does not have a 10-key number padand place the trackball next to the keyboard.ORThere are many improvementoptions for positioning thepointing device that are notcovered in this section. Othercomfortable positions for thepointing device that promote aflat (neutral) wrist can be used.Replace the keyboard platform with an adjustable keyboard platform wide enough to fit the keyboard andthe trackball. Adjust the height and tilt of the platform so that the tops of the home row keys are at yourelbow height, or slightly below your elbows (negative tilt), when your shoulders are relaxed.20
POSITIONING THE CURSORACTION GOAL #8 ContinuedIF YOU SEE THIS.TRY THIS . . .The pointing device is a mouse ortrackball that does not fit on thekeyboard platform.Follow these steps:There are many improvementoptions for positioning thepointing device that are notcovered in this section. Othercomfortable positions for thepointing device that promote aflat (neutral wrist can be used).1. Remove the keyboard platform;2. Place the keyboard and pointing device on thework surface, with the mouse or trackball next tothe keyboard.3. Raise the chair until the tops of the home rowkeys are at the same height as your elbows, orslightly below your elbows, when your shouldersare relaxed. Use a footrest, if necessary.4. Adjust the height and distance of the monitor, ifnecessary.ORUse a keyboard with a built-in pointingdevice (touch pad or roller bar mouse).21
COMPUTER ERGONOMICS GUIDEORGANIZINGTHEWORK SPACE“Near” work spaceOverreaching is defined as reaching to such a distance that you leanforward or to the sides while fully extending your arm. Overreaching inany direction causes fatigue, reducing productivity and accuracy andincreasing the risk of injury. Reduce or eliminate overreaching byrearranging the work station.“Near” Work space ActivitiesFor activities performed frequently or repetitively, the work should beperformed within the “near” work space, with your elbows at your sides.Within this space, you can work comfortably without stretching orleaning. Working outside this space requires you to reach, bend, twist,and so forth. These activities lead to discomfort and fatigue and cancause injuries. By working within the “near” work space, you canmaximize efficiency and comfort.“Mid” Work space ActivitiesActivities performed occasionally can be performed in the “mid” workspace (an arm’s length away); however, this requires extension of yourarm. Activities performed beyond this mid-range involve leaning andreaching and should be performed rarely.If your work space is properly organized9a. Reaches performed frequently are within the “near” work space(your elbows remain at your sides).9b. Reaches performed occasionally are within the “near” or “mid”work space (no more than an arm’s length away).9c. You are not reaching across your body to work.22“Mid” work spaceAvoidoverreaching“Near”work space“Mid”work spaceAvoid reachingacross yourbody
ORGANIZING THE WORK SPACEACTION GOAL #9: Organize the work space sothat:a. Reaches performed frequently are within thenear work space (your elbows are at your sides).b. Reaches performed occasionally are within thenear or mid work space (no more than an arm’slength away).c. You are not reaching across your body to work.IF YOU SEE THIS . . .TRY THIS . . .“Mid” work space“Near” work spaceYou frequently lean tomake reaches more thanan arm’s length away.Remove unnecessary equipment and supplies from thework station;ANDRe-organize your work space by moving all necessaryequipment and supplies close, to no more than an arm’slength away, or to a location where you must get up andwalk to it.23
COMPUTER ERGONOMICS GUIDEACTION GOAL #9 ContinuedIF YOU SEE THIS . . .TRY THIS . . .You are using a keyboard platform andyou are keying, mousing, and writingsimultaneously, and you reach above andbehind your keyboard to get to thepointing device or the writing surface.Follow these steps:1. Remove the keyboard platform;2. Then place the keyboard, pointing device andwriting material directly on the work surface;3. Raise the chair until the tops of the home rowkeys are at the same height as your elbows, orslightly below your elbows when yourshoulders are relaxed. Use a footrest, ifnecessary.4. Adjust the height and distance of the monitor,if necessary.ORFollow these steps:1. Replace the keyboard platform with aheight- and tilt-adjustable platform that iswide enough for the keyboard andpointing device.2. Adjust the height and tilt of the keyboardplatform until the tops of the home rowkeys are the same height as your elbows,or slightly below your elbows(negative tilt) when your shoulders arerelaxed.24
ORGANIZING THE WORK SPACEACTION GOAL #9 ContinuedIF YOU SEE THIS . . .TRY THIS . . .You reach across your body to workbecause:Your work station does not matchyour dominant hand (handedness)Reverse the placement of the computerequipment so that non-keying tasks areperformed on your dominant side when you aresitting at your keyboard.IF YOU SEE THIS . . .TRY THIS . . .You reach across your body towork because:File drawers prevent you fromhaving knee clearance beneaththe work surface on yourdominant side.Reverse the placement of the filedrawers so that they are beneath thework surface on your non-dominantside.25
COMPUTER ERGONOMICS GUIDEWHEN VIEWING THE MONITORMonitor heightThe maximum height of your viewing range is established by your horizontal line of sight when youare comfortably
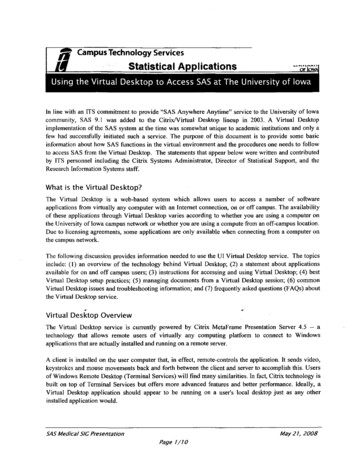
Easy Ergonomics for Desktop Computer Users was developed and prepared for publication by Cal/ . made to improve your work station by purchasing new or replacing existing furniture and . refer to the pages below for improvement options. If you continue to have pain or discomfort, let your
