Transcription
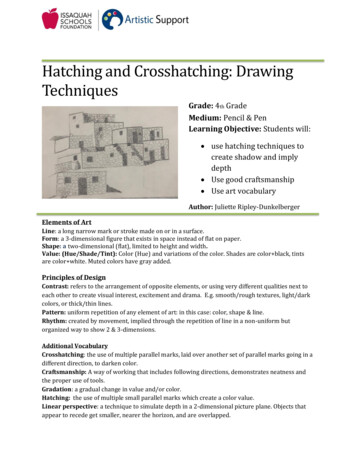
Hatching and Crosshatching: DrawingTechniquesGrade: 4th GradeMedium: Pencil & PenLearning Objective: Students will: use hatching techniques tocreate shadow and implydepth Use good craftsmanship Use art vocabularyAuthor: Juliette Ripley-DunkelbergerElements of ArtLine: a long narrow mark or stroke made on or in a surface.Form: a 3-dimensional figure that exists in space instead of flat on paper.Shape: a two-dimensional (flat), limited to height and width.Value: (Hue/Shade/Tint): Color (Hue) and variations of the color. Shades are color black, tintsare color white. Muted colors have gray added.Principles of DesignContrast: refers to the arrangement of opposite elements, or using very different qualities next toeach other to create visual interest, excitement and drama. E.g. smooth/rough textures, light/darkcolors, or thick/thin lines.Pattern: uniform repetition of any element of art: in this case: color, shape & line.Rhythm: created by movement, implied through the repetition of line in a non-uniform butorganized way to show 2 & 3-dimensions.Additional VocabularyCrosshatching: the use of multiple parallel marks, laid over another set of parallel marks going in adifferent direction, to darken color.Craftsmanship: A way of working that includes following directions, demonstrates neatness andthe proper use of tools.Gradation: a gradual change in value and/or color.Hatching: the use of multiple small parallel marks which create a color value.Linear perspective: a technique to simulate depth in a 2-dimensional picture plane. Objects thatappear to recede get smaller, nearer the horizon, and are overlapped.
Materials & Supplies Pencils,Class set rulers (optional but help lowconfidence drawers)Fine tipped permanent markersKneaded erasers Crosshatching value worksheetPueblo building image for drawing(can show on viewer)9” x 12” White drawing paperAdvanced Preparation Print crosshatching value worksheet for each student.Find images of Santorini stucco buildings, or pueblos for students to draw from.Context (History and/or Artists)Cross-hatching is a method of line drawing that shows shadows. Light is shown by the white of thepaper, while shadow is created by crossed lines. The closer together the lines, the darker value youwill create.Using the value scale below, see how the light end at left uses a simple pattern of parallel linesspaced widely and evenly apart to represent light. The dark end (right) layers crisscrossing lines torepresent shadow. The use of densely packed lines creates deep shadow and is how we show depthon a flat page.Reflection Point (Assessment of Learning ObjectivesStudents will: use hatching technique to create shadow and imply depth Use good craftsmanship Use art vocabulary2 Page
Discussion Points Write the definitions on the board, read them aloud and use those terms during the lesson.If you have one color to draw with, how do you make it look darker? (press harder, go overit a few more times, etc.)When you are drawing on a flat surface (height and width), how can you make somethinglook three dimensional (depth)?Light moves in a straight line, so it hits an object in different ways, depending on the object’ssurface. Parts of the surface that receive less light look darker with shadow. Look aroundthe room for proof of that theory. Look for the ‘cast shadow’ that is left on the ground orwall when light is blocked by an object.Instructions for Lesson1. View images of hatching and crosshatching used to create depth using the vocabulary wordsas you talk about them. Black and white comic strips are fun to use too.by Bettina Dodson2. Demonstrate hatching. Ask if anyone can think of other marks that would do this.(Hopefully you will get some ideas like stippling, crosshatching and contoured hatching.)3. Demonstrate each of the marks that they need to fill in their worksheet.4. Hand out worksheets and have students fill them in (5 – 8 minutes).5. Hand out drawing paper as they are working. Wait to hand out rulers.3 Page
6. Direct students’ attention to the image you have for them to draw from. Talk about the basiclines and shapes found in buildings.7. Point out areas with light, medium and dark values. Compare it to the shading they madewith cross-hatching.8. Demonstrate: find a building wall shape and draw it, then move on to the shape next to it.Be observant using angles and perspective as a guide for your lines.9. Remind everyone that the goal isn’t to re-create the photos perfectly, it is to use hatching /crosshatching to create shadow and imply depth. The photos show us where shadows are.10. Demonstrate: in the photo find a shadow, maybe door, window or cast shadow and outlineits shape with your finger. Now return to your drawing and hatch that same shadow in thesame place. Talk about the process as you work, making sure everyone is watching.11. Students can choose which type of mark to use to create their values. They need to remainconsistent throughout unless they want to call attention to a specific item.12. Students can choose an area of the photo, instead of the whole photo, to draw lightly withtheir pencil.13. Hand out rulers to those who want them. When they finish pencil drawing, they can go overthe marks with their fine tipped marker.14. As they draw, keep track of the time. About 15 minutes before the end of class, announcethat everyone needs to finish what they are working on and switch to marker.15. As you circulate, you can talk about what you see being drawn by who. Keep it positive andshare successes. Talk about their craftsmanship, difficult details they’ve added, use artvocabulary again and again.References and AttributionsLesson written by Juliette Ripley-Dunkelberger. Alexander, K. (2003). Drawing & painting activities:using masterworks as inspiration. Glenview, IL: Crystal Productions.4 Page
Notes for Educators21st Century Thinking SkillsThinking flexibly, persisting, questioning, creating, innovating, listening with empathy, takingresponsible risks, observing, making connections, visualizing, sequencing, predicting,comparing/contrasting, determining main idea, finding evidence, problem solving, cause and effect,determining point of view, decision making.WA State Learning Standards(VA:Cr2.1.4) a. Explore and invent art-making techniques and approaches.(VA:Cr2.2.4) a. When making works of art, utilize and care for materials, tools, and equipment in amanner that prevents danger to oneself and others.(VA:Cr2.3.4) a. Document, describe, and represent regional constructed environments.(VA:Cr3.1.4) a. Revise artwork in progress on the basis of insights gained through peer discussion.This happens if you share out about students’ choices of craftsmanship during the lesson.(VA:Re7.2.4) a. Analyze components in visual imagery that convey messages. This happens whenyou explain how to create the illusion of depth in a 2-dimensional picture plane.(VA:Re8.1.4) a. Interpret art by referring to contextual information and analyzing relevant subjectmatter, characteristics of form, and use of media.(VA:Re9.1.4) a. Apply one set of criteria to evaluate more than one work of art.(VA:Cn11.1.4) a. Through observation, infer information about time, place, and culture in which awork of art was created.5 Page
Value Scales using CrosshatchingLightestDarkestParallel LinesContour LinesCrosshatching LinesTick marksStipplingCreate your own6 Page
Hatching and Crosshatching: Drawing Techniques Grade: 4 th Grade Medium: Pencil & Pen Learning Objective: Students will: use hatching techniques to create shadow and imply depth Use good craftsmanship Use art vocabulary Author: Juliette Ripley-Dunkelberger Elements of Art Li