Transcription
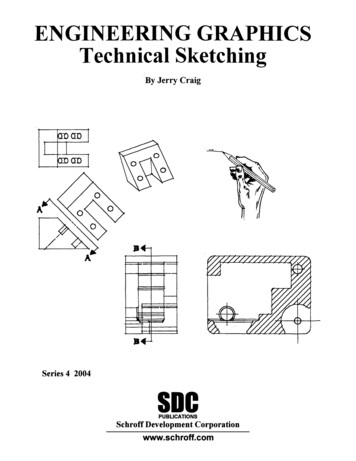
Engineering GraphicsORTHOGRAPHIC ople who work with drawings develop the ability to look at lines on paper or on a computer screen and"see" the shapes of the objects the lines represent. Visualization is an essential skill when working with technicalinformation. Architects, engineers, machinists, carpenters, welders, installers -- many types of workers createor use drawings. Technical drawings and sketches provide a clear, concise, exact method of representingthree-dimensional information. Starting at the Industrial Revolution the process and theory of technical drawinghas evolved into a universal graphical language.CopyrightedMaterialHow do people who work with drawings think about the lines they see? What is the mental process that allowsskilled workers to quickly interpret abstract lines, curves and shapes to form an exact mental image of theobjects represented? Part of the answer is that these people rapidly recognize and analyze basic types of surfaces.Once individual surfaces are recognized, then the interfaces -- common edges and intersections -- between thesurfaces may be visualized. With practice this process becomes very rapid.In the next four chapters much emphasis will be placed on recognizing types of plane and curved surfaces inspace. Only three types of plane (flat) surfaces exist. Many types of curved surfaces -- cylinders, cones, spheres,torus, etc. -- exist. By recognizing each type of surface, rules may be applied to the appearance of the surfaceon drawings. Visualizing objects is a process of assembling the individual surfaces into shapes then into objects.Portions may be solved by following rules before the actual answer is apparent. Objects may be solved in muchthe same way a mathematical expression is solved.CopyrightedMaterialLearning to visualize objects is an individual skill. Making clay models, computer models or LEGO (tm) modelsis an excellent step. Seeing the answer from someone else destroys all chance to learn. Problems at the end ofeach chapter are designed to develop visualization skills. Work on each problem for short time. If the answeris not apparent, come back to the problem later.D-1
ORTHOGRAPHIC PROJECTIONEngineering GraphicsPictorial vs. Orthographic ViewsCopyrightedMaterialPictorial drawings give quick three-dimensionalviews of objects. They are often used for advertising, repair manuals, and general information.Shapes are easier to visualize and intersections ofsurfaces can be seen.Pictorials distort the lengths of lines and anglesat corners. These drawings cannot be used forproduction.This drawing is an isometric pictorial.CopyrightedMaterialProduction (detail) drawings describe the shape ofthe object by looking directly at the faces of theobject. In this way the true length lines and trueangles at corners may be seen. Multiple views areneeded. These views are two-dimensional. Viewsare obtained by looking in the direction of thearrows shown in the isometric above.Multiple views are needed. FRONT, TOP andRIGHT SIDE views are used here.CopyrightedMaterialDimensions and notes give size and manufacturinginstructions. Dimensions are placed where theshape shows best.Engineers, architects and designers "see" objects inpictorial mental images. They must convert pictorial ideas into orthographic form for production.Workers and others must convert the orthographicdrawings back into pictorial images in order toanalyze the shapes and use the information. Thetransition from pictorial - to orthographic - to pictorial is a constant process.CopyrightedMaterialBy far, the most difficult step is converting orthographic drawings to pictorials. This process requires looking at two-dimensional images to getthree-dimensional shapes.Computer modeling is simplifying this process.D-2
Engineering GraphicsORTHOGRAPHIC PROJECTIONMultiple View DrawingsCopyrightedMaterialOrthographic views may be obtained by placing an object inside a "glass box". Faces of thebox are at right angles. Surfaces on the objectare aligned parallel to the faces of the box whenpossible. Views are drawn by projecting linesand surfaces to each face of the box.Orthographic views are two-dimensional.In the front view there is no way to show thedifference in level (depth) between the surfaces.CopyrightedMaterialProjection planes of the glass box are perpendicular to each other. Three regular planes areshown. Left side, bottom and back planes mayalso be used.These planes are also used by computer graphics systems.CopyrightedMaterialThe line of sight for each view is perpendicularto each projection plane. Looking perpendicularto a plane gives the true size of the plane in aparticular view -- the other projection planesappear in edge-view.Surface 1,2,3,4 is parallel to the front projectionplane. It will appear as a surface (true size) inthe front view.In the top view 1,2,3,4 appears as edge-ofsurface A-B.CopyrightedMaterialIn the side view 1,2,3,4 appears as edge-of-surface C-D."Reading" orthographic views involves integrating this type of information about everysurface on the object to form a mental image.D-3
ORTHOGRAPHIC PROJECTIONEngineering GraphicsSix Regular Orthographic ViewsCopyrightedMaterialSix regular views of an object may be projected.Rule: Each feature of an object must beshown as visible lines in at least one view.Drafters must decide which views to draw.Sometimes additional (auxiliary) views areneeded to clarify shapes and remove ambiguities. Dimensions, for example, must beplaced on the "true shape" views. Partialviews may be drawn.CopyrightedMaterialNotice the hinge locations when unfoldingthe plastic box. Observe the alignment of theviews: front-top-bottom, and front-rightleft-back. Views must be placed on the pageor computer screen in this form.This graphic shows the AMERICANSTANDARD ARRANGEMENT OFVIEWS. Third Angle ProjectionViews must be sketched or drawn according to this alignment.CopyrightedMaterialPeople who work with drawings expect to find the views of objects in thisform.Front, top and bottom views must bealigned vertically. All corners and features must project vertically.Front, right side, left side and backviews must be aligned horizontally.Features and corners must project horizontally.CopyrightedMaterialMetric Drawings - First Angle ProjectionDrawings made according to metric standards may place the views in a different form on the page.See page D- 20 for an explanation.D-4
Engineering GraphicsORTHOGRAPHIC PROJECTIONOrthographic Views are Two-DimensionalCopyrightedMaterialSurfaces on an object are at different levels.A is more to the front, then B, then CD is more to the top, then EF is more to the right, G is more to the left.If a line separates two surfaces, there must bea difference in level between the surfaces.CopyrightedMaterialWhen surfaces A, B and C are projected to thefront projection plane, they appear next to eachother. Depth is lost. The person reading thedrawing must look at an adjacent (top or side)view to see which surface is in front.CopyrightedMaterialWhen F and G are projected to the side view, theyappear next to each other. Width is lost. Thesurfaces are at different levels. Look at the frontor top views to see which surface is more to theright or left.CopyrightedMaterialD and E appear next to each other in the top view.Height is lost. Look at the front or side views tosee which surface is higher and which surface isset down lower.D-5
ORTHOGRAPHIC PROJECTIONEngineering GraphicsCommon Dimensions Between ViewsCopyrightedMaterialMajor dimensions for objects are commonly namedHEIGHT, WIDTH AND DEPTH. Orthographicviews are two-dimensional so each view can showonly two of the three dimensions.In any two adjacent views, all three dimensionsmay be seen.WIDTH is the common dimension between thefront, top (and bottom) views.Top view shows width and depthFront view shows width and height.CopyrightedMaterialWidth is projected vertically between the views.HEIGHT is the common dimension between thefront, right side, (left side and back) views.Front view shows height and widthSide view shows height and depth.Height is projected horizontally betweenviews.theCopyrightedMaterialDEPTH is the common dimension between the topand side views. While DEPTH is measured in ahorizontal direction in space, it must be measured ina vertical direction in the top view.Side view shows depth and heightTop view shows depth and width.CopyrightedMaterialDepth is measured horizontally in the side viewand vertically in the top view.D-6
Engineering GraphicsORTHOGRAPHIC PROJECTIONTransferring the DEPTH DimensionCopyrightedMaterialSeveral methods of transferring depth are shown. Dividers are the quickest and most accurate tool. Use thepaper method for plain paper sketches.CopyrightedMaterialCopyrightedMaterialA miter line may be used to geometrically transferdepth from the side-to-top and the top-to-side views.This technique is used on drawings created with Tsquares or drafting machines. This technique may beused to transfer depth measurements on computerdrawings.CopyrightedMaterialThe miter line technique may be used on two dimensional CAD drawings.D-7On grid papers,count the "units" totransfer depth.
ORTHOGRAPHIC PROJECTIONEngineering s are shown in standard arrangement. Notice the common dimensions between the views. Also, note theline of sight between the views. For example, the arrow shows the direction to look at the front view to get theside view. And, the direction to look at the side view to get the front view.CopyrightedMaterialActually holding an object and turning it asshown will help verify the views and theprojection theory on previous examples. Besure you turn the object correctly to draweach view. At first people tend to draw someviews backward!Clay ModelsCarving clay models of objects is the mosteffective way to experience the transitionfrom real objects to paper drawings. Creatingmodels from drawings will strongly reinforcethe transition from abstract lines on paper toreal objects.CopyrightedMaterialStyrofoam packing blocks also make goodmodeling material.D-8
Engineering GraphicsORTHOGRAPHIC PROJECTIONVisualizing ObjectsCopyrightedMaterialCarving models (or just thinking through the steps) is an effective way to visualize objects. Starting with a solid block, observe the outlines of the top, front and side views. Cut awaymaterial from the object to leave the profiles shown.No material is left in the open areas. This means that the objectmust be cut all the way across: top to bottom, front to back, rightto left respectively.CopyrightedMaterialFrom the front view, cut away the block as shown. Thiscut creates surfaces A and B.line 1,2 is added to the top viewline 9,10 is added to the side view.CopyrightedMaterialIn the top view, remove the block shown. This createssurface C.Hidden line 1,2 is added to the front view.Lines 3,6 and 5,4 are added to the side view.A similar process is used in computer solids modeling."Tools" are shaped then mathematically subtractedfrom an object.CopyrightedMaterialCut the block from the top of the object. This completesthe shape outlined in the first picture.Surface D is createdline 1,2 is added to the front viewline 3,4 and 5,6 are added to the top view.D-9
ORTHOGRAPHIC PROJECTIONEngineering GraphicsBuilding Objects by Joining SolidsCopyrightedMaterialObjects may be visualized by imagining the basic shapeswhich were joined.Basic shapes include:conesrectangular rialPieces include cylinders and plates in this example.CopyrightedMaterialObjects are often combinations of added shapes minus subtractedshapes.These concepts are used in computer solids modeling. Librariesof shapes may be provided which generate geometric solids. Thesolids may then be added together (union) or subtracted away.CopyrightedMaterialTwo rectangular solids are first joined together, then a cylinder issubtracted to create the final shape.D - 10
Engineering GraphicsORTHOGRAPHIC PROJECTIONLinetypes Used on DrawingsCopyrightedMaterialA number of special linetypes are used on drawings. The most common line codes are shown:Object lines are solid lines which represent thevisible edges of objects.Hidden lines represent features which cannotbe seen. These lines must be shown to givecomplete information about the shape of the object. Hidden lines are short dashes- 1/8" or so.Center lines define the center geometry ofholes or symmetry on an object. They are longshort dashed lines. 3/4" long and 1/8" short segments.CopyrightedMaterialExamples of preferred hidden and center linerepresentations are shown.Center lines should intersect at the centers ofcircles.Preferred hidden line intersections are shown.CopyrightedMaterialCAD software does not always support thesepreferences.Visible edge lines are most important. Theyhave precedence over other linetypes.Hidden lines are second in importance. Oftenthere are hidden lines behind visible lines on adrawing. The hidden lines cannot be shownbecause the visible lines are most important.This makes reading a drawing a bit harder.CopyrightedMaterialCenter lines have no visibility. They are leastin importance.D - 11
ORTHOGRAPHIC PROJECTIONEngineering GraphicsCreating Multi-view drawings from PictorialsCopyrightedMaterialA pictorial shows the shape of the object for easier visualization.Identify the surfaces by placing a letter in each bounded area.Sketch the top, front and side views by looking directly at eachface.A,B and C are seen in the top view. They are at different levelsto each other. (Top to bottom).J, K and L are seen in the front view. J and K are at differentlevels. L and K are at different levels. J and L are at the samelevel. (Front to back).R, S, T, and U are seen in the side view. They are all atdifferent levels. (right to left). R extends down behind U creating the hidden line in the side view.CopyrightedMaterialOrthographic front and top views must align vertically.Front and side views must align horizontally.CopyrightedMaterialThis object has normal, inclined, oblique and cylindrical surfaces.N1 and O are seen in the front.N, C (circular hole), I and O are seen in the top.N2, I and O are seen in the side view.Note the location of each surface in each view:FRONT:N, I and N2 appear as edge-of surface.N1 is a true view, O is foreshortened.TOP:N1, N2 and C (cylinder) appear as edge-of-surface.O and I are foreshortened.SIDE:N and N1 appear as an edge-of-surfaceO and I are foreshortened."C" Cylindrical surface is a plotted curve.CopyrightedMaterialD - 12
Engineering GraphicsORTHOGRAPHIC PROJECTIONCreating Pictorial Views from Orthographic ViewsCopyrightedMaterialFront, top and side views of an object are given.These views are complete with no missing lines.Label surfaces by placing a letter (neatly!) ineach surface. Labeling surfaces is important toassure that all surfaces are accounted for.Sketch a box to enclose the pictorial:11 units width (upward to left)8 units height (vertical)8 units depth (upward to right).CopyrightedMaterialSketch the surfaces on the outer faces of theisometric box first.Surface A is seen from the front view.Sketch surface A on the front face of the isometricbox. Use the dimensions from the orthographicviews.CopyrightedMaterialSurface B is seen in the right side view.Sketch surface B on the right side face of thebox. Surface A and surface B share an edge.CopyrightedMaterialSketching the surfaces on the faces of theisometric box helps locate corners which willbe needed for other surfaces later.D - 13
ORTHOGRAPHIC PROJECTIONEngineering GraphicsSketching Isometric PictorialsCopyrightedMaterialSurface C is seen from the top view.Sketch C on the top plane of the isometric box.Surface E and surface C share an edge.CopyrightedMaterialSurface D shares a horizontal edge with surface A.D is parallel to C and two units below.Sketch D on the pictorial starting at the top edgeof A and working back 5 units.CopyrightedMaterialSurface E is parallel to surface B and 6 units to theleft of B. E shares a vertical edge with A.Sketch E on the pictorial, starting at A and extending upward to the right 5 units.CopyrightedMaterialD - 14
Engineering GraphicsORTHOGRAPHIC PROJECTIONIsometric PictorialCopyrightedMaterialSurface F is seen from the top view. It is 3 unitsup from the bottom face. F shares an edge withA also.Starting from A sketch F upward to the right 5units deep and 6 units wide.CopyrightedMaterialSurface G is seen from the front view. It sharesedges with D, E, F, b and C.Sketch the closed shape of surface G on thepictorial. This completes the view.Hidden lines are usually not shown on pictorial views.CopyrightedMaterialNormal Surface PictorialLabel the surfaces on the object.CopyrightedMaterialSketch (or draw) isometric box.Modify box per shape of top view.Locate surface A, B and C on the faces of thebox.Sketch interior surfaces from common edges.D - 15
ORTHOGRAPHIC PROJECTIONEngineering GraphicsInclined Surfaces on PictorialsCopyrightedMaterialInclined surfaces may be plotted by locating theendpoints on the inclined edges on the isometricaxes. Sketch the angled lines by connecting theendpoints.Measurements on Isometrics can only be madealong the isometric axes.upward to the left (width)upward to the right (depth)vertical (height).CopyrightedMaterialAngles must be converted to coordinate measurements. Calculate (or measure) distances X and Yfrom the 60 degree angles. Use the distances X andY along the isometric axes to locate point O on thepictorial.Angular dimensions must be converted to coordinate distances.CopyrightedMaterialMeasure isometric distances A and B from theorthographic view and transfer upward to the left(width) on the isometric view.CopyrightedMaterialMeasure distances C and D from the orthographicview and transfer vertically (height) on the isometric view.D - 16
Engineering GraphicsORTHOGRAPHIC PROJECTIONOblique Edges and Surfaces on PictorialsCopyrightedMaterialOblique edge 8 - 4 is the line of intersectionbetween two inclined surfaces.Sketch each inclined surface on the faces ofthe isometric box to locate the line of intersection.Locate edge 6 - 7 and sketch the entire surfaceusing parallel edges.Locate edge 2 - 3 and sketch the entire surfaceusing parallel edges.CopyrightedMaterialIntersection line 4, 8 can be located from thecommon point between the two constructionsurfaces.Locate oblique surfaces by fixing points on theedges of the isometric box.extend 1, 2 to locate A on the top-front edgeplot 4 on the front-bottom edgeplot point 5 on the side-bottom edgelocate point 2 on the top-side-back edge.CopyrightedMaterialSketch parallel lines to locate interior points.Locate 1 on A - 2Locate 5 on A - 45, 6 is parallel to 3, 4 and 2, A1, 6 is parallel to 4, A. These lines locate point6.CopyrightedMaterialD - 17
ORTHOGRAPHIC PROJECTIONEngineering GraphicsCircular Edges and Cylinders in Pictorial ViewsCopyrightedMaterialCircles show as ellipses in pictorial views. Threeorientations are possible.circle in the top face - fig. 1circle in the front face - fig. 3circle in the side face - fig. 2"Four center" ellipses may be used for correctappearance in isometric pictorials.Four construction lines, even on sketches, areneeded to locate the centers for arcs which approximate true ellipses. Approximate ellipses are usuallyused on isometrics.CopyrightedMaterial4 center ellipsesSketch rhombus 1,2,3,4 on the pictorial.(Use correct radius for each ellipse).Fig 1:Locate mid-point for each side A,B,C,D.Sketch line from obtuse angle to opposite midpoint. (2 lines).Fig 2:Sketch a small arc at corner 1 and 3 using intersection of 2-A : 4-B and 2-D : 4-C.Fig 3:Sketch long arcs using 4 and 2 as centers.CopyrightedMaterialSimilar constructions for top or side ellipses areshown.Four center ellipses may be used for freehandsketches or for drawings using either a compass ora computer.Sketch an ellipse at each point along the cylinderwhere an intersection occurs. This will insure anaccurate looking picture.CopyrightedMaterialSketch a new rhombus and new ellipse for eachdiameter circle in the pictorial.D - 18
Engineering GraphicsORTHOGRAPHIC PROJECTIONCircles and Curves in PictorialsCopyrightedMaterialCorrect directions for ellipses in each face areshown.Center lines follow the isometric axis direction foreach face.Correct ellipse orientation and centerline direction is essential to produce accurate pictorialviews.CopyrightedMaterialOther curves in pictorial views may require anumber of points. Transfer X and Y distancesfrom the orthographic view using constructionlines 1 through 9 as shown.Use parallel line constructions to locate points.Sketch a smooth curve through the points.CopyrightedMaterialAn irregular curve may be used on drawings todraw a smooth curve through the points. SomeCAD software provides polyline constructionswith curve-fitting to draw smooth curves.CopyrightedMaterialD - 19
ORTHOGRAPHIC PROJECTIONEngineering GraphicsThird Angle vs. First Angle projectionCopyrightedMaterialDrawings in the United States and a few othercountries use 3rd angle projection. An example isshown to the AngleObject placed in3rd ons on objects may be in inchesor millimeters.When the reference planes are opened the views areplaced on the paper as shown. This is the AmericanStandard arrangement of views.Metric drawings made according to ISO standardsare created using the First Angle.CopyrightedMaterialWhen the views are opened and placed on a flat sheet,the same Front, Top, Side views are placed as shown.Note where the reference planes are "hinged" to seewhy the views are placed on the page this way.CopyrightedMaterialMetric ISO standard arrangement of views.Many drawings produced by other countries followthis view placement.D - 20
Engineering GraphicsORTHOGRAPHIC pyrightedMaterialCopyrightedMaterialD - 21
ORTHOGRAPHIC PROJECTIONEngineering rightedMaterialCopyrightedMaterialD - 22
Engineering GraphicsORTHOGRAPHIC pyrightedMaterialCopyrightedMaterialD - 23
ORTHOGRAPHIC PROJECTIONEngineering rightedMaterialCopyrightedMaterialD - 24
Engineering GraphicsORTHOGRAPHIC pyrightedMaterialCopyrightedMaterialD - 25
ORTHOGRAPHIC PROJECTIONEngineering rightedMaterialCopyrightedMaterialD - 26
Technical drawings and sketches provide a clear, concise, exact method of representing three-dimensional information. Starting at the Industrial Revolution the process and theory of technical drawing has evolved into a universal graphical language. How do people who work with drawings think

![Engineering Graphics Essentials [4th Edition]](/img/13/978-1-58503-610-3-1.jpg)
