Transcription
HollyCharcoal pencil on drawing paper12 9 (30cm 23cm)
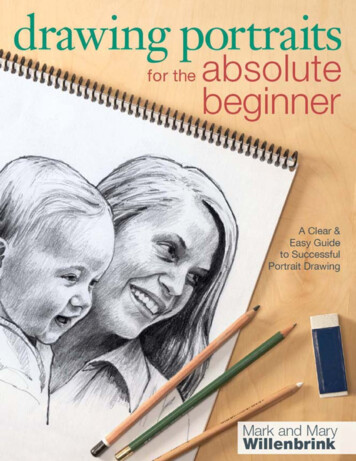
drawing portraitsabsolute beginnerfor theA Clear & Easy Guide toSuccessful Portrait DrawingMark and MaryWillenbrink
ContentsIntroductionMaterialsWhat You NeedPencilsPaperErasersAdditional ToolsSetupChapter 1Techniques and PrinciplesStructure Values DrawingPencil Grips and StrokesDifferent ApproachesCombining ApproachesUnderstanding ValuesLight EffectsLighting the SubjectChapter 2ProportionsMeasuringMale Proportions, Front ViewMale Proportions, Side ViewMale Proportions,Three-Quarter ViewFemale Proportions
Elderly ProportionsChild ProportionsFacial ExpressionsChapter 3FeaturesEyesNosesMouthsEarsHairHandsCostumes and AccessoriesHatsEyeglassesDiversityChapter 4Let’s Draw Portraits!WomanMan With BeardMale Contour DrawingWoman on Toned PaperBabyCostumed WomanMan in ProfileMother and BabyClose-up PortraitMale Teen With HatLittle Girl in PastelSelf-Portrait in Profile
Toddler With Toy PhoneFinishing Your PortraitsConclusionGlossaryAbout the Authors
IntroductionWe hope this book will have the same effect on you that it had on us—we fell in lovewith people. Drawing portraits offers the artist a unique opportunity to observe people.Every person is unique with their own special features and personality. Portrait artcaptures the personality of the subject through the eyes of the artist.With simple tools and basic principles, this book will help you to develop yourdrawing skills. We will use some fun tricks and techniques to help you learn how todraw portraits, even if you are an absolute beginner. Everyone is an artist, includingyou, so get ready to have fun!B.P.Graphite on drawing paper11 19 (28cm 48cm)What You Need
Paper9 12 (23cm 30cm) fine-tooth drawing paper9 12 (23cm 30cm) medium-tooth drawing paper9 12 (23cm 30cm) light gray and medium gray medium-tooth drawing paper9 12 (23cm 30cm) sketch paperPencils2B, 4B, 6B and 8B graphite pencils2B charcoal pencilblack pastel pencillight gray pastel pencil (Stabilo CarbOthello 1400/110 )medium gray pastel pencil (Stabilo CarbOthello 1400/724)white pastel pencilOther Suppliesblending stumpdrawing boardfacial tissuehole punchkneaded erasermirrorpencil sharpenerrulerscissorsslip sheetwhite vinyl eraserOptional Suppliesdivider or sewing gaugelightboxpencil extenderspray fixative
transfer paper
PencilsThere are many different types of pencils. Perhaps the most common drawing pencil hasa core of graphite, carbon or charcoal encased in wood. Though pencils are not madefrom lead, the core is commonly referred to as lead.
Graphite, Carbon and CharcoalGraphite goes down smooth, but never gets truly black. If you want a really black color,use a carbon or charcoal pencil, but they can smear easily.Woodless graphite pencils are made of a cylinder of graphite coated with lacquer.These pencils can make wide or thin strokes but can break in two if they are not handledwith care. Graphite and charcoal sticks have no outer casing. Use the sides to makebroad strokes, or use the ends for narrower strokes.
Colored PencilsStandard colored pencils can be waxy and hard to erase. Erasable and pastel chalkcolored pencils offer similar results but with more versatility than standard coloredpencils.
Mechanical PencilsMechanical pencils are an alternative to traditional wood pencils. Though convenient,most mechanical pencils can only produce very thin strokes. Lead holders aremechanical pencils that grip a single piece of lead at a time. The graphite is about inch (2mm) in diameter, wider than other mechanical pencil leads.Pencil ChoicesSome of the different types of pencils and drawing tools available are standard lead encased in wood, woodless,graphite and charcoal sticks, colored and mechanical pencils.Lead HoldersThough characteristically similar to a wood pencil, the lead in a lead holder is prone to breaking if excessive pressure isapplied to the tip.Extended UseWood pencils that are too short to hold can be made useful with the help of a pencil extender.The Hard (and Soft) RealityThe rating of the hardness of pencil lead is usually stamped on the pencil. H leads are hard compared to B leads,which are soft. F and HB leads are in between. Hard leads can’t make rich darks like the soft leads; however, theyhold a sharp point longer than soft leads.
Keeping Your Pencil SharpTo keep a sharp point on your pencil, you need to sharpen your pencil from time to time.Pencils can be sharpened with a pencil sharpener or by hand using a craft knife andsandpaper pad. Some artists choose to sharpen pencils by hand to better control theshape and amount of exposed lead.Lead It BeA common misnomer is to call the core of pencils lead. Pencil cores are made ofdifferent materials such as graphite, carbon or charcoal, but not lead.1Trim the Wood(Note: These instructions are for right-handed people. If you are left-handed, reverse thehand order.) With the pencil point directed outward, hold the pencil with your left hand,the craft knife in your right hand. Push your left thumb against your right thumb to createleverage so the blade cuts into the wood. Roll the pencil in your hand and repeat so thewood is trimmed and the lead core is exposed.
2Sand the LeadDrag the lead of the pencil back and forth over the sandpaper pad to sharpen the point.Pencil SharpenersMany different types of pencil sharpeners offer a quick and easy way to sharpen pencils; the small types areespecially good for travel.Sharpening Lead in a Lead HolderThe lead in a lead holder can be sharpened using a rotary lead pointer. Simply put the lead holder with lead into thehole in the top and spin the top to sharpen the point.
PaperPaper for sketching and drawing varies in weight, size, surface texture, content andcolor.
WeightSketch paper usually has a paper weight of 50 to 70 lbs. (105gsm to 150gsm),commonly thinner than drawing paper, which usually weighs 90 lbs. (190gsm) or more.The heavier weight paper is intended for finished drawings and will withstand heavypencil pressure and erasing better than thinner papers.
SizeSmall pads are handy and portable for quick sketches. Bigger pads can also be used forquick sketches or finished drawings.
Surface TextureSurface texture, or tooth, may vary according to individual paper. The tooth of a paperidentifies the roughness or smoothness of the paper and can be decided upon by the typeof pencil used and desired results. Paper with a rough surface works well with softpencils such as charcoal, while smooth paper lends itself to graphite pencils for moredetailed results.
ContentSketching and drawing papers are made from wood pulp, cotton or a combination of thetwo. Cheaper paper may use wood pulp, which has an acid content, causing the paper toyellow over time. With this in mind, for finished drawings it’s best to use acid-freepaper.
ColorYou can use colored drawing paper for different effects. On neutral-colored paper, thedrawing already has a middle value, so you can add both darks and lights instead of justdarks. Colored drawing paper is available in individual sheets.Sketching and Drawing PadsPaper pads can be used as is, or you can remove individual sheets for use on a drawing board.Copier PaperIf you have a fear of wasting a good piece of paper, try sketching on less expensive copier paper. Though this type ofpaper may not hold up over time, it may seem less intimidating for quick, loose observational sketches.
Drawing BoardsA drawing board placed behind a sheet of drawing paper provides a smooth, hard surface to control the amount ofpressure applied with the pencil. Drawing boards come in different sizes and are made of Masonite or lightweightwood.
ErasersTo lift pencil lines you may use an eraser. Kneaded erasers and white vinyl eraserswork well with drawing; however, erasers are best used sparingly because they maydistort the surface of the paper or smear the drawing.Soft and putty-like, a kneaded eraser is very gentle to the paper’s surface. To use,first press the eraser to the paper’s surface and try lifting the marks. If this isn’t enough,try rubbing the kneaded eraser against the paper surface going in just one direction. Ifthis still isn’t enough, switch to the white vinyl eraser.Use a white vinyl eraser to remove hard-to-erase pencil lines. Vinyl erasers are easyto use and will not stain the paper.
Erasing ShieldAn erasing shield allows for more controlled erasing by isolating the area being erased.Hold the shield over the area you want to keep untouched while erasing the undesiredareas through the holes or along the edges of the shield.Eraser “Tips”Avoid using the eraser at the end of your pencil because it may smear pencil lines andstain the paper.Kneaded and White Vinyl ErasersThese erasers are commonly used when drawing.
Erasing ShieldAn erasing shield is a thin sheet of metal used for more controlled erasing.
Additional ToolsIn addition to the basic supplies, other tools will help make your drawing experienceeasier and more enjoyable.
Proportional DevicesDividers and sewing gauges can be used to measure proportions. A divider can be usedwith photos, and a sewing gauge can be used with both photos or drawings from life.See chapter 2 for more instruction.
MirrorA small handheld mirror is useful for observing your own facial features for details andexpression.
LightboxArtists use a lightbox to trace a structural sketch onto drawing paper. With the light frombehind, tape the drawing paper over the structural sketch and trace the image onto thedrawing paper. Or use a window instead of a lightbox.
Facial Tissue and Blending StumpsThere may be times when using soft lead pencils that you want to blend the line workfor a soft effect. Facial tissue works for large regions. Blending stumps, made of tightlyrolled up soft paper, work for detailed blending.These items can blend or soften the lines of a drawing.
Transfer PaperTransfer paper is another option for applying a structural sketch onto drawing paper. Tomake transfer paper, also called graphite paper, cover one side of a sheet ofheavyweight tracing paper with soft graphite from a pencil or stick. Wipe a cotton ballslightly dampened with rubbing alcohol across the surface of the tracing paper to bindthe graphite to the paper. When dry, place this sheet of paper graphite side down on topof a sheet of drawing paper and under the structural sketch. Using a hard lead pencil, goover the pencil lines to transfer the structural sketch onto the drawing paper.
FixativeUse fixative to prevent artwork from smearing. This is especially useful for carbon orcharcoal drawings, which tend to be more powdery than graphite. Use properventilation when applying fixative.Proportioning DevicesDividers and sewing gauges work well as proportioning devices.Using a MirrorUse a small mirror to observe your own facial features.Using a LightboxUse a lightbox for tracing structural sketches onto drawing paper.
Transferring an ImageTransfer structural sketches onto drawing paper with transfer paper.Applying FixativeSpray fixative applied to drawings prevents smearing.Facial Tissue and Blending StumpsThese items can blend the lines of a drawing.
SetupHere are some tips for setting up your work station, whether you choose to draw fromphotos or from life.
Drawing From PhotographsDrawing from photographs allows you to study the subject in a two-dimensional form.In some ways, it may be easier to draw from photos because the subject is flat andunchanging. However, the life and personality of the subject are more likely to becaptured by drawing from a live model.
Drawing From LifeDrawing from a live model offers you the experience of capturing the personality of themodel. However, not everyone will sit still for a prolonged period of time to have theirportraits drawn. For this reason, you may want to keep a camera on hand to photographthe person and then complete the drawing from photos.
Be Intentional About Lighting SubjectsAn adjustable desk lamp or photography lamp can control the lighting of the subject tohelp you create interesting results.Some artists prefer to draw portraits while standing, using an easel to prop thedrawing board and paper. By standing, the artist can experience more freedom ofmovement.Drawing From PhotographsAmong the obvious supplies of pencils, pencil sharpener, erasers, drawing paper and drawing board, also included arethe reference photo, divider and slip sheet to rest your hand without smearing pencil lines.
Setup for Drawing From a Live ModelChoose someone who is willing to sit as long as needed, or photograph the person in process to compete the drawingfrom photographs.
1 Techniques andPrinciplesAs you sketch, you will be studying different aspects of your subject, capturing yourobservations through your sketches. A drawing is the culmination of the experience yougain as you study your subject by sketching.Sketching and drawing can be thought of as two different activities. A sketch is astudy or a work in progress. The process of sketching helps you to understand thestructure and lights and darks of a subject. Drawing is the activity of producing afinished piece of art. As a beginner, if you are trying to do more drawings than sketches,then you may be putting too much pressure on yourself. Loosen up and enjoy learninghow to express yourself through portraits.
T.R.Graphite pencil on drawing paper8" 5" (20cm 13cm)
Structure Values DrawingMost of the drawings and demos included in this book are completed through a twostage process. The first stage is the structural sketch. The second stage is adding thevalues, or lights and darks of the subject. This chapter will better describe these termsas well as other techniques and principles.Bright IdeaWork out the structural sketch on sketch paper, then trace
drawing already has a middle value, so you can add both darks and lights instead of just darks. Colored drawing paper is available in individual sheets. Sketching and Drawing Pads Paper pads can be used as is, or you can remove individual sheets for use on a drawing board. Copier Paper If you have a fear of wasting a good piece of paper, try sketching on less expensive copier paper. Though .