Transcription
MODELS / MODELOS / MODÈLES :DSR114, DSR115Jump Starter and DC Power SourceArrancador y Fuente de Poder de CCAide de Démarrage et Source d’Énergie CCOWNERS MANUAL / MANUAL DEL USUARIO / MANUEL D’UTILISATIONDSR114DSR115PLEASE SAVE THIS OWNER’S MANUAL AND READ BEFORE EACH USE.This manual will explain how to use your jump starter safely and effectively. Pleaseread and follow these instructions and precautions carefully.POR FAVOR GUARDE ESTE MANUAL DEL PROPIETARIO Y LEER ANTES DECADA USO. En este manual se explica cómo utilizar el arrancador con seguridady eficacia. Por favor, lea y siga las siguientes instrucciones y precauciones.ESSAYER DE GARDER LE MANUEL D’INSTRUCTIONS ET LE LIRE AVANTCHAQUE UTILISATION. Ce manuel explique comment utiliser l’unité d’une façonsûre et efficace. S’il vous plaît lisez et suivez ces instructions et précautions.0099001807-02
CONTAINS SEALED, NON-SPILLABLE LEAD-ACID BATTERY.MUST BE DISPOSED OF PROPERLY.CONTIENE UNA BATERÍA SELLADA DE ÁCIDO-PLOMO NODERRAMABLE QUE DEBE DESECHARSE APROPIADAMENTE.CONTIENT UNE BATTERIE À L’ACIDE QUI DOIT ÊTREDISPOSÉCORRECTEMENT.WARNING: Possible explosion hazard. Contact with battery acid may cause severe burnsand blindness. Keep out of reach of children.ADVERTENCIA: Posible riesgo de una explosión. El contacto con una batería de ácidopuede causar quemaduras y ceguera. Manténgase alejado de los niños.AVERTISSEMENT : Hasard d’explosion possible. Contact avec l’acide de batterie peutprovoquer sévère brûle et la cécité. Ne le laissez pas a la portée des enfants.CONTENTSIMPORTANT SAFETY INSTRUCTIONS.5PERSONAL PRECAUTIONS.5CONNECTING THE JUMP STARTER.6FEATURES.7CHARGING THE INTERNAL BATTERY OF THE JUMP STARTER.8OPERATING INSTRUCTIONS . 9MAINTENANCE INSTRUCTIONS.10MOVING AND STORAGE INSTRUCTIONS.10TROUBLESHOOTING. 11BEFORE RETURNING FOR REPAIRS.12SPECIFICATIONS.13REPLACEMENT PARTS/ACCESSORIES.13LIMITED WARRANTY.14WARRANTY CARD.35
CONTENIDOSINSTRUCCIONES IMPORTANTES DE SEGURIDAD.15PRECAUCIONES PERSONALES.15CONECTAR EL ARRANCADOR.16CARACTERÍSTICAS.17PARA CARGAR LA BATERIA INTERNA DEL ARRANCADOR.18INSTRUCCIONES DE OPERACIÓN.19INSTRUCCIONES DE MANTENIMIENTO.21INSTRUCCIONES PARA EL MANEJO Y ALMACENAMIENTO.21LOCALIZACIÓN Y SOLUCIÓN DE PROBLEMAS.21ANTES DE DEVOLVER A REPARACIONES.23ESPECIFICACIONES.23REPUESTOS / ACCESORIOS.24GARANTÍA LIMITADA.24TARJETA DE GARANTÍA.35
TABLE DES MATIÈRESCONSIGNES DE SÉCURITÉ IMPORTANTES.25PRÉCAUTIONS PERSONNELLES.25CONNECTE LE AIDE AU DÉMARRAGE.26CARACTÉRISTIQUES.27CHARGEMENT DE LA BATTERIE INTERNE DE L’AIDE AU DÉMARRAGE. 28CONSIGNES D’UTILISATION.29INSTRUCTIONS D’ENTRETIEN.31INSTRUCTIONS DE STOCKAGE ET EMPLACEMENT.31DÉPANNAGE.31AVANT DE RETOURNER POUR LES RÉPARATIONS.33SPÉCIFICATIONS.33PIÈCES DE RECHANGE / ACCESSOIRES.34GARANTIE LIMITÉE.34CARTE DE GARANTIE.36
1. IMPORTANT SAFETY INSTRUCTIONSSAVE THESE INSTRUCTIONS.WARNING – RISK OF EXPLOSIVE GASESWORKING IN THE VICINITY OF A LEAD-ACID BATTERY IS DANGEROUS.BATTERIES GENERATE EXPLOSIVE GASES DURING NORMAL OPERATION.IT IS IMPORTANT THAT YOU FOLLOW THESE INSTRUCTIONS EACH TIMEYOU USE THE UNIT.1.11.21.31.41.51.61.7To reduce the risk of battery explosion, follow these instructions and those published bythe battery manufacturer and the manufacturer of any equipment you intend to use in thevicinity of a battery. Review cautionary markings on these products and on the engine.WARNING!1.8 Do not operate the jump starter withRISK OF ELECTRIC SHOCK OR FIRE.damaged cables or clips; replace thedamaged cable or clip immediately.Read the entire manual before using thisproduct. Failure to do so could result in1.9 Do not operate the jump starter if it hasserious injury or death.received a sharp blow, been dropped orotherwise damaged in any way; take it toKeep out of reach of children.a qualified service person.Do not put fingers or hands into any of thejump starter’s outlets.1.10 Do not disassemble the jump starter;take it to a qualified service person whenDo not expose the jump starter to rainservice or repair is required. Incorrector snow.reassembly may result in a risk of fire orUse only recommended attachments. Useelectric shock.of an attachment not recommended orWARNING! RISK OF EXPLOSIVE GASES.sold by the jump starter manufacturer mayresult in a risk of fire, electric shock or1.11 To reduce the risk of a battery explosion,injury to persons or damage to property.follow these instructions and thoseTo reduce the risk of damage to thepublished by the battery manufacturer andelectric plug or cord, pull by the plugthe manufacturer of any equipment yourather than the cord when disconnectingintend to use in the vicinity of the battery.the jump starter.Review the cautionary markings on theseproducts and on the engine.To reduce the risk of electric shock, unplugthe jump starter charger from the outlet1.12 This jump starter employs parts, such asbefore attempting any maintenance orswitches and circuit breakers, that tendcleaning. Simply turning off the controls willto produce arcs and sparks. If used in anot reduce this risk.garage, locate this jump starter 18 inches(46 cm) or more above floor level.2. PERSONAL PRECAUTIONS2.12.22.32.42.5WARNING! RISK OF EXPLOSIVEGASES. A SPARK NEAR THE BATTERYMAY CAUSE A BATTERY EXPLOSION.TO REDUCE THE RISK OF A SPARKNEAR THE BATTERY:NEVER smoke or allow a spark or flamein the vicinity of a battery or engine.Do not permit the internal battery of thejump starter to freeze. Never charge afrozen battery.To prevent sparking, NEVER allow clips totouch together or contact the same pieceof metal.When charging the internal battery, workin a well ventilated area and do not restrictthe ventilation in any way.Be sure the area around the battery iswell ventilated while the jump starter isbeing used.2.6 Remove personal metal items such asrings, bracelets, necklaces and watcheswhen working with a lead-acid battery. Alead-acid battery can produce a shortcircuit current high enough to weld a ringor the like to metal, causing a severe burn.2.7 Be extra cautious, to reduce the risk ofdropping a metal tool onto the battery. Itmight spark or short-circuit the battery orother electrical part that may cause anexplosion.2.8 Consider having someone nearby tocome to your aid when you work near alead-acid battery.2.9 Have plenty of fresh water and soapnearby in case battery acid contacts yourskin, clothing or eyes.2.10 Wear complete eye and body protection,including safety goggles, face shield and 5
protective clothing. Avoid touching youreyes while working near the battery.2.11 If battery acid contacts your skin orclothing, immediately wash the areawith soap and water. If acid enters youreye, immediately flood the eye with coldrunning water for at least 10 minutes andget medical attention right away.2.12 If battery acid is accidentally swallowed,drink milk, the whites of eggs or water.DO NOT induce vomiting. Seek medicalattention immediately.WARNING! RISK OF CONTACT WITHBATTERY ACID. BATTERY ACID IS AHIGHLY CORROSIVE SULFURIC ACID.2.13 Clean the battery terminals before usingthe jump starter. During cleaning, keepairborne corrosion from coming intocontact with your eyes, nose and mouth.Use baking soda and water to neutralizethe battery acid and help eliminateairborne corrosion. Do not touch youreyes, nose or mouth.2.14 Add distilled water to each cell until thebattery acid reaches the level specifiedby the battery manufacturer. Do notoverfill. For a battery without removablecell caps, such as valve regulated leadacid batteries (VRLA), carefully follow themanufacturer’s instructions.2.15 Read, understand and follow allinstructions for the jump starter, battery,vehicle and any equipment used near thebattery and jump starter.2.16 Determine the voltage of the battery byreferring to the vehicle owner’s manualand make sure that the output voltage ofthe jump starter is correct.2.17 Make sure that the jump starter cableclips make tight connections.2.18 WARNING: This product contains oneor more chemicals known to the Stateof California to cause cancer and birthdefects or other reproductive harm.3. CONNECTING THE JUMP STARTER3.13.23.33.43.5WARNING! A SPARK NEAR THE3.6 For a negative-grounded vehicle, connectBATTERY MAY CAUSE A BATTERYthe POSITIVE (RED) clip from the jumpEXPLOSION. TO REDUCE THE RISKstarter to the POSITIVE (POS, P, )OF A SPARK NEAR THE BATTERY:ungrounded post of the battery. Connectthe NEGATIVE (BLACK) clip to theAttach the output cables to the batteryvehicle chassis or engine block away fromand chassis as indicated below. Neverthe battery. Do not connect the clip to theallow the output clips to touch each other.carburetor, fuel lines or sheet-metal bodyPosition the DC cables to reduce the risk ofparts. Connect to a heavy gauge metaldamage by the hood, door and moving orpart of the frame or engine block.hot engine parts. NOTE: If it is necessaryto close the hood during the jump starting 3.7 For a positive-grounded vehicle, connectthe NEGATIVE (BLACK) clip from theprocess, ensure that the hood does notjump starter to the NEGATIVE (NEG, N, -)touch the metal part of the battery clips orungrounded post of the battery. Connectcut the insulation of the cables.the POSITIVE (RED) clip to the vehicleStay clear of fan blades, belts, pulleyschassis or engine block away from theand other parts that can cause injury.battery. Do not connect the clip to theCheck the polarity of the battery posts.carburetor, fuel lines or sheet-metal bodyThe POSITIVE (POS, P, ) battery postparts. Connect to a heavy gauge metalusually has a larger diameter than thepart of the frame or engine block.NEGATIVE (NEG, N, -) post.3.8 When disconnecting the jump starter, turnDetermine which post of the battery isall switches to off (if applicable), removegrounded (connected) to the chassis.the clip from the vehicle chassis, thenIf the negative post is grounded to theremove the clip from the battery terminal.chassis (as in most vehicles), see step3.6. If the positive post is grounded to thechassis, see step 3.7. 6
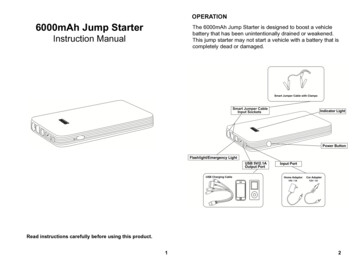
4. FEATURES2345Jump Starter1. Heavy-duty battery clamps2. 12V DC socket13. Jump starter ON/OFF switch4. Digital display5. Display button6. USB port71627. USB buttonCharger31. Charging status LED2. Bad Battery LED3. Power LED4.1 Digital DisplayDSR115). The display will indicate thebattery’s voltage.When connected to a battery, the digitaldisplay can be used to indicate the battery’sTo check the voltage level of the vehicle’svoltage. When not connected to a battery,battery, make sure the switch in the OFFthe digital display can be used to indicateposition, then connect the clips to thethe percent of charge or the voltage of thevehicle’s battery. The display will indicatejump starter’s internal battery.the battery’s voltage.To check the internal battery’s charge4.2 Charger LED Indicatorsstatus, make sure the rotary switch is inPOWER (green) LED lit: Thethe OFF position, then press the displaycharger is connected to AC power.button on the front of the jump starter.The digital display will show the battery’sCHARGING STATUS LED (green)percent of charge. A fully charged batterypulsing slowly: The charger iswill read 100%. Charge the internal batterycharging the jump starter’s internalif the display shows it is under 100%.battery, or the battery is fullyNOTE: The internal battery’s percent ofcharged and the charger is incharge is most accurate when the jumpMaintain mode.starter has been disconnected from allCHARGING STATUS LEDdevices and charging sources for a few(yellow/orange) flashing rapidly:hours.The charger has detected a problemTo check the voltage level of the jumpwith the battery. See Troubleshootingstarter’s internal battery, make sure thefor more information.clips are attached to their plastic storageBAD BATTERY (red) LED lit:holders and not touching each other,The charger has detected a problemand then turn the rotary switch to thewith the battery. SeeTroubleshooting12V position (12V or 24V position onfor more information. 7
5. CHARGING THE INTERNAL BATTERY OF THE JUMP STARTERIMPORTANT!5.2 Charging the Jump StarterCHARGE IMMEDIATELY AFTERwith included ChargerPURCHASE, AFTER EACH USE AND1. Make sure the charger and jump starterEVERY 30 DAYS, TO KEEP THE UNIT’Sare placed on a dry, nonflammableINTERNAL BATTERY FULLY CHARGEDsurface. To charge the jump starter, plugAND PROLONG BATTERY LIFE.the charger into the charging port on thefront of the jump starter.To check the internal battery’s chargestatus, make sure the rotary switch is in the2. Confirm the AC outlet voltage matchesOFF position, then press the display buttonthe input voltage of the charger.on the front of the jump starter. The digital3. Connect the charger to the AC walldisplay will show the battery’s percent ofoutlet and confirm that the greencharge. A fully charged battery will readPOWER LED on the charger turns on.100%. Charge the internal battery if the4. Check that the greenCHARGINGdisplay shows it is under 100%. CompleteSTATUS LED on the charger is pulsingcharging may take up to 24 hours.slowly, to indicate that charge process5.1 Grounding and AC Power Cordhas started. To see the status of theConnectionscharge, check the percentage shownon the jump starter display.IMPORTANT: Only use the charger that5. When the jump starter display showswas included with the jump starter to charge100 (%), the internal battery is fullythe internal battery of the jump starter.charged and the jump starter is readyUsing a different charger could result into use. Complete charging may take uppersonal injury or property damage.to 24 hours.WARNING!NOTE: The greenCHARGINGRISK OF ELECTRIC SHOCK OR FIRE.STATUS LED will remain pulsing afterThis battery charger is for use on athe display shows 100%, as the chargernominal 120V circuit. The plug must beautomatically goes into Maintain modeplugged into an outlet that is properlyand maintains the battery at full chargeinstalled in accordance with all localwithout damaging it.codes and ordinances. The plug pins6. After the charge is complete, disconnectmust fit the receptacle (outlet). Do not usethe charger from the AC outlet, thenwith an ungrounded system.disconnect the charger from jump starter.DANGER. Never alter the AC cord or plug5.3ChargerModesprovided – if it does not fit the outlet, haveAutomatic charging modea proper outlet installed by a qualifiedWhen an automatic charge is performed,electrician. An improper connection canthe charger switches to maintain moderesult in a risk of an electric shock orautomatically after the battery is charged.electrocution.Aborted ChargeAn extension cord should not be usedIf charging cannot be completed normally,unless absolutely necessary. Use of ancharging will abort. When charging aborts,improper extension cord could resultthe charger’s output is shut off. The BADin a risk of fire and electric shock. If anBATTERY(red) LED will light. Doextension cord must be used, make sure:not continue attempting to charge the That the pins on the plug of the extensionbattery. Check the battery and replace, ifcord are the same number, size andnecessary.shape as those of the plug on the charger.Desulfation Mode That the extension cord is properly wiredDesulfation could take 8 to 10 hours. Ifand in good electrical condition.desulfation fails, charging will abort. The That the wire size is large enough for thered BAD BATTERYLED will light andAC ampere rating of the charger,the yellow/orange CHARGING STATUSas specified:LED will flash.Length of cord (feet) 25 50 100 150Completion of ChargeAWG* size of cord18 18 18 16When the internal battery is fully charged,*AWG-American Wire Gaugethe jump starter’s display will show “100”. 8
Maintain Mode (Float Mode Monitoring)When the internal battery is fully chargedand the jump starter display shows “100”,the charger has started maintain mode. Inthis mode, the charger keeps the batteryfully charged by delivering a small currentwhen necessary. If the charger has toprovide its maximum maintain current fora continuous 12 hour period, it will go intoabort mode (see Aborted Charge). Thisis usually an indication of a bad battery;have the jump starter checked.5.4 Charging the Internal BatteryWhile DrivingYou may also charge the internal batterywhile driving, using a male-to-male chargercable (part number 94500109 – soldseparately).IMPORTANT: DO NOT CHARGE THEINTERNAL BATTERY FOR MORE THAN30 MINUTES OR LEAVE THE BATTERYUNATTENDED. IT COULD EXPLODE,CAUSING PROPERTY DAMAGE ORPERSONAL INJURY.1. Make sure the car is running.2. Insert one end of the accessory cableinto the 12V DC power outlet.3. Insert the other end of the accessorycable into the vehicle’s accessoryoutlet (lighter socket).NOTE: Using this method to charge thebattery overrides the maintain mode andthe battery can be overcharged.4. Monitor the progress of the charge bypressing the Percentage of Chargebutton on the front of the unit. Do notleave the battery unattended or it couldexplode, causing property damage andpersonal injury. When the battery is fullycharged, disconnect the accessory cablefrom the jump starter, and then from thelighter socket of the vehicle.NOTE: Completely disconnect the chargercable when the engine is not running.6. OPERATING INSTRUCTIONS6.1 Jump Starting a Vehicle EngineNOTE: If the cables are connected to a24 volt system when the switch is in theIMPORTANT: Using the jump starter12 volt position, the audio alarm willwithout a battery installed in the vehicle willsound continuously. TURN OFF the jumpdamage the vehicle’s electrical system.starter immediately or internal batteryIMPORTANT: Do not use the jump starterdamage could occur.while charging its internal battery.NOTE: If the switch is in the 12V or 24V1. Turn the vehicle’s ignition OFF beforeposition or the jump starter is connected tomaking cable connections.a battery for more than five minutes, four2. Make sure the rotary switch on thebeeps will sound. This is a reminder to turnfront of the jump starter is in the OFFthe jump starter off and/or disconnect itposition. Connect the jump starter tofrom the vehicle’s battery when not in use.the battery, following the precautionsWARNING! RISK OF EXPLOSION.listed in section 3.To prevent sparking, NEVER allow theWARNING! RISK OF EXPLOSION.clips to touch together or to contact theIf you have connected the clips backward,same piece of metal. Never attempt toan audio alarm will sound. DO NOT turnjump start a frozen battery.the rotary switch to the 12V (12V or 24Vfor model DSR115) position. This could6.2 Powering A 12V DC Device:cause serious damage to the jump starterThe jump starter is a power source for allor the vehicle. Reverse the connections12V DC accessories that are equippedand the audio alarm will stop.with a 12V accessory plug. Use it forpower outages and fishing or camping3. If no audio alarm sounds, turn thetrips. Estimated usage time is listed in therotary switch to the 12V position (12Vfollowing chart.or 24V position for model DSR115).The clips are now powered.1. Make sure the device to be poweredis OFF before inserting a 12V DC4. Crank the engine. If the engine does notaccessory plug into the 12V DC socket.start within 3-8 seconds, stop crankingand wait at least 1 minute before2. Ensure the battery clips are securelyattempting to start the vehicle again.clipped on the storage holders.(This permits the battery to cool down.)3. Open the protective cover of the 12V DC5. After the engine starts, turn the rotarypower outlet on the front of the jumpswitch to the OFF position. Disconnectstarter.the black clip (-), then the red clip ( ) in4. Plug the 12V DC device into the 12Vthat order, and clip them back onto theDC power outlet, and turn on the 12Vjump starter storage holders.DC device (if required).6. Recharge the jump starter as soon as5. If the 12V DC device draws more thanpossible after use.15A or has a short circuit, the internal 9
circuit breaker of the jump starterElectric tool24 watts11 hrs.22 hrs.will trip and disconnect the power toElectric cooler 48 watts 5.5 hrs.11 hrs.the device. Disconnect the 12V DCCar vacuum,80watts3.3hrs.6.6hrs.device. The breaker will automaticallyair compressorreset a short time after an overload isNOTE: Estimated run-times. Actual time may vary.disconnected.Times are based on the internal battery being fully charged.6. Recharge immediately after unplugging6.3USING THE USB PORTthe 12V DC device.The USB port provides up to 2.1A at 5V DC.NOTE: The DC power outlet is wired1. Ensure the battery clips are securelydirectly to the internal battery. Extendedclipped on the storage holders.operation of a 12V DC device may resultin excessive battery drain.2. Press the USB button on the front ofthe unit.12V DC ESTIMATED RUN-TIMES3.Plug the device into the USB port onEST.EST.APPLIANCEEST.the front of the unit.TIME RUN TIMETYPEWATTAGE RUNDSR114DSR1144. Turn the USB device on.Cell phone,5. Reverse these steps when finished66 hrs.132 hrs.fluorescent light 4 wattsusing the USB port.Radio, fan,6.Charge the jump starter as soon as9watts29.3hrs.58.6hrs.depth finderpossible after using the USB port.Camcorder15 watts17.6 hrs.35.2 hrs.7. MAINTENANCE INSTRUCTIONS7.1 After use and before performing7.3 Ensure that all of the jump startermaintenance, unplug and disconnectcomponents are in place and in goodthe jump starter.working condition.7.2 Use a dry cloth to wipe all battery corrosion 7.4 All servicing should be performed byand other dirt or oil from the battery clips,qualified service personnel.cords and the jump starter case.8. MOVING AND STORAGE INSTRUCTIONS8.1 Store inside, in a cool, dry place.8.4 IMPORTANT:8.2 Do not store the clips on the handle, CHARGE IMMEDIATELY AFTERclipped together, on or around metal, orPURCHASEclipped to cables. The clips on the jump KEEP FULLY CHARGEDstarter are live when the switch is in theCharge the jump starter’s internal batteryON position and will produce arcing orimmediately after purchase, after everysparking if they come in contact with eachuse and every 30 days.other. To prevent accidental arcing, alwaysAll batteries are affected by temperature.place the switch in the OFF position andThe ideal storage temperature is atkeep the clips on the storage holders when70 F. The internal battery will graduallynot using it to jump start a vehicle.self-discharge (lose power) over time,8.3 If the jump starter is moved around theespecially in warm environments. Leavingshop or transported to another location,the battery in a discharged state maytake care to avoid/prevent damage to theresult in permanent battery damage. Tocords, clips and jump starter. Failure toensure satisfactory performance anddo so could result in personal injury oravoid permanent damage, charge theproperty damage.internal battery every month.IMPORTANT: Do not use and/or store thejump starter in or on any area or surfacewhere damage could occur if the internalbattery should unexpectedly leak acid. 10
9. TROUBLESHOOTINGJump StarterPROBLEMThe jump starter won’tjump start my car.POSSIBLE CAUSEClamps are not making a goodconnection to the battery.SOLUTIONCheck for poor connection tobattery and frame. Make sureconnection points are clean.The jump starter’s battery is not Check the battery charge statuscharged.by pressing the Display buttonon the front of the unit. Thedisplay will show the percentageof charge.The jump starter won’tpower my 12V device.The vehicle’s battery is defective. Have the battery checked.The 12V device is notTurn on the 12V device.turned on.The jump starter’s battery is not Check the battery charge statuscharged.by pressing the Display buttonon the front of the unit. Thedisplay will show the percentageof charge.The 12V device draws morethan 15A or has a short circuit.The battery in the jumpstarter won’t hold acharge.The jump starter’s alarmis on.The battery is bad (will notaccept a charge).Connections are reversed. 11 Disconnect the 12V device. Theinternal breaker will automaticallyreset after a minute or two. Tryusing the 12V device again.Replace the battery.Disconnect the jump starter andreverse the clamps.
ChargerPROBLEMThe green POWERLED does not light whencharger is properlyconnected.REASONAC outlet is dead.SOLUTIONCheck for open fuse or circuitbreaker supplying AC outlet.Poor electrical connection.Check power cord and extensioncord for a loose fitting plug.The charger is in desulfationmode. Continue charging forseveral hours. If not successful,have the battery checked.The battery is sulfated.The redBADBATTERY LED is lit.Lack of progress is detected and The battery may be overheated. Ifbattery voltage is below 14.2V.so, allow the battery to cool. Thebattery may be too large or have ashort circuit. Have battery checkedor replaced.The battery’s initial voltage isbelow 12.2V and the total inputis less than 1.5 Ah.The battery capacity is too low,or the battery is too old. Have itchecked or replaced.The battery voltage dropsbelow 12.2V during MaintainMode.The redBADBATTERY LED is lit andthe yellow/orangeCHARGING STATUSLED is flashing rapidly.The battery won’t hold a charge.May be caused by a drain onthe battery or the battery couldbe bad. Make sure there are noloads on the battery. If there areremove them. If there are none,have the battery checked orreplaced.The battery voltage is still below The battery may be defective.10V after 2 hours of charging.Make sure there are no loads on(or)the battery. If there are, removeIn maintain mode, the outputthem. If there are none, have thecurrent is more than 1.5A for 12 battery checked or replaced.hours.Desulfation was unsuccessful.The battery may be defective.Have battery checked or replaced.10. BEFORE RETURNING FOR REPAIRSIf these solutions do not eliminate the problem,or for more information about troubleshooting,contact customer service for erychargers.comor call 1-800-621-5485Monday-Friday 7:00am to 5:00pm CSTFor REPAIR OR RETURN, contact Customer Service at 1-800-621-5485.DO NOT SHIP UNIT until you receive a RETURN MERCHANDISE AUTHORIZATION(RMA) number from Customer Service at Schumacher Electric Corporation. 12
11. SPECIFICATIONSDSR114Internal Battery Type.Sealed, Maintenance Free, AGM, Lead-AcidNominal Voltage.12V DCCapacity.22AhDC Power Output (Maximum Continuous Load). 12V DC/15APeak Amps. 2200Cranking Amps.
instructions for the jump starter, battery, vehicle and any equipment used near the battery and jump starter. 2.16 Determine the voltage of the battery by referring to the vehicle owner’s manual and make sure that the output voltage of the jump starter is correct. 2.17 Make sure