Transcription
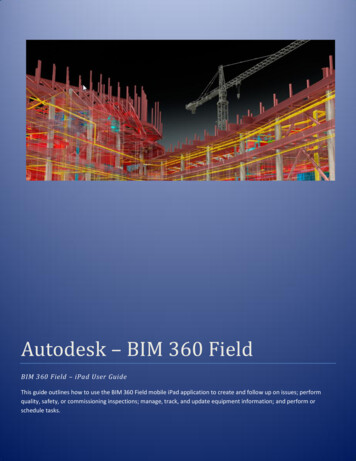
Autodesk – BIM 360 FieldBIM 360 Field – iPad User GuideThis guide outlines how to use the BIM 360 Field mobile iPad application to create and follow up on issues; performquality, safety, or commissioning inspections; manage, track, and update equipment information; and perform orschedule tasks.
Autodesk BIM 360 FieldiPad User GuideThe Autodesk BIM 360 Field iPad application is a field mobility tool that is designed to enable field level access toinformation and to collaborate on issues, inspections, equipment, and tasks to be performed.For access to Autodesk BIM 360 Field Mobile, you will need an iPad and to have downloaded the free BIM 360 FieldMobile Application from the application store. Below is a screen shot of the BIM 360 Field Mobile Application on theiPad highlighting the areas of the application that will be discussed and reviewed in this guide.The numbers listed next to the different field functionality on the iPad are the sections that are setup in the guide andeach area is covered in the sequence identified below. Copyright 2013 Autodesk, Inc. All rights reserved.1
Autodesk BIM 360 FieldiPad User GuideTable of ContentsLogin to BIM 360 Field Mobile . 3Synchronize - Download . 4Synchronize - Upload . 6Issue Management. 7Issue Creation . 8Add Issues using Issue Templates . 9Adding Issue Attachments . 10Add Issues using Pushpins. 11Mark up attached Documents . 13Re-Inspecting Existing Issues . 14Filtering Issues . 15Adding Comments to Issues . 15Checklist Creation . 16Selecting and Editing Existing Checklists. 18Equipment Tracking and Commissioning . 19Edit Equipment Information . 19Fill out Equipment Checklists . 20Adding and Viewing Equipment Issues . 20Adding and Viewing Attachments to Equipment. 20Adding and Viewing Comments to Equipment . 20Reviewing /Editing Equipment Checklists . 21Tasks . 22Fill out Task Checklists . 22Add Issues to Tasks. 23Add Attachments to Tasks . 23Add Signatures to Tasks . 23Add Comments to Tasks . 23Gadgets . 24Bubble Level . 24Notebook . 24Barcode Scanner . 25 Copyright 2013 Autodesk, Inc. All rights reserved.2
Autodesk BIM 360 Field1aLogin to BIM 360 Field MobileiPad User GuideTo login into BIM 360 Field Mobile you will need to be connected to theInternet to perform this function. Ensure that you are connected to the internetusing a Wi-Fi signal, or if Wi-Fi is not available and the iPad has 3Gcapabilities you may use a 3G connection on your iPad if available.To Login to BIM 360 Field Mobile: Tap on the BIM 360 Field Mobile application icon to open theapplication. Tap on the “silhouette” at the bottom right of the main window to login. Enter your email address or the email address used to setup youraccount, enter the password that was setup when you first logged intoBIM 360 Field Web and tap on “Log in”. Once logged in select the desired project from the project drop downmenu list. Copyright 2013 Autodesk, Inc. All rights reserved.3
Autodesk BIM 360 Field1bSynchronize - DownloadiPad User GuidePrior to going out to the field you will need to sync the BIM 360 Field Mobileapplication with the project database. When syncing your iPad you canchoose what to download to bring out to the field with you. You will be able toreview your current download sync settings in the Login dialogue box. Copyright 2013 Autodesk, Inc. All rights reserved.To sync BIM 360 Field Mobile select the “up and down arrow” icon at thebottom right of the screen to view the “Download Sync” Settings window.To select or change the Sync Settings for the Library, Issues, EquipmentChecklists or Tasks tap the “ ” to the right of the download settings.Library – To change the library setting to specify the information todownload to the iPad tap on “Library”.o To download “All Folders” which is recommended, tap “AllFolders” and tap on “Download Sync” to exit.o To select specific folders to be downloaded, tap on “SelectedFolders” and tap the blue arrow to the right which will enable youto Select the folder(s) to download. When finished tap “SyncLibrary” and to exit the library settings tap the “Download Sync”button.Issues - To change the Issues sync setting tap “Issues”, select the desiredfilter to be applied, and tap the “Download Sync” button to exit. If a filter isnot available your BIM 360 Field Admin may edit existing filters as well ascreate new filters.Checklists – To change your Checklist sync setting tap on “Checklists”and select the desired sync setting.o To not download any previously completed checklists select“Don’t Sync Checklists”. If you wish to review all completed orpreviously uploaded checklists, select “All Checklists”. To accesspreviously uploaded open or closed checklists tap on either “OpenChecklists” or “Closed Checklists”.o When Finished tap on “Download Sync” to exit.4
Autodesk BIM 360 FieldiPad User Guide Equipment - To download equipment details and any associatedinformation (checklists, attachments, issues, and comments), tap on“Equipment” and select the desired sync setting.o Selecting “Don’t sync equipment” will only download theequipment name to the iPad. Selecting “All Equipment” willdownload all Equipment and the related details.o When Finished tap on “Download Sync” to exit.Tasks – To change your Task sync setting tap on “Tasks” and select thedesired filter.o To download any tasks that are assigned to you or that you havecreated and assigned to others select “My Unresolved Tasks”. Ifyou do not want to download any task information select “Don’tSync Tasks”.o When Finished tap on “Download Sync” to exit.Once all the Download Sync settings are configured to your liking tap onthe Sync button to begin the download process.Note: If this is the first time that you are logging into BIM 360 Field Mobilewe strongly recommend that you connect to the internet using a Wi-Fisignal as you may exceed any data plans associated with 3G or 4G. Copyright 2013 Autodesk, Inc. All rights reserved.5
Autodesk BIM 360 Field1cSynchronize - UploadiPad User GuideOnce you are finished for the day you will want to upload any information tosend any changes that have been entered or captured in the field to theproject database. “Sync Upload” enables field users to view, edit, and deletework in progress prior to syncing the information to the server. Copyright 2013 Autodesk, Inc. All rights reserved.To review the Upload Sync Settings prior to uploading all data tap the “ ”to the right of the upload settings.To make any changes or edit the items listed in this view, tap on the itemfrom the list and make the change directly to the desired item.If the item is a duplicate or is not needed one may delete the item or anyupdates by selecting the “trash can” icon to delete the item.The “Upload” area on the right side of the Upload Settings control screenwill enable you to specify what is uploaded from the iPad to the server. Ifyou want a checklist or issue to remain on the iPad and not be uploadedto the database, tap on the ON/OFF switch to change the setting to “OFF”.If you toggle the upload switch to “OFF”, BIM 360 Field will automaticallyleave the information behind on the iPad and going forward these itemswill need to be selected individually for Upload.To Sync the “In Progress” information tap on the Sync button (Up / DownArrows icon) at the bottom of the Upload Settings window.Sync will upload current work done on the iPad that is set to “ON” mode tothe server, and will download new data from the server based on yoursync download settings in the Sync menu.After the full sync is complete all “In Progress” information will have beenremoved from the iPad and will now be included in the data downloadedfrom the project database.It is recommended that you sync multiple times a day if possible and atleast once at end of day in order to keep data on the server current.6
Autodesk BIM 360 Field2Issue Management Copyright 2013 Autodesk, Inc. All rights reserved.iPad User GuideIssues are any items that have been identified in the field that require a followup action or to document the information. In BIM 360 Field Mobile you will beable to view and manage any of the issues that you have decided to sync anddownload to your iPad from your project database. To get to the Issuesfunctionality in BIM 360 Field Mobile you will click on the “Go To” button onthe lower left corner of the screen and select Issues from the list of fieldprocesses available on the iPad.7
Autodesk BIM 360 Field2aIssue CreationiPad User GuideTo create a new issue you will need to specify the location where the issue isbeing identified. You start by selecting the “By Location” button on the top left of the screenthat will enable you to select a location from the Location Hierarchydropdown at the top of the window. Tap on the down arrow next to Top Level to select or specify thelocation where the issue is to be entered. Copyright 2013 Autodesk, Inc. All rights reserved.Click on the “ ” icon on the upper right corner of the screen to create anew issue. Enter the issue description, specify the issue type, select thecompany, as well as add any other information as desired.Issues are automatically saved on the iPad as they are entered.8
Autodesk BIM 360 Field2bAdd Issues using IssueTemplatesiPad User GuideTemplates are used for common or repeatedly found issues and work itemson the project. Templates will enable you to have a majority of the issue detailinformation already filled out and pre-defined for an issue to make it easierand faster for the users in the field. Copyright 2013 Autodesk, Inc. All rights reserved.Select or specify the location under the location hierarchy dropdownwhere you are identifying the issue and click on the Template icon (lookslike a rubber stamp) to open the list of available templates for the project.Tap on the template group to find the correct issue template and thenselect the Issue template that will be used to create the issue.To exit from the template list to edit the issue tap anywhere on the screenoutside of the off the Issue Template list.To add additional detail or edit the issue if desired, tap the issuedescription to open the issue details and make any appropriate changes,such as adding an attachment, adding a comment, changing thecompany, due date, or adding location detail.9
Autodesk BIM 360 Field2cAdding Issue AttachmentsiPad User GuideThe attachment functionality in BIM 360 Field mobile will enable BIM 360Field mobile users in the field to attach pictures, documents, documentfolders, and/or web hyperlinks as attachments to an issue. You can attach aphoto taken with the iPad built in camera, a document or folder from the BIM360 Field Library, a photo from the iPad photo album, and/ or a hyperlink to awebsite or URL. Copyright 2013 Autodesk, Inc. All rights reserved.To access the attachments functionality for an issue, tap on the issuedescription and select attachments under the issue details, or tap on theattachments button to the right of the issue in the “list” view.This will open the Attachments view (see screenshot above)To attach a photo using the built in iPad camera, tap on the blue cameraicon and take the photo by orienting the iPad camera and tapping on thecamera icon at the bottom of the screen. Tap “Use” to add the picture tothe issue or “Retake” if the picture needs to be reattempted.To attach a document or folder from the BIM 360 Field Document Library,tap on the folder icon and select the folder that contains the document (orfolder) to attach it to the issue.Tap “Attachments” to return to the attachments screen.Note: Folder attachments do not show up on the report and you cannotmarkup documents attached within a folder.To attach a photo from the iPad photo album, tap on the “MountainSilhouette icon and select the desired photo from the iPad photo library.To attach a Link, tap on the “Link” icon and type in the URL path or hyperlink to the desired website.When finished with attachments, tap anywhere outside the Attachmentswindow to go to the “List” view or tap the issue ID to return to the IssueDetail window.10
Autodesk BIM 360 Field2dAdd Issues using Pushpins Copyright 2013 Autodesk, Inc. All rights reserved.iPad User GuideUsing pushpins in BIM 360 Field Mobile will enable you to create and viewissues on a document. Managing issues using pushpins will assist in locatingan issue on a document or drawing that has been linked to a location withinthe project Location Hierarchy. To create issues using a pushpin select the location from the LocationHierarchy dropdown where the issue exists and then tap on the “Pins”button located at the upper left part of the screen. If this is the first time you are using pushpins in a location you may bedirected to go to the mobile document library to link a drawing to thelocation. To link a drawing to the Location tap on “Add From Library” and select thedrawing or document from the BIM 360 Field Document Library.11
Autodesk BIM 360 FieldiPad User Guide Once the document is displayed use the “pinch to zoom” functionality tozoom into the area of the drawing where the issue exists. Once the correctroom is in the view screen make sure to set the print area by selecting the“Set ‘Print Area’ to appear on report” at the upper right of the screen.To add pushpins manually tap on the pushpin icon at the left side of thescreen and then tap the spot on the drawing in the room where the issueis located. Within the Issue Details window; enter the issue description,specify the issue type, assign the company, or add any other relevantinformation. Once finished adding the issue details tap anywhere outsideof the issue detail window to exit the issue and add additional pushpinissues.To add an issue via templates, tap on the template icon within the pushpinwindow. Select the Group and then the issue template. Tap on thedrawing to place the issue.To change issue data added by a template, tap on the pin once it is placedto bring up the issue detail form.To zoom in and out, or pan across the page, tap on the hand icon whichwill enable you to navigate through the drawing.Best Practices when using pushpins: Copyright 2013 Autodesk, Inc. All rights reserved.Use single page PDF formatted drawings.Use a single “generic” drawing per location as the same drawing may belinked to multiple locations within a floor, level, or area.Link a drawing to a “detailed” location at the lowest level of the LocationHierarchy (i.e. A Room or a Column / Grid Line location, not a floor orlevel)12
Autodesk BIM 360 Field2eMark up attached DocumentsiPad User GuideDocuments or photos that are attached to Issue can be “marked up” using theBIM 360 Field Mobile drawing utility that is built directly into the application. Copyright 2013 Autodesk, Inc. All rights reserved.To mark up an attachment to an issue, open the “attachment” view for anissue and tap on the image icon for the document or photo to be markedup which will enable the BIM 360 Field Mobile “mark up” utility.The drawing options in the BIM 360 Field Mobile mark up utility are to:o Select a “Hand” tool to zoom in and out and pan around theimage or drawing.o Select a “Pointer” tool to tap existing markup items to edit, modify,or delete them.o Select a “Pencil” tool to draw solid or highlight freestyle or straightlines, and arrows.o Select a preset tool to add circle, square, or polygon markups aswell as a text box markup utility.o Select a “Ruler” measurement tool to specify a markup scale andthen add line or area markups with associated measurements.o Adjust the markup line thickness, or select different colors fromthe color palette.Additionally you can undo and redo markups, delete the attachment, oremail the attachment with any markups.Once finished adding any mark up’s to an attachment, make sure toalways set your “print area” for the region of the attachment which is toappear on the report, then tap on “close” to go back to the issue detailsscreen.13
Autodesk BIM 360 Field2fRe-Inspecting Existing IssuesiPad User GuideWhen re-inspecting existing issues you will be able to view the issues andany issue details with the most current updates. The issue information that isavailable will be based on the sync setting specified for issues and will havebeen downloaded to BIM 360 Field Mobile before starting work, or prior totaking the iPad into the field. When re-inspecting issues you will be able to determine if an issue iseither an existing issue that has been downloaded from the databaseduring the sync process, versus a “new” issue. For an existing issue youwill see an “Issue ID”, where in contrast a new issue that has not beendownloaded will show New Issue for the Issue ID. For an existing issue that was downloaded during the last full sync, youwill see a small blue dot to the left of the issue. The “blue dot” is a visualindicator to assist in the re-inspection workflow to show whether the issuehas had any changes or updates since the last full sync. If any changesare made to the issue the “blue dot” will disappear to inform you that theissue has been updated. Copyright 2013 Autodesk, Inc. All rights reserved.To update or make any changes to an issue, simply open the issue detailsby tapping on the issue description.To change the details of an issue simply tap on the desired detail itemsuch as the Issue Status, select the appropriate status, and tap anywhereon the screen outside of the issue details window to save the choice andexit the issues details window.14
Autodesk BIM 360 Field2gFiltering IssuesiPad User GuideFilters may be applied to the issues view so that you may quickly and easilyfind and identify specific issues on which you would like to re-inspect and/orupdate. Once filters have been applied they will stay in place until they areremoved and will show only the desired issues in both the list and pushpinviews. To filter issues by Status, Company, Issue type, or many other availableoptions tap on the filter button in list view, or tap on the filter in pushpinsview (it looks like a funnel) to open the filter options dropdown list. To start applying any of the available filters tap on the desired field andthen either select or remove any of the items for the filtered view. Thedefault selection by default will have everything selected under eachcategory. To uncheck all selections, tap on the “X” at the upper right of thefilter window and then make any specific filter selections. To clear thefilters or select all options, tap on the “check mark” icon at the upper rightof the filter window To sort or arrange the view of the issues based on Company, Status,Identifier, Description, or Last Changed tap on the “Sort by” button. To arrange the issues in either Ascending or Descending tap on theappropriate sort based on the desired view.Once finished with editing or viewing any issues, make sure to “clear” orremove the filters if they are no longer applicable.2hAdding Comments to Issues Copyright 2013 Autodesk, Inc. All rights reserved.Comments may easily be added or viewed for an issue to ask a question,reply with an answer, or to provide more information or additional contextsuch as what was done to complete any work, or why the work may beincorrect. Comments may be viewed or added to an issue when viewing the issuesin a “list view” or in a “push pin” view. To add or view existing comments for an issue when in list view, tap onthe “Comment” button to the right of the issue, add the comment in theopen text box, and tap on the “ ” icon. To add or view existing comments for an issue when in Pins view, tap onthe pushpin to open the issue details, tap on the “Comments” field in thelist and add the comment in the open text box. When finished adding thecomment tap the “ ” icon to add the comment and tap anywhere outsidethe issue detail window to exit.15
Autodesk BIM 360 Field3Checklist CreationiPad User GuideChecklists can be created using any of the templates that have been setup inBIM 360 Field for the QA/QC, Safety, and Commissioning functions.Completing a checklist is done the same way within each field process andwhen checklists are setup correctly by the Project Administrator, they willgreatly enhance your quality, safety, and commissioning programs as well asto provide automated efficiencies in the field. Copyright 2013 Autodesk, Inc. All rights reserved.To access the Checklist functionality in BIM 360 Field Mobile tap on “GoTo” at the bottom right of the screen and select “Checklists”. To view a listof all the currently available checklists for the project tap on the“Checklists” button at the Top left corner of the Checklists window/screen.The checklists that are available will be divided up into three sections forQAQC, Safety, and Commissioning.To open or begin filling out a checklist, tap on the desired template fromthe available checklists.The first step when filling out a new checklist is to specify the locationwhere the checklist is being performed as well as the default company thatwill be responsible for any deficiencies/non conformances that are found,etc. To set the location and company tap on the “Header” button at the topright corner of the screen and enter the appropriate information.Once the desired header information has been added tap anywhereoutside of the “Header” information text box to begin filling out thechecklist.When filling out the checklist tap on a positive response (Yes, True, Pass,or ) when conforming, and a negative response (No, False, Fail, -) whennon-conforming. A best practice recommendation is to add a comment toany response conforming or non-confirming prior to selecting a responsetype.16
Autodesk BIM 360 FieldiPad User Guide Copyright 2013 Autodesk, Inc. All rights reserved.If the response to the checklist item is non-conforming, an issue may beautomatically created as long as the checklist is configured to createissues. The Project Administrator for BIM 360 Field can setup andconfigure checklists to auto default the issue details to simplify thisprocess.If an issue is not created automatically, a non-conforming or conformingissue may also be created for the checklist item by tapping on the “Issue”button the left side of the checklist item.To edit an issue that has been created automatically tap on the issuedescription and edit any of the desired issue details, or if you have morethan one issue to assign to multiple sub-contractors for the inspectionitem, tap the “ ” icon to add additional issues.Add an attachment to the issue for any conforming or non-confirming itemidentified.When the checklist is complete change the status of the checklist from“Open” to “Closed”.To create the same checklist but for a different location, go to the bottomof the checklist window and tap on “Fill out another checklist like this one”.Once done with your inspections tap on “Checklists” to go to a differentchecklist template.17
Autodesk BIM 360 Field3aSelecting and Editing ExistingChecklistsiPad User GuideExisting checklists may be edited if they have been downloaded to the iPadbased on the sync settings, or if they have been downloaded specificallywhen connected to a Wi-Fi signal. To edit an existing or already completed checklist tap on “Go To” at thebottom of window, select “Checklists” and then tap on the “Checklists”button on the upper left to view the available templates.If a checklist template has a button with the word “List” next to it (Seeabove screenshot), this indicates that there are previously filled outchecklists where you will be able to see the date and time of when the lastof this type of checklist was created.To view a list of the previously filled out checklists, tap on the “List” button.The next view will display all the different locations where the checklistshave been created. The number in parenthesis is the total number ofchecklists that have been filled out for that specific location.Tap on the Location where the checklists you would like to review or editreside and select the specific checklist instance you wish to review/edit. Ifyou selected, “Don’t sync checklists” in the sync settings page, you willsee the option to “Download” the previously completed checklist. Theoption to “Download” will only work if you are connected to Wi-Fi or 3Gsignals to retrieve the checklist from the database. If your sync selectionwas “Sync all checklists” at the time of the last full iPad sync, you will beable to tap on the checklist and it will bring up the checklist on the iPad.NOTE: If your project administrator has specified the preference that “ClosedChecklists are not Editable” then any checklist that is downloaded to the iPadthat has the status “Closed” will be locked and will not be able to be modifiedor edited. Copyright 2013 Autodesk, Inc. All rights reserved.18
Autodesk BIM 360 Field44aEquipment Tracking andCommissioningEdit Equipment Information Copyright 2013 Autodesk, Inc. All rights reserved.iPad User GuideThe Equipment module in BIM 360 Field Mobile may be used to track andupdate information for equipment or physical objects for a project as well asbeing able to associate Checklists, Commissioning Inspections, Attachments,Track Issues, and add or review Comments related to an equipment-trackingprogram.To access the Equipment Tracking and Commissioning functionality in BIM360 Field Mobile: Tap on “Go To” at bottom of window to view the list of BIM 360 FieldMobile Field Processes and select “Equipment” and th
The Autodesk BIM 360 Field iPad application is a field mobility tool that is designed to enable field level access to information and to collaborate on issues, inspections, equipment, and tasks to be performed. For access to Autodesk BIM 360 Field Mobile, you will need an iPad and t
