Transcription
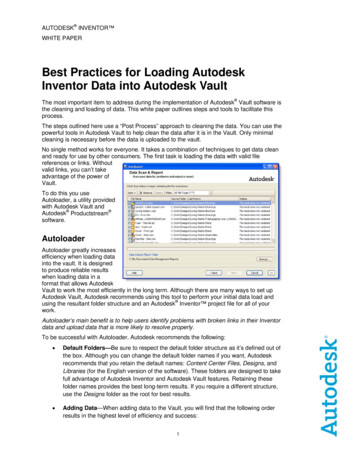
AUTODESK INVENTOR WHITE PAPERBest Practices for Loading AutodeskInventor Data into Autodesk VaultThe most important item to address during the implementation of Autodesk Vault software isthe cleaning and loading of data. This white paper outlines steps and tools to facilitate thisprocess.The steps outlined here use a “Post Process” approach to cleaning the data. You can use thepowerful tools in Autodesk Vault to help clean the data after it is in the Vault. Only minimalcleaning is necessary before the data is uploaded to the vault.No single method works for everyone. It takes a combination of techniques to get data cleanand ready for use by other consumers. The first task is loading the data with valid filereferences or links. Withoutvalid links, you can’t takeadvantage of the power ofVault.To do this you useAutoloader, a utility providedwith Autodesk Vault andAutodesk Productstream software.AutoloaderAutoloader greatly increasesefficiency when loading datainto the vault. It is designedto produce reliable resultswhen loading data in aformat that allows AutodeskVault to work the most efficiently in the long term. Although there are many ways to set upAutodesk Vault, Autodesk recommends using this tool to perform your initial data load andusing the resultant folder structure and an Autodesk Inventor project file for all of yourwork.Autoloader’s main benefit is to help users identify problems with broken links in their Inventordata and upload data that is more likely to resolve properly.To be successful with Autoloader, Autodesk recommends the following: Default Folders—Be sure to respect the default folder structure as it’s defined out ofthe box. Although you can change the default folder names if you want, Autodeskrecommends that you retain the default names: Content Center Files, Designs, andLibraries (for the English version of the software). These folders are designed to takefull advantage of Autodesk Inventor and Autodesk Vault features. Retaining thesefolder names provides the best long-term results. If you require a different structure,use the Designs folder as the root for best results. Adding Data—When adding data to the Vault, you will find that the following orderresults in the highest level of efficiency and success:1
BEST PRACTICES FOR LOADING AUTODESK INVENTOR DATA INTO VAULT oLibraries—Scan and add libraries first. If these all add and resolve on theirown, chances are good that subsequent data will upload smoothly as well.oAdding the First Project—After the libraries have been added, you canimport the first project into the vault. If a single project encapsulates many“logical” projects, you can use the “excluded from upload” feature ofAutoloader to reduce the amount of data added at one time. This process iscovered later in this document.oSubsequent Projects—Repeat the preceding process until all projects havebeen loaded cleanly into the Vault.Inventor Project Types—Any Inventor project type (Single User, Vault, SemiIsolated, or Shared) can be used with Autoloader. It automatically cleans up andremoves any additional paths that were supported in these project types andconsolidates them into a new single Inventor project.Step 1: Preparing Your DataA few best practices will help you get your data loaded fast. It’s best to upload either all yourdata or a complete project when making the transition to Vault. This means that you mustperform this operation when there aren’t people working on these files.Copy all of your project data to a local server first. If you need to make changes to yourInventor project files to get your data to resolve, then do so before loading your data. Havingall of your data local gives you the best performance. Avoid loading data over the network ifpossible.Because you are copying this data locally, you need to ensure that other users aren’t makingchanges to the data while you are doing this. Be sure that you can accomplish your goal byperforming several test uploads.Step 2: Scrubbing Duplicate FilesThe only process that is done before using Autoloader is to scrub for duplicate files in theproject. It isn’t crucial that all duplicate files be removed. However, any obvious duplicate datashould be removed, for example, a duplicated directory for a design iteration that was nevercleaned up.After data has been loaded, the remaining duplicates can be reported on and removed usingVault software’s duplicate file check (administration tools), as follows:1. Launch Autodesk Inventor.2. From the File menu, choose Projects.3. Set the current active project to the one you want to load.4. Click the Find Duplicate Files button in the lower-right section of the Projects dialogbox, as shown in the following image.2
BEST PRACTICES FOR LOADING AUTODESK INVENTOR DATA INTO VAULT5. A report shows the duplicates in your project and where they exist. Resolvingduplicates may require input from the people most familiar with the data. You can runanother report from Vault and resolve duplicates later if needed. A good rule is that ifyou need to rename or manipulate the files in any way other than deleting theduplicates, then you probably should wait until after the data has been loaded intothe vault.6. Close Inventor.3
BEST PRACTICES FOR LOADING AUTODESK INVENTOR DATA INTO VAULTNote: Many free and for-pay utilities are available for download from the Internet. If you havemany duplicates, third-party tools might help with the cleaning and merging of duplicates.Step 3: Autoload DataAfter you have removed as many duplicate files as practical, you can now attempt to load thisdata. This process does the following: Scans data for broken links and other problems that might cause errors in Vault orInventor Copies data to a temporary directory and redirects1 all references to help ensure thatthey resolve properly Removes existing locks (or reservations) that were left over from the Semi-Isolatedand Shared modes of Inventor Uploads the data into Vault and optionally creates DWF filesDuring this process you implement a few different techniques that make this process easierand helps to ensure the best level of performance. Follow these steps to use the Autoloaderutility to load your data. In the following example the Inventor Samples project is used todemonstrate some of these techniques.1. Launch Autoloader, and log into the appropriate Vault as an Administrator. Disableany unique file names set to True (Administrative settings). You can always turn thison after data has been uploaded and cleaned.2. Select the folder that you want to upload data from. It can be a single subfolder froman existing project or a top-level workspace for larger amount of data. This exampleuses the Assemblies folder. Notice that this is a subfolder of the top-level Samplesfolder. This is one technique to reduce the amount of data loaded. You can easilyrepeat this process with other parallel folders.1Redirection refers to the process that Autoloader uses to manipulate the file path information stored in Inventor and AutoCAD data that instructs the files how to open. The redirection process helps toensure that all of this path data is in an acceptable format for Vault and Productstream.4
BEST PRACTICES FOR LOADING AUTODESK INVENTOR DATA INTO VAULT3. Next you are prompted for the proper project file. If Autoloader finds a project in asubfolder of the one you selected, it automatically attempts to choose it. If it doesn’tfind the project, or if it finds the wrong one, you can easily select any other project.This step is crucial for the Inventor data to upload properly.4. The selected folder’s contents are displayed down to the file level. You can navigatejust as in a typical folder browser, selecting and removing content as you want. Usestandard selection process to select the folders you want to remove. To exclude afolder, choose the Exclude from Upload option. Although this command removes filesand folders from an initial upload set, the next step of the process automatically addsany required files (for example, a part referenced in an assembly from a selectedfolder) back into the selection set.5. Click Next.6. Click the Scan button in the upper-left corner of the dialog box to begin analysis ofthe data. Here you might see a list of errors that need to be resolved beforecontinuing, including Missing files Files in a version of Inventor previous to 5.3 Corrupt and zero-byte files Files saved in a beta version of Inventor7. Resolve each error before you continue. The best way do to this is to use the Exportcommand and save the results to a Microsoft Excel or CSV file (CSV format isbetter for larger data sets or if you don’t have Excel). Keep Autoloader open becauseyou will use it to correct these errors.5
BEST PRACTICES FOR LOADING AUTODESK INVENTOR DATA INTO VAULT8. Launch Inventor and work through the errors. Start with top or high-level assembliesor any file that is reported to have “issues with children.” Open the files and see whatsort of error Inventor gives you. If it is a missing file, Inventor instructs you to find it. Ifit is an unmigrated file, Inventor prompts you to save it when you close.9. After you have corrected a few of the errors, click the Scan button again inAutoloader. The issues for the files you corrected should be gone.10. Repeat this process until all errors have been corrected. By starting with higher-levelassemblies you should find that more than one error is corrected with a singlechange. It’s often the case that a single part can ripple through many assemblies andlook like a larger set of issues.11. After all errors have been corrected, click Next.12. In the Map Vault Folders section you need to assign a location for Autoloader toplace each Path (Workspace, Workgroup or Library) in the vault. There is always aContent Center Files path that is set to a fixed location and cannot be changed;however, you need to specify where each of the other paths go. Workspace andWorkgroup paths must be set to the Designs folder. Inventor Library paths must beset to a folder under Libraries. You can map these to almost any level of subfolderunder the appropriate root locations. This is a good time to make minor changes toyour folder structure.6
BEST PRACTICES FOR LOADING AUTODESK INVENTOR DATA INTO VAULT13. After all folders have been mapped, click Next.14. The next step (Copy and File Redirection) is simply a processing step. Autoloaderperforms the redirection mentioned earlier and makes sure all data is clean andresolved without any broken links.15. Click Next.16. Autoloader displays the files that will be uploaded. This step can also be done as amultipass process. The filter at the top of the list enables you to filter by file types. It isa best practice to perform this from the bottom of the structure up. For example, startwith parts, then assemblies, then presentations, and finally drawings and all otherfiles. This provides a more structured approach to the task. Of course if your data setis under 2,500 files, you can simply do all at once.17. Optionally, you can choose to publish a related DWF file for all AutoCAD andInventor data. However, doing so increases the amount of time required to performthis operation. This is a required step for Productstream users.18. Click the View Report button to see a complete report of the DWF generation as wellas the upload status for all files. If there are any errors, make sure you investigateeach one. The most productive way to resolve these is to open the files in Inventor or7
BEST PRACTICES FOR LOADING AUTODESK INVENTOR DATA INTO VAULTAutoCAD to correct any issues.Top 10 Things You Should KnowThe following are the top 10 things you should know after reading this paper. Following theserules will give you the best results.1. Copy your data to the server where Autodesk Vault is installed. Running Autoloaderfrom this machine with local data helps to ensure the best performance during thescan and upload phases.2. If your data was previously on a network drive, disconnect those mapped drivestemporarily while performing the data load. This helps to ensure that Inventor doesn’ttry to resolve files from their original locations.3. Practice makes perfect. Perform multiple dry runs on the data through the scan andupload phases. This can help you estimate the amount of work and how long it willtake. You need to be able to get the data in by the time users need to access itagain.4. For the most reliable and predictable results, always use the default folder structure(top three folders) with Autoloader. These folders were designed to produce the bestresults.5. Clean up any large groups of duplicate files before using Autoloader. Not all of theduplicates need to be removed; just the obvious ones.6. You can use any Inventor project type to load data with Autoloader (Single User,Vault, Semi-Isolated, or Shared).8
BEST PRACTICES FOR LOADING AUTODESK INVENTOR DATA INTO VAULT7. The Exclude from Upload command is possibly the most powerful feature ofAutoloader. It enables you to reduce the amount of data loaded by Autoloader andproduces more reliable and predictable uploads of large data sets.8. Use the Folder Mapping section of Autoloader to reorganize and change your folderstructure if you want. Changing things here is easier than doing it elsewhere.9. Generating DWF files take additional time. This is the best place to publish DWF filesif you plan to use them. However, it does increase upload times.10. After all your data has been loaded, clean your data using Autodesk Vault andProductstream tools such as Edit Properties, Rename, Copy Design, and Replace.Using these tools on a clean data set uploaded with Autoloader greatly acceleratesthe overall process.Autodesk, AutoCAD, Autodesk Inventor, DWF, Inventor, and Productstream are registered trademarks or trademarks of Autodesk, Inc., in the USA and/orother countries. All other brand names, product names, or trademarks belong to
AUTODESK INVENTOR WHITE PAPER Best Practices for Loading Autodesk Inventor Data into Autodesk Vault The most important item to address during the implementation of Autodesk Vault software is the cleaning and loading of data. This white paper

