Transcription
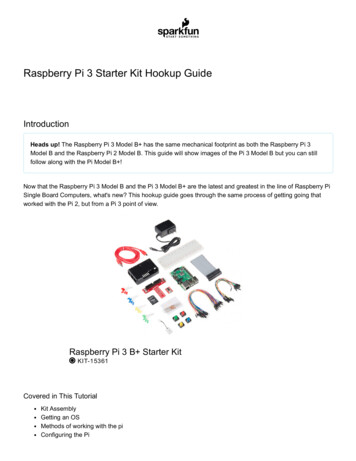
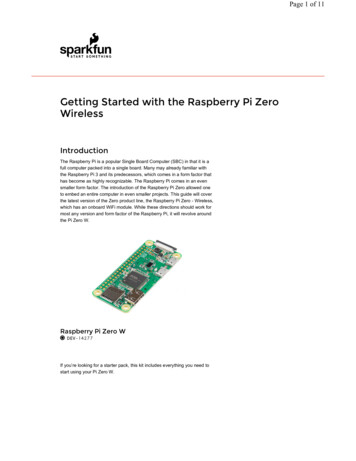
Page 1 of 11 Getting Started with the Raspberry Pi ZeroWirelessIntroductionThe Raspberry Pi is a popular Single Board Computer (SBC) in that it is afull computer packed into a single board. Many may already familiar withthe Raspberry Pi 3 and its predecessors, which comes in a form factor thathas become as highly recognizable. The Raspberry Pi comes in an evensmaller form factor. The introduction of the Raspberry Pi Zero allowed oneto embed an entire computer in even smaller projects. This guide will coverthe latest version of the Zero product line, the Raspberry Pi Zero - Wireless,which has an onboard WiFi module. While these directions should work formost any version and form factor of the Raspberry Pi, it will revolve aroundthe Pi Zero W.Raspberry Pi Zero W DEV-1427 7If you’re looking for a starter pack, this kit includes everything you need tostart using your Pi Zero W.
Page 2 of 11SparkFun Raspberry Pi Zero W Basic Kit KIT-1429 8Required MaterialsTo follow along with this tutorial, you will need the following items: Raspberry Pi Zero W Basic KitMonitorKeyboardMouse (optional but suggested)USB hub (for more than one USB device)Suggested ReadingHere are some tutorials you may find interesting before continuing:Single Board ComputerBenchmarksSD Cards and WritingImagesHow to set up differentbenchmarking programs on singleboard computers or computingmodules and run them. The resultsfor various generations are shownon the subsequent pages.How to upload images to an SDcard for Raspberry Pi, PCDuino, oryour favorite SBC.Raspberry gPIoRaspberry Pi SPI and I2CTutorialHow to use either Python or C todrive the I/O lines on a RaspberryPi.How to use the serial buses on yourRaspberry Pi.
Page 3 of 11Hardware OverviewLet’s go over some of the most noticeable differences between theRaspberry Pi Zero (and Pi Zero W) and the Raspberry Pi 3.Both boards are identical in features except that the W has built in Wifi andBluethooth. Getting started with the Pi Zero board can be a little morecumbersome than with the Pi 3 because many of the connectors needadapters to connect to standard size connectors. Otherwise, to get started,all you need is a uSD card with a Raspberry Pi image on it and power.Mini HDMIUnlike the previous models of the Raspberry Pi which use a standard HDMIconenctor, the Zero uses a mini HDMI connector to save space. To connectthe Zero to a monitor or television, you will need a mini HDMI to HDMIadapter or cable.USB On-the-GoThe Raspberry Pi 3 and other models have traditionally had 2-4 standardsize female USB connectors, which allowed for all variety of devices toconnect including mice, keyboards, and WiFi dongles. Again to save space,the Zero has opted for a USB On-the-Go (OTG) connection. The Pi Zerouses the same Broadcom IC that powered the original Raspberry Pi A andA models. This IC connects directly to the USB port allowing for OTGfunctionality, unlike the Pi B, B , 2 and 3 models, which use an onboardUSB hub to allow for multiple USB connections.To connect a device with a standard male USB connection, you will need aUSB OTG cable. Plug the microUSB end into the Pi Zero, and plug yourUSB device into the standard female USB end.
Page 4 of 11For use with other standard USB devices, it is recommended that you use apowered USB hub. Wireless keyboard and mouse combos work best asthey have one USB dongle for both devices.PowerLike other Pis, power is provided through a microUSB connector. Voltagesupplied to the power USB should be in the range of 5-5.25V.microSD Card SlotAnother familiar interface is the microSD card slot. Insert your microSDcards that contains your Raspberry Pi image file here.
Page 5 of 11WiFi and BluetoothAs with the Raspberry PI 3, the Zero W offers both 802.11n wireless LANand Bluetooth 4.0 connectivity. This frees up many of the connections thatwould have been made over USB, such as a WiFi dongle and a USBkeyboard and mouse if substituting a Bluetooth keyboard/mouse.Camera ConnectorThe Raspberry Pi Zero V1.3 and all Zero Ws have an onboard cameraconnector. This can be used to attach the Raspberry Pi Camera module.However, the connector is a 22pin 0.5mm and different than the standardPi. You will need a different cable to connect the camera to the Pi Zero W.GPIOAs with all other models of the Raspberry Pi, there are a plethora of GPIOpins broken out, many of which other other functionality such as I2C. If youare using the GPIO header, you may want to consider soldering headers toit.Additional ConnectionsLast, you may notice two sets of thruhole pads labeled TV and Run. The TVpads allow you to connect an RCA jack to the board instead of using theHDMI out. The Run pins connect to the chips reset pin and will either turnthe board off or turn it back on once it has been shutdown. Connecting abutton here is a good way to power cycle your board.
Page 6 of 11For a complete description of each pin on the GPIO header and all theconnectors on the PI Zero, consult the graphical datasheet below.Click on the image to view the PDF.Hardware AssemblyDepending on your use case, setup for the Pi Zero can be minimal, or it canbe cumbersome due to smaller connectors on the Zero and the adaptersneeded to connect standard devices such as mice, keyboards, andmonitors.Monitor1. To attach the Pi Zero to a Monitor or TV that has an HDMI input,attach a miniHDMI to HDMI cable or adapter to the miniHDMIconnector on the Pi Zero. Connect the other end to the HDMI port onyour monitor or television.2. Connect the USB OTG cable to the Pi Zero via the microUSBconnector. If you have a keyboard/mouse combe, attach your dongleto the standard female USB end. If you have a separate mouse andkeyboard, you will need a USB hub to attach both tto the USB OTGcable.3. Make sure that you have a valid Raspberry Pi image on yourmicroSD card (more on this later). Insert the microSD card into themicroSd slot.4. Power your Pi Zero via the microUSB power input.
Page 7 of 11There are a few other connectors to point out but we won’t be using. The PiZero has a 40 pin GPIO connector on the board that matches the pinout ofthe standard Pi 3. You can solder wires, headers or Pi Hats to thisconnector to access the GPIO pins or even power. The camera connectorwill allow you to connect the Raspberry Pi camera although it is worthnoting that the connector is a 22pin 0.5mm and different than the standardPi and will need a different cable to connect the camera to the Pi.Installing the OSWhen it comes to crating an image on an SD card for your Pi Zero W, thereare two options.Option 1: NOOBSThe Raspberry Pi foundation has created NOOBS (New Out Of the BoxSoftware) which is easy to use and get you started. Most generic kits suchas the Pi3 Starter Kit will come with a NOOBS uSD card. Unfortunately asof the release of the Pi Zero Basic Kit the NOOBS image will need to beupdated to work on the Pi Zero boards. If you don’t have a current NOOBSimage or just want to start again from scratch installing NOOBS is easy,you don’t need any special software to install it on a card. Just downloadthe image, unzip, drag and drop the files to your card, and you are good togo. Once you have NOOBS on your card, insert it in your board, applypower, and you should see action on your screen. Follow the prompts andinstall Raspbian (you may also want to select a differernt region for yourkeyboard and language). You can also go into the Wifi screen and setupWifi. If you do you will get a lot more options for images to install.You will not see most of these options unless you are connected to theinternetOption 2: .img FileIf you want something other than the basic Raspbian install or other optionsfound on NOOBS, you will need to install your own image on the uSD card.This method is slightly more involved because you need a special *.img filethat not only puts your files on the card, but also sets up things like makingthe card bootable. The Raspberry Pi foundation has a handful of imageslike Ubuntu, OSMC (Open Source Media Center), and even Windows 10IOT Core. A google search will find many more including specializedimages for certain tasks. If you’ve never worked with Raspberry PI before,we recommend Raspian. You can download the latest version using the linkbelow.D O W N L O A D LA T ES T V ER S I O N O F R A S PB I A NHeads up! When isntalling Raspbian, you do not need to worry aboutwhich model Raspberry Pi you are using. However, other RaspberryPi image files, such as OSMC or RetroPi, have images that are
Page 8 of 11designed for different models, often distinguishing between the Pi 2 or3 and older models. Because those Pis use a slightly differentprocessor than the Zero, these images won’t work. The good news isthat the Zero line uses the same chip as the older Raspbery PiA/A /B/B models, so there are still a lot of images out there for it.Visit this link for a breakdown of each Pi model.To install your own image on your card, we recommend software calledEtcher. These guys have taken all the different steps needed and put themall in one piece of software to take care of everything. Download yourimage, then run the program, select your image, select your uSD carddrive, and then hit flash. Once it is done, remove your card and you aregood to go. Once the image is installed, insert the card into the board andapply power.For Mac users, the ApplePi Baker Software is a great way to upload a newimage to an SD card. It will ask for an admin password upon startup. Selectthe SD card on the left plane, then upload your image iundet the PiIngrediants: IMG Recipe section. Click Restore Backup, wait for theprogress bar to finish, and you’re done. The program even ejects the cardyou, so can yank it right out and insert it into your Pi.For the rest of this tutorial, we’ll assume you’ve installed Raspbian either byinstalling the image directly or with Noobs. The tutorial should also workfine for most Linux based systems with a Graphical User Interface, butthings might be in slightly different locationsUsing RaspbianNow that you’ve gotten your board up and running let’s go over somebasics.Raspbian and most Raspberry Pi OSes are going to be Linux based. Don’tlet that scare you too much. Gone are the days of having to remember lotsof commands or that you need to type :wq to save and exit your texteditor. Linux now a days has a Graphical User Interface (GUI) similar toWindows or MacOS, and, while you will probably want to learn a few basiccommands and shorcuts, you can usually get away with not using them.In the upper left hand corner of Raspbian you will see six icons. The first isa Raspberry. This is basically the same as your ‘Start Menu’ on Windowsmachines. Click on this, and you will see a menu of all the installed
Page 9 of 11programs as well as the shutdown options. The second icon looks like aglobe, and it is the Web Browser. Then we have the “File Manager”,“Terminal”, “Mathematica”, and finally “Wolfram”.Raspbian OS Desktop as of 07/2017.Changing Your PasswordAn important thing to remember is that Linux has user names andpasswords. The default Raspian user id is “pi” and the password is“raspberry”. The second thing to remember is that I know your user id andpassword and so do lots of other people with less honorable intentions.Don’t assume all viruses are written for full sized computers. Raspberry Pistend to have a reasonable amount of processing power and are often leftrunning wtih very little to do. Recently viruses have been showing up thatwere written specifically to log into Raspberry Pis using the default username and password and use their processing power to mine cryptocurrencies.So, the first thing we are going to do is change the password. Open up aterminal window and typepi@raspberrypi : sudo passwdYou will be prompted to enter your new password. Type in your newpassword, and your Pi will be that much more secure from unwantedvisitors.Connecting to WiFiNext, let’s connect the Pi Zero W to the internet. If you have a Pi Zero, youwill need to add a Wifi dongle to your board’s USB port (you may need aUSB hub at this point). The Pi Zero W has built in WiFi, so you will not needany external WiFi dongles.To enable WiFi on your Pi, look at the upper right corner of the Desktop,and left click the WiFi icon. You should see a list of available networks.Select the one you want. If it is a secured network, it will prompt you for apassword. Enter the network password, and press OK. Give it a fewseconds, and you should be connected. The WiFi symbol on the Desktopwill change its appearance once connected. If you setup WiFi in Noobs, thisinformation will already be saved. Adding WiFi isn’t strictly necessary, butyou will need internet access if you plan on doing updates.Update SoftwareThe last thing we are going to do is to update all the software packages onthe board. Packages are constantly updated, and no one wants to be leftbehind. Luckily, Linux uses a package manager. All we have to do is tell ourpackage manager to update everything, and then sit back and watch. Let’sgo over a few of the commands we’ll be using. Go ahead and open theterminal, if it isn’t already open. Type the following.pi@raspberrypi: sudo apt-get updateThis will go fetch the latest package information and tell the packagemanager what needs to be updated.
Page 10 of 11 sudo (also known as super user) is a command that you will see alot, specifically with high security commands. It makes sure you havethe correct privileges. Depending on settings, it may or may not askyou for a password. apt get is the package manager and update is the command weare giving it.pi@raspberrypi: sudo apt-get upgradeThis will download and upgrade all the packages. Please note that thisupgrade will take a while. It will also prompt you if this is really what youwant to do, the correct answer is “Y”.pi@raspberrypi: sudo shutdown -r now shutdown will shutdown the machine. r tells it to reboot aftershutting down, and now tells it to do so now ( 15 would tell themachine to shutdown in 15 minutes).What happens if you don’t type in sudo? Linux will give you an error sayingyou don’t have permission to do something. Generally if you see that errorstop for a second and think if you really know what you are doing and wantto do it. If you do, then type sudo in front of your command, and try again.Other Useful Linux CommandsA few other useful commands for use in the terminal command line:pwd - Print Working Directory, if you not sure what folder you are in this willtell you where you are in the filesystem.ls - List, this will show you the contents of the folder. To show all files,including hidden ones, type ls a to show all files/folders. Alternatively,typing ls al will show you all files/folders as well as their permissionsettings.cd - this is how you change directories. cd foldername will move you tothat folder. cd . will back you up one level. cd will take you back toyour home directory.passwd - this will allow you to change your passwordman - this stands for manual. Type man before a command to get asummary of how to use it.nano - this will open a basic text editor that is fairly easy to use.At this point you should be interacting with your Raspberry Pi like you wouldany other computer. You can teach yourself the finer points of Linux, learnPython, program the GPIO pins, setup a minecraft server, build a networkstorage system, game console, or media center, or just surf the web.Resources and Going FurtherRaspberry Pi Resources Raspberry Pi HomepageRaspberry Pi imagesRaspberry Pi Zero and Zero W Graphical DatasheetEtcher - MacOS, Windows and Linux application for writing .img filesto SD cards. ApplePi Baker - MacOS application for writing .img files to SD cards.For more Raspberry Pi fun, check out these other great SparkFun tutorials.
Page 11 of 11FLIR Lepton Hookup GuideBark Back Interactive Pet MonitorSee the invisible world of infraredradiation using the FLIR Dev Kit andRaspberry Pi.Monitor and interact with petsthrough this dog bark detectorproject based on the Raspberry Pi!Preassembled 40-pin Pi WedgeHookup GuidePiRetrocade Assembly GuideUsing the Preassembled Pi Wedgeto prototype with the Raspberry PiB .Build your very own retro gamingcontroller using the SparkFunPiRetrocade tarted-with-the-raspberry-pi-zero-wireless? ga. 7/21/2017
Jul 21, 2017 · the Raspberry Pi 3 and its predecessors, which comes in a form factor that has become as highly recognizable. The Raspberry Pi comes in an even smaller form factor. The introduction of the Raspberry Pi Zero allowed one to embed an entire computer in even