Transcription
Retro Gaming with Raspberry PiCreated by Phillip BurgessLast updated on 2018-08-22 03:35:52 PM UTC
Guide ContentsGuide ContentsOverviewPicking a Game EmulatorWhich emulator is for me?2455Help - this emulator doesn't work!5RetroPiePiPlayRecalboxLakkaAdding Controls: HardwareConsole-Style Controls with USBArcade and Handheld Gaming ControlsConnecting to the Raspberry PiDo I need Pull-up or Pull-down resistors?Example: Connecting an Arcade Joystick & 2 ButtonsAdding More ButtonsExample: A Mini Portable Gaming HandheldInstalling RetrogameDownload and InstallConfiguring RetrogameNew retrogame: Settings FileConfiguring Older RetrogameClassic retrogame: Edit Source CodeArcade Cabinet Pack Assembly5677999111213151619192121232325Raspberry Pi Arcade Cabinet Pack25RetroPie: Improving Emulator PerformanceOverclockingChoosing an Alternate EmulatorInstalling Additional EmulatorsUpdating Emulators to Latest VersionsTroubleshooting RetroPie and retrogameretrogame Related Troubleshooting34343537384040Some of my buttons/controls aren’t working!NONE of my buttons/controls are working!My controls only work if there’s also a USB keyboard plugged in!Retrogame doesn’t work with my optical buttons!I ran Adafruit’s retrogame installer script and rebooted, and now the keyboard and network are unresponsive!RetroPie Related TroubleshootingMy controls work in the EmulationStation UI, but not in one or more specific emulators!The ROM files I have worked in a different emulator before, but aren’t working in RetroPie!Installing RetroPie PackagesAccessing Alternate Emulators Adafruit with-raspberry-pi40404040404141414143Page 2 of 44
More RetroPie Help Adafruit g-with-raspberry-piPage 3 of 44
OverviewI’m a child of the 1980s. Miami Vice! Skinny ties! Big hair! Honest, I had hair then and every town had at least onegood video game arcade.Thanks to the super affordable Raspberry Pi and some clever software, anyone can re-create the classic arcadeexperience at home. Adafruit brings the genuine “clicky” arcade controls, you bring the game files and a little craftingskill to build it.Classic game emulation used to require a well-spec’d PC and specialized adapters for the controls, so it’s exciting tosee this trickle down to a 40 computer. Adafruit with-raspberry-piPage 4 of 44
Picking a Game EmulatorBefore you begin with adding an arcade control you'll need some games to play! In particular we're going to be talkingabout Retro Gaming hereRetro gaming is one of the most popular uses for the Raspberry Pi, and there are now a multitude of ready-to-go SDcard images packed with emulator software (though most require sourcing your own ROM files). The days of installingemulators onesy-twosey are behind us; and the Pi Store (an online app store for Raspberry Pi, recommended in earlierversions of this guide) was shuttered in 2015.Which emulator is for me?Before committing to a big arcade project build, we recommend testing one or more of these packages with akeyboard connected and confirm you can set up and run all the games you’re most interested in then move aheadwith more interesting controls.These are all free downloads, so there’s no harm in downloading them all and seeing what fits your tastes. Also, asyou work with each one and tweak and tune, it’s not uncommon to have to wipe and start over. Keep careful notes ofyour setup process and any configuration changes you make!Once you've downloaded an emulator image, burn it onto your SD card using these instructions (https://adafru.it/pHe)Help - this emulator doesn't work!If you encounter difficulty with these packages or just need tips on setting them up, please visit the FAQ and/orsupport forum on the corresponding project’s web site, not the Adafruit Forums. They’ll be better equipped to answerquestions about their own software.(We can only help out if you have questions specifically about our arcade controls or the retrogame software we’llintroduce on the last page. Please ask for such help in the Adafruit Customer Support Forums (https://adafru.it/jIf) donot submit support questions as bug reports on GitHub, they’ll be ignored there and be as specific as possible indescribing both the variant of Raspberry Pi hardware you’re using and which software package and release, exactversion number or date, etc. Thanks!)So! Here are a few gaming OSes we’re currently aware of Once you've picked it out and installed it on your Raspberry Pi, you can continue to the next stepRetroPieThis is our recommended emulator package!From the RetroPie web site (https://adafru.it/qoa): Adafruit with-raspberry-piPage 5 of 44
“RetroPie allows you to turn your Raspberry Pi or PC intoa retro-gaming machine. It builds upon Raspbian,EmulationStation, RetroArch and many other projects toenable you to play your favourite Arcade, home-console,and classic PC games with the minimum set-up. Forpower users it also provides a large variety ofconfiguration tools to customise the system as you want.“RetroPie sits on top of a full OS, you can install it on anexisting Raspbian, or start with the RetroPie image andadd additional software later. It's up to you.”From the site’s Download page (https://adafru.it/rA3), there are separate versions of RetroPie optimized for single- andmulti-core Raspberry Pi boards (i.e. Pi Zero, original Model A or B, A or B versus the multi-core Pi 2 and Pi 3); theseare not cross-compatible; be sure to start with the right version for your model of Pi!In particular, we like the 3.8.1 release, as it includes some ready-to-run games such as Doom (see all releaseshere (https://adafru.it/sNB))Click here to download the v3.8.1 release for Raspberry Pi 2 and 3 (https://adafru.it/sNC)Click here to download the v3.8.1 release for Raspberry Pi Zero and 1 (https://adafru.it/sND)Breaking down some of the jargon above Raspbian is the standard and most popular Linux operating system distribution for the Raspberry Pi; it’s whatmost people start with when setting up a Raspberry Pi for “normal computer stuff.”EmulationStation is a graphical front-end that lets you select among different emulators or games installed on thesystem, as well as configure gaming controls and other options.RetroArch is among the broadest and most popular multi-platform emulators this is the code that runs the actualgames. But it’s not the only one RetroPie (and most other gaming OSes) collect several others for differentsituations.PiPlayFrom the PiPlay web site (https://adafru.it/rA4): Adafruit with-raspberry-piPage 6 of 44
“PiPlay, formerly called PiMAME, [is a] pre builtRaspberry Pi OS made for gaming and emulation.“Also included is a suite of software designed to reducethe complexity and time needed to setup a fully workingsystem. An updater is included with the distribution.”PiPlay lacks the breadth and active development of RetroPie; it’s not currently Pi 3 or Zero compatible, hasn’t beenupdated since 2015 and the forums are falling victim to spambots. Still, some users report an easier time configuringthings here than other distributions as long as you’re running on the right hardware.RecalboxFrom the Recalbox web site (https://adafru.it/rA5):“Recalbox offers a wide selection of consoles and gamesystems. From the very first arcade systems to the NES,the MEGADRIVE and even 32-bit platforms, such as thePlaystation.“With Kodi already included, Recalbox also serves as aMedia Center. By connecting it to your home network,you will be able to stream videos from any compatibledevices (NAS, PC, External HDD, etc.).”A relative newcomer with an impressive variety of emulated systems. One SD card image (from their “DIY recalbox”link (https://adafru.it/rA6)) is compatible with all current Raspberry Pi boards (no separate single- or multi-coredownloads).It appears that recalbox has its own support for interfacing arcade buttons and joysticks to the Pi’s GPIO header,obviating the need for our own software explained on the last page. Have not experimented with this yet!Lakka Adafruit with-raspberry-piPage 7 of 44
From the Lakka web site (https://adafru.it/rA7):“Lakka is a lightweight Linux distribution that transformsa small computer into a full blown game console.“Lakka is the official Linux distribution of RetroArch andthe libretro ecosystem.“Each game system is implemented as a libretro core,while the frontend RetroArch takes care of inputs anddisplay. This clear separation ensures modularity andcentralized configuration.”Lakka is not as all-inclusive as other packages, but as a result it’s extremely compact. There are separate downloadsfor single- and multi-core Raspberry Pi boards. Adafruit with-raspberry-piPage 8 of 44
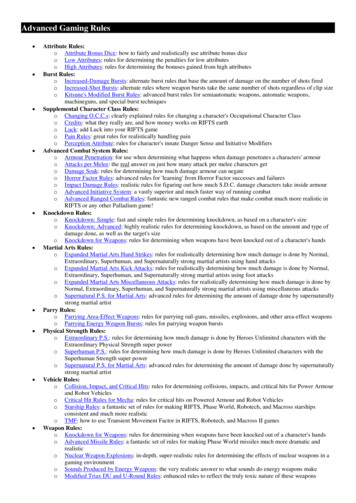
Adding Controls: HardwareAt this point you should have one (or more) games playable from the keyboard. The next step is adding nifty controls Console-Style Controls with USBIf you’re aiming for a home TV gaming console feel,things are super easy: a variety of USB-compatiblegaming controllers exist that’ll plug straight into the Piand you’re done!If aiming to simulate a particularly nostalgic console,chances are you can find an equivalent controller in USBformat. Look around a site like NewEgg or just Googlesearch for some options I’ve seen classic-stylecontrollers resembling the NES, Genesis, Playstation andmore, as well as USB adapters if you’d prefer usingactual original controls.Pictured: Logitech F310Arcade and Handheld Gaming ControlsLet’s look at arcade-style controls first, since they’re physically larger and thus easier to work with Just as there are USB console-style controllers, so too are there USB arcade-style setups. They’re often a bitcostly though also, nearly all of them are laid out for 1990s fighting games. If the ready-mades meet your needs,fantastic. But maybe you want something simpler, or may have ergonomic preferences (I’ve always prefered righthanded joysticking, for example). Making your own control box (or even a whole cabinet) is a satisfying DIY project!This is where things take a creative turn. There’s no One Right Way to arrange controls that can cover every game.Instead, pick a few favorites and devise a layout that handles the most frequently-used inputs well. For everything else,you can still use a keyboard.You’ll also need to build your control panel using the materials and tools best suited to your own skills. I’m fortunateto have access to a laser cutter that can work with acrylic, but that’s a tall order for most. Scrap plywood or a metalproject box are viable materials (a cigar box works great too!), while a drill, hole saw, Dremel tool or wood rasp are allreasonable tools for making holes. Improvise!We have a nice assortment of arcade-style controls in the shop Adafruit with-raspberry-piPage 9 of 44
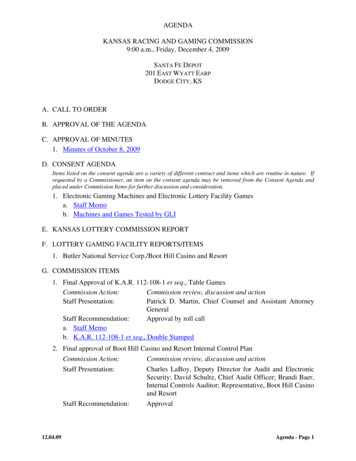
Our Small Arcade Joystick (http://adafru.it/480) is thegamer’s equivalent of the IBM Model M keyboard —clicky and built like a tank!This is an 8-way “digital” joystick. Most classic gamesare designed for this type of stick, and it’s easy tointerface the Raspberry Pi can’t read proportional“analog” joysticks directly.Our 30mm Arcade Button (http://adafru.it/471) isavailable in six different colors and is similarly industrialgrade. Any momentary push-type button (“normallyopen” contacts) will also work. Adafruit with-raspberry-piPage 10 of 44
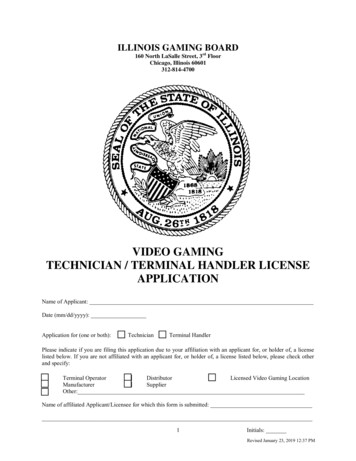
Large (http://adafru.it/1192) (60mm)and Massive (http://adafru.it/1187) (100mm) arcadebuttons come in five colors and are irresistible! Thesebigger buttons are typically seen on quiz games ratherthan fast-twitch shooters.A classic Atari or Commodore joystick can also be used, since these are just passive switches internally. Most latergaming consoles used serial protocols for their controls unfortnately those won’t work here but as mentionedpreviously, USB clones exist for most.We offer a variety of arcade controls, but we don't sell COMMON SENSE. When drilling and cutting, takeprecautions such as wearing SAFETY GLASSES, always cut AWAY from yourself, etc.Connecting to the Raspberry PiThe controls will be wired to the 40-pin GPIO (generalpurpose input/output) header on the Raspberry Pi board.Early model Raspberry Pi boards had a 26-pin header same idea, just with fewer spots to connect things. Adafruit with-raspberry-piPage 11 of 44
Each pin on this header has a unique “GPIO number” not in-order, but we provide a map below for translating.Buttons and a joystick (each of 4 directions) will connect between any available GPIO pin and a ground (GND) pin.This map is turned 90- degrees from the photo above so the 5V pins are nearest the corner of the board, whileGPIO21 is nearest the USB connectors:All of the green pins are fair game for connecting buttons.Yellow pins may or may not be available for controls, depending what hardware features are enabled on thesystem:GPIO2 and GPIO3 are off-limits if using any I2C peripherals (for example, most real-time clock boards).GPIO14 and GPIO15 are off-limits if using the TTL serial port (for example, with a serial console cable, orthermal printer).If using one of our PiTFT displays (as most of our portable gaming projects do), another seven GPIO pinsare out of commission: GPIO7-GPIO11 and GPIO24-25.Our I2S audio amplifier board (https://adafru.it/qpB) needs GPIO pins 18, 19 and 21.Avoid red pins, these carry power and aren’t suitable for controls.Black pins are ground points. The other leg of each button (and the “common” pin from a joystick) will need toconnect to one of these. There are several sca
22.08.2018 · Click here to download the v3.8.1 release for Raspberry Pi 2 and 3 (https://adafru.it/sNC) Click here to download the v3.8.1 release for Raspberry Pi Zero and 1 (https://adafru.it/sND) Breaking down some of the jargon above Raspbian is the standard and most popular Linux operating system distribution for the Raspberry Pi; it’s what