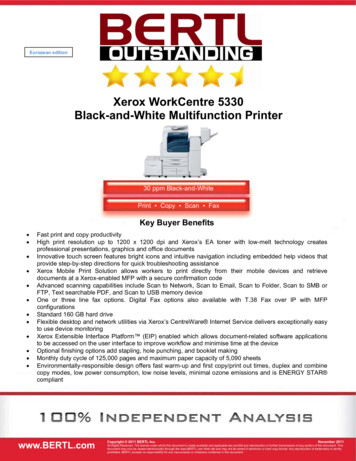
Transcription
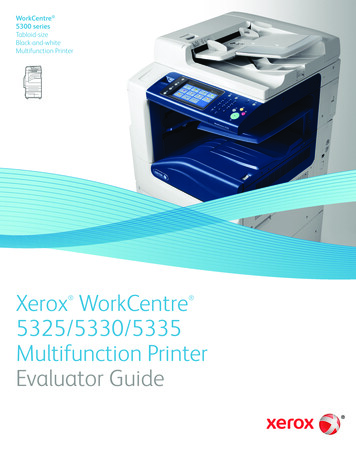
Xerox WorkCentre5325/5330/5335Security Function SupplementaryGuideVersion 1.0, September 2011
Table of ContentsGuideCopyright 2011 by Fuji Xerox Co., Ltd. All rights reserved.2
Before Using the Security FunctionThis section describes the certified security functions and the items to be confirmed.PrefaceThis guide is intended for the manager and system administrator of the organization where the machine isinstalled, and describes the setup procedures related to security.For general users, this guide describes the operations related to security features.For information on the other features available for the machine, refer to the following guidance.Xerox WorkCentre 5325/5330/5335 System Administrator Guide: Version 1.0: September 2011Xerox WorkCentre 5325/5330/5335 User Guide: Version 1.0: September 2011The security features of the Xerox WorkCentre 5325/5330/5335 are supported by the following ROM versions.Controller ROMVer. 1.202.3IOT ROMVer. 30.19.0ADF ROMVer. 7.8.50Important:The machine has obtained IT security certification for Common Criteria EAL3.This certifies that the target of evaluation has been evaluated based on the certain evaluation criteria andmethods, and that it conforms to the security assurance requirements.Note: Your ROM and guidance may not be the certified version because they may have been updated along withmachine improvements.For the latest information on security and operation concerning your device, download the latest edition ofguidance from http://www.support.xerox.com/support3
Security FeaturesXerox WorkCentre 5325/5330/5335 has the following security features: Hard Disk Data Overwrite Hard Disk Data Encryption User Authentication System Administrator’s Security Management Customer Engineer Operation Restriction Security Audit Log Internal Network data protection Fax Flow Security4
Settings for the Secure OperationFor the effective use of the security features, the System Administrator (Machine Administrator) must follow theinstructions below: Passcode Entry from Control PanelDefault [On]. The System Administrator PasscodeChange the default passcode "1111" to another passcode of 9 or morecharacters. Maximum Login AttemptsDefault [5] Times. Service Rep. Restricted OperationSet to [On], and enter a passcode of 9 or more characters. Overwrite Hard DiskDefault [3 Overwrites]. Data EncryptionDefault [On]. Scheduled Image OverwriteSet to [Enabled]. AuthenticationSet to [Login to Local Accounts] or [Login to Remote Accounts]. Access ControlSet to [Locked] for Device Access and Service Access. Private PrintSet to [Save as Private Charge Print]. User Passcode Minimum LengthSet to [9] characters. Direct FaxSet to [Disabled] when remote authentication is used. Self TestSet to [Enabled]. Software DownloadSet to [Disabled]. SMBSet to [Disabled] for [NetBEUI]. WebDAVSet to [Disabled] when remote authentication is used. IPPDefault [Enabled]. SSL/TLSSet to [Enabled]. IPSecSet to [Enabled]. SNMPv1/v2cSet to [Disabled]. SNMPv3Set to [Enabled]. S/MIMESet to [Enabled]. Audit LogSet to [Enabled].Important:The security will not be warranted if you do not correctly follow the above setting instructions.The Information Flow Security feature requires no special settings by System Administrator.When you set Data Encryption [On] again, enter an encryption key of 12 characters.5
Data RestorationThe enciphered data cannot be restored in the following conditions. When a trouble occurs in the hard disk When you have forgotten the encryption key When you have forgotten the System Administrator ID and a passcode when setting [Service Rep. RestrictedOperation] to [On].Starting use of the data encryption feature andchanging the settingsWhen data encryption is started or ended, or when the encryption key is changed, the machine must be restarted.The corresponding recording area (the Hard Disk) is reformatted when restarting. In this case, the previous data isnot guaranteed.The recording area stores the following data. Spooled print data Print data including the secure print and sample print Forms for the form overlay feature Folder and job flow sheet settings (Folder name, passcode, etc.) Files in Folder Address book dataImportant:Be sure to save all necessary settings and files before starting to use the data encryption feature or changing thesettings.An error occurs if the connected hard disk does not match the encryption settings.6
Use of the Overwrite Hard DiskIn order to protect the data stored on the hard disk from unauthorized retrieval, you can set the overwriteconditions to apply them to the data stored on the hard disk.You can select the number of overwrite passes from one time or three times. When [1 Overwrite] is selected, “0” iswritten to the disk area. [3 Overwrites] ensures higher security than [1 Overwrite].The feature also overwrites temporarily saved data such as copy documents.Important:If the machine is powered off during the overwriting operation, unfinished files may remain on the hard disk. Theoverwriting operation will resume if you power the machine on again with the unfinished files remaining on thehard disk.Service Representative Restricted OperationSpecifies whether the Service Representative has full access to the security features of the machine, including theability to change System Administrator settings.For the WorkCentre 5325/5330/5335, select [On] and then set [Maintenance Passcode] to restrict the ServiceRepresentative from entering the System Administration mode.Important:If the System Administrator’s user ID and the passcode are lost when [Service Rep. Restricted Operation] is set to[On], not only you but also we are no longer able to change any setting in the System Administration mode.7
For Optimal Performance of the SecurityfeaturesThe manager (of the organization that the machine is used for) needs to follow the instructions below: The manager needs to assign appropriate people as system and machine administrators, and manage andtrain them properly. The manager and system administrators need to train users about the security policies and procedures of theirorganization. The machine needs to be placed in a secure or monitored area where the machine is protected fromunmanaged physical access. If the network where the machine is installed is to be connected to external networks, configure the networkproperly to block any unauthorized external access. The users need to set a user ID and a passcode certainly on [Accounting Configuration] of printer driver. Users and administrators need to set passcodes and an encryption key according to the following rules for theclient PC login and the machine’s setup.・Do not use easily guessed character strings for passcodes.・A passcode needs to contain both numeric and alphabetic characters. Users and administrators need to manage and operate the machine so that their user IDs and passcodes maynot be disclosed to another person.Administrators need to set the account policy in the remote authentication server as follows. ・Set password policy to [9 or more characters]・Set account lockout policy to [5 times] For secure operation, all of the remote trusted IT products that communicate with the machine shallimplement the communication protocol in accordance with industry standard practice with respect toRFC/other standard compliance (SSL/TLS, IPSec, SNMPv3, S/MIME) and shall work as advertised. The settings described below are required for both the machine’s configuration and the client’s configuration.1.) SSL/TLSFor the SSL client (Web browser) and the SSL server that communicate with the machine, select a dataencryption suite from the following.・SSL RSA WITH RC4 128 SHA・SSL RSA WITH 3DES EDE CBC SHA・TLS RSA WITH AES 128 CBC SHA・TLS RSA WITH AES 256 CBC SHA(The recommended browser is Microsoft Internet Explorer 6/7/8)2.) S/MIMEFor the machine and E-mail clients, select an Encryption Method/Message Digest Algorithm from the following.・RC2 (128bit)/SHA1・3Key Triple-DES (168bit)/SHA18
3.) IPSecFor the IPSec host that communicates with the machine, select an Encryption Method/Message DigestAlgorithm from the following.・AES (128bit)/SHA1・3Key Triple-DES (168bit)/SHA14.) SNMPv3The encryption method of SNMPv3 is fixed to DES. Set [Message Digest Algorithm] to [SHA1].Important: For secure operation, while you are using the CentreWare Internet Services, do not access other web site. For secure operation, when you change [Authentication Type], initialize the hard disk by resetting [DataEncryption] and changing [encryption key]. For preventing SSL vulnerability, you should set the machine address in the proxy exclusion list of browser.With this setting, secure communication will be ensured because the machine and the remote browsercommunicate directly without proxy server, and thus you can prevent man-in-the-middle attacks.Confirm the Machine ROM version and theSystem ClockBefore making initial settings, the System Administrator (Machine Administrator) needs to check the ROM versionof the machine and the system clock of the machine.How to check by Control Panel1.Press the Machine Status button on the control panel.2.Select [Machine information] on the touch screen.3.Select [Software Version] on the [Machine information] screen.You can identify the software versions of the components of the machine on the screen.How to check by Print Report1.Press the Machine Status button on the control panel.2.Select [Print Reports] on the [Machine information] screen.3.Select [Printer Reports] on the touch screen.4.Select [Configuration Reports].5.Press the Start button on the control panel.You can identify the software versions of the components of the machine by Print Report.9
How to check the System Clock1.Press the Log In/Out button on the control panel.2.Enter the System Administrator’s Login ID and the passcode if prompted (default ID: “admin”, defaultpasscode: “1111”).3.Select [Enter] on the touch screen.4.Press the Machine Status button on the control panel.5.Select [Tools] on the touch screen.6.Select [System Settings].7.Select [Common Service Settings].8.Select [Machine Clock/Timers].You can check the time and the date of the internal clock. If you need to change the time and the date, refer tothe following procedures.1.Select the required option.2.Select [Change Settings].3.Change the required setting. Use the scroll bars to switch between screens.4.Select [Save].10
Initial Settings Procedures UsingControl PanelThis section describes the initial settings related to Security Features, and how to set them on the machine’scontrol panel.Authentication for entering the SystemAdministration mode1.Press the Log In/Out button on the control panel.2.Enter "admin" with the keyboard displayed. This is the factory default ID.3.Select [Next] on the touch screen.4.Enter "1111" for passcode from the keyboard.5.Select [Enter] on the touch screen.6.Press the Machine Status button on the control panel.7.Select [Tools].Use Passcode Entry from Control Panel1.Select [Authentication/Security Settings] on the [Tools] screen.2.Select [Authentication].3.Select [Passcode Policy].4.On the [Passcode Policy] screen, select [Passcode Entry from Control Panel].5.Select [Change Settings].6.On the [Passcode Entry from Control Panel] screen, select [On].7.Select [Save].8.To exit the [Passcode Policy] screen, select [Close].11
Change the System Administrator’s Passcode1.Select [Authentication/Security Settings] on the [Tools] screen.2.Select [System Administrator Settings].3.Select [System Administrator’s Passcode].4.Select [New Passcode].5.Enter a new passcode of 9 or more characters using the keyboard displayed, and then select [Save].6.Select [Retype Passcode].7.Enter the same passcode, and then select [Save].8.Select [Save].9.A confirmation window appears. Select [Yes] to confirm your entry.Set Maximum Login Attempts1.Select [Authentication/Security Settings] on the [Tools] screen.2.Select [Authentication].3.Select [Maximum Login Attempts By System Administrator].4.On the [Maximum Login Attempts] screen, select [Limit Attempts].5.With [ ] and [ ], set [5].6.Select [Save].Set Service Rep. Restricted Operation1.Select [System Settings] on the [Tools] screen.2.Select [Common Service Settings].3.Select [Other Settings].4.On the [Other Settings] screen, select [Service Rep. Restricted Operation].5.Select [Change Settings].6.Select [On].7.Select [Maintenance Passcode].8.Select [New Passcode].9.Enter a new passcode of 9 or more characters by using the keyboard displayed, and then select [Save].10. Select [Save].11. Select [Retype Password/Passcode].12. Enter the same passcode by using the keyboard displayed, and then select [Save].13. Select [Save].14. Select [Yes] to apply the change.15. A confirmation window appears. Select [Yes] to confirm your entry.16. To exit the [Other Settings] screen, select [Close].12
Set Overwrite Hard Disk1.Select [Authentication/Security Settings] on the [Tools] screen.2.Select [Overwrite Hard Disk].3.Select [Number of Overwrites].4.On the [Number of Overwrites] screen, select [1 Overwrite] or [3 Overwrites].5.Select [Save].Set Scheduled Image Overwrite1.Select [Authentication/Security Settings] on the [Tools] screen.2.Select [Overwrite Hard Disk].3.Select [Scheduled Image Overwrite].4.On the [Scheduled Image Overwrite] screen, select [Daily], [Weekly], or [Monthly].5.Set [Day], [Hour],and [Minutes],6.Select [Save].Set Data Encryption1.Select [System Settings] on the [Tools] screen.2.Select [Common Service Settings].3.Select [Other Settings].4.On the [Other Settings] screen, select [Data Encryption].5.Select [Change Settings].6.Select [On].7.Select [New Encryption Key].8.Enter a new encryption key of 12 characters by using the keyboard displayed, and then select [Save].9.Select [Re-enter the Encryption Key]10. Enter the same passcode, and then select [Save].11. Select [Save].12. Select [Yes] to apply the change.13. Sele
Xerox WorkCentre 5325/5330/5335 System Administrator Guide : Version 1.0: September 2011 Xerox WorkCentre 5325/5330/5335 User Guide : Version 1.0: September 2011 The security features of the Xerox WorkCentre 5325/5330/5335 are supported by the following ROM versions. Controller ROM Ver. 1.202.3 IOT ROM Ver. 30.19.0 ADF ROM Ver. 7.8.50 Important: The machine has obtained IT security .
