Transcription
Sophos UTMRemote access via PPTPProduct version: 9.706
ContentsContentsii1 Introduction32 Configuring UTM42.1 Create a user account42.2 Configure PPTP settings52.3 Configure advanced PPTP settings72.4 Creating firewall and masquerading rules82.4.1 Create a firewall rule2.4.2 Create a masquerading rule3 Configuring the remote client810123.1 Configure Windows 10123.2 Configure Windows 7124 Connecting to the VPN144.1 Connect to the VPN in Windows 10144.2 Connect to the VPN in Windows 714Open source software attributions15Copyright notice15
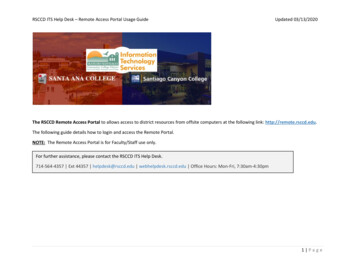
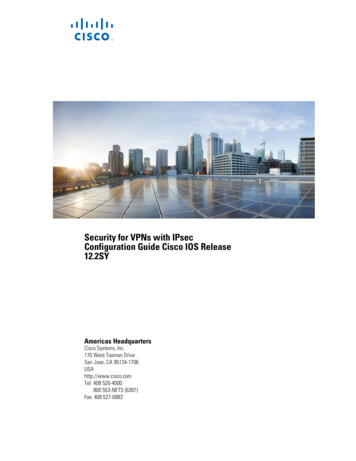
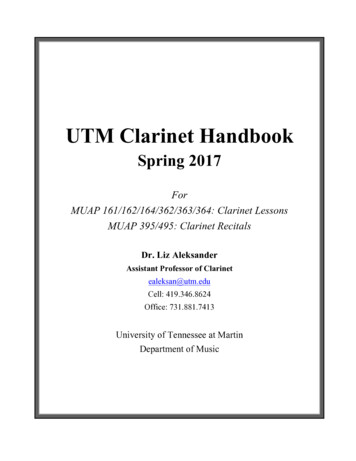
1 IntroductionThis guide helps you configure step by step remote access to the UTM using the Point-toPoint Tunneling Protocol (PPTP). PPTP allows single internet-based hosts to accessinternal network services through an encrypted tunnel. The structure is described in the following chart. PPTP is easy to set up, and requires on Microsoft Windows systems no additional client software.Configuration guidehttps://IP addressSophos UTMeth0User Portaleth1EncryptedVPN tunnelRoad WarriorInternetLANAdministratorHeadquartersFirst, you configure the UTM to allow remote access. Then, you enable the User Portal ofthe UTM for the remote access users.The User Portal offers a configuration guide to the remote access user. You must provideusers with their login data for the User Portal.In order to use PPTP with UTM, client computers must support the MS-CHAPv2 authentication protocol, which is automatically available for Windows.
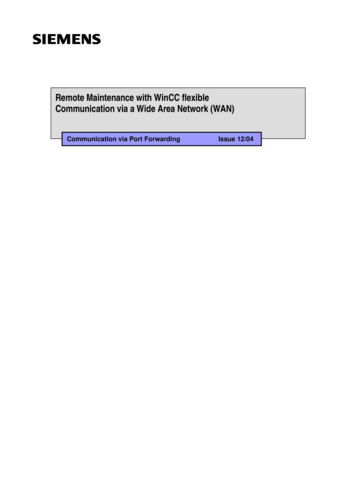
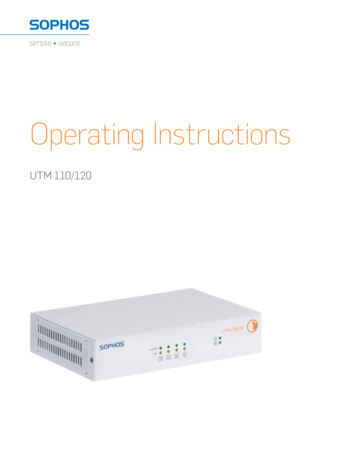
2 Configuring UTMYou configure UTM through WebAdmin from your administration PC. For information onhow to use WebAdmin, see the UTM administration guide.2.1 Create a user accountCreate a user account that should be able to access the User Portal and use the VPN connection.If you want to use an existing account, adopt the required settings from the user configuredin the next steps.1. Open the Definitions & Users Users & Groups Users page.2. Click the New User button.The Create New User dialog shows.
2.2 Configure PPTP settings2 Configuring UTM3. Make the following settings:Username: Enter a username. Example: gforeman. The remote user needs this username later to log in to the User Portal.Real name: Enter the full name of the remote user. Example: George Foreman).Email address: Enter the e-mail address of the remote user.Authentication: Remote access through PPTP supports the authentication methods:Local and RADIUS. For Local authentication, enter a password for the remote user. Touse RADIUS, select Remote.Use static remote access IP (optional): You can assign the remote access user a staticIP address. This IP address must not originate from the IP address pool used in theremote access settings. When the connection is being established, the IP address isautomatically assigned to the host.Comment (optional): You can enter a description or additional information on the user.4. Click Save.Cross Reference: Find more information about user accounts in the UTM administrationguide under Definitions & Users.2.2 Configure PPTP settingsThis topic shows how you enable PPTP, configure basic settings, and access control.1. Go to Remote Access PPTP Global.2. Enable PPTP.Click the switch to turn on PPTP remote access.The switch turns amber and you can edit the page.3. Make the following settings:Authentication via: Select the authentication method.PPTP remote access supports Local and RADIUS authentication. For users usingother authentication methods, remote access through PPTP won’t work.You can use RADIUS authentication if you have defined a RADIUS server on the Definitions & Users Authentication Servers Servers page. The RADIUS server mustsupport MS-CHAPv2 challenge-response authentication. The server can pass backparameters such as the client's IP address and DNS/WINS server addresses. ThePPTP module sends the following string as NAS-ID to the RADIUS server: pptp. Whenyou select RADIUS authentication, local users can’t authenticate through PPTP.5UTM 9 Administration Guide
2 Configuring UTM2.2 Configure PPTP settingsCross Reference: The configuration of the Microsoft IAS RADIUS server and the configuration of RADIUS within WebAdmin is described in the UTM administration guideunder Definitions & Users.Users and groups: When you select Local, select the users or groups who should beable to use PPTP remote access.Assign IP addresses by: During connection establishment, user clients get an IPaddress. The IP address can be taken from a predefined IP address pool or it can berequested from a DHCP server.OptionDescriptionIP address pool Pool network: By default, UTM assigns IP addresses from the private IPaddress space 10.242.1.x/24. This network is called VPN Pool (PPTP). Touse a different network, change the definition of the VPN Pool (PPTP) onthe Definitions & Users Network Definitions page, or create another IPaddress pool by clicking the Plus icon.Note: If you want that PPTP-connected users are allowed to accessthe internet, you must additionally define appropriate masqueradingor NAT rules.DHCP serverDHCP server: You must specify an DHCP server that runs on a physicallydifferent system. The local DHCP server won’t work.Via interface: Define the interface through which the DHCP server isconnected. The DHCP server doesn’t have to be directly connectedto that interface, it must be just reachable, for instance through arouter.4. Click Apply to save your settings.The switch turns green. PPTP is active now.UTM 9 Administration Guide6
2.3 Configure advanced PPTP settings2 Configuring UTMCross Reference: Find more information about remote access in the UTM administrationguide under Remote Access.2.3 Configure advanced PPTP settings1. Go to Remote Access PPTP Advanced.2. Set the encryption strength.The available options are Weak (40 bit) and Strong (128 bit).Security note: You should always set encryption to Strong (128-bit), except whenyour network includes endpoints that can’t support this. Both sides of the connectionmust use the same encryption strength.3. Click Apply to save your settings.4. Optionally, enable debug mode.If you select Enable debug mode, the PPTP daemon log file contains extended information about PPTP connection negotiation.5. Click Apply to save your settings.6. Open the Remote Access Advanced page.You can define name servers (DNS and WINS) and the name service domain that isassigned to hosts during the connection establishment.7UTM 9 Administration Guide
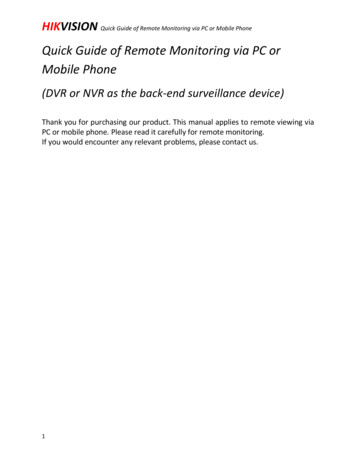
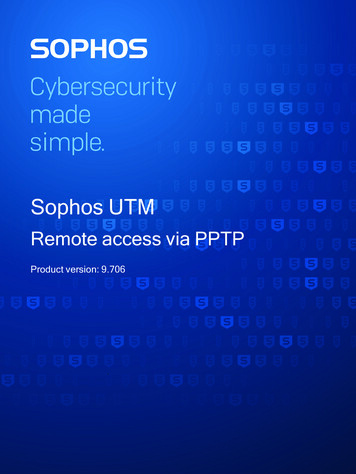
2 Configuring UTM2.4 Creating firewall and masquerading rules7. Click Apply to save your settings.2.4 Creating firewall and masquerading rulesTo allow traffic from and to endpoint clients, you must create appropriate firewall and masquerading rules.2.4.1 Create a firewall rule1. Open the Network Protection Firewall Rules page.2. Click New Rule.The Add Rule dialog shows.UTM 9 Administration Guide8
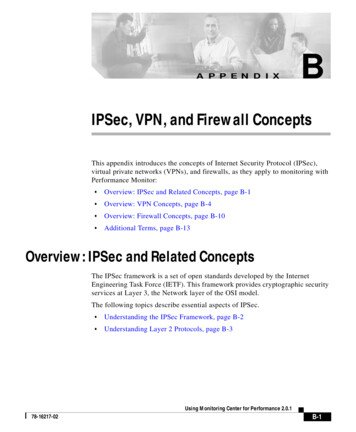
2.4 Creating firewall and masquerading rules2 Configuring UTM3. Make the following settings:Sources: Add the remote user network (in this example: gforeman).Services: Add the allowed services.Destinations: Add the allowed networks. Example: Internal (Network). If remote usersshould be able to access internet you must select the appropriate network definition.Example: Internet or Any.Action: Select Allow.4. Click Save.The firewall rule shows in the list and is turned off (switch is gray).5. Click the switch to turn on the rule.The switch turns green.9UTM 9 Administration Guide
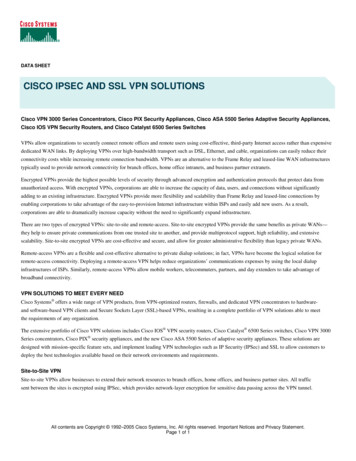
2 Configuring UTM2.4 Creating firewall and masquerading rulesThe UTM evaluates active rules from the top down until it finds a match. Once it finds amatch, it doesn’t evaluate subsequent rules. So, position the specific rules above the lessspecific rules.Security Note: Don’t place a rule such as Any – Any – Any – Allow at the top, since thismatches all traffic, and the following rules are never evaluated.Cross Reference: Find more information about firewall rules in the UTM administrationguide under Network Protection.2.4.2 Create a masquerading ruleNote: This is an optional step depending on your environment.Masquerading is used to mask the IP addresses of one network with the IP addresses of asecond network, in this example: gforeman with External. Thus, remote users who onlyhave private IP addresses can, for example, surf on the internet with a public IP address.Depending on your system configuration, masquerading can also be necessary for otherconnection types.1. Go to Network Protection NAT Masquerading.2. Click New Masquerading Rule.The Add Masquerading Rule dialog shows.3. Make the following settings:Network: Select the network of the remote endpoint (in this example: gforeman).Interface: Select the interface that should be used to mask the clients (in this example:External).Use address: If the selected interface has more than one IP address, you can definewhich IP address should be used for masquerading. Default: Primary address.4. Click Save.The masquerading rule shows at the end of the list and is turned off (switch showsgray).UTM 9 Administration Guide10
2.4 Creating firewall and masquerading rules2 Configuring UTM5. Click the switch to turn on the rule.The switch turns green.Cross Reference: Find more information about masquerading rules in the UTM administration guide under Network Services.6. Optionally, activate the proxies:If the remote employees should access URL services via the remote access you mayconfigure the required proxies on the UTM – this would be the DNS and HTTP proxy forexample.Cross Reference: Find more information about proxies in the UTM administrationguide.Depending on the security policy of your organization and the requirements of your network,you might have to make additional settings.After configuring the VPN server (headquarter), remote users must configure their devices.11UTM 9 Administration Guide
3 Configuring the remote clientFor users to be able to access the UTM via PPTP VPN, they must configure their clientdevice. For that, they must access the UTM User Portal with a browser from their remote client. Then, they can view installation instructions. The VPN connection has to be configuredin Windows.3.1 Configure Windows 101. Go to Start Settings.2. In the dialog, go to Network & Internet VPN.3. Select Add a VPN connection.4. In the dialog, make the following settings:VPN provider: Select Windows (built-in).Connection name: Enter a name for the connection.Server name or address: Enter the DNS name or the IP address of your organization’sserver that accepts remote access connections. Your organization’s administratorshould have provided this information to you.VPN type: Select Point to Point Tunneling Protocol (PPTP). Automatic should workas well if Windows can determine the type during the connection establishment.Type of sign-in info: Select User name and password.5. (Optional) You can enter your username and password now. You can also save thesealong with the connection.If you don’t enter your credentials, Windows prompts you when you initiate the connection.6. Click Save.7. Select Connect to test the connection.8. Close the dialog once you’re finished.3.2 Configure Windows 71. Click Start and then Control Panel.2. In the Control Panel, click Network and Internet, then Network and Sharing Center.3. Click Set up a new connection or network.The Set up a Connection or Network assistant opens.4. Click Connect to a workplace and Next.
3.2 Configure Windows 73 Configuring the remote client5. Define the dial-up internet connection.If you have a permanent connection to the internet, select the Use my internet connection (VPN) option. Otherwise, click Dial directly, and then select your dial-up internet connection from the list.6. Click Next.7. Enter the hostname or the IP address of the gateway you want to connect to.8. Enter a descriptive name for the connection.9. Optional: Select the following options if required:Allow other people to use this connection: Select this option if you want the connection to be available to anyone who signs in to the client.Don't connect now; just set it up so I can connect later: Select this option if you wantto use the connection later.10. Click Next.11. Enter the user credentials.Enter the User name and Password (Remote User Account).12. Click Create.The assistant closes.13. In the Network and Sharing Center, click Connect to a network.A list with the available network connection opens.14. Right-click the new connection and select Properties.The Connection Properties dialog box opens.General: You can change the hostname or destination address of the connection. In theFirst connect section, select any network connections that need to be establishedbefore setting up the PPTP session.Options: You can define the dial and redial options.Security: In the Type of VPN drop-down list, make sure you select Automatic.Sharing: This menu allows you to share the PPTP connection with other computers onthe local network.15. To close the dialog box, click OK.Now you can directly establish the connection in the sign-in window.For information on how to establish the connection if the sign-in window is not open, seeConnecting to the VPN in Windows 7.13UTM 9 Administration Guide
4 Connecting to the VPN4.1 Connect to the VPN in Windows 10To establish the connection in Windows 10, do as follows:1. Go to Start and type VPN, and select VPN settings from the matches.The VPN dialog opens.2. Select the connection you created and select Connect.4.2 Connect to the VPN in Windows 7To establish the connection in Windows 7, do as follows:1. Open the connections list.In Windows 7, in the Network and Sharing Center, click Connect to a network. A list ofavailable network connections opens.Alternatively, click the Network Connection icon on the right of the task bar.2. In the network connections list, click the appropriate connection to initiate the connection.If you are not currently connected to the internet, MS Windows offers to connect to theinternet. After your computer connects to the internet, the VPN server prompts you foryour username and password.3. Type your username and password, and then click Connect.To disconnect from the VPN, right-click the Network Connection icon on the right of the taskbar, then click Disconnect from and select the connection.
Open source software attributionsThird-party license informationCopyright noticeThe specifications and information in this document are subject to change without notice.Companies, names, and data used in examples herein are fictitious unless otherwise noted.This document may not be copied or distributed by any means, in whole or in part, for anyreason, without the express written permission of Sophos Limited. Translations of this original manual must be marked as follows: "Translation of the original manual". 2021Sophos Limited. All rights reserved.http://www.sophos.comSophos UTM, Sophos UTM Manager, Sophos Gateway Manager, Sophos iView Setup andWebAdmin are trademarks of Sophos Limited. Cisco is a registered trademark of Cisco Systems Inc. iOS is a trademark of Apple Inc. Linux is a trademark of Linus Torvalds. All furthertrademarks are the property of their respective owners.Limited WarrantyNo guarantee is given for the correctness of the information contained in this document.
Sophos UTM https://IP address. User Portal. Road Warrior. Internet. First, you configure the UTM to allow remote access. Then, you enable the User Portal of the UTM for the remote access users. The User Portal offers a configuration guide to the remote access user. You must