Transcription
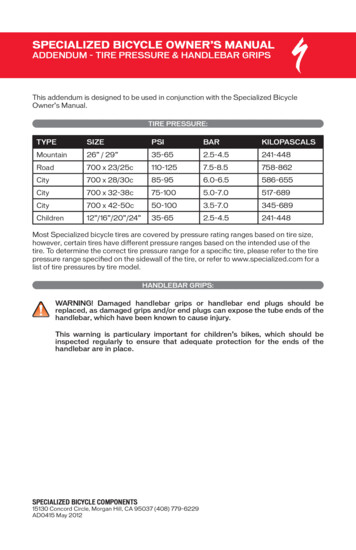
SPECIALIZED BICYCLE OWNER’S MANUALADDENDUM - TIRE PRESSURE & HANDLEBAR GRIPSThis addendum is designed to be used in conjunction with the Specialized BicycleOwner’s Manual.TIRE PRESSURE:TYPESIZEPSIBARKILOPASCALSMountain26” / 29”35-652.5-4.5241-448Road700 x 23/25c110-1257.5-8.5758-862City700 x 28/30c85-956.0-6.5586-655City700 x 32-38c75-1005.0-7.0517-689City700 x �/24”35-652.5-4.5241-448Most Specialized bicycle tires are covered by pressure rating ranges based on tire size,however, certain tires have different pressure ranges based on the intended use of thetire. To determine the correct tire pressure range for a specific tire, please refer to the tirepressure range specified on the sidewall of the tire, or refer to www.specialized.com for alist of tire pressures by tire model.HANDLEBAR GRIPS:WARNING! Damaged handlebar grips or handlebar end plugs should bereplaced, as damaged grips and/or end plugs can expose the tube ends of thehandlebar, which have been known to cause injury.This warning is particulary important for children’s bikes, which should beinspected regularly to ensure that adequate protection for the ends of thehandlebar are in place.SPECIALIZED BICYCLE COMPONENTS15130 Concord Circle, Morgan Hill, CA 95037 (408) 779-6229AD0415 May 2012
SPECIALIZEDBICYCLEOWNER’SMANUAL
Bicycle Owner’s Manual9th Edition, 2007This manual meets EN Standards 14764, 14765, 14766 and 14781.IMPORTANT:This manual contains important safety, performance and service information.Read it before you take the first ride on your new bicycle, and keep it forreference.Additional safety, performance and service information for specific componentssuch as suspension or pedals on your bicycle, or for accessories such ashelmets or lights that you purchase, may also be available. Make sure that yourdealer has given you all the manufacturers’ literature that was included withyour bicycle or accessories. In case of a conflict between the instructions in thismanual and information provided by a component manufacturer, always followthe component manufacturer’s instructions.If you have any questions or do not understand something, take responsibility foryour safety and consult with your dealer or the bicycle’s manufacturer.NOTE:This manual is not intended as a comprehensive use, service, repair or maintenancemanual. Please see your dealer for all service, repairs or maintenance. Your dealermay also be able to refer you to classes, clinics or books on bicycle use, service,repair or maintenance.
IntroductionCongratulations! You have in your possession one of the finest bicycleproducts in the world. The following pages will provide you with the informationyou need to properly use, adjust, maintain and service your new bike, so you canget the most out of every ride.It is essential that you read this owner’s manual thoroughly before riding yourbicycle—we know you’re anxious, but trust us, it will only take a few minutes, andthen you can unleash the full potential of your Specialized bicycle.Please pay special attention to the safety information and cautions locatedthroughout this owner’s manual, as they are in place to help you avoid serious injury.If you encounter any issues with your bicycle that aren’t covered in thismanual, please contact your nearest Authorized Specialized Dealer. As yournumber one resource, your Specialized dealer can answer questions, performrequired maintenance, recommend the best equipment and gear to complementyour ride and provide a completely customized bike fit (BG FIT-certified dealersonly).A list of Authorized Specialized Dealers is available online at www.specialized.com.Thank you for buying a Specialized! We’re proud to be your brand of choice.Now go ride!
ContentsGENERAL WARNINGA special note to parents1. FirstA. Bike fitB. Safety firstC. Mechanical Safety CheckD. First ride2. SafetyA. The BasicsB. Riding SafetyC. Off Road SafetyD. Wet Weather RidingE. Night RidingF. Extreme, stunt or competition ridingG. Changing Components or Adding Accessories3. FitA. Standover heightB. Saddle positionC. Handlebar height and angleD. Control position adjustmentsE. Brake reach4. TechA. Wheels1. secondary retention devices2. Wheels with cam action systems3. Removing and installing wheelsB. Seat post cam action clampC. BrakesD. Shifting gearsE. PedalsF. Bicycle SuspensionG. Tires and Tubes5. ServiceA. Service IntervalsB. If your bicycle sustains an impactp. 1p. 2p.p.p.p.3335p. 6p. 7p. 8p. 8p. 9p. 10p. 11p. 12p. 12p. 14p. 15p. 16p. 16p. 18p. 18p. 19p. 22p. 23p. 25p. 27p. 29p. 30p. 32p. 34Appendix A: Intended UseAppendix B: Lifespan of your bike and its componentsAppendix C: Coaster BrakesAppendix D: Fastener Torque Specificationsp. 35p. 42p. 49p. 50International subsidiaries and distributorsp. 53
GENERAL WARNING:Like any sport, bicycling involves risk of injury and damage. By choosing toride a bicycle, you assume the responsibility for that risk, so you need to know— and to practice — the rules of safe and responsible riding and of proper useand maintenance. Proper use and maintenance of your bicycle reduces risk ofinjury.This Manual contains many “Warnings” and “Cautions” concerning theconsequences of failure to maintain or inspect your bicycle and of failure to followsafe cycling practices. The combination of thesafety alert symbol and the word WARNINGindicates a potentially hazardous situation which, if not avoided, could result inserious injury or death. The combination of thesafety alert symbol and the word CAUTIONindicates a potentially hazardous situation which, if not avoided, may result inminor or moderate injury, or is an alert against unsafe practices. The word CAUTION used without the safety alert symbol indicates asituation which, if not avoided, could result in serious damage to the bicycle orthe voiding of your warranty.Many of the Warnings and Cautions say “you may lose control and fall”.Because any fall can result in serious injury or even death, we do not alwaysrepeat the warning of possible injury or death.Because it is impossible to anticipate every situation or condition which canoccur while riding, this Manual makes no representation about the safe useof the bicycle under all conditions. There are risks associated with the useof any bicycle which cannot be predicted or avoided, and which are the soleresponsibility of the rider.1
A special note for parents:As a parent or guardian, you are responsible for the activities and safetyof your minor child, and that includes making sure that the bicycle is properlyfitted to the child; that it is in good repair and safe operating condition; that youand your child have learned and understand the safe operation of the bicycle;and that you and your child have learned, understand and obey not only theapplicable local motor vehicle, bicycle and traffic laws, but also the commonsense rules of safe and responsible bicycling. As a parent, you should read thismanual, as well as review its warnings and the bicycle’s functions and operatingprocedures with your child, before letting your child ride the bicycle.WARNING: Make sure that your child always wears an approvedbicycle helmet when riding; but also make sure that your childunderstands that a bicycle helmet is for bicycling only, and must beremoved when not riding. A helmet must not be worn while playing, in playareas, on playground equipment, while climbing trees, or at any time whilenot riding a bicycle. Failure to follow this warning could result in seriousinjury or death.2
1. FirstNOTE: We strongly urge you to read this Manual in its entirety before your firstride. At the very least, read and make sure that you understand each point in thissection, and refer to the cited sections on any issue which you don’t completelyunderstand. Please note that not all bicycles have all of the features described inthis Manual. Ask your dealer to point out the features of your bicycle.A. Bike fit1. Is your bike the right size? To check, see Section 3.A. If your bicycle is toolarge or too small for you, you may lose control and fall. If your new bike is notthe right size, ask your dealer to exchange it before you ride it.2. Is the saddle at the right height? To check, see Section 3.B. If you adjustyour saddle height, follow the Minimum Insertion instructions in Section 3.B.3. Are saddle and seat post securely clamped? A correctly tightened saddle willallow no saddle movement in any direction. See Section 3.B.4. Are the stem and handlebars at the right height for you? If not, see Section3.C.5. Can you comfortably operate the brakes? If not, you may be able to adjusttheir angle and reach. See Section 3.D and 3.E.6. Do you fully understand how to operate your new bicycle? If not, before yourfirst ride, have your dealer explain any functions or features which you do notunderstand.B.Safety first1. Always wear an approved helmet when riding your bike, and follow thehelmet manufacturer’s instructions for fit, use and care.2. Do you have all the other required and recommended safety equipment?See Section 2. It’s your responsibility to familiarize yourself with the laws of theareas where you ride, and to comply with all applicable laws.3. Do you know how to correctly secure your front and rear wheels? CheckSection 4.A.1 to make sure. Riding with an improperly secured wheel can causethe wheel to wobble or disengage from the bicycle, and cause serious injury ordeath.4. If your bike has toeclips and straps or clipless (“step-in”) pedals, makesure you know how they work (see Section 4.E). These pedals require specialtechniques and skills. Follow the pedal manufacturer’s instructions for use,adjustment and care.5. Do you have “toe overlap”? On smaller framed bicycles your toe or toeclipmay be able to contact the front wheel when a pedal is all the way forwardand the wheel is turned. Read Section 4.E. to check whether you have toeclipoverlap.6. Does your bike have suspension? If so, check Section 4.F. Suspensioncan change the way a bicycle performs. Follow the suspension manufacturer’sinstructions for use, adjustment and care.3
C. Mechanical Safety CheckRoutinely check the condition of your bicycle before every ride. Nuts, bolts screws & other fasteners: Because manufacturers usea wide variety of fastener sizes and shapes made in a variety of materials,often differing by model and component, the correct tightening force or torquecannot be generalized. To make sure that the many fasteners on your bicycleare correctly tightened, refer to the Fastener Torque Specifications in AppendixD of this manual or to the torque specifications in the instructions provided bythe manufacturer of the component in question. Correctly tightening a fastenerrequires a calibrated torque wrench. A professional bicycle mechanic with atorque wrench should torque the fasteners on you bicycle. If you choose to workon your own bicycle, you must use a torque wrench and the correct tighteningtorque specifications from the bicycle or component manufacturer or from yourdealer. If you need to make an adjustment at home or in the field, we urge you toexercise care, and to have the fasteners you worked on checked by your dealeras soon as possible.WARNING: Correct tightening force on fasteners –nuts, bolts,screws– on your bicycle is important. Too little force, and the fastenermay not hold securely. Too much force, and the fastener can stripthreads, stretch, deform or break. Either way, incorrect tightening force canresult in component failure, which can cause you to loose control and fall. Make sure nothing is loose. Lift the front wheel off the ground by two orthree inches, then let it bounce on the ground. Anything sound, feel or lookloose? Do a visual and tactile inspection of the whole bike. Any loose parts oraccessories? If so, secure them. If you’re not sure, ask someone with experienceto check. Tires & Wheels: Make sure tires are correctly inflated (see Section4.G.1). Check by putting one hand on the saddle, one on the intersection of thehandlebars and stem, then bouncing your weight on the bike while looking at tiredeflection. Compare what you see with how it looks when you know the tires arecorrectly inflated; and adjust if necessary. Tires in good shape? Spin each wheel slowly and look for cuts in the treadand sidewall. Replace damaged tires before riding the bike. Wheels true? Spin each wheel and check for brake clearance and side-toside wobble. If a wheel wobbles side to side even slightly, or rubs against or hitsthe brake pads, take the bike to a qualified bike shop to have the wheel trued.CAUTION: Wheels must be true for rim brakes to work effectively.Wheel trueing is a skill which requires special tools and experience.Do not attempt to true a wheel unless you have the knowledge,experience and tools needed to do the job correctly. Wheel rims clean and undamaged? Make sure the rims are clean andundamaged at the tire bead and, if you have rim brakes, along the brakingsurface. Check to make sure that any rim wear indicator marking is not visible atany point on the wheel rim.4
WARNING: Bicycle wheel rims are subject to wear. Ask your dealerabout wheel rim wear. Some wheel rims have a rim wear indicatorwhich becomes visible as the rim’s braking surface wears. A visiblerim wear indicator on the side of the wheel rim is an indication that thewheel rim has reached its maximum usable life. Riding a wheel that is at theend of its usable life can result in wheel failure, which can cause you toloose control and fall. Brakes: Check the brakes for proper operation (see Sections 4.C).Squeeze the brake levers. Are the brake quick-releases closed? All controlcables seated and securely engaged? If you have rim brakes, do the brakepads contact the wheel rim squarely and make full contact with the rim? Do thebrakes begin to engage within an inch of brake lever movement? Can you applyfull braking force at the levers without having them touch the handlebar? If not,your brakes need adjustment. Do not ride the bike until the brakes are properlyadjusted by a professional bicycle mechanic. Wheel retention system: Make sure the front and rear wheels are correctlysecured. See Section 4.A Seat post: If your seat post has an over-center cam action fastener foreasy height adjustment, check that it is properly adjusted and in the lockedposition. See Section 4.B. Handlebar and saddle alignment: Make sure the saddle and handlebarstem are parallel to the bike’s center line and clamped tight enough so that youcan’t twist them out of alignment. See Sections 3.B and 3.C. Handlebar ends: Make sure the handlebar grips are secure and in goodcondition. If not, have your dealer replace them. Make sure the handlebar endsand extensions are plugged. If not, have your dealer plug them before you ride.If the handlebars have bar end extensions, make sure they are clamped tightenough so you can’t twist them.WARNING: Loose or damaged handlebar grips or extensions cancause you to lose control and fall. Unplugged handlebars orextensions can cut you and cause serious injury in an otherwiseminor accident.VERY IMPORTANT SAFETY NOTE:Please also read and become thoroughly familiar with the importantinformation on the lifespan of your bicycle and its components in AppendixB on Page 42.D. First rideWhen you buckle on your helmet and go for your first familiarization ride onyour new bicycle, be sure to pick a controlled environment, away from cars, othercyclists, obstacles or other hazards. Ride to become familiar with the controls,features and performance of your new bike.Familiarize yourself with the braking action of the bike (see Section 4.C). Testthe brakes at slow speed, putting your weight toward the rear and gently applyingthe brakes, rear brake first. Sudden or excessive application of the front brake5
could pitch you over the handlebars. Applying brakes too hard can lock up awheel, which could cause you to lose control and fall. Skidding is an example ofwhat can happen when a wheel locks up.If your bicycle has toeclips or clipless pedals, practice getting in and out of thepedals. See paragraph B.4 above and Section 4.E.4.If your bike has suspension, familiarize yourself with how the suspensionresponds to brake application and rider weight shifts. See paragraph B.6 aboveand Section 4.F.Practice shifting the gears (see Section 4.D). Remember to never move theshifter while pedaling backward, nor pedal backwards immediately after havingmoved the shifter. This could jam the chain and cause serious damage to thebicycle.Check out the handling and response of the bike; and check the comfort.If you have any questions, or if you feel anything about the bike is not as itshould be, consult your dealer before you ride again.2. SafetyA. The BasicsWARNING: The area in which you ride may require specific safetydevices. It is your responsibility to familiarize yourself with the lawsof the area where you ride and to comply with all applicable laws,including properly equipping yourself and your bike as the law requires.Observe all local bicycle laws and regulations. Observe regulationsabout bicycle lighting, licensing of bicycles, riding on sidewalks, lawsregulating bike path and trail use, helmet laws, child carrier laws, specialbicycle traffic laws. It’s your responsibility to know and obey the laws.1. Always wear a cycling helmet which meets the latestcertification standards and is appropriate for the type of riding youdo. Always follow the helmet manufacturer’s instructions for fit,use and care of your helmet. Most serious bicycle injuries involvehead injuries which might have been avoided if the rider had wornan appropriate helmet.WARNING: Failure to wear a helmet when riding may result in seriousinjury or death.2. Always do the Mechanical Safety Check (Section 1.C) before you get on abike.3. Be thoroughly familiar with the controls of your bicycle: brakes (Section4.C.); pedals (Section 4.E.); shifting (Section 4.D.)4. Be careful to keep body parts and other objects away from the sharp teethof chainrings, the moving chain, the turning pedals and cranks, and the spinningwheels of your bicycle.5. Always wear:6
Shoes that will stay on your feet and will grip the pedals. Make sure thatshoe laces cannot get into moving parts, and never ride barefoot or in sandals. Bright, visible clothing that is not so loose that it can be tangled in thebicycle or snagged by objects at the side of the road or trail. Protective eyewear, to protect against airborne dirt, dust and bugs — tintedwhen the sun is bright, clear when it’s not.6. Don’t jump with your bike. Jumping a bike, particularly a BMX or mountainbike, can be fun; but it can put huge and unpredictable stress on the bicycle andits components. Riders who insist on jumping their bikes risk serious damage,to their bicycles as well as to themselves. Before you attempt to jump, do stuntriding or race with your bike, read and understand Section 2.F.7. Ride at a speed appropriate for conditions. Higher speed means higher risk.B. Riding Safety1. Obey all Rules of the Road and all local traffic laws.2. You are sharing the road or the path with others — motorists, pedestriansand other cyclists. Respect their rights.3. Ride defensively. Always assume that others do not see you.4. Look ahead, and be ready to avoid: Vehicles slowing or turning, entering the road or your lane ahead of you, orcoming up behind you. Parked car doors opening. Pedestrians stepping out. Children or pets playing near the road. Pot holes, sewer grating, railroad tracks, expansion joints, road or sidewalkconstruction, debris and other obstructions that could cause you to swerve intotraffic, catch your wheel or cause you to have an accident. The many other hazards and distractions which can occur on a bicycle ride.5. Ride in designated bike lanes, on designated bike paths or as close to theedge of the road as possible, in the direction of traffic flow or as directed by localgoverning laws.6. Stop at stop signs and traffic lights; slow down and look both ways at streetintersections. Remember that a bicycle always loses in a collision with a motorvehicle, so be prepared to yield even if you have the right of way.7. Use approved hand signals for turning and stopping.8. Never ride with headphones. They mask traffic sounds and emergencyvehicle sirens, distract you from concentrating on what’s going on around you,and their wires can tangle in the moving parts of the bicycle, causing you to losecontrol.9. Never carry a passenger, unless it is a small child wearing an approvedhelmet and secured in a correctly mounted child carrier or a child-carrying trailer.10. Never carry anything which obstructs your vision or your complete controlof the bicycle, or which could become entangled in the moving parts of thebicycle.11. Never hitch a ride by holding on to another vehicle.12. Don’t do stunts, wheelies or jumps. If you intend to do stunts, wheelies,jumps or go racing with your bike despite our advice not to, read Section 2.F,Downhill, Stunt or Competition Biking, now. Think carefully about your skillsbefore deciding to take the large risks that go with this kind of riding.7
13. Don’t weave through traffic or make any moves that may surprise peoplewith whom you are sharing the road.14. Observe and yield the right of way.15. Never ride your bicycle while under the influence of alcohol or drugs.16. If possible, avoid riding in bad weather, when visibility is obscured, atdawn, dusk or in the dark, or when extremely tired. Each of these conditionsincreases the risk of accident.C. Off Road SafetyWe recommend that children not ride on rough terrain unless they areaccompanied by an adult.1. The variable conditions and hazards of off-road riding require close attentionand specific skills. Start slowly on easier terrain and build up your skills. If yourbike has suspension, the increased speed you may develop also increases yourrisk of losing control and falling. Get to know how to handle your bike safelybefore trying increased speed or more difficult terrain.2. Wear safety gear appropriate to the kind of riding you plan to do.3. Don’t ride alone in remote areas. Even when riding with others, make surethat someone knows where you’re going and when you expect to be back.4. Always take along some kind of identification, so that people know who youare in case of an accident; and take along some cash for food, a cool drink or anemergency phone call.5. Yield right of way to pedestrians and animals. Ride in a way that does notfrighten or endanger them, and give them enough room so that their unexpectedmoves don’t endanger you.6. Be prepared. If something goes wrong while you’re riding off-road, help maynot be close.7. Before you attempt to jump, do stunt riding or race with your bike, read andunderstand Section 2.F.Off Road respectObey the local laws regulating where and how you can ride off-road, andrespect private property. You may be sharing the trail with others — hikers,equestrians, other cyclists. Respect their rights. Stay on the designated trail.Don’t contribute to erosion by riding in mud or with unnecessary sliding. Don’tdisturb the ecosystem by cutting your own trail or shortcut through vegetationor streams. It is your responsibility to minimize your impact on the environment.Leave things as you found them; and always take out everything you brought in.D. Wet Weather RidingWARNING: Wet weather impairs traction, braking and visibility, bothfor the bicyclist and for other vehicles sharing the road. The risk of anaccident is dramatically increased in wet conditions.Under wet conditions, the stopping power of your brakes (as well as thebrakes of other vehicles sharing the road) is dramatically reduced and your tires8
don’t grip nearly as well. This makes it harder to control speed and easier to losecontrol. To make sure that you can slow down and stop safely in wet conditions,ride more slowly and apply your brakes earlier and more gradually than youwould under normal, dry conditions. See also Section 4.C.E. Night RidingRiding a bicycle at night is much more dangerous than riding during the day. Abicyclist is very difficult for motorists and pedestrians to see. Therefore, childrenshould never ride at dawn, at dusk or at night. Adults who chose to accept thegreatly increased risk of riding at dawn, at dusk or at night need to take extracare both riding and choosing specialized equipment which helps reduce thatrisk. Consult your dealer about night riding safety equipment.WARNING: Reflectors are not a substitute for required lights. Ridingat dawn, at dusk, at night or at other times of poor visibility withoutan adequate bicycle lighting system and without reflectors isdangerous and may result in serious injury or death.Bicycle reflectors are designed to pick up and reflect car lights and street lightsin a way that may help you to be seen and recognized as a moving bicyclist.CAUTION: Check reflectors and their mounting brackets regularly tomake sure that they are clean, straight, unbroken and securelymounted. Have your dealer replace damaged reflectors andstraighten or tighten any that are bent or loose.The mounting brackets of front and rear reflectors are often designed as brakestraddle cable safety catches which prevent the straddle cable from catching onthe tire tread if the cable jumps out of its yoke or breaks.WARNING: Do not remove the front or rear reflectors or reflectorbrackets from your bicycle. They are an integral part of the bicycle’ssafety system.Removing the reflectors reduces your visibility to others using theroadway. Being struck by other vehicles may result in serious injury ordeath.The reflector brackets may protect you from a brake straddle cablecatching on the tire in the event of brake cable failure. If a brake straddlecable catches on the tire, it can cause the wheel to stop suddenly, causingyou to loose control and fall.If you choose to ride under conditions of poor visibility, check and be sureyou comply with all local laws about night riding, and take the following stronglyrecommended additional precautions: Purchase and install battery or generator powered head and tail lights whichmeet all regulatory requirements and provide adequate visibility. Wear light colored, reflective clothing and accessories, such as a reflectivevest, reflective arm and leg bands, reflective stripes on your helmet, flashinglights attached to your body and/or your bicycle . any reflective device or lightsource that moves will help you get the attention of approaching motorists,9
pedestrians and other traffic. Make sure your clothing or anything you may be carrying on the bicycledoes not obstruct a reflector or light. Make sure that your bicycle is equipped with correctly positioned andsecurely mounted reflectors.While riding at dawn, at dusk or at night: Ride slowly. Avoid dark areas and areas of heavy or fast-moving traffic. Avoid road hazards. If possible, ride on familiar routes.If riding in traffic: Be predictable. Ride so that drivers can see you and predict yourmovements. Be alert. Ride defensively and expect the unexpected. If you plan to ride in traffic often, ask your dealer about traffic safety classesor a good book on bicycle traffic safety.F. Extreme, stunt or competition ridingWhether you call it Aggro, Hucking, Freeride, North Shore, Downhill, Jumping,Stunt Riding, Racing or something else: if you engage in this sort of extreme,aggressive riding you will get hurt, and you voluntarily assume a greatlyincreased risk of injury or death.Not all bicycles are designed for these types of riding, and those that are maynot be suitable for all types of aggressive riding. Check with your dealer or thebicycle’s manufacturer about the suitability of your bicycle before engaging inextreme riding.When riding fast down hill, you can reach speeds achieved by motorcycles,and therefore face similar hazards and risks. Have your bicycle and equipmentcarefully inspected by a qualified mechanic and be sure it is in perfect condition.Consult with expert riders, area site personnel and race officials on conditionsand equipment advisable at the site where you plan to ride. Wear appropriatesafety gear, including an approved full face helmet, full finger gloves, and bodyarmor. Ultimately, it is your responsibility to have proper equipment and to befamiliar with course conditions.WARNING: Although many catalogs, advertisements and articlesabout bicycling depict riders engaged in extreme riding, this activityis extremely dangerous, increases your risk of injury or death, andincreases the severity of any injury. Remember that the action depicted isbeing performed by professionals with many years of training andexperience. Know your limits and always wear a helmet and otherappropriate safety gear. Even with state-of-the-art protective safety gear,you could be seriously injured or killed when jumping, stunt riding, ridingdownhill at speed or in competition.WARNING: Bicycles and bicycle parts have limitations with regard tostrength and integrity, and this type of riding can exceed thoselimitations.10
We recommend against this type of riding because of the increased risks; but ifyou choose to take the risk, at least: Take lessons from a competent instructor first Start with easy learning exercises and slowly develop your skills beforetrying more difficult or dangerous riding Use only designated areas for stunts, jumping, racing or fast downhill riding Wear a full face helmet, safety pads and other safety gear Understand and recognize that the stresses imposed on your bike by thiskind of activity may break or damage parts of the bicycle and void the warranty Take your bicycle to your dealer if anything breaks or bends. Do not rideyour bicycle when any part is damaged.If you ride downhill at speed, do stunt riding or ri
Bicycle Owner’s Manual 9th Edition, 2007 This manual meets EN Standards 14764, 14765, 14766 and 14781. IMPORTANT: This manual contains important safety, performance and service information. Read it before you take the f