Transcription
Iomega ix2-dl Users GuideD31593401
Table of ContentsSetting up Your Device . 1Setup Overview . 1Set up My Iomega StorCenter If It's Not Discovered . 2Discovering with Iomega Storage Manager . 2Discovering the Iomega device without the Internet . 2Setup Page . 3Network Connection. 4Connecting the Iomega StorCenter ix2-dl to Your Network . 4Network Settings . 6Manually Configuring the Network . 7Naming Your Iomega StorCenter ix2-dl . 8Configuring Your Iomega StorCenter ix2-dl to Use Active Directory. 9Enabling Active Directory Trusted Domains . 9Obtaining Alerts About Your Iomega StorCenter ix2-dl . 11Using Your Iomega StorCenter ix2-dl in Various Time Zones . 12Setting the Display Language for Your Iomega StorCenter ix2-dl . 13Printing Documents. 14Setting up Personal Cloud, Security, and File Sharing . 15Sharing Files . 17Sharing Overview . 17Interfaces for Sharing . 17Shares . 18What are Shares and How Do I Organize Content with Them? . 18Adding Shares . 19Managing Shares. 20Deleting Shares . 22iii
Iomega StorCenter ix2-dl User GuideUsing Protocols to Share Files . 23What Are Protocols and How Do I Use Them to Share Files? . 23AFP File Sharing for Macs . 24Bluetooth File Sharing . 25FTP File Sharing . 26NFS File Sharing . 27rsync: Synchronizing Files with Another Storage Device or Other Computers . 28TFTP . 29Monitoring Your Device with an SNMP Management Tool . 30WebDAV: Managing Files Using HTTP or HTTPS . 31Windows DFS: Creating a Distributed Windows File System . 32Windows File Sharing . 33Sharing Your Content with the World . 34Deleting a Slideshow . 34Automatically Sending Content to Multiple People at Once . 35How to Set Up an Email Distribution Active Folder . 35Sharing Content using Social Media: Overview . 36Managing Your Content . 37Transferring Content to and from Your Iomega StorCenter ix2-dl with Copy Jobs . 38Copy Jobs Limitations . 38Getting Content from a USB External Storage Device . 39Safely removing external storage . 39iSCSI: Creating IP-Based Storage Area Networks (SAN) . 41iSCSI Overview . 41Adding iSCSI Drives . 42Enabling iSCSI Drives . 42Connecting to iSCSI Drives . 42iv
Table of ContentsManaging iSCSI Drives . 44Changing Access Permissions . 44Deleting iSCSI Drives . 45Storage Pool Management . 47Adding New Drives to Your Iomega StorCenter ix2-dl . 47Backing up and Restoring Your Content . 49Backup and Restore Overview . 49Backup of Data through RAID Protection . 49Backing up to and Restoring from Your Device . 50Backing up Macs with Time Machine . 50Copy Jobs Overview . 51Backing up Your Device . 52Copy Jobs. 53Mozy Backup . 61Restoring Folders with Mozy Backup . 62Amazon S3 . 63Restoring Files with Amazon S3 . 64Backing up with Iomega Personal Cloud . 65Restoring with Personal Cloud . 66Securing Your Device and Contents . 67What Is Security and Do I Need It? . 67Enabling Security and Creating an Administrator User. 68Disabling Security . 68Limiting Access to Your Content by Creating Users . 70Users . 71Users Overview . 71Adding Users . 72v
Iomega StorCenter ix2-dl User GuideManaging Users . 74Deleting Users . 76Groups . 77Groups Overview . 77Adding Groups . 78Managing Groups . 79Deleting Groups . 80Using Active Directory Domain to Manage Users and Groups . 81Active Directory Users and Groups Overview . 81Managing Users and Groups with Active Directory . 82Deleting Active Directory Users and Groups . 84Personal Cloud: Accessing Your Device From Anywhere in the World . 85What Is an Iomega Personal Cloud ? . 85Iomega Personal Cloud Key Terms . 85Is My Content Secure? . 87Iomega Personal Cloud Setup Overview . 88Creating an Iomega Personal Cloud . 89Configuring Router Port Forwarding for Personal Cloud . 90Router Port Forwarding . 90Configuring Your Iomega Personal Cloud . 92Enabling Internet Access to the StorCenter ix2-dl . 92Changing Personal Cloud Settings . 92Inviting People onto Your Iomega Personal Cloud . 93Joining a Trusted Device to an Iomega Personal Cloud . 94Managing Trusted Devices on a Personal Cloud . 95Disconnecting Trusted Devices . 95Deleting Trusted Devices . 95vi
Table of ContentsUsing Copy Jobs with an Iomega Personal Cloud . 96Disabling or Deleting Your Iomega Personal Cloud . 97Accessing Content Using Your Iomega Personal Cloud . 98Informing Users What to Do with Iomega Personal Cloud . 99Sharing Content Using Social Media . 101Sharing Content using Social Media: Overview . 101Facebook . 102Flickr . 103YouTube . 104Share Content through Iomega Personal Cloud . 105Media Management . 107Media Management Overview . 107Scanning for media content . 107Media Services Capabilities and Limitations . 108Sharing Media Content over the Internet . 109Enabling Internet Access from the Media Server Page . 109Media Aggregation . 110Social Media Sharing . 111Streaming Music, Movies, and Pictures . 112Example: Setting up iTunes . 112Example: Setting up Xbox 360 . 112Photos . 113Photos Overview . 113Streaming Pictures. 114Creating a Slideshow on the Device Home Page . 115Automatically Resizing Your Photos . 116Getting Pictures from Your Camera . 117vii
Iomega StorCenter ix2-dl User GuideMusic . 118Music Overview . 118Streaming Music . 119Torrents . 120Torrent Overview . 120Enabling Torrent Downloads . 121Deleting torrent jobs . 122Configuring Your Router for Torrent Downloads . 123Torrent Active Folders . 124Videos . 126Video Capabilities Overview . 126Streaming Movies . 127Video Surveillance . 128Adding Applications to Your Device . 135Application Overview . 135Application Manager . 136Starting or stopping an application . 136Adding applications . 136Removing applications . 136Upgrading Your Device . 137Software Updates . 137Auto-update process: installing a device software update . 137Manual update process: installing a device software update . 137Recovering Your Device Configuration. 139Copying Your Iomega StorCenter ix2-dl Settings to Other Devices . 139Backing up Device Configuration . 139Restoring a Configuration Backup . 139viii
Table of ContentsHardware Management . 141About the StorCenter ix2-dl Components . 141Front Panel . 141Rear Panel . 141Energy Saving . 143Power Down Drives . 143Brightness . 143Factory Reset . 144UPS Management . 145Adding New Drives to Your Iomega StorCenter ix2-dl . 146Troubleshooting Routers . 147Enabling the DMZ . 147Configuring Port Forwarding on Double NAT Networks . 147Bridging the Secondary Router . 148Bridging the Primary Router . 148Additional Support . 151How to Get Help . 151Support . 152Legal . 153StorCenter ix2-dl Trademark Page . 153Regulatory Information . 154FCC (United States). 154Canadian Verification . 154CE (European Community) . 155Manufacturer/Responsible Party . 155EU Representative . 155Safety Information. 156ix
Iomega StorCenter ix2-dl User GuideLimited Warranty . 157Drives and Media . 157Coverage . 157Excluded Products and Problems. 157Remedies . 157Obtaining Warranty Service . 157Limitations . 158Open Source . 159x
Setting up Your DeviceSetup OverviewSetup with your Iomega StorCenter ix2-dl is easy. Remove it from the box, connect it to yournetwork or computer, and power it up. Then, launch a web browser, and enter the setup URLidentified in the Quick Install Guide. Iomega Setup launches and displays a message that yourStorCenter ix2-dl is online and ready to use.You then can install client software that includes: Iomega Storage Manager Twonky Media Server for media aggregation Iomega QuikProtect for backupsIomega Storage Manager is a management tool that helps you discover your StorCenter ix2-dl on yournetwork to simplify access to content on your StorCenter ix2-dl from your computer and allows youto add your computer as a trusted device to an Iomega Personal Cloud . Refer to Iomega StorageManager online help for additional information. Twonky Media Server consolidates all media files ondevices on your network and presents them in a unified view. Iomega QuikProtect offers file backupof your computer to an Iomega storage device.From Iomega Setup, you can optionally create a Personal Cloud or begin using your StorCenter ix2-dlby clicking Manage My Device.How do I .set up my StorCenter ix2-dl if it's not discoveredcreate an Iomega Personal Cloudset up media aggregation1
Iomega StorCenter ix2-dl User GuideSet up My Iomega StorCenter If It's Not DiscoveredIf, after you enter the setup URL identified in the Quick Install Guide, your Iomega device is notdiscovered, you have two ways of discovering it.Discovering with Iomega Storage ManagerYou can install Iomega Storage Manager from Iomega Setup, which helps you discover your Iomegadevice on your network.Discovering the Iomega device without the InternetYou can access your Iomega device device without internet access as described by these methods forWindows pcs or Macs: Windows 7 and Vista — Click Start, Computer, Network. Under Other Devices, you should seeyour Iomega device listed. For example, if you have an EZ Media device, you can double-clickthe device labeled IomegaEZ, and you will see the Iomega StorCenter Console for the Iomegadevice . Windows XP — If you have not enabled UPnP Discovery, click Start, Help and Support. In theHelp and Support browser, search for UPnP, and follow the steps from “Install the UPnPframework”. After UPnP is enabled, open Windows Explorer and in the Folders view, expandMy Network Places. You should see your Iomega device listed. For example, if you have an EZMedia device, you can double-click the device labeled IomegaEZ, and you will see the IomegaStorCenter Console for the Iomega device . Mac — Browse to your Iomega device through Finder, Shared, All and use Go, Connect toServer to connect to Shares on your Iomega device .How do I .set up my Iomega deviceinstall Iomega Storage Manager2
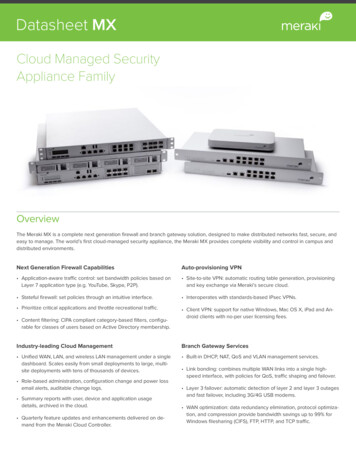
Setting up Your DeviceSetup PageThe Setup page opens when you first access the Iomega StorCenter ix2-dl from the Home Page or theIomega Storage Manager . On this page, you can configure some basic device features by clicking theappropriate link. The current setting of the feature displays above the link. You can also configureall features shown on the Setup page by accessing the specific features directly.3
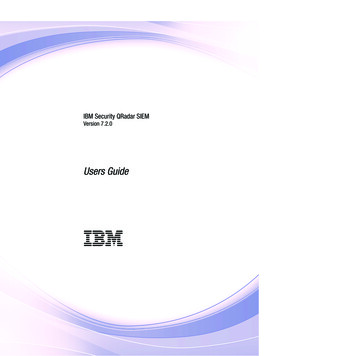
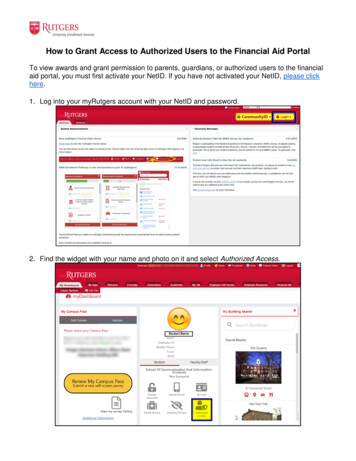
Iomega StorCenter ix2-dl User GuideNetwork ConnectionConnecting the Iomega StorCenter ix2-dl to Your NetworkFirst, check the package contents.Verify that the box contains the following items: StorCenter ix2-dl (models may vary) Power Cable Quick Start Guide Ethernet CablePackage contents may vary.Connecting the StorCenter ix2-dlInitial SetupIf you have purchased more than one StorCenter ix2-dl , complete all steps on one device beforesetting up additional devices.1. Use the included network cable to connect the StorCenter ix2-dl to a network hub, switch ordirectly to a computer.2. Connect the included power cord to the back of the StorCenter ix2-dl and a power socket orUninterruptible Power Supply (UPS).3. Your StorCenter ix2-dl should power on automatically.4
Setting up Your Device4. Start your computer and wait for the operating system to load.5. For best results, use a computer that is connected to the same router, hub, or switch as theStorCenter ix2-dl .6. OPTIONAL: if desired, install the Iomega Storage Manager , QuikProtect, and Media Aggregationsoftware.If you install the Iomega Storage Manager , its icon will appear in the System Tray (Windows)or Menu Bar (Mac). The Iomega Storage Manager will automatically scan your network andconnect to available Shares.If you receive a message from your operating system's firewall alerting you of networkactivity, be sure to unblock communications.Mac Users: Shares on the StorCenter ix2-dl will mount and appear on the Mac Desktop.PC Users: Shares on the StorCenter ix2-dl will automatically be assigned a drive letter andwill be available in the Network Drives section under My Computer.5
Iomega StorCenter ix2-dl User GuideNetwork SettingsThe Network page of your StorCenter ix2-dl is where you make changes to set up networkconnectivity. The Network page displays your current network settings and enables those settings tobe modified. On this page, you can identify your DNS servers and WINS servers and how your system'sIP address is determined. Most system IP addresses and other network settings can normally beconfigured automatically.Manually Configuring Your NetworkIf you are comfortable with network technology and want to configure the network, refer toManually Configuring the Network.Enabling Jumbo Frames for Each NICYou can enable jumbo frames for each NIC in your StorCenter ix2-dl by expanding the Informationsection for a NIC and selecting a jumbo frame size from the Jumbo Frame drop-down menu. Validjumbo frame sizes are 4,000 or 9,000 bytes. If you do not want jumbo frame support, select Nonefrom the Jumbo Frame drop-down menu. Jumbo frame support is useful for transferring large files,such as multimedia files, over a network. Jumbo frame support increases transfer speed by placinglarge files in fewer data packets. It also reduces the demand on the device hardware by having theCPU process more data in fewer data packets.Jumbo frame support should only be enabled if you are sure your network is jumbo-framecompatible and all network devices have been configured to support jumbo frames. It isrecommended that you confirm all network interface cards (NICs) are configured to support jumboframes before enabling this feature.6
Setting up Your DeviceManually Configuring the NetworkThere are various settings in the network setup that you can manually configure.1. ClickModify network settings.2. Uncheck Automatically configure DNS, WINS, and all IP addresses (DHCP).3. DNS Servers — enter the IP addresses of the DNS (Domain Name System) servers. DNS
If you install the Iomega Storage Manager , its icon will appear in the System Tray (Windows) or Menu Bar (Mac). The Iomega Storage Manager will automatically scan your network and connect to available Shares. If you receive a message from your operating system's firewall alerting yo