Transcription
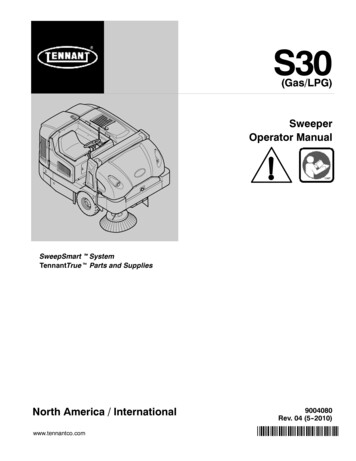
S30(Gas/LPG)SweeperOperator ManualSweepSmartt SystemTennantTruet Parts and SuppliesNorth America / International9004080Rev. 04 (5-- 2010)*9004080*www.tennantco.comHomeFind. Go To.
This manual is furnished with each new model. It provides necessary operation and maintenance instructions.Read this manual completely and understand the machine before operating or servicing it.This machine will provide excellent service. However, the best results will be obtained at minimum costs if:S The machine is operated with reasonable care.S The machine is maintained regularly - per the machine maintenance instructions provided.S The machine is maintained with manufacturer supplied or equivalent parts.PROTECT THE ENVIRONMENTPlease dispose of packaging materials,old machine components such asbatteries, hazardous fluids, includingantifreeze and oil, in anenvironmentally safe way according tolocal waste disposal regulations.Always remember to recycle.MACHINE DATAPlease fill out at time of installation for future reference.Model No. -Serial No. -Machine Options -Sales Rep. -Sales Rep. phone no. -Customer Number -Installation Date --Tennant CompanyPO Box 1452Minneapolis, MN 55440Phone: (800) 553--8033 or (763) 513--2850www.tennantco.comCALIFORNIA PROPOSITION 65 WARNING:Engine exhaust from this product contains chemicals known to the State of California to cause cancer,birth defects, or other reproductive harm.Thermo--Sentry, 1--STEP, EasyOpen, MaxPro, InstantAccess, II--Speed, Perma--Filter, Duramer, Lower Total Cost of Ownership, Touch--N--Go, and CabForward ErgoSpace are US registered and unregistered trademarks of Tennant Company.Specifications and parts are subject to change without notice.Original Instructions, Copyright E 2008, 2009, 2010 TENNANT Company, Printed in U.S.A.HomeFind. Go To.
CONTENTSCONTENTSPageSAFETY PRECAUTIONS . . . . . . . . . . . . . . . . . 3OPERATION . . . . . . . . . . . . . . . . . . . . . . . . . . . . 7MACHINE COMPONENTS . . . . . . . . . . . . . 7CONTROLS AND INSTRUMENTS . . . . . . 8TOUCH PANEL (S30 XP and X4) . . . . . . . . 9SYMBOL DEFINITIONS . . . . . . . . . . . . . . . . 10OPERATION OF CONTROLS . . . . . . . . . . 11DIRECTIONAL PEDAL . . . . . . . . . . . . . . 11BRAKE PEDAL . . . . . . . . . . . . . . . . . . . . 11PARKING BRAKE PEDAL . . . . . . . . . . . 11STEERING COLUMN TILT PEDAL . . . 11FUEL GAUGE . . . . . . . . . . . . . . . . . . . . . 12GASOLINE MACHINES . . . . . . . . . . 12LPG MACHINES . . . . . . . . . . . . . . . . 12HOUR METER . . . . . . . . . . . . . . . . . . . . . 13SUPERVISOR CONTROL BUTTONS(S30 XP and X4) . . . . . . . . . . . . . . . . 13ENGINE SPEED CONTROLS . . . . . . . . 13VACUUM FAN CONTROLS (S30) . . . . 14VACUUM FAN CONTROLS(S30 XP and X4) . . . . . . . . . . . . . . . . 14CONTRAST CONTROL BUTTON(S30 XP and X4) . . . . . . . . . . . . . . . . 14FILTER SHAKER CONTROL (S30) . . . 15FILTER SHAKER CONTROL(S30 XP and X4) . . . . . . . . . . . . . . . . 15OPERATING / HAZARDLIGHT SWITCH . . . . . . . . . . . . . . . . . 15SIDE BRUSH LIGHTSWITCH (OPTION) . . . . . . . . . . . . . . 15OPERATOR SEAT . . . . . . . . . . . . . . . . . . 16DELUXE SUSPENSION SEAT . . . . . . . 16SEAT BELTS . . . . . . . . . . . . . . . . . . . . . . 16BRUSH INFORMATION . . . . . . . . . . . . . . . . 17HOW THE MACHINE WORKS . . . . . . . . . . 17PRE--OPERATION CHECKLIST . . . . . . . . . 17CHANGING THE LPG TANK . . . . . . . . . . . 18STARTING THE MACHINE . . . . . . . . . . . . . 19TURNING OFF THE MACHINE . . . . . . . . . 19WHILE OPERATING THE MACHINE . . . . 20SWEEPING (S30) . . . . . . . . . . . . . . . . . . . . . 21SWEEPING (S30 XP and X4) . . . . . . . . . . . 22EMPTYING THE HOPPER . . . . . . . . . . . . . 23ENGAGING THE HOPPERSUPPORT BAR . . . . . . . . . . . . . . . . . . . . 24DISENGAGING THE HOPPERSUPPORT BAR . . . . . . . . . . . . . . . . . . . . 25DISPLAY MODULE FAULTINDICATORS (S30) . . . . . . . . . . . . . . . . . 26FAULT INDICATOR(S) (S30 XP and X4) . 27DASH FAULT INDICATORS . . . . . . . . . . . . 28PageOPTIONS . . . . . . . . . . . . . . . . . . . . . . . . . . . . 29WAND (OPTION) . . . . . . . . . . . . . . . . . . . 29HEATER / AIR CONDITIONERCONTROLS (OPTION) . . . . . . . . . . . 30WINDSHIELD WIPERSWITCH (OPTION) . . . . . . . . . . . . . . 30CAB LIGHT SWITCH (OPTION) . . . . . . 30TOWER BUMPERS (OPTION) . . . . . . . 31TURN SIGNAL SWITCH (OPTION) . . . 31MACHINE TROUBLESHOOTING . . . . . . . 32MAINTENANCE . . . . . . . . . . . . . . . . . . . . . . . . . 33MAINTENANCE CHART . . . . . . . . . . . . . . . 34LUBRICATION . . . . . . . . . . . . . . . . . . . . . . . . 36ENGINE OIL . . . . . . . . . . . . . . . . . . . . . . . 36REAR WHEEL SUPPORT . . . . . . . . . . . 36STEERING CYLINDER BEARING . . . . 36HOPPER LIFT ARM BEARINGS . . . . . 36FRONT WHEEL BEARINGS . . . . . . . . . 36HYDRAULICS . . . . . . . . . . . . . . . . . . . . . . . . 37HYDRAULIC FLUID . . . . . . . . . . . . . . . . 37HYDRAULIC HOSES . . . . . . . . . . . . . . . 38ENGINE . . . . . . . . . . . . . . . . . . . . . . . . . . . . . 38COOLING SYSTEM . . . . . . . . . . . . . . . . 38AIR FILTER . . . . . . . . . . . . . . . . . . . . . . . . 40FUEL FILTER (Gasoline) . . . . . . . . . . . . 40FUEL FILTER (LPG) . . . . . . . . . . . . . . . . 40ELECTRONIC PRESSUREREGULATOR (LPG) . . . . . . . . . . . . . 41SPARK PLUGS . . . . . . . . . . . . . . . . . . . . 41ENGINE BELT . . . . . . . . . . . . . . . . . . . . . 41TIMING BELT . . . . . . . . . . . . . . . . . . . . . . 41BATTERY . . . . . . . . . . . . . . . . . . . . . . . . . . . . 41FUSES AND RELAYS . . . . . . . . . . . . . . . . . 42RELAY PANEL FUSES AND RELAYS . 42ENGINE HARNESS FUSESAND RELAYS . . . . . . . . . . . . . . . . . . . 43CAB FUSES (CAB OPTION) . . . . . . . . . 43REMOVING AND INSPECTING THEDUST FILTER . . . . . . . . . . . . . . . . . . . . . . 44CLEANING THE DUST FILTER . . . . . . . . . 45MAIN BRUSH . . . . . . . . . . . . . . . . . . . . . . . . . 45REPLACING OR ROTATING THEMAIN BRUSH . . . . . . . . . . . . . . . . . . . 46CHECKING THE MAIN BRUSHPATTERN . . . . . . . . . . . . . . . . . . . . . . 47ADJUSTING THE MAIN BRUSHTAPER . . . . . . . . . . . . . . . . . . . . . . . . . 47ADJUSTING THE MAIN BRUSHWIDTH . . . . . . . . . . . . . . . . . . . . . . . . . 48SIDE BRUSH . . . . . . . . . . . . . . . . . . . . . . . . . 48REPLACING THE SIDE BRUSH . . . . . 48ADJUSTING THE SIDE BRUSHPATTERN . . . . . . . . . . . . . . . . . . . . . . 49ROTATING AND REPLACING THE SIDEBRUSH GUARD . . . . . . . . . . . . . . . . . 491S30 Gas/LPG 9004080 (2--08)HomeFind. Go To.
CONTENTSPageSKIRTS AND FLAPS . . . . . . . . . . . . . . . . . . 50HOPPER SKIRTS . . . . . . . . . . . . . . . . . . 50BRUSH DOOR SKIRTS . . . . . . . . . . . . . 50REAR SKIRT . . . . . . . . . . . . . . . . . . . . . . 50RECIRCULATION FLAP . . . . . . . . . . . . . 50SEALS . . . . . . . . . . . . . . . . . . . . . . . . . . . . . . . 51BRUSH DOOR SEALS . . . . . . . . . . . . . . 51DUST FILTER SEALS . . . . . . . . . . . . . . . 51HOPPER SEALS . . . . . . . . . . . . . . . . . . . 51HOPPER INSPECTION DOORSEALS . . . . . . . . . . . . . . . . . . . . . . . . . 51FILTER CHAMBER INLET SEAL . . . . . 52DUST RETURN SEALS . . . . . . . . . . . . . 52VACUUM WAND DOORSEALS (OPTION) . . . . . . . . . . . . . . . 52CYCLONIC PRE--FILTER SEALS . . . . 52BRAKES AND TIRES . . . . . . . . . . . . . . . . . . 53BRAKES . . . . . . . . . . . . . . . . . . . . . . . . . . 53PARKING BRAKE . . . . . . . . . . . . . . . . . . 53TIRES . . . . . . . . . . . . . . . . . . . . . . . . . . . . 53REAR WHEEL . . . . . . . . . . . . . . . . . . . . . 53PROPELLING MOTOR . . . . . . . . . . . . . . . . 53PUSHING, TOWING, AND TRANSPORTINGTHE MACHINE . . . . . . . . . . . . . . . . . . . . . 54PUSHING OR TOWING THEMACHINE . . . . . . . . . . . . . . . . . . . 54TRANSPORTING THE MACHINE . 54MACHINE JACKING . . . . . . . . . . . . . . . . . . . 56STORAGE INFORMATION . . . . . . . . . . . . . 56SPECIFICATIONS . . . . . . . . . . . . . . . . . . . . . . . 57GENERAL MACHINEDIMENSIONS/CAPACITIES . . . . . . . . . 57GENERAL MACHINE PERFORMANCE . . 57HYDRAULIC SYSTEM . . . . . . . . . . . . . . . . . 57STEERING . . . . . . . . . . . . . . . . . . . . . . . . . . . 57POWER TYPE . . . . . . . . . . . . . . . . . . . . . . . . 58TIRES . . . . . . . . . . . . . . . . . . . . . . . . . . . . . . . 58MACHINE DIMENSIONS . . . . . . . . . . . . . . . 59INDEX . . . . . . . . . . . . . . . . . . . . . . . . . . . . . . . . . . 612S30 Gas/LPG 9004080 (2--08)HomeFind. Go To.
SAFETY PRECAUTIONSSAFETY PRECAUTIONSThe following precautions are used throughoutthis manual as indicated in their description:WARNING: To warn of hazards orunsafe practices that could result insevere personal injury or death.CAUTION: To warn of unsafe practicesthat could result in minor or moderatepersonal injury.FOR SAFETY: To identify actions that must befollowed for safe operation of equipment.Do not use the machine other than described inthis Operator Manual. The machine is notdesigned for use on public roads.The following information signals potentiallydangerous conditions to the operator orequipment:WARNING: Moving belt and fan. Keepaway.WARNING: Machine emits toxic gases.Serious injury or death can result.Provide adequate ventilation.WARNING: Raised hopper may fall.Engage hopper support bar.WARNING: Lift arm pinch point. Stayclear of hopper lift arms.WARNING: Burn hazard. Hot surface. DoNOT touch.WARNING: Accident may occur. Do notoperate vacuum or blower wand whiledriving.CAUTION: LPG engine will run for afew seconds after key is turned off.Apply parking brake before leavingmachine.FOR SAFETY:1. Do not operate machine:-- Unless trained and authorized.-- Unless operator manual is read andunderstood.-- If it is not in proper operatingcondition.-- In flammable or explosive areas.-- In areas with possible falling objectsunless equipped with overhead guard.2. Before starting machine:-- Check for fuel, oil, and liquid leaks.-- Keep sparks and open flame awayfrom refueling area.-- Make sure all safety devices are inplace and operate properly.-- Check brakes and steering for properoperation.-- Adjust seat and fasten seat belt (if soequipped).3. When starting machine:-- Keep foot on brake and directionalpedal in neutral.4. When using machine:-- Do not pick up burning or smokingdebris, such as cigarettes, matches orhot ashes-- Use brakes to stop machine.-- Go slow on inclines and slipperysurfaces.-- Use care when reversing machine.-- Move machine with care when hopperis raised.-- Make sure adequate clearance isavailable before raising hopper.-- Do not carry passengers on machine.-- Always follow safety and traffic rules.-- Report machine damage or faultyoperation immediately.5. Before leaving or servicing machine:-- Stop on level surface.-- Set parking brake.-- Turn off machine and remove key.3S30 9004080 (2--08)HomeFind. Go To.
SAFETY PRECAUTIONS6. When servicing machine:-- Avoid moving parts. Do not wear loosejackets, shirts, or sleeves.-- Block machine tires before jackingmachine up.-- Jack machine up at designatedlocations only. Support machine withjack stands.-- Use hoist or jack that will support theweight of the machine.-- Wear eye and ear protection whenusing pressurized air or water.-- Disconnect battery connections beforeworking on machine.-- Avoid contact with battery acid.-- Avoid contact with hot engine coolant.-- Do not remove cap from radiator whenengine is hot.-- Allow engine to cool.-- Keep flames and sparks away fromfuel system service area. Keep areawell ventilated.-- Use cardboard to locate leakinghydraulic fluid under pressure.-- Use Tennant supplied or approvedreplacement parts.7. When loading/unloading machineonto/off truck or trailer:-- Turn off machine.-- Use truck or trailer that will supportthe weight of the machine.-- Use winch. Do not drive the machineonto/off the truck or trailer unless theload height is 380 mm (15 in) or lessfrom the ground.-- Set parking brake after machine isloaded.-- Block machine tires.-- Tie machine down to truck or trailer.4S30 9004080 (2--08)HomeFind. Go To.
SAFETY PRECAUTIONSThe following safety labels are mounted on themachine in the locations indicated. If any labelbecomes damaged or illegible, install a new labelin its place.FAN AND BELT LABEL -Located on engine beltguard.EMISSIONS LABEL -- Located on theside of the operator compartment.LPG ENGINE LABEL -- Locatednext to the ignition switch on theinstrument panel.(LPG machines only)HOPPER LIFT ARMS LABEL -Located on both hopper lift arms.3545905S30 9004080 (5--10)HomeFind. Go To.
SAFETY PRECAUTIONSHOT SURFACE LABEL -- Located onthe exhaust shield.RAISED HOPPER LABEL -- Located on thehopper support bar.FOR SAFETY LABEL -Located on the side of theoperator compartment.RAISED HOPPER LABEL -- Located on thehopper lift arm.VACUUM / BLOWER WAND LABEL -Located on the optional vacuum or blowerwand door.3545906S30 9004080 (5--10)HomeFind. Go To.
OPERATIONOPERATIONMACHINE ent panelFront shroudHopper access doorHopperSide brushHeadlightsMain brush access door8.9.10.11.12.13.14.Fuel tankOperator seatRear engine shroudTaillightsSide shroudHopper support barTop cover7S30 9004080 (5--10)HomeFind. Go To.
OPERATIONCONTROLS AND INSTRUMENTS2012345181319156171671481211109(All models)1. Steering wheel2. Dash Fault Indicator lights3. Wand switch (option)4. Side brush light switch (option)5. Operating / hazard light switch6. Ignition switch7. Horn button8. Directional pedal9. Brake pedal10. Parking brake pedal11. Steering column tilt pedal12. Main brush adjustment knob(S30 only)13. Side brush lever14. Side brush adjustment knob15. Main brush lever16. Hopper door switch17. Hopper raise / lower switch18. Engine speed switch19. Vacuum fan / filter shaker switch20. Indicator panel8S30 9004080 (2--08)HomeFind. Go To.
OPERATIONTOUCH PANEL (S30 XP and X4)123137124611581091. Supervisor control buttons2. Hour meter / fuel indicator / fault codeindicator3. Contrast control button4. 1--STEP sweep button5. Engine speed button6. Vacuum fan button7. Side brush button8. Hopper door open button9. Hopper door close button10. Hopper lower button11. Hopper raise button12. Filter shaker button13. Fault indicator light9S30 9004080 (2--08)HomeFind. Go To.
OPERATIONSYMBOL DEFINITIONSThese symbols are used on the machine toidentify controls, displays, and features. See alsoDisplay Module Fault Indicators (S30) and DashFault Indicators.Sweep (S30)Jack pointVacuum fan (S30)Fault indicator (S30 XP and X4)Filter Shaker (S30)Contrast Control (S30 XP and X4)Engine Idle Speed (S30)1--STEP Sweep (S30 XP and X4)Engine High speed (S30)Engine speed (S30 XP and X4)Empty Hopper (S30)Vacuum fan (S30 XP and X4)Hopper Door Automatic (S30)Side brush (S30 XP and X4)Hopper Door Manual Open (S30)Filter shaker (S30 XP and X4)Hopper Lower (S30)Hopper Up / Down (S30 XP and X4)Hopper Raise (S30)Hopper raise (S30 XP and X4)WandHopper lower (S30 XP and X4)Operating lightsOpen/Close Hopper Door (S30 XP, X4)Hazard lightHopper door open (S30 XP and X4)HornHopper door close (S30 XP and X4)Unleaded fuel only10S30 9004080 (12--08)HomeFind. Go To.
OPERATIONPARKING BRAKE PEDALOPERATION OF CONTROLSDIRECTIONAL PEDALPress the top of the Directional pedal to moveforward and the bottom of the pedal to movebackward. The pedal returns to the neutralposition when it is released.Press the Brake pedal down as far as possibleand use toe to lock the Parking brake pedal intoplace. Press the Brake pedal to release theparking brake. The Parking brake pedal will returnto the unlocked position.STEERING COLUMN TILT PEDALBRAKE PEDALPress the Brake pedal to stop the machine.1. Step on the Steering column tilt pedal andadjust the steering column to the desiredposition.2. Release the Steering column tilt pedal to lockin place.11S30 9004080 (2--08)HomeFind. Go To.
OPERATIONFUEL GAUGELPG MACHINESGASOLINE MACHINESFor LPG machines, the Fuel indicator does NOTdisplay the amount of fuel in the LPG tank. It willdisplay all the indicator bars to show that somefuel is in the tank. The fuel level fault indicator willilluminate when the fuel level gets low. Refer toDISPLAY MODULE FAULT INDICATOR(S).NOTE: Do not use leaded fuels. Leaded fuels willpermanently damage the system oxygen sensorand catalytic converter.The Fuel indicator displays the amount of fuel leftin the tank. The fuel level fault indicator willilluminate when the fuel tank is near empty. Referto DISPLAY MODULE FAULT INDICATOR(S).The LPG fuel gauge on the tank displays theamount of fuel in the LPG tank.S30S30 XP and X412S30 9004080 (2--08)HomeFind. Go To.
OPERATIONHOUR METERENGINE SPEED CONTROLSThe Hour meter records the hours the machinewas operated. Use this information to determinemachine service intervals.Idle Speed: This speed is for starting themachine.NOTE: S30 XP and X4 machines automaticallystart in idle speed.S30S30S30 XP and X4Medium (Fast 1) Speed: This speed is for generalsweeping.S30 XP and X4SUPERVISOR CONTROL BUTTONS(S30 XP and X4)The Supervisor Control buttons are for accessingthe configuration and diagnostic modes. Onlyproperly trained service personnel and TENNANTrepresentatives should access these modes.S30S30 XP and X4High (Fast 2) Speed: This speed is for sweepinglight litter or moving quickly between areas.S30S30 XP and X413S30 9004080 (2--08)HomeFind. Go To.
OPERATIONVACUUM FAN CONTROLS (S30)VACUUM FAN CONTROLS (S30 XP and X4)The vacuum fan automatically comes on when themain brush is lowered with the Vacuum fan switchin the automatic/on position.The vacuum fan automatically comes on when the1--STEP Sweep button is activated. The light nextto the Vacuum fan button will come on.NOTE: Turn off the vacuum fan when sweepingover large wet areas or standing water. Thisprevents the dust filter from getting wet whilesweeping.Press the Vacuum fan switch to the middleposition to shut off the vacuum fan.NOTE: Turn off the vacuum fan when sweepingover large wet areas or standing water. Thisprevents the dust filter from getting wet whilesweeping.Press the Vacuum fan button to shut off thevacuum fan. The light next to the button will goout.CONTRAST CONTROL BUTTON(S30 XP and X4)Press and hold the Contrast control button todarken/lighten the LCD display.14S30 9004080 (2--08)HomeFind. Go To.
OPERATIONFILTER SHAKER CONTROL (S30)OPERATING / HAZARD LIGHT SWITCHPress the Filter shaker switch. The filter shakerwill operate for 30 seconds.Operating and Hazard Lights On: Press the top ofthe Operating / hazard light switch.Operating Lights On: Press the Operating /hazard light switch to the middle position.All Lights Off: Press the bottom of the Operating /hazard light switch.FILTER SHAKER CONTROL (S30 XP and X4)The filter shaker automatically activates for about30 seconds when the 1--STEP Sweep button isturned off.Press the filter shaker switch to manually start the30 second shaker cycle or to stop the shakercycle.SIDE BRUSH LIGHT SWITCH (OPTION)Side Brush Lights On: Press the top of the Sidebrush light switch to turn the side brush light on.Side Brush Lights Off: Press the bottom of theSide brush light switch to turn the side brush lightoff.15S30 9004080 (2--08)HomeFind. Go To.
OPERATIONOPERATOR SEATThe front--to--back adjustment lever adjusts theseat position.DELUXE SUSPENSION SEATThe operator seat has three adjustments:backrest angle, operator weight, and front toback.The weight adjustment knob controls the firmnessof the operator seat. Use the gauge next to theweight adjustment knob to help determine seatfirmness.The front--to--back adjustment lever adjusts theseat position.The backrest adjustment knob adjusts the angleof the backrest.SEAT BELTSFOR SAFETY: Before starting machine, adjustseat and fasten seat belt (if equipped).16S30 9004080 (2--08)HomeFind. Go To.
OPERATIONBRUSH INFORMATIONHOW THE MACHINE WORKSFor best results, use the correct brush type for thecleaning application.The steering wheel controls the direction ofmachine travel. The directional pedal controls thespeed and forward/reverse direction. The brakepedal slows and stops the machine.NOTE: The amount and type of soilage play animportant role in determining the type of brushesto use. Contact a Tennant representative forspecific recommendations.Polypropylene Sand Wedge Main Brush -Recommended for heavy accumulation of sandand other fine particles.The side brush sweeps debris into the path of themain brush. The main brush sweeps debris fromthe floor into the hopper. The vacuum systempulls dust and air through the hopper and the dustcontrol system.Polypropylene Window Main Brush -Recommended for light litter, especially onsmooth floors.When sweeping is finished, shake the dust filterand empty the hopper.Polypropylene 8-double row Main Brush -Recommended for general sweeping applications.PRE--OPERATION CHECKLISTPolypropylene and Wire 8-double row MainBrush -- Recommended for general sweeping andslightly impacted debris.Nylon 8-double row Main Brush -Recommended for general sweeping, especiallyon rough or irregular surfaces. Nylon has a longwear life.Nylon Full Fill Main Brush -- Recommended foraccumulation of sand and other fine particles.Nylon has a long wear life.Nylon Patrol Main Brush -- Recommended forbulky debris swept at faster speeds.Wire 8-double row Main Brush -Recommended for general sweeping and slightlyimpacted debris.- Check the fuel level.- Check the condition of the main brushes.Remove string, banding, plastic wrap, or otherdebris wrapped around the brushes.- Check the main brush compartment rightskirts and seals for damage and wear.- Right Side Brush: Check the condition of thebrush. Remove string, banding, plastic wrap,or other debris wrapped around the brush.- Check the condition of the debris deflectionskirts.- Check the hydraulic fluid level.- Check the main brush compartment left skirtsand seals for damage and wear.Natural Fiber and Full Fill Main Brush -Recommended for accumulation of sand andother very fine particles.- Check the engine coolant level.Polypropylene Side Brush -- Recommended forgeneral sweeping of light to medium debris.- Check the radiator and hydraulic cooler finsfor debris.Nylon Side Brush -- Recommended for generalsweeping of rough or irregular surfaces. Nylonhas a long wear life.- Check the headlights, taillights, and safetylights.Flat Wire Side Brush -- Recommended foroutdoor curb-side sweeping where dirt is heavy orcompacted.- Check the engine oil level.- Check the brakes and steering for properoperation.- Check the service records to determinemaintenance requirements.17S30 9004080 (12--08)HomeFind. Go To.
OPERATION5. Open the LPG tank access door located infront of the operator seat.CHANGING THE LPG TANKFOR SAFETY: Before leaving or servicingmachine, stop on level surface, set parkingbrake, and turn off machine.6. Disengage the mounting strap, then removethe locating pin and remove the empty LPGfuel tank.1. Open the side access door.2. Close the LPG tank service valve.7. Align the hole in the tank collar with thecentering pin and carefully place the full LPGtank onto the tray. Secure the tank withmounting strap.3. Start the machine and operate the engineuntil it stops from lack of fuel. Turn off themachine.WARNING: Machine emits toxic gases.Severe respiratory damage orasphyxiation can result. Provideadequate ventilation. Consult with yourregulatory authorities for exposurelimits. Keep engine properly tuned.FOR SAFETY: When servicing machine, keepflames and sparks away from fuel systemservice area. Keep area well ventilated.4. Put on gloves and remove the quickdisconnect tank coupling.8. Connect the LPG fuel line to the tank servicecoupling. Make sure the tank service couplingis clean and undamaged and that it matchesthe fuel line coupling.9. Slowly open the tank service valve and checkfor leaks. If a leak is found, immediately closethe service valve and inform the appropriatepersonnel.18S30 9004080 (6--08)HomeFind. Go To.
OPERATION4. Turn the ignition switch key until the enginestarts.STARTING THE MACHINE1. LPG powered machines: Slowly open theliquid service valve.NOTE: Opening the service valve too quickly maycause the service check valve to stop the flow ofLPG fuel. If the check valve stops the fuel flow,close the service valve, wait a few seconds, andslowly open the valve again.NOTE: Do not operate the starter motor for morethan 10 seconds at a time or after the engine hasstarted. Allow the starter to cool 15--20 secondsbetween starting attempts or damage to thestarter motor may occur.5. Allow the engine and hydraulic system towarm up for three to five minutes.WARNING: Machine emits toxic gases.Severe respiratory damage orasphyxiation can result. Provideadequate ventilation. Consult with yourregulatory authorities for exposurelimits. Keep engine properly tuned.2. Sit in the operator seat and press the brakepedal or set the parking brake.FOR SAFETY: When starting machine, keepfoot on brake and directional pedal in neutral.3. S30: Place the Engine speed switch into theidle position.S30 XP and X4: The engine will automaticallystart in the idle speed.TURNING OFF THE MACHINE1. Stop the machine and turn off all sweepingfunctions.2. Turn the ignition switch key counter clockwiseto turn off the machine. Remain in theoperator seat until the engine is off.CAUTION: LPG engine will run for a fewseconds after key is turned off. Applyparking brake before leaving machine.NOTE: To protect engine emission componentson LPG powered machines, the engine willcontinue to operate for a few seconds after theignition switch is turned off.FOR SAFETY: Before leaving or servicingmachine, stop on level surface, set parkingbrake, and turn off machine.19S30 9004080 (2--08)HomeFind. Go To.
OPERATIONWHILE OPERATING THE MACHINEPick up oversized debris before sweeping. Pickup wire, string, twine, large pieces of wood, or anyother debris that could become wrapped aroundor tangled in the brushes.Drive as straight a path as possible. Avoidbumping into posts or scraping the sides of themachine. Overlap the sweep paths by severalcentimeters (a few inches).Avoid turning the steering wheel too sharply whenthe machine is in motion. The machine is veryresponsive to the movement of the steering wheel.Avoid sudden turns, except in emergencies.Adjust the machine speed and brush pressure.Use the lowest brush pressure for bestperformance.Keep the machine moving to prevent damagingfloor finishes.If poor cleaning performance is observed, stopcleaning and refer to MACHINETROUBLESHOOTING in this manual.Perform the Daily Maintenance Procedures aftereach use (see MACHINE MAINTENANCE in thismanual).Drive the machine slowly on inclines. Use thebrake pedal to control machine speed ondescending inclines. Sweep with the machine upinclines rather than down inclines.FOR SAFETY: When using machine, go slowon inclines and slippery surfaces.Maximum rated climb and descent for a fullhopper is 10 /18%. Maximum rated climb anddescent for an empty hopper is 14 /25%.20S30 9004080 (2--08)HomeFind. Go To.
OPERATION5. Select an engine speed. Use medium speedfor general sweeping and high speed forsweeping light litter.SWEEPING (S30)FOR SAFETY: Do not operate machine, unlessoperator manual is read and understood.1. Start the machine.2. Ensure the hopper is completely lowered.3. Ensure the vacuum fan switch is in theautomatic/on position.6. Lower the brushes.NOTE: The brushes will rotate, the hopper doorwill open, and the vacuum fan will come on.4. Ensure the hopper door switch is in the upperautomatic position.7. Release the parking brake, then press theDirectional pedal to begin sweeping.FOR SAFETY: When using machine, go slowon inclines and slippery surfaces.NOTE: Turn off the vacuum fan when sweepingover large wet areas or standing water. Thisprevents the dust filter from getting wet whilesweeping.21S30 9004080 (2--08)HomeFind. Go To.
OPERATION8. To stop sweeping, press the Brake pedal tostop the machine.9. Raise the brushes.SWEEPING (S30 XP and X4)FOR SAFETY: Do not operate machine, unlessoperator manual is read and understood.1. Start the machine.NOTE: Make sure the sweep modes / settings areset before sweeping.2. Press the 1--STEP Sweep button. All thepreset sweeping functions will turn on. Thelight on the button will come on.NOTE: The engine idle speed will increase, thebrushes will rotate, the hopper door will open, andthe vacuum fan will come on. Adjust the engineidle speed as needed.10. Press the filter shaker switch to activate thehopper filter shaker. It will operate for about30 seconds.3. Release the parking brake, then press theDirectional pedal to begin sweeping.11. Empty the debris hopper at the end of eachshift or as needed. See EMPTYING THEHOPPER section of this manual.FOR SAFETY: When using machine, go slowon inclines and slippery surfaces.NOTE: Turn off the vacuum fan when sweepingover large wet areas or standing water. Thisprevents the hopper dust filter from getting wetwhile sweeping.4. To stop sweeping, press the Brake pedal tostop the machine.5. Press the 1--STEP Sweep button. The light onthe button will turn off. All the preset sweepingfunctions will turn off and the automatic filtershaker will operate for about 30 seconds.6. Empty the debris hopper at the end of eachshift or as needed. See EMPTYING THEHOPPER section of this manual.22S30 9004080 (2--08)HomeFind. Go To.
OPERATION6. Open the hopper door to empty the hopper.EMPTYING THE HOPPER1. Slowly drive the machine to the debris site ordebris container.2. Stop the sweeping functions.3. Press and hold the Hopper raise switch orbutton to raise the hopper.S30S30 XP and X47. S30: Place the Hopper door switch in theautomatic position to close the hopper door.S30 XP and X4: Press the Hopper door closebutton to close the hopper door.S30S30 XP and X4FOR SAFETY: When
Operator Manual. This manual is furnished with each new model. It provides necessary operation and maintenance instructions. . Minneapolis, MN 55440 Phone: (800) 553--8033 or (763) 513--2850 www.tennantco.com . Located on the optional vacuum or blower wand door. OPERATION S30 9004080 (5-