Transcription
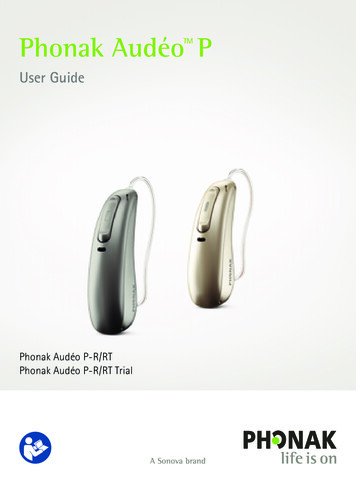
Phonak Audéo PTMUser GuidePhonak Audéo P-R/RTPhonak Audéo P-R/RT Trial
This user guide is valid for:Wireless hearing aidsPhonak Audéo P90-RPhonak Audéo P90-RTPhonak Audéo P70-RPhonak Audéo P70-RTPhonak Audéo P50-RPhonak Audéo P50-RTPhonak Audéo P30-RPhonak Audéo P30-RTPhonak Audéo P-R TrialPhonak Audéo P-RT Trial2020202020202020202020202020202020202020Non wireless charging accessoriesPhonak Charger Case CombiPhonak Charger BTE RICPhonak Mini Charger CasePhonak Power Pack22018201920182016
Your hearing aid & charger detailsIf no box is checked and you do not know themodel of your hearing aid or charging accessories,please ask your hearing care professional.The hearing aids described in this user guidecontain a built-in and non-removable rechargeablelithium-ion battery.The Power Pack contains a built-in and nonremovable rechargeable lithium-polymer battery.Please also read safety information regardinghandling rechargeable hearing aids (chapter 23).Hearing aid modelsc Audéo P-R (P90/P70/P50/P30)c Audéo P-RT (P90/P70/P50/P30)c Audéo P-R Trialc Audéo P-RT TrialEarpiecesc Domec SlimTipc cShellCharging accessoriesc Charger Case Combi*c Charger BTE RIC*c Mini Charger Case*c Power Pack* Incl. power supply and USB cable ( 3 m)3
Your hearing aids and chargers have been developed byPhonak – the world leader in hearing solutions based inZurich, Switzerland.These premium products are the result of decades ofresearch and expertise and are designed to keep youconnected to the beauty of sound! We thank you formaking such a great choice and wish you many years oflistening pleasure.Please read the User Guide carefully to make sure thatyou understand and get the best out of hearing aids. Formore information regarding features, benefits, setup, useand maintenance or repairs of your hearing aid andaccessories – contact your hearing care professional ormanufacturer representative. Additional information canbe found in the Data Sheet of your product.4
For any information regarding the repair service of thehearing aid or accessories please contact the hearing careprofessional.Phonak - life is onwww.phonak.com5
ContentsYour hearing aid and charger1. Quick guide2. Parts of the hearing aid & chargerUsing the charger3. Preparing the charger4. Charging the hearing aids1415Using the hearing aid5. Left & right hearing aid markings6. Putting on the hearing aid7. Removing the hearing aid8. Multi-function button9. On/Off10. Tap control11. Connectivity overview1 2. Initial pairing13. Phone calls14. Flight mode15. Rebooting your hearing aid24252627282930313338416810
Further information16. Operating, transport and storage conditions17. Care and maintenance18. Exchanging the earwax protection19. Service and warranty20. Compliance information21. Information and description of symbols22. Troubleshooting23. Important safety information42444752546166707
1. Quick guideCharging your hearing aidsBefore using your hearing aid for the first time, it isrecommended to charge it for 3 hours.After placing your hearing aidin the charger, the indicatorlight will show the chargingstate of the battery until thehearing aid is fully charged.When fully charged theindicator light will beconstantly on, i.e. solidgreen light.Left & right hearing aid markingsBlue marking for lefthearing aid.Red marking forright hearing aid.8
Multi-function button with indicator lightThe button has several functions. Itfunctions as an on/off switch, a volumecontrol and/or a program change dependingon the hearing aid programming. This isindicated in your individual instructions.Phone calls: If paired with a Bluetooth enabled phone, a short press will acceptand a long press will reject an incoming call.On/Off: Firmly press the lower part of the button for3 seconds until the indicator light blinks.On: indicator light is solid greenOff: indicator light is solid redEnter flight mode: When device is off, press the lower partof the button for 7 seconds until the solid orange lightappears. Then release the button.Tap Control (only available for models P90 and P70)If paired with a Bluetooth enabled device, multiple functionscan be accessed using tap control, please refer to chapter 10.This is also indicated in your individual instructions.To use tap control tap the top of your ear twice.9
2. Parts of the hearing aid & chargerThe following pictures show the hearing aid model andcharger accessories described in this user guide. You canidentify your personal models by: checking “Your hearing aid & charger details” onpage 3. comparing your earpieces, hearing aid and charger withthe following models.Possible earpiecesDomeSlimTipcShellAudéo P-R/RTAudéo P-R/RT TrialMulti-function button with built-in indicator lightTubeAnchor (optional)10Charging contactsSpeaker(without earpiece attached)
Charger Case CombiSpace for drying capsule(cover closed)Space for earpiecesHearing aid charging inserts with left/right indicatorsSpace for dryingcapsule (cover open)Drying capsule(optional)11
Charger Case Combi with optional Power PackCharger Case CombiIndicator light for powermicro-USB connectionto external power supplyPower Packmicro-USB connection to external power supplyBattery check buttonIndicator light for battery statusand external powerPower Pack lock and release12
Mini Charger CaseHearing aid charging insertswith left/right indicatorsUSB-C connectionto external power supplyIndicator light for powerExternal power supplyUSB cable ( 3 m)Power supply13
3. Preparing the chargerConnecting the power supplycdabdba) Plug the larger end of the charging cable into the powersupply.b) Plug the smaller end into the USB port on the charger.c) Plug the power supply into a power outlet.d) The indicator light is green when the chargeris connected to the power supply.Power supply specificationPower supply output voltageCharger input voltageUSB cable specifications145 VDC /-10%, current 1 A5 VDC /-10%, current 1 A5 V min. 1 A, USB-A to USB-C,maximum length 3 m
4. Charging the hearing aids Low power: You will hear two beeps when thebattery is low. You will have approximately60 minutes before you have to charge the hearingaids (this can vary, depending on the hearing aidsettings).The hearing aid contains a built-in and nonremovable rechargeable lithium-ion battery.Before using your hearing aid for the first time, itis recommended to charge it for 3 hours.The hearing aid must be dry before charging,see chapter 17.Please ensure to charge and use the hearing aidwithin operating temperature range: 5 to 40 Celsius (41 to 104 Fahrenheit).15
4.1 Using the Charger Case Combi or Mini ChargerCasePlease refer to chapter 3 for how to set up the charger.1.Insert the hearing aid into the charging inserts.Make sure the left and right hearing aid markings matchthe left (blue), right (red) indicators next to the charginginserts. The hearing aids will automatically be switched offwhen inserted into the charger.16
17
2.The indicator light will show the charging state of thebattery until the hearing aid is fully charged. When fullycharged the indicator light will remain on, i.e. solidgreen light.The charging process will automatically stop when thebatteries are fully charged, so the hearing aids can besafely left in the charger. It can take up to 3 hours tocharge the hearing aids. The charger covers can be closedwhile charging.Charging timesIndicator lightCharging stateApprox. charging times0 – 10%11 – 80%30 min (30%)60 min (50%)90 min (80%)81 – 99%100%183h
19
3.Remove the hearing aids from the charging inserts by1. pulling the hearing aids gently toward yourself and2. lifting them out of the charger.Do not hold the tubes to remove the hearing aidsfrom the charger as this can damage the tubes.The hearing aid switches on automatically when removedfrom the charger. The indicator light starts blinking.The solid green light indicates the hearing aid is ready.If you unplug the charger while the hearing aid ischarging inside, please make sure to turn off the hearingaid to prevent discharge.Turn off your hearing aid before inserting it in thedisconnected charger to store it.20
212121
4.2 Using the optional Power PackNote: The Power Pack is only compatible with the Charger Case Combi.1.Attach the Power Pack to thebottom of the Charger CaseCombi and lock it.2.Plug in the micro-USB and connect to an external powersupply. The Power Pack and hearing aids will be charged atthe same time. While connected to an external powersupply, the Power Pack indicator light will show thecurrent battery charge status of the Power Pack.Before using Power Pack for the first time, it isrecommended to charge it for 3 hours.The Power Pack contains a built-in and nonremovable rechargeable lithium-polymer battery.22
micro-USB connection to external power sourceIndicator light batterystatus: 0%-29% 30%-59% 60%-100%Battery check push buttonPower Pack lock and release3.To check the remaining battery capacity of the PowerPack, press the battery check push button. The indicatorlights will show the status.Please ensure to charge the Power Pack withinoperating temperature range: 5 to 40 Celsius(41 to 104 Fahrenheit)23
5. Left & right hearing aid markingsThere is a red or blue marking on the back of the hearingaid and on the speaker. This will tell you if it is a left or aright hearing aid.Blue markingfor left hearing aid.Red markingfor right hearing aid.24
6. Putting on the hearing aid1.Place the hearing aid behindyour ear.2.Insert the earpiece into yourear canal.3.If there is an anchor attachedto the earpiece, tuck it intothe bowl of your ear to secureyour hearing aid.25
7. Removing the hearing aidPull on the bend of the tubeand remove the hearing aidfrom behind the ear.26
8. Multi-function buttonThe multi-function button has several functions.It functions as an on/offswitch, a volume controland/or a program changedepending on the hearingaid programming. This isindicated in your individual“Hearing aid instructions”.Please ask your hearing careprofessional for a printout.If the hearing aid is paired with a Bluetooth enabledphone, a short press on the upper or the lower part of thebutton will accept an incoming call and a long press willreject an incoming call – refer to chapter 13.27
9. On/OffSwitch on hearing aidThe hearing aid is configuredto switch on automaticallywhen removed from thecharger. If this function is notconfigured, firmly press andhold the lower part of thebutton for 3 seconds until theindicator light blinks. Wait until the solid green lightindicates the hearing aid is ready.Switch off hearing aidPress and hold the lower part of button for 3 secondsuntil the solid red light indicates the hearing is off.Blinking greenHearing aid is switching onSolid red for 2 secondsHearing aid is switching offWhen you switch on the hearing aid you might heara start-up melody.28
10. Tap controlTap control is only available for models P90 and P70.If paired with a Bluetooth enabled device, multiplefunctions can be accessed using tap control e.g.accept/end phone call, pause/resume streaming,start/stop voice assistant. This is indicated in yourindividual “Hearing aid instructions”.To use tap control tapthe top of your ear twice.29
11. Connectivity overviewThe illustration below shows the connectivity optionsavailable for your hearing aid.Bluetooth enableddevice, e.g. cellphoneTV Connector connected to TV*Roger*** The TV Connector can be connected to any audio source such as a TV, PC or hi-fi system.** Roger wireless microphones can be connected to your hearing aids as well.30
12. Initial pairing12.1 Initial pairing to a Bluetooth enabled deviceIt is only necessary to perform the pairingprocedure once with each device featuringBluetooth wireless technology. After the initialpairing, your hearing aids will connectautomatically to the device. Initial pairing can takeup to 2 minutes.1.On your device (e.g. a phone), ensure that Bluetoothwireless technology is enabled and search for Bluetoothenabled devices in the connectivity setting menu.2.Switch on both hearing aids.You now have 3 minutesto pair your hearing aidswith your device.31
3.Your device shows a list of Bluetooth enabled devices.Select the hearing aid from the list to simultaneously pairboth hearing aids. A beep confirms successful pairing.For more information about pairing instructions forBluetooth wireless technology, specific to some ofthe most popular phone manufacturers, go to:https://www.phonak.com/com/en/support.html12.2 Connecting to the deviceAfter your hearing aids have been paired to your device,they will automatically connect again when switched on.The connection will be maintained as long as thedevice remains ON and within range.Your hearing aid can be connected to up to twodevices and paired to up to eight devices.32
13. Phone callsYour hearing aids connect directly with Bluetooth enabled phones. When paired and connected to yourphone, you will hear the caller’s voice directly in yourhearing aids. Your voice is picked up by the hearing aidmicrophones and transmitted to the phone.Your voiceCaller’s voiceBluetooth is a registered trademark owned by the Bluetooth SIG, Inc.33
13.1 Making a callEnter the phone number and press the dial button.You will hear the dialing tone through your hearing aids.Your voice is picked up by the hearing aid microphonesand transmitted to the phone.34
13.2 Accepting a callWhen receiving a call, a calling notification will be heardin the hearing aids.The call can be accepted by taping the top of your eartwice (only available for models P90 and P70), a shortpress on the upper or lower part of the multi-functionbutton on the hearing aid (less than 2 seconds) or directlyon your phone.short press 2 sectap eartwice35
13.3 Ending a callA call can be ended by taping the top of your ear twice(only available for models P90 and P70), a long press onthe upper or lower part of the multi-function button onthe hearing aid (more than 2 seconds) or directly on yourphone.long press 2 sectap eartwice36
13.4 Rejecting a callAn incoming call can be rejected by a long press on theupper or lower part of the multi-function button on thehearing aid (more than 2 seconds) or directly on yourphone.long press 2 sec37
14. Flight modeYour hearing aids operate between 2.4 GHz–2.48 GHzfrequency range. When flying some operators require alldevices to be switched into flight mode. Entering flightmode will not disable normal hearing aid functionality,only the Bluetooth connectivity functions.14.1 Enter flight modeTo disable the wireless function and enter flight mode ineach hearing aid:38
1.If the hearing aid is turned off,proceed to Step 2.If the hearing aid is on, turn it offby pressing and holding the lowerpart of the button for 3 seconds,until the indicator light turns solidred for 2 seconds, signifying thatthe hearing aid is switching off.2.Press and hold the lower part ofthe button. The green indicatorlight blinks when the hearing aidstarts up.3.Keep pressing the button for7 seconds, until the indicator lightis solid orange, then release thebutton.The solid orange light indicates thehearing aid is in flight mode.In flight mode, your hearing aid cannot connect directlyto your phone.39
14.2 Exit flight modeTo enable the wireless functionand exit flight mode in eachhearing aid:Switch the hearing aid off andthen on again - refer to chapter 9.40
15. Rebooting your hearing aidUse this technique if your hearing aid is in an error state.This will not remove or delete any program or settings.1.Press the lower part of the button for at least15 seconds. It does not matter if the hearing aid isswitched on or off before you start pressing the button.There is no light or acoustic notification at the end of the15 seconds.2.Place the hearing aid in the power-connected chargerand wait until the indicator light blinks green. This cantake up to 30 seconds. The hearing aid is now ready to use.41
16. Operating, transport and storageconditionsThe product is designed such that it functions withoutproblems or restrictions if used as intended, unlessotherwise noted in these user guides.Please ensure to use, charge, transport and store thehearing aids and the Power Pack according to thefollowing conditions:UseChargingTransport 5 to 40 C(41 to 104 F) 5 to 40 C(41 to 104 F)-20 to 60 C -20 to 60 C(-4 to 140 F (-4 to 140 F)Recommended 5 to 40 C(41 to 104 F)range 7 to 32 C(45 to 90 F)0 to 20 C(32 to 68 ge0 to 20 C(32 to 68 F)0% to 70%0% to 85%0% to 85%(non(noncondensating) condensating)0% to 70%0% to 60%0% to 60%Recommended 0% to 60%(non(nonrangecondensating) condensating)0% to 60%Atmosphericpressure500 hPa to1060 hPa42500 hPa to1060 hPa500 hPa to1060 hPa500 hPa to1060 hPa
Please ensure to charge the hearing aids and thePower Pack regularly during long-term storage.These hearing aids are classified IP68 (depth of 1 meterfor 60 minutes) and designed to be used in all daily lifesituations. Therefore you do not have to worry aboutgetting the hearing aids exposed to a rain shower orsweat. However, these hearing aids are not intended to beused in water activities that includes chlorinated water,soap, salt water or other liquids with a chemical content.43
17. Care and maintenanceDiligent and routine care of your hearing aid and chargerscontribute to outstanding performance and a long servicelife. To ensure a long service life, Sonova AG provides aminimum of a five year service period after phase out ofthe respective hearing aid.Please use the following specifications as a guideline.Further information regarding product safety, seechapter 23.2.44
General informationBefore using hair spray or applying cosmetics, you shouldremove your hearing aid from your ear, because theseproducts may damage it.Your hearing aids are resistant to water, sweat and dustunder the following conditions: After exposure to water, sweat or dust, the hearing aidis cleaned and dried. The hearing aid is used and maintained as described inthis user guide.Always make sure that the hearing aids andcharger are dry and clean before charging.45
DailyHearing aid: Inspect the earpiece for earwax and moisturedeposit and clean the surfaces with a lint-free cloth. Neveruse cleaning agents such as household detergents, soap,etc. for cleaning your hearing aid. It is not recommendedto rinse with water. If you need to clean your hearing aidintensively, ask your hearing care professional for adviceand information on filters or drying capsules.Chargers: Make sure that charger inserts are clean.Never use cleaning agents such as household detergents,soap, etc. for cleaning your charger.WeeklyHearing aid: Clean the earpiece with a soft, damp cloth orwith a special cleaning cloth for hearing aids. For morein-depth maintenance instructions or for more than basiccleaning, please see your hearing care professional. Cleanthe charging contacts on the hearing aid with a soft,damp cloth.Chargers: Remove dust or dirt from the charger inserts.Always make sure that the charger is disconnectedfrom the power mains before cleaning.46
18. Exchanging the earwax protectionYour hearing aid is equipped with an earwax protection toprotect the speaker from earwax damage.Please check the earwax protector regularly and exchangeit if it looks dirty or if the hearing aid volume or soundquality is reduced. The earwax protection should bereplaced every four to eight weeks.18.1 Removing the earpiece from the speaker1.Remove the earpiece from thespeaker by holding the speakerin one hand and the earpiece inthe other.47
2.Gently pull off the earpieceto remove.3.Clean the speaker with alint-free cloth.48
18.2 Exchanging the earwax protection withCeruShield Disk1.Gently rotate the CeruShieldDisk in the direction indicated bythe arrows until a free openingappears under the bin icon.2.To remove a used earwaxprotector carefully insert thespeaker into the free opening(under bin icon) until it clicks.After the click you will see theused earwax protector in theopening below the bin icon.49
3.To insert a new earwax protectorcarefully insert the speaker intothe opening where the newearwax protector is visible(opposite the bin icon) until itclicks. After the click you will seethe opening below is empty andthe new earwax protector is nowinside the speaker.50
18.3 Attaching the earpiece to the speaker1.Hold the speaker in one handand the earpiece in the other.2.Slide the earpiece over thespeaker sound outlet.3.The speaker and the earpieceshould fit perfectly together.51
19. Service and warrantyLocal warrantyPlease ask the hearing care professional where youpurchased your hearing aids and chargers about theterms of the local warranty.International warrantySonova AG offers a one year limited internationalwarranty, valid from the date of purchase. Thislimited warranty covers manufacturing and materialdefects in the hearing aid and chargers respectively,but not accessories such as tubes, earpieces, externalreceivers. The warranty only comes into force if aproof of purchase is shown.The international warranty does not affect any legalrights that you might have under applicable nationallegislation governing sale of consumer goods.52
Warranty limitationThis warranty does not cover damage from improperhandling or care, exposure to chemicals or undue stress.Damage caused by third parties or non-authorized servicecenters renders the warranty null and void. This warrantydoes not include any services performed by a hearing careprofessional in their office.Serial numbersHearing aid left side:Hearing aid right side:Charger Case Combi:Charger BTE RIC:Mini Charger Case:Power Pack:Date of purchase:Authorized hearing careprofessional (stamp/signature):53
20. Compliance informationEurope:Declaration of Conformity for the hearing aidHereby Sonova AG declares that this product meets therequirements of the Medical Devices Directive 93/42/EECas well as the Radio Equipment Directive 2014/53/EU.The full text of the EU Declaration of Conformity canbe obtained from the manufacturer or the local Phonakrepresentative whose address can be taken from thelist on www.phonak.com/us/en/certificates (Phonakworldwide locations).Australia/New Zealand:Indicates a device’s compliance with applicableRadio Spectrum Management’s (RSM) andAustralian Communications and Media Authority(ACMA) regulatory arrangements for the legalsale in New Zealand and Australia.The compliance label R-NZ is for radio productssupplied in the New Zealand market underconformity level A1.54
The wireless models listed on page 2 are certified under:Phonak Audéo P-R & P-RT (P90/P70/P50/P30)Phonak Audéo P-R Trial & P-RT TrialUSACanadaFCC ID: KWC-MRPIC: 2262A-MRP55
Notice 1:This device complies with Part 15 of the FCC Rules andwith RSS-210 of Industry Canada. Operation is subject tothe following two conditions:1) this device may not cause harmful interference, and2) this device must accept any interference received,including interference that may cause undesired operation.Notice 2:Changes or modifications made to this device notexpressly approved by Sonova AG may void the FCCauthorization to operate this device.Notice 3:This device has been tested and found to comply withthe limits for a Class B digital device, pursuant to Part 15of the FCC Rules and ICES-003 of Industry Canada.These limits are designed to provide reasonable protectionagainst harmful interference in a residential installation.This device generates, uses and can radiate radiofrequency energy and, if not installed and used inaccordance with the instructions, may cause harmfulinterference to radio communications. However, there is56
no guarantee that interference will not occur in aparticular installation. If this device does cause harmfulinterference to radio or television reception, which can bedetermined by turning the equipment off and on, the useris encouraged to try to correct the interference by one ormore of the following measures: Reorient or relocate the receiving antenna. Increase the separation between the deviceand receiver. Connect the device into an outlet on a circuitdifferent from that to which the receiver is connected. Consult the dealer or an experienced radio/TVtechnician for help.57
Radio information of your wireless hearing aidAntenna typeResonant loop antennaOperation frequency2.4 GHz – 2.48 GHzModulationGFSK, Pi/4 DPSK, GMSKRadiated power 2.5 mWBluetooth Range 1 mBluetooth4.2 Dual-ModeProfiles supportedHFP (Hands-free profile), A2DP58
Compliance with emission and immunity standardsEmission standardsEN 60601–1-2:2015IEC 60601–1-2:2014EN 55011:2009 O 7637-2:2011CISPR25:2016EN 55025:201759
Immunity standards60EN 60601-1-2:2015IEC 60601-1-2:2014EN 61000-4-2:2009IEC 61000-4-2:2008EN 61000-4-3:2006 A1 A2IEC 61000-4-3:2006 A1 A2EN 61000-4-4:2012IEC 61000-4-4:2012EN 61000-4-5:2014IEC 61000-4-5:2014EN 61000-4-6:2014IEC 61000-4-6:2013EN 61000-4-8:2010IEC 61000-4-8:2009EN 61000-4-11:2004IEC 61000-4-11:2004IEC 60601-1 (§ 4.10.2):2005ISO 7637-2:2011
21. Information and descriptionof symbolsWith the CE symbol, Sonova AG confirms that thisproduct – including accessories – meets therequirements of the Medical Devices Directive93/42/EEC as well as the Radio EquipmentDirective 2014/53/EU. The numbers after theCE symbol correspond to the code of certifiedinstitutions that were consulted under theabove-mentioned directives.This symbol indicates that the products describedin these user instructions adhere to therequirements for an applied part of Type B of EN60601-1. The surface of the hearing aid isspecified as an applied part of Type B.Indicates the medical device manufacturer, asdefined in EU Directive 93/42/EEC.Indicates the Authorized representative in theEuropean Community. The EC REP is also theimporter to the European Union.61
This symbol indicates that it is important forthe user to read and take into account therelevant information in these user guides.This symbol indicates that it is important forthe user to pay attention to the relevantwarning notices in these user guides.Important information for handling andproduct safety.This symbol confers that the electromagneticinterference from the device is under limitsapproved by the US Federal CommunicationsCommission.The Bluetooth word mark and logos areregistered trademarks owned by Bluetooth SIG,Inc. and any use of such marks bySonova AG is under license. Other trademarksand trade names are those of their respectiveowners.62
Indicates a device’s compliance with theBrazilian General requirements for ProductsCertification.Japanese mark for certified radioequipment.Indicates the manufacturer’s serial number sothat a specific medical device can beidentified.Indicates the manufacturer’s cataloguenumber so that the medical device can beidentified.Indicates that the device is a medical device.This symbol indicates that it is important forthe user to read and take into account therelevant information in this user guide.63
Temperature during transportation and storage:–20 to 60 Celsius (–4 to 140 Fahrenheit).Humidity during storage: 0% to 70%, if not inuse. See instruction in chapter 23.2 regardingdrying the hearing aid after use.Atmospheric pressure during transportationand storage: 500 hPa to 1060 hPaDuring transportation keep dry.The symbol with the crossed-out garbage bin isto make you aware that this hearing aid as wellas chargers and Power Pack may not be thrownaway as normal household waste. Pleasedispose of old or unused hearing aids andcharger, at waste disposal sites intended forelectronic waste, or give your hearing aid andcharger to your hearing care professional fordisposal. Proper disposal protects theenvironment and health.64
Symbols applicable to the European power supply onlyPower supply with double isolation.Device designed for indoor use only.Safety isolating transformer, short circuitproof.65
22.TroubleshootingProblemHearing aid notfunctioningHearing aid whistlesHearing aid too loudHearing aid not loudenough or distortedHearing aid plays twobeepsHearing aid will notswitch onIndicator light on hearingaid does not light up whenhearing aid placed incharging insertsCausesSpeaker/earpiece blockedHearing aid switched offBattery fully dischargedHearing aid not inserted correctly into earCerumen in ear canalVolume too loudVolume too lowLow batterySpeaker/earpiece blockedHearing has changedIndication for low batteryBattery fully dischargedButton was inadvertently deactivated bypressing the button longer than 15 secondsHearing aid not inserted correctlyinto chargerCharger not connected to power sourceBattery fully dischargedPlease check https://www.phonak.com/com/en/support.html for furtherinformation.66
What to doClean speaker opening/earpiecePress lower part of multi-function button for 3 seconds (chapter 9)Charge hearing aid (chapter 4)Insert hearing aid correctly (chapter 6)Contact your ENT/GP or hearing care professionalDecrease volume if volume control available (chapter 8)Increase volume if volume control available (chapter 8)Charge hearing aid (chapter 4)Clean speaker opening/earpieceContact you hearing care professionalCharge hearing aid (chapter 4)Charge hearing aid (chapter 4)Perform step 2 of the rebooting process (chapter 15)Insert hearing aid correctly into charger (chapter 4)Connect charger to external power supply (chapter 3)Wait three hours after placing hearing aid in charger, regardless ofLED behavior67
ProblemIndicator light on hearingaid is solid red whilehearing aid is in thechargerIndicator light on hearingaid switches off whenhearing aid is removedfrom chargerIndicator light on he
Phonak Charger Case Combi Phonak Charger BTE RIC Phonak Mini Charger Case Phonak Power Pack 2020 2020 2020 2020 2020 2020 2020 2020 2020 2020 2018 2019 2018 2016 This user guide is valid for: 3 Your hearing aid & charger details Hearing aid models Earpieces c Audéo P-R (P90/P70/P50/P30) c