Transcription
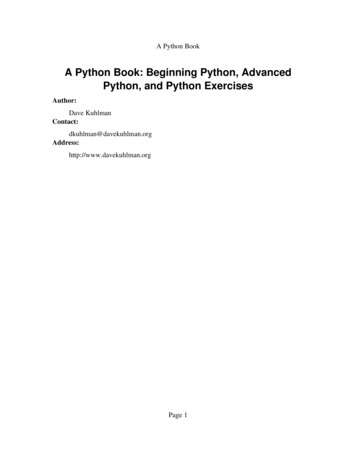
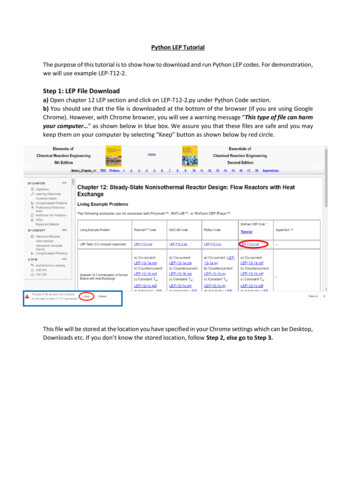
Python LEP TutorialThe purpose of this tutorial is to show how to download and run Python LEP codes. For demonstration,we will use example LEP-T12-2.Step 1: LEP File Downloada) Open chapter 12 LEP section and click on LEP-T12-2.py under Python Code section.b) You should see that the file is downloaded at the bottom of the browser (if you are using GoogleChrome). However, with Chrome browser, you will see a warning message “This type of file can harmyour computer ” as shown below in blue box. We assure you that these files are safe and you maykeep them on your computer by selecting “Keep” button as shown below by red circle.This file will be stored at the location you have specified in your Chrome settings which can be Desktop,Downloads etc. If you don’t know the stored location, follow Step 2, else go to Step 3.
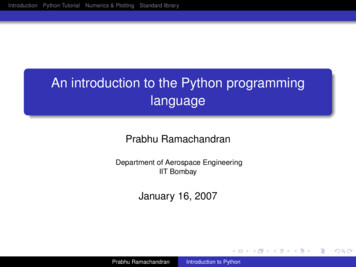
Step 2: Knowing File LocationRight click on the downloaded file LEP-T12-2.py and choose “Show in Folder “as shown in above image.This will show the folder location where your file is stored.
The following location page will appear. You can see here your downloaded file (shown below by redcircle) and location (refer black circle). Remember your file location as it will be used later in Step 6.In this case the file is stored at Desktop.Step 3: Open Spyder SoftwareMake sure you have Spyder3 (Python 3.7) installed on your computer so that you can run thedownloaded file. If you don’t have Spyder 3 installed, then you can refer to Python Installation tutorialon CRE website (http://umich.edu/ elements/5e/tutorials/python installation tutorial.pdf).To open Spyder, first locate the search box which is present at the bottom of your screen as shownbelow
Now type “spyder” to search for Spyder software and click on the circled icon shown below. This willopen up Spyder.You will see that the Python is loaded and following command windows will appear.
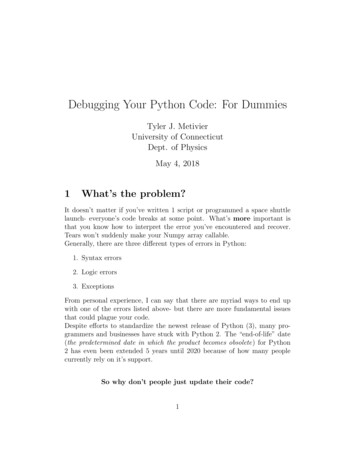
Step 4: Check Python SettingsTo create a new window for graphs, you need to have your python “Backend” setting as “Automatic”.If you already have this setting, you can go to Step 6, else follow below steps:Go to Tools option present on the top menu bar and then select PreferencesThis will open up following pop-up window. Click on “IPython console” option and then select Graphicstab present on top menu bar
Under Graphics, click on drop-down menu for Backend option and select Automatic. When you aredone, Click OkStep 5: Restart PythonOnce you have made changes to Python settings, you need to restart kernel. A 'kernel' is a programthat runs and introspects the user's code. To restart kernel, you can close the Python software andthen re- open it.As an easy step, follow below option:Click on Settings icon present under Console 1/A and the click on “Restart kernel”
You will then be prompted to confirm your action. Click on Yes button.Now, your settings has been applied successfully.Step 6: Opening LEP FileGo to the file Menu and Click on Open. As a shortcut, you can also use keyboard button ‘ Ctrl O ‘ .Go to the place where your file (LEP-T12-2) is stored. In this case, file was stored at desktop as wasidentified in Step 2. If your file was saved at different location, then you should go to that location.After you have found the file, double click on “LEP-T12-2” to open it. This will open the codes for thisLEP.
Step 7: Executing the FileYou will see that LEP-T12-2 is opened. Click on the run icon (run the code.) as indicated in the image below to
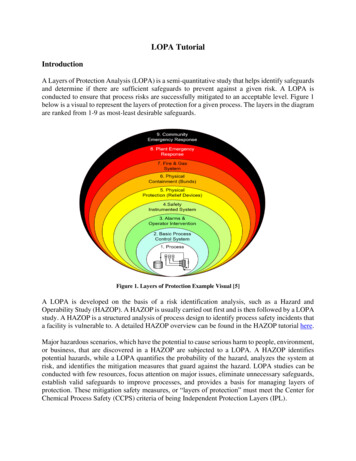
Now look for a new spyder window in the taskbar (shown below by red circle). Click on it to open thisfile which contains graph.You will see a window (as shown below) displaying interactive Conversion, Temperature, & Heatprofiles.Click on Maximize button to generate the full graph size.
You will see following window. On the top left zone, you can see all the variables that you can playwith and see the simultaneous effects on various graphs. You can also see a “Reset variables” buttonwhich initializes the variable values.Step 8: Playing with VariablesChange the variable values by shifting slider on slider bar (with your mouse or touchpad). Observe thechanges on the different plots. As you change the variable values, you can view the current value ofvariables by looking at the corresponding values displayed at the end of each slider (shown below byred rectangle)
Step 9: Reset VariablesIf you wish to go back to the initial values of the variables, you can click on “Reset variables” buttonto initialize all the variables. This would change the values of all the variables to their initial values asshown below. You can see that after clicking “Reset variables” button, the graph becomes same asthat of Step 7.Step 10: PlayChange different variables and observe the change in various graphs. Draw your conclusions.
Python LEP Tutorial The purpose of this tutorial is to show how to download and run Python LEP codes. For demonstration, we will use example LEP-T12-2. Step 1: LEP File Download a) Open chapter 12 LEP section and click on