Transcription
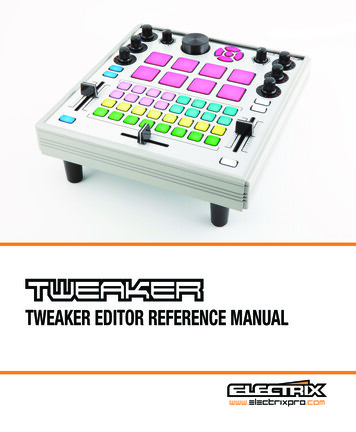
TWEAKER EDITOR REFERENCE MANUALWWW.ELECTRIXPRO.COM
Tweaker Editor Reference ManualTable of Contents12345678Getting Started1.1Before You Begin1.2Installing the Editor1.3Connecting the TweakerOverviewControl Settings3.1Buttons3.2Sliders and Pots3.3Encoders3.4LED Rings3.5Drum Pads3.6Group3.7Global Settings3.8FSR Settings3.9PresetsSave to TweakerToolsMIDI Hub6.1Windows Setup6.2Mac OS Setup6.2MIDI LearnThe Settings ChannelSysex Messages233345778899101112131516181919192021
1. Getting Started1 Getting Started1.1 Before You BeginJava 1.6 or above is required.For the Windows operating system, you can go to http://www.java.com and install Java.For OS X 10.6 and below, Java is already installed. For OS X 10.7 and above:8 From the Go menu in the Finder, select Utilities (You can press [ ] [Shift] [U] to open theUtilities folder)8 Open the Java Preferences.8 If Java is not installed, you receive the message: “To open ‘Java Preferences,’ you need a Javaruntime. Would you like to install one now?”8 Click Install and accept the license agreement. The Java runtime will be downloaded andinstalled.1.2 Installing the EditorTo begin the installation process, insert the installation CD into your computer’s optical drive. Openthe TWEAKER EDITOR folder and select your platform.8 MAC OS X: Double click the file TweakerEditor.dmg‘ to get started.8 WINDOWS: Double click the file TweakerEditor Installer WIN.exe’ to get started.The installer will guide you through the rest of the installation process. Follow the on-screeninstructions carefully.3
1. Getting Started1.3 Connecting the TweakerA TWEAKER must be connected to your computer before starting the editor. When the TWEAKEREDITOR first starts up, it searches all MIDI ports for a Tweaker. If a TWEAKER is connected, it will loadthe primary interface and let you edit settings.If you have more than one TWEAKER attached, you can use the port menu at the top to select theport that communicates with the TWEAKER you want to edit.If a TWEAKER is not found upon starting the editor, you must quit and connect a TWEAKER beforerestarting the editor.If you disconnect the TWEAKER while the editor is open, you will lose any unsaved changes, and youmust restart the editor after reconnecting the TWEAKER.Connections and MIDI ports are detailed in the TWEAKER user manual.4
2. Overview2 OverviewThe ELECTRIX TWEAKER EDITOR provides a complete interface for modifying the settings andcontrols of the TWEAKER control surface. While the TWEAKER provides a lot of capability withoutever changing its settings, many users will want to explore its full potential as a controller for varioussoftware and hardware platforms.5
2. OverviewSome of the changes that you can explore are:8 Enable and disable local control of LED rings and button LED’s8 Create preset files that are stored on the computer to extendthe preset possibilities and share setups with others8 Test and confirm your Tweaker’s settings and LED’s8 Reset the Tweaker to default settings8 Change the function and look of LED rings8 Change the MIDI channels of different controls8 Change the output message of button from MIDI notes tocontinuous controller (CC)It is easy to navigate and select controls. Use the mouse to click oncontrols on-screen or just use TWEAKER: press a button or turn a dial,and the appropriate editor will appear in the interface so you can changesettings. This is, of course, limited to buttons and encoders: LED ringsmust be clicked on to show the LED ring Inspector panel.Selecting a control highlights the midi note/cc# number box in theControl Settings panel enabling you to just type in a value. This makes iteasy to quickly edit MIDI note and CC values: select, type, enter, select,type, enter, etc.Any time you modify a property of a control, the change is instantly sentto the TWEAKER. However, for the change to be permanent – so theTweaker will power up with the new settings – you must press the “Saveto Tweaker” button. This writes the settings to flash memory on thehardware. Don’t do this more than necessary, because the flash memoryhas a finite lifespan of data writes.6
3. Control Settings3 Control SettingsWhen you select a control, either by clicking on the interface or using a control on the TWEAKER,the Control Settings panel will show the current settings of the control for the parameters that youcan configure. Buttons, LED’s, encoders, drum pads and LED rings all have different possibilities, andeach control has its own settings.Some common things you’ll see in the panels are the ID number (in square brackets) and the groupbutton. The ID just provides an easy reference name to each control, particularly for support andcommunication purposes. ID’s start at 0. See below for more about the group button.3.1 Buttonsnote/cc#Enter a note or CC number that you want the button to send. Valid note and cc numbers range from0-127.i If you want to display the note values as musical notes, go to More in thetop menu bar and select Display as Notes.chEnter a MIDI channel that the control will send on. All controls can beset to one of 16 possible channels.modeThis determines if the number you entered in note/CC# will be a noteor a CC message.enc speedA button can serve as the encoder speed shifter such that when it isheld down, the encoders will react to turns at encspeedB (in GlobalSettings). Turn this switch on to configure the button with the encoderspeed shift settings (note/cc# 126 and mode cc). Only one buttoncan serve as the speed shift, so if another button is configured as aspeed shift, it will be de-assigned, and you will see a warning to this7
3. Control Settingseffect. If a button is configured as enc speed, it will send no MIDI messages.3.2 Sliders and Potscc#Enter CC number that you want the button to send. Valid CC numbers range from 0-119.chEnter a MIDI channel that the control will send on. All controls can be set to one of 16 possiblechannels.3.3 Encoderscc#Enter CC number that you want the button to send. Valid CC numbersrange from 0-119.chEnter a MIDI channel that the control will send on. All controls can beset to one of 16 possible channels.modeThis determines if the number you entered in note/CC# will be a noteor a CC message.typeThe type determines if the encoder will output a range of 0-127(absolute) or provide increment/decrement values (relative). In relativemode, the encoder will output a stream of values of 1 when turned tothe left, and a stream of 127 when turned to the right.i Relative mode works with “2’s compliment” relative mode as used byAbleton Live and Serato.8
3. Control Settings3.4 LED RingsThe LED rings for the encoders can be controlled independently of theencoder value. This is useful if you want to use the rings to display anabsolute value while the encoders are in relative mode.cc#Enter a CC number that you want to use to control the LED ring to send.Valid CC numbers range from 0-119.chEnter a MIDI channel that the control will send on. All controls can beset to one of 16 possible channels.modeThe mode menu determines how the LED ring responds to knob turns.8 Walk: (default) illuminates only one LED at a time to indicate value.8 Fill: Illuminates all LED’s that precede the current value, eventually lighting all LED’s at themaximum value.8 EQ: Fills to the left or right from top-center and is ideal for DJ EQ’s that have cut/boost valuesfrom center.8 Spread: Fills both sides from center. This is useful for parameters that indicate a “width”.3.5 Drum PadsThe velocity (pressure) sensitive drum pads can be configured to send a note as well as a CCaftertouch. Each pad can be set to its own channel.noteEnter a note number that you want the drum pad to send. Valid note numbers range from 0-127.chEnter a MIDI channel that the note will send on. All controls can be set to one of 16 possible channels.cc#9
3. Control SettingsEnter a CC number that you want the drum pad to send on aftertouch(that is, holding down and pressing the pad). Valid CC numbers rangefrom 0-119.chEnter a MIDI channel that the control will send on. All controls can beset to one of 16 possible channels.cc enableIf you do not want to send CC messages on aftertouch, you can turnthat feature off for each pad with this switch.3.6 GroupThe group button offers a fast way to assign multiple controls of the same type with the samesettings. Press the group button and all the settings of a given type will be copied, and all the note/cc# assignments will be grouped around the shown value, in order of ID.i The group function is available for the following control groups: drum pads,encoders, rings, button grid, and pots/slidersFor example if you click on button ID 6 and assign it cc# 16, cc mode and set to channel 5, then allbutton will have that mode and channel and their note values will range from 10 (ID 0) to 41 (ID 31).Note that the IDs increase in count according to rows, left to right, where ID 0 is the top left buttonin the grid, ID 1 is to the right of that, and ID 8 is below it.Another example can be illustrated using drum pads. If you want to transpose all drum pads up 8semi-tones, you can easily do this. If a pad ID 0 is set to note 36, you can quickly shift all pads up bychanging pad ID to note 42, then press group to transpose all pads.10
3. Control Settings3.7 Global SettingsThe global settings affect all controls.Encoder SpeedsYou can set two different speeds for encoders. Speed A is the default speed of encoders. The Bspeed is accessed by assigning one of the buttons on the TWEAKER as the enc speed shift. Whenthis shift button is held down, the encoders will respond with the speed set as B.There are several possible speeds (or sensitivities) for the encoders. A low speed will mean the knobtakes more rotations to go from low to high value, a high speed mean it will take less rotation.Settings ChannelThe settings channel is a special receiving channel for theTWEAKER that listens to MIDI CC values to change propertiesof encoders and LED rings. For those familiar with other MIDIcontrollers use of NRPNs, you will probably find this a moreconvenient and useful method. Details of the settings channelcan be found below and in the Settings Channel Response Tabledocument.LED Ring Local ControlBy default, if you turn an encoder on the TWEAKER, the LEDring will indicate the value, without needing a MIDI message toupdate the ring. This is usually desirable, but not always. If youwant full and exclusive remote control of the LED rings, you’llwant to disable the LED ring local control.Button Local ControlBy default, button local control is disabled, and requires MIDIinput to illuminate LED’s. If you want a button’s LED to illuminatewhen you press a button, you’ll want to turn this on. This isparticularly useful if you are working with software or hardwarethat cannot provide MIDI feedback, and you want buttons tolight when pressed.OmniOmni mode is a standard MIDI mode for many devices thatreceive MIDI input. If omni is on, then the TWEAKER will ignore11
3. Control Settingsany channel settings of the incoming message and respond accordingly. For example, suppose theTWEAKER’s bottom left button is configured to respond to note 37 on channel 1. If omni is off, thenthe TWEAKER would ignore any note 37 (on or off ) received on any other channel. If omni is on, thenthat same note message would actually turn the LED on and off in response!Potentiometer NotesThe “pot. notes” button will enable or disable a unique feature of the TWEAKER. When enabled,the 2 sliders and 2 analog knobs with center detent will send out a MIDI note with velocity 0 whenthe potentiometer is at exact center of the range. Additionally, a note will be sent with a differentvelocity when the potentiometer crosses the center of the range. If the center is crossed whendecreasing the value of the pot, it will send out a note with velocity 64; if increasing the velocityis 127. The note values are fixed and cannot be edited, however, they match the default CC valuesof the pots. This feature is particularly useful when using the knobs trigger a filter sweep or whenusing the fader for pitch control.3.8 FSR SettingsThe FSR (Force Sensitive Resistor) enables the pressure sensitivity of the drum pads, and can becustomized for sensitivity and response. These settings affect all drum pads.Retrigger RateThis describes the “temporal resolution” of the aftertouch CC messages of the drum pads. Thenumber represents multiples of 5 milliseconds (ms). For example, with a setting of 9, the TWEAKERwill send CC messages every 45ms while a drum pad is held down.SensitivityA higher number makes the pads more sensitive, a lower number less sensitive, and thereforerequiring more force to produce a note and velocity value.TrriggerThe pressure at which a pad generates a Note On message (and starts streaming CC messages).Min:0Max:1023Default: 15Note: Least Significant Byte is Transmitted First.12
3. Control SettingsReturnThe pressure at which a pad generates a Note Off Message (and stops streaming CC Messages).Min:0Max:1023Default: 15Note: Least Significant Byte is Transmitted First.3.9 PresetsPresets are a way of storing TWEAKER’s current settings in a file on your computer, and recall them asneeded. Preset files include both Control Settings and Global Settings. You can create any numberof presets, and even share these files with others.i Presets are stored in your user preferences folder:Windows: /Users/username/AppData/Roaming/Electrix/TweakerOS X: /Library/Application Support/Electrix/TweakerMenuThe preset menu can be used to recall or rename a preset. Click on the name to edit it, or click to theright of the name to select a preset from the menu.SavePress this button to save all the current settings to the currently selected preset file for later use. Ifno preset is selected (that is, the menu reads “select a preset”), then you will be prompted to entera name to create a preset.Save to Press this button to save your settings to a new preset file. You will be prompted to enter a newname, and the preset will be available in the menu.CopyPress this button to copy the currently selected preset to a new file. You will be prompted to entera new name, and the preset will be available in the menu. It is worth noting that if you have notsaved current changes to the controls to the preset you are copying, they will not be part of thenew preset.13
3. Control SettingsDeletePress this button to delete the currently selected preset. You’ll beasked for confirmation before you commit this change! This willdelete the preset file from your hard drive. There is no undo.Reset to DefaultsPress this button to send the TWEAKER a message to revert to thefactory default settings. You’ll be asked for confirmation before youcommit this change! The default settings are documented in theincluded TWEAKER MIDI Map document.14
4. Save to Tweaker4 Save to Tweakeri The save function is very important! Read carefully.When the TWEAKER is connected to power, settings are recalled from flash memory.If you want the current settings to load when you connect the controller, you will have to press thisbutton to store the current setup in flash memory. Otherwise, all changes will be lost when youdisconnect the controller.15
5. Tools5 ToolsThe tools window hosts a variety of utilities that help you test your controller’s setup as well as havea little bit of fun! These tools are not exclusive to the TWEAKER: they can be used to send and MIDIfrom and to any port or device.View MIDI InputThis panel displays the type, values and channel of incoming MIDI messages. It defaults to TWEAKERPort 1 but you can select a different port or device from the menu.Send Single Note or CCUse this tool to send a single note or CC to the TWEAKER. Use the note/cc toggle to change the16
5. Toolsmessage this sends. Just type in a note number into the box and the note will be sent, or type in avelocity value and the note will be sent. You can alter the properties of the note with the velocityand duration field.This is useful for testing LED’s on a one-by-one basis, and observing how different velocities affectthe illumination. If you want to keep an LED illuminated, turn on the no note off button so a note offis never sent and the LED will stay on. It is also useful for testing LED rings and their different modes.Just type in a CC number, then scroll through values in the value number box to send a stream ofCC values to an LED ring.Send Many NotesIf you want to see all the button LED’s illuminate in succession, use the send many notes tool. Youcan set a range of notes with the min and max settings. Change the timing with the interval numberbox. You can set the duration of the notes using the duration field in Send Single Note. Press Go tostart the cycle and Stop to cancel it. If you want the cycle to keep running, turn on Loop.Send CC RampsSimilar to the Send Many Notes tool, but sends ramps of data on successive continuous controllernumbers. Use the min and max values to set the range of CC numbers you want to send, and use theinterval setting to determine how fast the ramp is. For example, if you set the range to CC numbers0-4 and an interval of 10, the program will send a ramp of values 0 to 127 on CC 0, taking (10*128)ms ( 1.3 seconds) to complete the ramp, then it will do the same for CCs 1,2,3, and 4. You can usethe remap feature to set the CC numbers to a succession of your choice, rather than the linear rangeusing min and max.Output from ToolsDisplays the messages sent to the TWEAKER from the various functions in the Tools window.17
6. MIDI Hub6 MIDI HubThe MIDI Hub provides a mechanism to direct MIDI from another application (over a MIDI loopback/IAC port) to the controller so you can dynamically change presets with the editor while using othermusic software. This is mostly useful for the Windows operating system, which only allows one MIDIsoftware application to use the controller. If the MIDI Hub is in use, you will no longer be able toselect controls in the editor using the TWEAKER - you will have to use your mouse. This makes theprogram more efficient, as it is presumed you are using the MIDI Hub for performance reasons, andwould like to keep things streamlined!i To open the MIDI Hub, go to More in the top menu bar and select MIDI Hub.18
6. MIDI Hub6.1 Windows Setupi You’ll need to install a 3rd-party ‘MIDI loopback port’ application to usethe Hub. We recommend MIDI Yoke, which can be downloaded fromhttp://www.midiox.comIn your MIDI software (for example, Ableton Live), instead of selecting the controller’s in/out portsin the MIDI preferences, select a MIDI loopback port, such as MIDI Yoke 1 (for input) and MIDI Yoke2 (for output). In the editor’s MIDI Hub, select the same ports to pass this data onto the controller.Once properly configured, you’ll be able to use your controller as normal, and use the editor to reprogram the controller with Presets or direct interaction.6.2 Mac OS Setupi You’ll need to turn on the IAC Driver (Mac OS’s built-in MIDI loopback port)in Audio MIDI Setup to use the Hub. Information about the IAC Driver can befound at http://support.apple.com/kb/PH5172In your MIDI software (for example, Ableton Live), instead of selecting the controller’s inputs andoutputs ports in the MIDI preferences, select the IAC Driver ports. In the editor’s MIDI Hub, selectthe same ports to pass this data onto the controller. Once properly configured, you’ll be able touse your controller as normal, and use the editor to reprogram the controller with Presets or directinteraction.6.2 MIDI LearnIn order to switch presets with MIDI Hub, you first need to assign two buttons on the TWEAKER as‘next’ and ‘previous’ preset selectors. To assign a TWEAKER button, simply press the learn button inthe MIDI Hub window, then press the desired button on the TWEAKER to assign it. Repeat for theother button.19
7. The Settings Channel7 The Settings ChannelThe settings channel is reserved for the use of standard MIDI CC messages to configure differentTWEAKER settings. Send a CC number on this channel to TWEAKER and if it matches the CC numbermapping for an LED ring or an encoder, the value will change its properties. Local Control settingscan be accessed using CC # 122.i The default Settings Channel is 16. It can be changed using the SettingsChannel setting in the Global Settings panel.Complete Settings Channel documentation is detailed in the TWEAKER user manual.20
8. SysEx Messages8 Sysex MessagesThe TWEAKER EDITOR uses SysEx (System Exclusive) messages to communicate allchanges to the TWEAKER. Complete documentation of all SysEx messages can be found inthe TWEAKER user manual.21
Electrix is a Division of Mixware, LLC11070 Fleetwood St, Unit FSun Valley, CA 91352USAwww.electrixpro.com 2012 Mixware, LLC. All rights reserved.Tweaker Editor was developed by Peter Nyboer for Livid Instruments.This document is based on version 1.01. The information contained herein is subject to change without prior noticeand does not represent a commitment on the part of Mixware, LLC.Electrix and the Electrix logo are registered trademarks of Mixware, LLC. Ableton is a trademark of Ableton AG. Traktor is a registered trademark of Native Instruments GmbH. Serato is a trademark of Serato Audio Research. Mac andMac OS are trademarks of Apple Inc., registered in the U.S. and other countries. Windows is a registered trademarkof Microsoft Corporation in the United States and other countries. All other trademarks are the property of theirrespective owners and use of them does not imply any affiliation with or endorsement by them.
Ableton Live and Serato. 3. Control Settings 9 3.4 LED Rings The LED rings for the encoders can be controlled independently of the encoder value. This is useful if you want to use the rings to display an ab
