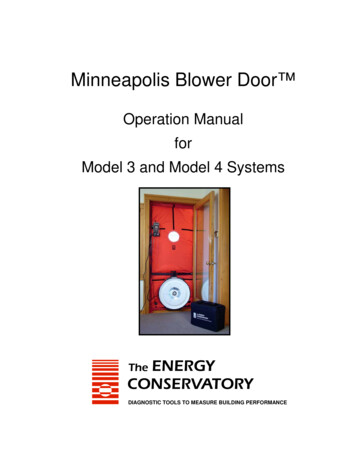
Transcription
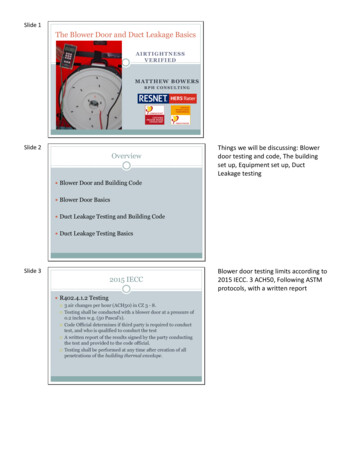
Slide 1The Blower Door and Duct Leakage BasicsA IR T IG HT NESSVER IFIEDMAT T HEW BOW ERSRPH CONSULTINGSlide 2OverviewThings we will be discussing: Blowerdoor testing and code, The buildingset up, Equipment set up, DuctLeakage testing Blower Door and Building Code Blower Door Basics Duct Leakage Testing and Building Code Duct Leakage Testing BasicsSlide 32015 IECC R402.4.1.2 Testing 3 air changes per hour (ACH50) in CZ 3 - 8. Testing shall be conducted with a blower door at a pressure of0.2 inches w.g. (50 Pascal's). Code Official determines if third party is required to conducttest, and who is qualified to conduct the test A written report of the results signed by the party conductingthe test and provided to the code official. Testing shall be performed at any time after creation of allpenetrations of the building thermal envelope.Blower door testing limits according to2015 IECC. 3 ACH50, Following ASTMprotocols, with a written report
Slide 42016 IECC Supplement R402.4.1.3 Testing Procedure for multifamilybuildings Blower door testing limits according to2016 IECC Supplement for multifamilybuildings 0.3 CFM50 / unit surfacearea, Following ASTM protocols, witha written report2 or more units within the thermal envelope0.3 CFM50 per sqft of enclosure surface areaTesting shall be conducted with a blower door at a pressure of0.2 inches w.g. (50 Pascal's).Enclosure Surface Area – sum of:Exterior wall surface areaInterior wall surface area that abuts to other unit (adiabatic walls) Ceiling surface area – either exterior or adiabatic Floor surface area – either exterior or adiabatic Slide 5Definitions CFM50 – Cubic Feet per minute (Air Volume Rate read at theManometer)CFM50 – Blower door Test ResultACH50 – Accounting for BuildingVolumeVolume – Fill the house with water ACH50 – Air Change Per Hour (number of time the volume ofair is completely replaced per hour at a ΔP of 50 Pascal's) Volume – Conditioned Floor Area (including area with wallheight 5’) multiplied by ceiling height. Vaulted ceilings arecalculated geometrically. (RESNET Standard Appendix A-27)Slide 6What is the Blower Door? A diagnostic tool to measure the airtightness ofbuildings and to help locate air leakage sites. Building airtightness measurements are used for avariety of purposes Documenting the construction airtightness or buildingsEstimating natural infiltration rates in homesMeasuring and documenting the effectiveness of air sealingactivitiesMeasuring duct leakage in forced air distribution systemsVariable speed fan and Manometersystem that quantifies buildingenvelope leakage by creating adifferential pressure. It results inforced infiltration / exfiltration.A diagnostic tool to measure theairtightness of buildings and to helplocate air leakage sites.Building airtightness measurementsare used for a variety of purposesDocumenting the constructionairtightness or buildingsEstimating natural infiltrationrates in homesMeasuring and documentingthe effectiveness of air sealingactivitiesMeasuring duct leakage inforced air distribution systems
Slide 7FormulaSlide 8Preparing the BuildingSlide 9Items to check before testingPut house in wintertime conditions.Only thing you are allowed tocompletely seal off is an HRV/ERVsystem supply and exhaust.Photo 1 – Rough in Blower Door test –plumbing trapsPhoto 2 – All windows are locked. Puthands on every window as they canappear closed but the latch is pushingapart the sashes.Photo 3 – Fireplace condition –extinguished, no ashes, flue closedPhoto 4 – Air handlers are off, and willnot come on during testNot pictured – Water Heater – Checkpilot after test
Slide10Items to check before testingSlide11Preparing the BuildingPhoto 1 – Floor Drain – may be driedout, fill before testPhoto 2 – Continuously operatingHRV/ERV supply and exhaustSpirit of the test – Test the house forair leaks the occur naturally whenmechanical systems are not running Important takeaways: Plumbing Traps Filled or sealed Windows closed AND latched Fireplace extinguished AND ashes removed ERV / HRV Slide12Seal inlet and exhaustNatural Drafting Flues – leave AS ISFresh Air Intake for whole house ventilation – leave AS IS withdamper closedDryer Vent Pipe – leave AS IS, with damper closedQuestions?Preparing the Building (Passive House) To meet the Passive House Standard0.6 ACH50 – PHI (International Standard)0.050 CFM50 / sqft of envelope area - PHIUS Average of Pressurizing and Depressurizing tests Measurements from interior dimensions and mayexclude interior wall volume – PHI Measurements from exterior of thermal envelopeincluding surfaces in contact with ground – PHIUS Special attention to damper selection (dryers and kitchenrange hood’s – if needed)What you may see in the near future –Passive House Blower Door results,more stringent testing requirementsthan ASTM requirements
Slide13Example HouseRun through an example house – 2story colonial with a full basement.The 2nd floor is built out over thegarage.Volume accordingto Sketch UpModel26,134 ft3Slide14Blower Door Test Walk ThoughCalculating the volume before arrivalwill ensure “fudging the volumenumbers” before test is prevented. Before arriving for test: Calculate the volume from Prints or verify in field prior tostarting test – 26,134 ft3Slide153 ACH500.6 ACH50NYS CodePassive House1307 CFM50261 CFM50Ring SelectionBlower Door RingsDuct Blaster RingsJust be aware that different systemsfrom different manufacturers havedifferent ring limits
Slide16Blower Door Set UpJust be aware that different systemsfrom different manufacturers havedifferent ring limitsThe blower door will puta house in the worst casescenario for air leakage.It will find all paths tothe outside-Slide17Slide18Attic bypassesOpen Sump crocksDry plumbing drainsPoor damperinstallationMinneapolis Blower Door Set UpChoose a door out of the wind, thatgoes directly outside (garage doorscan be used but are not ideal)Open Door, open storm doorMinneapolis Blower Door Set Up
Slide19Slide20Slide21Minneapolis Blower Door Set UpAssemble Frame, rough size frame intodoor opening, outdoor pressure hoseis placed away from fan (around acorner)Install canvas door over frameMinneapolis Blower Door Set UpMinneapolis Blower Door Set UpInstall door and lock cam’s to tightenthe fit
Slide22Slide23Slide24Bring in pressure hoseMinneapolis Blower Door Set UpInstall fan into canvas openingMinneapolis Blower Door Set UpInstall frame cross bar to support fanMinneapolis Blower Door Set Up
Slide25Slide26Slide27Minneapolis Blower Door Set UpMinneapolis Blower Door Set UpMinneapolis Blower Door Set UpManometer board installed ontoframe (optional)Connect pressure hose to blower doorfan pressure portConnect hoses outdoor hose and fanhose to manometer (Outside hose tothe reference port on left side, and fanhose to input port on right side)
Slide28Slide29Slide30Connect power cord and controllerMinneapolis Blower Door Set UpMinneapolis Blower Door Set UpMinneapolis Blower Door Set UpTurn on manometer and setManometer to “PR/ FL@50” then hit“baseline”The 50 Pa pressure difference is 50 Pagreater than normal – not 50 Pa as isIn this case we will be depressurizingto -52.2 PaAdjusted Pressure is 0Select appropriate Device (BlowerDoor 3 is standard, Blower Door 4 is a220V version, Duct Blaster Fans can beused as well)Select appropriate Configuration (Ringsize)
Slide31Slide32Slide33Outdoor view of fanMinneapolis Blower Door Set UpOutdoor hose is moved away from fanMinneapolis Blower Door Set UpMinneapolis Blower Door Set UpRemove appropriate ring (to matchmanometer configuration)
Slide34Run Test This house fails to meetthe NYS Code What to do? Slide35Verify all windows and doorsare closed and lockedVerify plumbing drains arenot leakingVerify proper manometer setupPhoto’s of Manometer set up Correct set up: Ring on Blower door fan matchesmanometer configuration (A – A1)Slide36 Hoses are in proper location (Greenleft side bottom –to outside, Red rightside top – to fan) ADJ indicator under pressure Mode : PR FL@50Photo’s of Manometer set up Wrong set up: - passes test Hoses are reversed proper location(Green left side bottom –to outside,Red right side top – to fan)Run Test (since wind pressure isconstantly changing the pressure willjump from -45.0 Pa to -55.0 Pa ormore)Our calculated limit was 1307 cfm50 –this test doesn’t meet codeTour house for inappropriate set up orsimple fixesCheck Manometer set up – Fan ringmatches configuration ring, Hoses arein proper location, we are using theADJ pressure, we are in the propermode “PR Fl@50”Things to watch out for: OperatorError – Switching ports significantlychanges the results
Slide37Photo’s of Manometer set up Wrong set up: - passes test Ring on Blower door fan doesn’tmatches manometer configuration (A– B2)Slide38Fixing a Failing Test Infrared ScansThings to watch out for: OperatorError – Incorrect configuration onManometer – changes resultssignificantlyThings to watch out for: OperatorError – Incorrect configuration onManometer – changes resultssignificantly Zonal Pressure Diagnostics Pressure Pan TestingRegardless some more air sealing needs to bedoneSlide39Infrared ScansTop Photo Set – Recessed light notsealedBottom Photo Set – This attic hatchhas a gasket. Caulk trim to ceiling, addweight to the hatch
Slide40Zonal Pressure DiagnosticsWith Blower Door Running Isolate individual roomsand measure thepressure difference.With Blower Door Running Isolate individual rooms andmeasure the pressure difference. The larger the pressuredifference, the more connectedto the outside you are. The larger the pressuredifference, the moreconnected to the outsideyou are.Slide41Pressure Pan TestingWith Blower Door Running Cover individual fixturewith pressure panWith Blower Door Running Cover individual fixture withpressure pan The larger the pressuredifference, the more connectedto the outside you are. The larger the pressuredifference, the moreconnected to the outsideyou are.Slide42Re-Run Test This house now meets theNYS Code Re-Run Test after the necessary airsealing has been doneOur calculated limit was 1307 cfm50 –We have now met the code minimum.
Slide43Final ReportFan Pressure can be correlated to aCFM from the Blower door manual, soan improper configuration can becorrected without retesting ifeverything else was done properlyOther things you may want to collect:Photos of Manometer set upVolume CalculationSlide44Duct Leakage TestingSlide45What is the Duct Blaster? A diagnostic tool to measure the airtightness ofductwork. Leaky ductwork can lead to many problems in ahome Insufficient heating or air conditioning to various roomsImbalance of pressures throughout the houseMajor ice dams and deteriorating roof structureHigher Energy BillsPoor indoor air qualityFan Pressure can be correlated to aCFM from the Blower door manual, soan improper configuration can becorrected without retesting ifeverything else was done properlyOther things you may want to collect:Photos of Manometer set up, VolumeCalculationDuct Leakage Testing – “Duct Blaster”1st Photo – “smoking the system” forleaks2nd Photo – Standard test set upA diagnostic tool to measure theairtightness of ductwork.Leaky ductwork can lead to manyproblems in a homeInsufficient heating or airconditioning to various roomsImbalance of pressuresthroughout the houseMajor ice dams anddeteriorating roof structureHigher Energy BillsPoor indoor air quality
Slide46Definitions CFM25 – Cubic Feet per minute (Air Volume Rate read at theManometer)CFM25 – Duct Leakage Test ResultSQFT – conditioned area of house,typically includes the basement butexcludes any floor area with walls lessthan 5’ tall (ie: Next to a knee wall) SQFT – Conditioned Floor Area typically including basementarea.Slide47R403.3.3 Duct Testing (Mandatory)2015 IECC R403.3.3 Duct Testing (Mandatory) Rough in or Post Construction Test at 25 Pa (vs the blowerdoor which is 50 Pa) NOT REQUIRED IF ALL DUCTS ARE WITHINCONDITIONED SPACE R403.3.4 Duct Leakage (Prescriptive) Total Leakage Test ONLY Rough in w/o Air Handler –3 CFM/100sqft Rough in w/ Air Handler –4 CFM/100sqft Post Construction Test – 4 CFM/100sqftSlide48Avoiding the testing limits R401.2 Compliance Section 405 and Mandatory items An Energy Rating Index (ERI) Approach in Section R406 When ducts are outside the conditioned space thetest is required regardless, however they do not needto meet the 4 CFM/100 sqft limit. The test results will be part of a much larger energymodel that will take offsets from more efficient partsof the houseRough in or Post ConstructionTest at 25 Pa (vs the blower doorwhich is 50 Pa)NOT REQUIRED IF ALL DUCTS AREWITHIN CONDITIONED SPACER403.3.4 Duct Leakage (Prescriptive)Total Leakage Test ONLYRough in w/o Air Handler –3CFM/100sqftRough in w/ Air Handler –4CFM/100sqftPost Construction Test – 4CFM/100sqftThe test will be “extremely difficult” topass. It may be in the builder bestinterest to use an alternate path tocompliance.
Slide49Test Set Up Total Leakage Test only Leakage to the outside test is not accepted for NYS CodeCompliance Basically a blower door test for the ductwork For Rough-in test without the air handler, individualTotal Leakage Test onlyLeakage to the outside test isnot accepted for NYS CodeBasically a blower door test forthe ductworkFor Rough-in test without the airhandler, individual tests must be donefor supply and return ductworktests must be done for supply and return ductworkSlide50Test Set UpSlide51Example House1500 ft2Slab on GradeTo meet code the TotalLeakage Test must be under:60 CFM25 (With AirHandler – 4%)45 CFM25 (W/O AirHandler – 3%)Total Leakage Test only – Blower Doortest for the ductworkRun through an example house – Thisis a slab on grade version – if it had abasement it probably wouldn’t need atest
Slide52Test Set Up Turn off Air Handler Seal off all supply andreturn registers Slide53For a post constructiontest it is best to have bootssealed to subfloor or todrywall with mastic orcaulkCarpeted floors present aproblem getting a goodseal, extra time andattention to detail isneeded to seal the bootfrom the insideTest Set Up Install Duct Blaster Fan to ductwork or air handlerSlide54Test Set Up Install Duct Blaster Fan to ductwork or air handlerTurn off Air HandlerSeal off all supply and return registersFor a post construction test it isbest to have boots sealed tosubfloor or to drywall withmastic or caulkCarpeted floors present aproblem getting a good seal,extra time and attention todetail is needed to seal theboot from the insidePhoto 1 – Duct blaster connected tomain trunk line before the air handleris installedPhoto 2 – Duct blaster fan on the floorfor set upPhoto 1 – Duct blaster connected toair handlerPhoto 2 – Duct blaster connected tocentral return
Slide55Test Set Up Remove Furnace filter and re-install the filter coverSlide56Test Set Up Install the pressure probe into the ductwork Actual location isn’t too important, but should be out of thestream of air from the fan Usual locations include:TrunkNearest supply outlet Filter slot Slide57Test Set Up Set up manometer and pressurize the ductworkPhoto 1 – filter removalPhoto 2 – Taped over filter slot –should have a removable cover thatsealsInstall the pressure probe into theductworkActual location isn’t tooimportant, but should be outof the stream of air from thefanUsual locations include:TrunkNearest supply outletFilter slot25 Pa is the pressure of the ductwork204 is the CFM25 (The total ductleakage of the system is 204 CFM25)
Slide58How to fix a failed test Pressure diagnostics Probe each of the supplies and returns to identify the lowestpressure – lowest pressure is the leakiest Put filter in a garbage bag, and reinstall it This isolates the supply and returns Smoke test Inspect the furnace cabinet for leaksSlide59Most Common LeaksSlide60IMPORTANT As a building official it is VERY important to tell thebuilder at time of permit that you will require thetest. Not much can be done after drywallAEROSEAL is an option but has no guarantee They will only seal the ductwork,They isolate the furnace cabinet before the test – so leaky furnacecabinets still can lead to failuresPressure diagnosticsProbe each of the supplies andreturns to identify the lowestpressure – lowest pressure isthe leakiestPut filter in a garbage bag, andreinstall itThis isolates the supplyand returnsSmoke testInspect the furnace cabinet for leaksPhoto 1 – Furnace cabinet (formultiple position cabinets there is aremovable plate – that plate is notsealed)Photo 2 – Toe Kick supply – it is verycommon to see this register damagedand just pointing toward the toe kick,not sealed in any way – the register isfastened to the cabinetPhoto 3 – Ductwork Penetrations –Should be far less common now – butyou never knowIf you are going to require a ductleakage test, it is best to have this testdone in the rough so leaks can be fixedbefore they are covered up withdrywall. This can be a very painful andimpossible task if drywall is up
Slide61What do these tests cost?Blower Door TestingDuct Leakage Testing 250-500 depending on 400-800 depending onsize of house, andlocation Plan on 30 minutes tocomplete the test in thefieldsize of house, number ofsystems to test, stage ofconstruction etc. Plan on an hour tocomplete the test in thefieldBlower Door Tests cost 250-500depending on size of house, location,etc.Duct Leakage Tests cost 400-800depending on size of systems, numberof systems, stage of construction, etc.An Energy Rating Index Score (ERI)includes the cost of both of these testsand costs 650-1000 depending on avariety of items.Expect 50-75 per hour for Diagnostics, IR Camera Scanning, Smoke Machine etc.Slide62Questions ?Matt BowersRochester Passive House ConsultingRochesterPassiveHouse@gmail.comMatt BowersRPH ConsultingRochesterPassiveHouse@gmail.com
Slide 4 2016 IECC Supplement y R402.4.1.3 Testing Procedure for multifamily buildings {2 or more units within the thermal envelope{0.3 CFM 50 per sqft of enclosure surface area{Testing shall be conducted with a blower door at a pressure of 0.2 inches w.g. (50 Pascal's). {Enclosure Surface Area sum of:Ù Exterior wall