Transcription
FoodLivingOutsidePlayTechnologyWorkshopLED Cube 8x8x8by chr on November 16, 2010Table of ContentsLED Cube 8x8x8 . . . . . . . . . . . . . . . . . . . . . . . . . . . . . . . . . . . . . . . . . . . . . . . . . . . . . . . . . . . . . . . . . . . . . . . . . . . . . . . . . . . . . . . . . . . . . . . . . . . . . . . . . . . . . .1Intro: LED Cube 8x8x8 . . . . . . . . . . . . . . . . . . . . . . . . . . . . . . . . . . . . . . . . . . . . . . . . . . . . . . . . . . . . . . . . . . . . . . . . . . . . . . . . . . . . . . . . . . . . . . . . . . . . . .4Step 1: Skills required . . . . . . . . . . . . . . . . . . . . . . . . . . . . . . . . . . . . . . . . . . . . . . . . . . . . . . . . . . . . . . . . . . . . . . . . . . . . . . . . . . . . . . . . . . . . . . . . . . . . . . .4Step 2: Component list . . . . . . . . . . . . . . . . . . . . . . . . . . . . . . . . . . . . . . . . . . . . . . . . . . . . . . . . . . . . . . . . . . . . . . . . . . . . . . . . . . . . . . . . . . . . . . . . . . . . . .5File Downloads . . . . . . . . . . . . . . . . . . . . . . . . . . . . . . . . . . . . . . . . . . . . . . . . . . . . . . . . . . . . . . . . . . . . . . . . . . . . . . . . . . . . . . . . . . . . . . . . . . . . . . . . . . .7Step 3: Ordering components . . . . . . . . . . . . . . . . . . . . . . . . . . . . . . . . . . . . . . . . . . . . . . . . . . . . . . . . . . . . . . . . . . . . . . . . . . . . . . . . . . . . . . . . . . . . . . . . .8Step 4: What is a LED cube . . . . . . . . . . . . . . . . . . . . . . . . . . . . . . . . . . . . . . . . . . . . . . . . . . . . . . . . . . . . . . . . . . . . . . . . . . . . . . . . . . . . . . . . . . . . . . . . . . .9Step 5: How does a LED cube work . . . . . . . . . . . . . . . . . . . . . . . . . . . . . . . . . . . . . . . . . . . . . . . . . . . . . . . . . . . . . . . . . . . . . . . . . . . . . . . . . . . . . . . . . . . . .9Step 6: The anatomy of a LED cube . . . . . . . . . . . . . . . . . . . . . . . . . . . . . . . . . . . . . . . . . . . . . . . . . . . . . . . . . . . . . . . . . . . . . . . . . . . . . . . . . . . . . . . . . . . . 11Step 7: Cube size and IO port requirements . . . . . . . . . . . . . . . . . . . . . . . . . . . . . . . . . . . . . . . . . . . . . . . . . . . . . . . . . . . . . . . . . . . . . . . . . . . . . . . . . . . . . . . 12Step 8: IO port expansion, more multiplexing . . . . . . . . . . . . . . . . . . . . . . . . . . . . . . . . . . . . . . . . . . . . . . . . . . . . . . . . . . . . . . . . . . . . . . . . . . . . . . . . . . . . . . 12File Downloads . . . . . . . . . . . . . . . . . . . . . . . . . . . . . . . . . . . . . . . . . . . . . . . . . . . . . . . . . . . . . . . . . . . . . . . . . . . . . . . . . . . . . . . . . . . . . . . . . . . . . . . . . . . 13Step 9: IO port expansion, alternative solution . . . . . . . . . . . . . . . . . . . . . . . . . . . . . . . . . . . . . . . . . . . . . . . . . . . . . . . . . . . . . . . . . . . . . . . . . . . . . . . . . . . . . 13File Downloads . . . . . . . . . . . . . . . . . . . . . . . . . . . . . . . . . . . . . . . . . . . . . . . . . . . . . . . . . . . . . . . . . . . . . . . . . . . . . . . . . . . . . . . . . . . . . . . . . . . . . . . . . . . 14Step 10: Power supply considerations . . . . . . . . . . . . . . . . . . . . . . . . . . . . . . . . . . . . . . . . . . . . . . . . . . . . . . . . . . . . . . . . . . . . . . . . . . . . . . . . . . . . . . . . . . . 14Step 11: Buy a power supply . . . . . . . . . . . . . . . . . . . . . . . . . . . . . . . . . . . . . . . . . . . . . . . . . . . . . . . . . . . . . . . . . . . . . . . . . . . . . . . . . . . . . . . . . . . . . . . . . . 15Step 12: Build a power supply . . . . . . . . . . . . . . . . . . . . . . . . . . . . . . . . . . . . . . . . . . . . . . . . . . . . . . . . . . . . . . . . . . . . . . . . . . . . . . . . . . . . . . . . . . . . . . . . . 15Step 13: Choose your LEDs . . . . . . . . . . . . . . . . . . . . . . . . . . . . . . . . . . . . . . . . . . . . . . . . . . . . . . . . . . . . . . . . . . . . . . . . . . . . . . . . . . . . . . . . . . . . . . . . . . 16Step 14: Choose your resistors . . . . . . . . . . . . . . . . . . . . . . . . . . . . . . . . . . . . . . . . . . . . . . . . . . . . . . . . . . . . . . . . . . . . . . . . . . . . . . . . . . . . . . . . . . . . . . . . 17Step 15: Choose the size of your cube . . . . . . . . . . . . . . . . . . . . . . . . . . . . . . . . . . . . . . . . . . . . . . . . . . . . . . . . . . . . . . . . . . . . . . . . . . . . . . . . . . . . . . . . . . . 18Step 16: How to make straight wire . . . . . . . . . . . . . . . . . . . . . . . . . . . . . . . . . . . . . . . . . . . . . . . . . . . . . . . . . . . . . . . . . . . . . . . . . . . . . . . . . . . . . . . . . . . . . 19Step 17: Practice in small scale . . . . . . . . . . . . . . . . . . . . . . . . . . . . . . . . . . . . . . . . . . . . . . . . . . . . . . . . . . . . . . . . . . . . . . . . . . . . . . . . . . . . . . . . . . . . . . . . 19Step 18: Build the cube: create a jig . . . . . . . . . . . . . . . . . . . . . . . . . . . . . . . . . . . . . . . . . . . . . . . . . . . . . . . . . . . . . . . . . . . . . . . . . . . . . . . . . . . . . . . . . . . . . 20Step 19: Build the cube: soldering advice . . . . . . . . . . . . . . . . . . . . . . . . . . . . . . . . . . . . . . . . . . . . . . . . . . . . . . . . . . . . . . . . . . . . . . . . . . . . . . . . . . . . . . . . . 21Step 20: Build the cube: test the LEDs . . . . . . . . . . . . . . . . . . . . . . . . . . . . . . . . . . . . . . . . . . . . . . . . . . . . . . . . . . . . . . . . . . . . . . . . . . . . . . . . . . . . . . . . . . . 21Step 21: Build the cube: solder a layer . . . . . . . . . . . . . . . . . . . . . . . . . . . . . . . . . . . . . . . . . . . . . . . . . . . . . . . . . . . . . . . . . . . . . . . . . . . . . . . . . . . . . . . . . . . 22Step 22: Build the cube: test the layer . . . . . . . . . . . . . . . . . . . . . . . . . . . . . . . . . . . . . . . . . . . . . . . . . . . . . . . . . . . . . . . . . . . . . . . . . . . . . . . . . . . . . . . . . . . 25Step 23: Build the cube: straigthen the pins . . . . . . . . . . . . . . . . . . . . . . . . . . . . . . . . . . . . . . . . . . . . . . . . . . . . . . . . . . . . . . . . . . . . . . . . . . . . . . . . . . . . . . . 26Step 24: Build the cube: bend the pins . . . . . . . . . . . . . . . . . . . . . . . . . . . . . . . . . . . . . . . . . . . . . . . . . . . . . . . . . . . . . . . . . . . . . . . . . . . . . . . . . . . . . . . . . . . 27Step 25: Build the cube: solder the layers together . . . . . . . . . . . . . . . . . . . . . . . . . . . . . . . . . . . . . . . . . . . . . . . . . . . . . . . . . . . . . . . . . . . . . . . . . . . . . . . . . . 28Step 26: Build the cube: create the base . . . . . . . . . . . . . . . . . . . . . . . . . . . . . . . . . . . . . . . . . . . . . . . . . . . . . . . . . . . . . . . . . . . . . . . . . . . . . . . . . . . . . . . . . 30Step 27: Build the cube: mount the cube . . . . . . . . . . . . . . . . . . . . . . . . . . . . . . . . . . . . . . . . . . . . . . . . . . . . . . . . . . . . . . . . . . . . . . . . . . . . . . . . . . . . . . . . . 31Step 28: Build the cube: cathode risers . . . . . . . . . . . . . . . . . . . . . . . . . . . . . . . . . . . . . . . . . . . . . . . . . . . . . . . . . . . . . . . . . . . . . . . . . . . . . . . . . . . . . . . . . . 31http://www.instructables.com/id/Led-Cube-8x8x8/
Step 29: Build the cube: attach cables . . . . . . . . . . . . . . . . . . . . . . . . . . . . . . . . . . . . . . . . . . . . . . . . . . . . . . . . . . . . . . . . . . . . . . . . . . . . . . . . . . . . . . . . . . . 32Step 30: Build the controller: layout . . . . . . . . . . . . . . . . . . . . . . . . . . . . . . . . . . . . . . . . . . . . . . . . . . . . . . . . . . . . . . . . . . . . . . . . . . . . . . . . . . . . . . . . . . . . . 34File Downloads . . . . . . . . . . . . . . . . . . . . . . . . . . . . . . . . . . . . . . . . . . . . . . . . . . . . . . . . . . . . . . . . . . . . . . . . . . . . . . . . . . . . . . . . . . . . . . . . . . . . . . . . . . . 35Step 31: Build the controller: clock frequency . . . . . . . . . . . . . . . . . . . . . . . . . . . . . . . . . . . . . . . . . . . . . . . . . . . . . . . . . . . . . . . . . . . . . . . . . . . . . . . . . . . . . . 35Step 32: Build the controller: protoboard soldering advice . . . . . . . . . . . . . . . . . . . . . . . . . . . . . . . . . . . . . . . . . . . . . . . . . . . . . . . . . . . . . . . . . . . . . . . . . . . . 36Step 33: Build the controller: Power terminal and filtering capacitors . . . . . . . . . . . . . . . . . . . . . . . . . . . . . . . . . . . . . . . . . . . . . . . . . . . . . . . . . . . . . . . . . . . . . 37Step 34: Build the controller: IC sockets, resistors and connectors . . . . . . . . . . . . . . . . . . . . . . . . . . . . . . . . . . . . . . . . . . . . . . . . . . . . . . . . . . . . . . . . . . . . . . 38Step 35: Build the controller: Power rails and IC power . . . . . . . . . . . . . . . . . . . . . . . . . . . . . . . . . . . . . . . . . . . . . . . . . . . . . . . . . . . . . . . . . . . . . . . . . . . . . . 39Step 36: Build the controller: Connect the ICs, 8bit bus OE . . . . . . . . . . . . . . . . . . . . . . . . . . . . . . . . . . . . . . . . . . . . . . . . . . . . . . . . . . . . . . . . . . . . . . . . . . 39Step 37: Build the controller: Address selector . . . . . . . . . . . . . . . . . . . . . . . . . . . . . . . . . . . . . . . . . . . . . . . . . . . . . . . . . . . . . . . . . . . . . . . . . . . . . . . . . . . . . 40Step 38: Build the controller: AVR board . . . . . . . . . . . . . . . . . . . . . . . . . . . . . . . . . . . . . . . . . . . . . . . . . . . . . . . . . . . . . . . . . . . . . . . . . . . . . . . . . . . . . . . . . 40Step 39: Build the controller: Transistor array . . . . . . . . . . . . . . . . . . . . . . . . . . . . . . . . . . . . . . . . . . . . . . . . . . . . . . . . . . . . . . . . . . . . . . . . . . . . . . . . . . . . . . 42Step 40: Build the controller: Buttons and status LEDs . . . . . . . . . . . . . . . . . . . . . . . . . . . . . . . . . . . . . . . . . . . . . . . . . . . . . . . . . . . . . . . . . . . . . . . . . . . . . . . 43Step 41: Build the controller: RS-232 . . . . . . . . . . . . . . . . . . . . . . . . . . . . . . . . . . . . . . . . . . . . . . . . . . . . . . . . . . . . . . . . . . . . . . . . . . . . . . . . . . . . . . . . . . . . 44Step 42: Build the controller: Make an RS-232 cable . . . . . . . . . . . . . . . . . . . . . . . . . . . . . . . . . . . . . . . . . . . . . . . . . . . . . . . . . . . . . . . . . . . . . . . . . . . . . . . . 45Step 43: Build the controller: Connect the boards . . . . . . . . . . . . . . . . . . . . . . . . . . . . . . . . . . . . . . . . . . . . . . . . . . . . . . . . . . . . . . . . . . . . . . . . . . . . . . . . . . . 47Step 44: Build the controller: Connect the cube . . . . . . . . . . . . . . . . . . . . . . . . . . . . . . . . . . . . . . . . . . . . . . . . . . . . . . . . . . . . . . . . . . . . . . . . . . . . . . . . . . . . 47Step 45: Program the AVR: Set the fuse bits . . . . . . . . . . . . . . . . . . . . . . . . . . . . . . . . . . . . . . . . . . . . . . . . . . . . . . . . . . . . . . . . . . . . . . . . . . . . . . . . . . . . . . 48Step 46: Program the AVR with test code . . . . . . . . . . . . . . . . . . . . . . . . . . . . . . . . . . . . . . . . . . . . . . . . . . . . . . . . . . . . . . . . . . . . . . . . . . . . . . . . . . . . . . . . 50File Downloads . . . . . . . . . . . . . . . . . . . . . . . . . . . . . . . . . . . . . . . . . . . . . . . . . . . . . . . . . . . . . . . . . . . . . . . . . . . . . . . . . . . . . . . . . . . . . . . . . . . . . . . . . . . 50Step 47: Test the cube . . . . . . . . . . . . . . . . . . . . . . . . . . . . . . . . . . . . . . . . . . . . . . . . . . . . . . . . . . . . . . . . . . . . . . . . . . . . . . . . . . . . . . . . . . . . . . . . . . . . . . 50Step 48: Program the AVR with real code . . . . . . . . . . . . . . . . . . . . . . . . . . . . . . . . . . . . . . . . . . . . . . . . . . . . . . . . . . . . . . . . . . . . . . . . . . . . . . . . . . . . . . . . 51File Downloads . . . . . . . . . . . . . . . . . . . . . . . . . . . . . . . . . . . . . . . . . . . . . . . . . . . . . . . . . . . . . . . . . . . . . . . . . . . . . . . . . . . . . . . . . . . . . . . . . . . . . . . . . . . 52Step 49: Software: Introduction . . . . . . . . . . . . . . . . . . . . . . . . . . . . . . . . . . . . . . . . . . . . . . . . . . . . . . . . . . . . . . . . . . . . . . . . . . . . . . . . . . . . . . . . . . . . . . . . 53File Downloads . . . . . . . . . . . . . . . . . . . . . . . . . . . . . . . . . . . . . . . . . . . . . . . . . . . . . . . . . . . . . . . . . . . . . . . . . . . . . . . . . . . . . . . . . . . . . . . . . . . . . . . . . . . 53Step 50: Software: How it works . . . . . . . . . . . . . . . . . . . . . . . . . . . . . . . . . . . . . . . . . . . . . . . . . . . . . . . . . . . . . . . . . . . . . . . . . . . . . . . . . . . . . . . . . . . . . . . 53Step 51: Software: IO initialization . . . . . . . . . . . . . . . . . . . . . . . . . . . . . . . . . . . . . . . . . . . . . . . . . . . . . . . . . . . . . . . . . . . . . . . . . . . . . . . . . . . . . . . . . . . . . . 54Step 52: Software: Mode selection and random seed . . . . . . . . . . . . . . . . . . . . . . . . . . . . . . . . . . . . . . . . . . . . . . . . . . . . . . . . . . . . . . . . . . . . . . . . . . . . . . . . 54Step 53: Software: Interrupt routine . . . . . . . . . . . . . . . . . . . . . . . . . . . . . . . . . . . . . . . . . . . . . . . . . . . . . . . . . . . . . . . . . . . . . . . . . . . . . . . . . . . . . . . . . . . . . 55Step 54: Software: Low level functions . . . . . . . . . . . . . . . . . . . . . . . . . . . . . . . . . . . . . . . . . . . . . . . . . . . . . . . . . . . . . . . . . . . . . . . . . . . . . . . . . . . . . . . . . . . 57Step 55: Software: Cube virtual space . . . . . . . . . . . . . . . . . . . . . . . . . . . . . . . . . . . . . . . . . . . . . . . . . . . . . . . . . . . . . . . . . . . . . . . . . . . . . . . . . . . . . . . . . . . 58Step 56: Software: Effect launcher . . . . . . . . . . . . . . . . . . . . . . . . . . . . . . . . . . . . . . . . . . . . . . . . . . . . . . . . . . . . . . . . . . . . . . . . . . . . . . . . . . . . . . . . . . . . . . 59Step 57: Software: Effect 1, rain . . . . . . . . . . . . . . . . . . . . . . . . . . . . . . . . . . . . . . . . . . . . . . . . . . . . . . . . . . . . . . . . . . . . . . . . . . . . . . . . . . . . . . . . . . . . . . . 60Step 58: Software: Effect 2, plane boing . . . . . . . . . . . . . . . . . . . . . . . . . . . . . . . . . . . . . . . . . . . . . . . . . . . . . . . . . . . . . . . . . . . . . . . . . . . . . . . . . . . . . . . . . 61Step 59: Software: Effect 3, sendvoxels random Z . . . . . . . . . . . . . . . . . . . . . . . . . . . . . . . . . . . . . . . . . . . . . . . . . . . . . . . . . . . . . . . . . . . . . . . . . . . . . . . . . . 63Step 60: Software: Effect 4, box shrinkgrow and woopwoop . . . . . . . . . . . . . . . . . . . . . . . . . . . . . . . . . . . . . . . . . . . . . . . . . . . . . . . . . . . . . . . . . . . . . . . . . . . 64Step 61: Software: Effect 5, axis updown randsuspend . . . . . . . . . . . . . . . . . . . . . . . . . . . . . . . . . . . . . . . . . . . . . . . . . . . . . . . . . . . . . . . . . . . . . . . . . . . . . . 67Step 62: Software: Effect 6, stringfly . . . . . . . . . . . . . . . . . . . . . . . . . . . . . . . . . . . . . . . . . . . . . . . . . . . . . . . . . . . . . . . . . . . . . . . . . . . . . . . . . . . . . . . . . . . . 68Step 63: Software: RS-232 input . . . . . . . . . . . . . . . . . . . . . . . . . . . . . . . . . . . . . . . . . . . . . . . . . . . . . . . . . . . . . . . . . . . . . . . . . . . . . . . . . . . . . . . . . . . . . . . 70Step 64: PC Software: Introduction . . . . . . . . . . . . . . . . . . . . . . . . . . . . . . . . . . . . . . . . . . . . . . . . . . . . . . . . . . . . . . . . . . . . . . . . . . . . . . . . . . . . . . . . . . . . . 70File Downloads . . . . . . . . . . . . . . . . . . . . . . . . . . . . . . . . . . . . . . . . . . . . . . . . . . . . . . . . . . . . . . . . . . . . . . . . . . . . . . . . . . . . . . . . . . . . . . . . . . . . . . . . . . . 71Step 65: PC Software: Cube updater thread . . . . . . . . . . . . . . . . . . . . . . . . . . . . . . . . . . . . . . . . . . . . . . . . . . . . . . . . . . . . . . . . . . . . . . . . . . . . . . . . . . . . . . 71http://www.instructables.com/id/Led-Cube-8x8x8/
Step 66: PC Software: Effect 1, ripples . . . . . . . . . . . . . . . . . . . . . . . . . . . . . . . . . . . . . . . . . . . . . . . . . . . . . . . . . . . . . . . . . . . . . . . . . . . . . . . . . . . . . . . . . . 72Step 67: PC Software: Effect 2, sidewaves . . . . . . . . . . . . . . . . . . . . . . . . . . . . . . . . . . . . . . . . . . . . . . . . . . . . . . . . . . . . . . . . . . . . . . . . . . . . . . . . . . . . . . . 72Step 68: PC Software: Effect 3, fireworks . . . . . . . . . . . . . . . . . . . . . . . . . . . . . . . . . . . . . . . . . . . . . . . . . . . . . . . . . . . . . . . . . . . . . . . . . . . . . . . . . . . . . . . . . 73Step 69: PC Software: Effect 4, Conway's Game of Life 3D . . . . . . . . . . . . . . . . . . . . . . . . . . . . . . . . . . . . . . . . . . . . . . . . . . . . . . . . . . . . . . . . . . . . . . . . . . . 74Step 70: Run the cube on an Arduino . . . . . . . . . . . . . . . . . . . . . . . . . . . . . . . . . . . . . . . . . . . . . . . . . . . . . . . . . . . . . . . . . . . . . . . . . . . . . . . . . . . . . . . . . . . 75File Downloads . . . . . . . . . . . . . . . . . . . . . . . . . . . . . . . . . . . . . . . . . . . . . . . . . . . . . . . . . . . . . . . . . . . . . . . . . . . . . . . . . . . . . . . . . . . . . . . . . . . . . . . . . . . 76Step 71: Hardware debugging: Broken LEDs . . . . . . . . . . . . . . . . . . . . . . . . . . . . . . . . . . . . . . . . . . . . . . . . . . . . . . . . . . . . . . . . . . . . . . . . . . . . . . . . . . . . . . 77Step 72: Feedback . . . . . . . . . . . . . . . . . . . . . . . . . . . . . . . . . . . . . . . . . . . . . . . . . . . . . . . . . . . . . . . . . . . . . . . . . . . . . . . . . . . . . . . . . . . . . . . . . . . . . . . . . 77Related Instructables . . . . . . . . . . . . . . . . . . . . . . . . . . . . . . . . . . . . . . . . . . . . . . . . . . . . . . . . . . . . . . . . . . . . . . . . . . . . . . . . . . . . . . . . . . . . . . . . . . . . . . . . 78Comments . . . . . . . . . . . . . . . . . . . . . . . . . . . . . . . . . . . . . . . . . . . . . . . . . . . . . . . . . . . . . . . . . . . . . . . . . . . . . . . . . . . . . . . . . . . . . . . . . . . . . . . . . . . . . . . . 78http://www.instructables.com/id/Led-Cube-8x8x8/
Author:chrI like microcontrollers and LEDs :DIntro: LED Cube 8x8x8Create your own 8x8x8 LED Cube 3-dimensional display!We believe this Instructable is the most comprehensive step-by-step guide to build an 8x8x8 LED Cube ever published on the intertubes. It will teach you everything fromtheory of operation, how to build the cube, to the inner workings of the software. We will take you through the software step by step, both the low level drivers/routinesand how to create awesome animations. The software aspect of LED cubes is often overlooked, but a LED cube is only as awesome as the software it runs.About halfway through the Instructable, you will actually have a fully functional LED cube. The remaining steps will show you how to create the software.A video is worth a thousand words. I'll just leave it up to this video to convince you that this is the next project you will be building:I made this LED cube together with my friend chiller. The build took about 4 days from small scale prototyping to completed cube. Then another couple of hours to debugsome faulty transistors.The software is probably another 4-5 days of work combined.Step 1: Skills requiredAt first glance this project might seem like an overly complex and daunting task. However, we are dealing with digital electronics here, so everything is either on or off!I've been doing electronics for a long time, and for years i struggled with analog circuits. The analog circuits failed over half the time even if i followed instructions. Oneresistor or capacitor with a slightly wrong value, and the circuit doesn't work.About 4 years ago, I decided to give microcontrollers a try. This completely changed my relationship with electronics. I went from only being able to build simple analogcircuits, to being able to build almost anything!A digital circuit doesn't care if a resistor is 1k ohm or 2k ohm, as long as it can distinguish high from low. And believe me, this makes it A LOT easier to do electronics!With that said, there are still some things you should know before venturing out and building this rather large project.You should have an understanding of:Basic electronics. (We would recommend against building this as your very first electronics project. But please read the Instructable. You'll still learn a lot!)How to solder.How to use a multimeter etc.Writing code in C (optional. We provide a fully functional program, ready to go)http://www.instructables.com/id/Led-Cube-8x8x8/
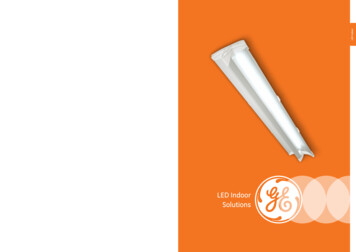
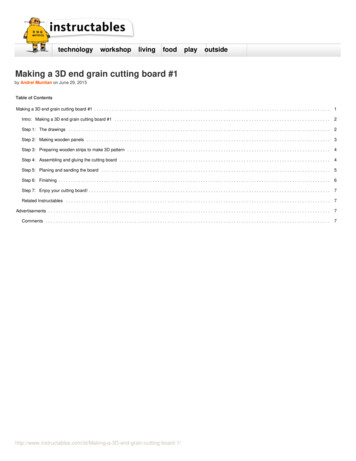
You should also have patience and a generous amount of free time.Step 2: Component listHere is what you need to make a LED cube:512x LEDs (plus some extra for making mistakes!)64x resistors. (see separate step for ohm value)1x or 2x large prototype PCBs. The type with copper "eyes", see image.1x ATmega32 microcontroller (you can also use the pin-compatible ATmega16)3x status LEDs. You choose color and size.3x resistors for the status LEDs.8x 74HC574 ICs16x PN2222 transistors16x 1k resistors1x 74HC138 IC1x Maxim MAX232 IC1x 14.7456 MHz crustal2x 22pF ceramic capacitors16x 0.1uF ceramic capacitors3x 1000uF electrolytic capacitor3x 10uF electrolytic capacitor1x 100uF electrolytic capacitors8x 20 pin IC sockets1x 40 pin IC socket2x 16 pin IC socket1x 2-pin screw terminal1x 2wire cable with plugs9x 8-pin terminal pins1x 4-pin terminal pins, right angle2x 16-pin ribbon cable connector1x 10-pin ribbon cable connectorRibbon cable2x pushbuttons2x ribbon cable plugs9x 8-pin female header plugsSerial cable and 4pin female pin headerPiece of wood for template and base8x optional pull-up resistors for layers5v power supply (see separate step for power supply)Total estimated build cost: 67 USD. See attached price 8/
Image Notes1. Make sure to get this type of prototyping PCB.Image Notes1. 100nFImage Notes1. Don't look at the color codes. This is not x8x8/Image Notes1. Lots and lots of LEDs!
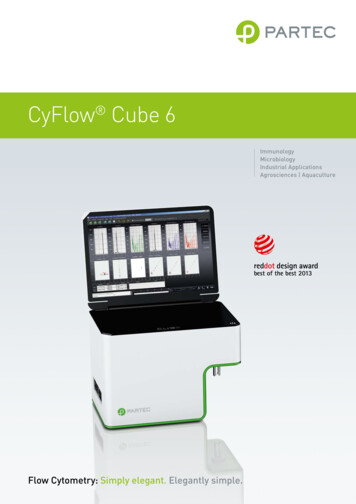
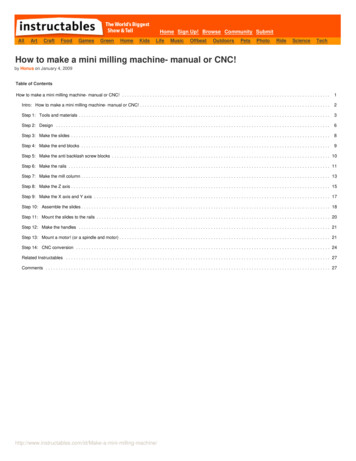
Image Notes1. Kynar wrapping wire. 30 AWG.Image Notes1. Very tiny wire. Perfect for working on prototyping PCBs.Image Notes1. Fan to blow away those soldering fumes.Image Notes1. Lots of ICsImage Notes1. See attached excel file for full list.File 8x8x8/
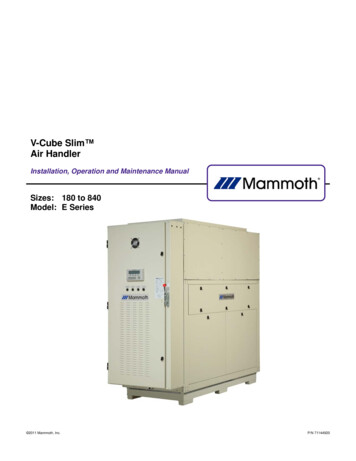
pricelist.xls (12 KB)[NOTE: When saving, if you see .tmp as the file ext, rename it to 'pricelist.xls']Step 3: Ordering componentsWe see a lot of people asking for part numbers for DigiKey, Mouser or other big electronics stores.When you're working with hobby electronics, you don't necessarily need the most expensive components with the best quality.Most of the time, it is more important to actually have the component value at hand when you need it.We are big fans of buying really cheap component lots on eBay. You can get assortments of resistor, capacitors, transistors and everything in between. If you buy thesetypes of assortments, you will almost always have the parts you need in your part collection.For 17 USD you can get 2000 resistors of 50 different values. Great value, and very convenient.Try doing som eBay searches and buy some components for future projects!Another one of our favorite stores is Futurlec (http://www.futurlec.com/). They have everything you need. The thing they don't have is 1000 different versions of that thingthat you need, so browsing their inventory is a lot less confusing than buying from those bigger companies.Image Notes1. 1000 leds for 16 bucks. But beware! The descriptions aren't always that great.We ordered diffused leds and got clear ones :/Image Notes1. This is the type of prototype PCB we used. 1 8x8/
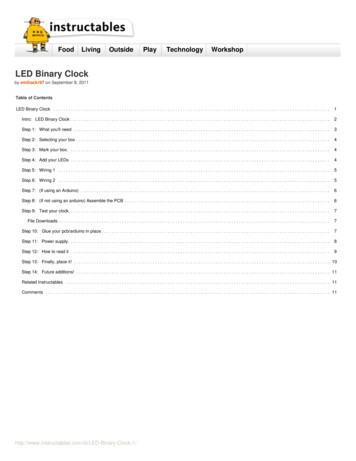
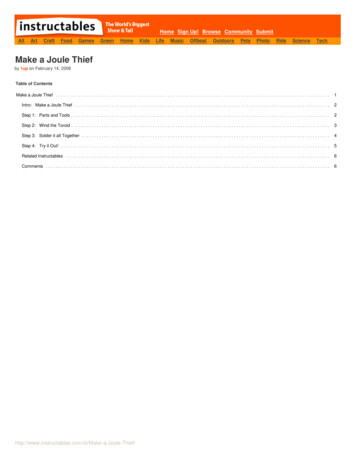
Image Notes1. 2000 resistors for 17 USDStep 4: What is a LED cubeA LED cube is like a LED screen, but it is special in that it has a third dimension, making it 3D. Think of it as many transparent low resolution displays. In normal displaysit is normal to try to stack the pixels as close as possible in order to make it look better, but in a cube one must be able to see trough it, and more spacing between thepixels (actually it's voxels since it is in 3d) is needed. The spacing is a trade-off between how easy the layers behind it is seen, and voxel fidelity.Since it is a lot more work making a LED cube than a LED display, they are usually low resolution. A LED display of 8x8 pixels is only 64 LEDs, but a LED cube in 8x8x8is 512 LEDs, an order of magnitude harder to make! This is the reason LED cubes are only made in low resolution.A LED cube does not have to be symetrical, it is possible to make a 7x8x9, or even oddly shaped ones.Step 5: How does a LED cube workThis LED cube has 512 LEDs. Obviously, having a dedicated IO port for each LED would be very impractical. You would need a micro controller with 512 IO ports, andrun 512 wires through the cube.Instead, LED cubes rely on an optical phenomenon called persistence of vision (POV).If you flash a led really fast, the image will stay on your retina for a little while after the led turns off.By flashing each layer of the cube one after another really really fast, it gives the illusion of a 3d image, when int fact you are looking at a series of 2d images stackedontop oneanother. This is also called multiplexing.With this setup, we only need 64 (for the anodes) 8 (for each layer) IO ports to control the LED cube.In the video, the process is slowed down enough for you to see it, then it runs faster and faster until the refresh rate is fast enough for the camera to catch the POV 8x8/
Image Notes1. We start by flashing the bottom layer. Layer 0.Image Notes1. Then the second.Image Notes1. And so on.Image Notes1. Do this fast enough, and your human eyes won't know the difference! Robotsmay be able to see past the illusion, 8x8/
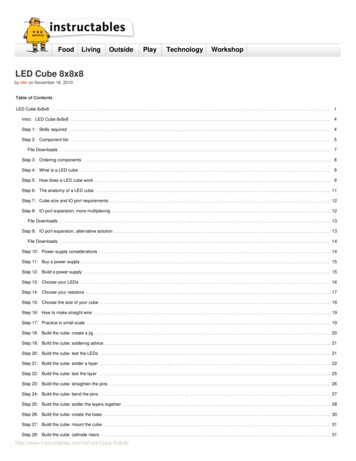
Step 6: The anatomy of a LED cubeWe are going to be talking about anodes, cathodes, columns and layers, so lets take a moment to get familiar with the anatomy of a LED cube.An LED has two legs. One positive (the anode) and one negative (cathode). In order to light up an LED, you have to run current from the positive to the negative leg. (If iremember correctly the actual flow of electrons is the other way around. But let's stick to the flow of current which is from positive to negative for now).The LED cube is made up of columns and layers. The cathode legs of every LED in a layer are soldered together. All the anode legs in one column are soldered together.Each of the 64 columns are connected to the controller board with a separate wire. Each column can be controlled individually. Each of the 8 layers also have a separatewire going to the controller board.Each of the layers are connected to a transistor that enables the cube to turn on and off the flow of current through each layer.By only turning on the transistor for one layer, current from the anode columns can only flow through that layer. The transistors for the other layers are off, and the imageoutputted on the 64 anode wires are only shown on the selected layer.To display the next layer, simply turn off the transistor for the current layer, change the image on the 64 anode wires to the image for the next layer. Then turn on thetransistor for the next layer. Rinse and repeat very very fast.The layers will be referred to as layers, cathode layers or ground layers.The columns will be referred to as columns, anode columns or anodes.Image Notes1. 8 layers2. A 64x64 image is flashed first on layer 03. Then another image is flashed on layer 14. Wash rinse repeatImage Notes1. Was easier to see when I didn't draw all 64 8/Image Notes1. 64 columns
Step 7: Cube size and IO port requirementsTo drive a LED cube, you need two sets of IO ports. One to source all the LED anode columns, and one to sink all the cathode layers.For the anode side of the cube, you'll need x 2 IO ports, where x 3 is the size of your LED cube. For an 8x8x8 (x 8), you need 64 IO ports to drive the LED anodes.(8x8). You also need 8 IO ports to drive the cathodes.Keep in mind that the number of IO ports will increase exponentially. So will the number of LEDs. You can see a list of IO pin requirement for different cube sizes in table1.For a small LED cube, 3x3x3 or 4x4x4, you might get away with connecting the cathode layers directly to a micro controller IO pin. For a larger cube however, the currentgoing through this pin will be too high. For an 8x8x8 LED cube with only 10mA per LED, you need to switch 0.64 Ampere. See table 2 for an overview of powerrequirements for a LED layer of different sizes. This table shows the current draw with all LEDs on.If you are planning to build a larger cub
http://www.instructables.com/id/Led-Cube-8x8x8/ You should also have patience and a generous amount of free