Transcription
Basic HTML 1October 2003InformationTechnologies
Copyright 2003 University of Delaware. Permission to copy without fee all or part of this material isgranted provided that the copies are not made or distributed for direct commercial advantage or profitand that the material duplicated is attributed to Information Technologies, University of Delaware. Tocopy otherwise or to republish requires specific permission and a fee.
Basic HTML 1OverviewThis class introduces you to HTML (HyperText Markup Language), an easy-tolearn language for creating and formatting documents for the World Wide Web.Web documents can include text, images, animation, sounds, and more.PrerequisitesTo take this class, you must have experience using a browser (e.g., InternetExplorer, Netscape) to view documents on the Web. You must also know how tocreate and save text files using a text editor or a word processing package andhave an active UNIX account.Note: This tutorial is designed to be used at the Pearson Hall Training Center(Room 116 Pearson Hall) on PCs running Windows XP. The exercises may notwork identically elsewhere.UNIX computer accountsAll University of Delaware faculty, staff, and students can obtain an account onthe central UNIX server. This account is a privilege granted to you by theUniversity. You must act responsibly when you use it, or you can lose thisprivilege. If you are uncertain about the proper use of computing resources, reada copy of the Policy for Responsible Computing on the University’s web ).Conventions used in this documentThe following conventions are used throughout the exercises in this document:Document ConventionsItemConventionExampleKeyboard keysUPPERCASE LETTERSENTERText you can replaceitalicized lettersfilenameText you typemixed-case letters(typewriter font)gifAll exercises are labeled as “Exercise” and are set off from the instructional textby horizontal rules.Information Technologies1
Basic HTML 1Resources for learning more about WWW and HTMLThere are many good online resources with information about preparingdocuments for the Web, including HTML tutorials, style guides, editors, andother tools. You can find many of them listed at http://www.udel.edu/ideacenter/.Class objectivesIn this class, you will prepare a document for the Web. When you complete theclass, you should: be familiar with the basic structure of HTML.be able to recognize and identify HTML tags.be able to create an HTML document that includes the following elements: 2basic document-level tagsheadingsparagraph and line breakslistsstyles (bold, italics, etc.)horizontal rulesimageshyperlinksbe able to publish your document on a Web server using the SSH SecureShell File Transfer program.October 2003
Basic HTML 1IntroductionHyperText Markup Language (HTML) is the language used to create documentsfor the World Wide Web. A markup language consists of characters or symbolsthat you insert in a text file to indicate how the text should look when it isdisplayed or printed. A Web browser allows others to view your work; browsersretrieve Web information and format Web documents.Designing documents for the Web requires a shift in the way you think aboutpresenting your material. When you prepare a document for the Web, youconcentrate on the content and structure of your information rather than on howthe information will look on the page (fonts, etc.). In fact, what you put on theWeb may look very different on different computers.On the Web, it is the individual browser and often also the user that control whatfont will be used to display headings or text, whether something will be bold oritalics, and so forth. So when you write text for the Web, don’t worry about whatfont you are using. Instead, think about the content of your document and aboutthe most effective way of structuring your message.Planning your Web sitePlanning your Web site ahead of time will help you stay organized and presentyour ideas to your audience in the best possible way. It is helpful to sketch yoursite on paper so that you have a visual image of how it will look. Each site beginswith a home page that can lead to other pages, depending upon how muchinformation you want to convey. Some helpful considerations in planning yoursite are1. What is your purpose for doing a Web page? What type of information doyou want to provide for people? How can you best organize that informationso that people will be able to find it easily?2. Who is your audience? How should you present your information for theaudience you want to reach? Are they interested in quick facts? In gettinginstructions for registering for classes? In being entertained?Once you’ve identified your audience, you can decide what type of a Webpage will appeal to them. Is plain text appropriate or will your audienceexpect graphics, sound, and animation?Knowing your purpose and audience ahead of time will guide your decisionsabout structuring your Web site.Information Technologies3
Basic HTML 1Setting up your Web directoryFor people to see a Web site, its files must be placed on a Web server. At theUniversity of Delaware, a UNIX Web server named “udel.edu” holdsindividuals’ Web files. The “www.udel.edu” UNIX Web server holds officialUniversity Web files. To allow the “udel.edu” server to find your Web files, youmust place them in a directory on your account on Copland called “public html.”If you have never created a public html directory, follow the directions below todo so.Exercise 1: Setting up a public html directory1. In the Applications folder, double-click the “Secure Shell Client” icon. In thedialog box that appears, type your username and click “Connect.” If you seea question about saving your “host key” to the local database, answer “No.”In the next dailog box, type your password and click “OK.”2. Create your public html directory and give it the permissions necessary todisplay web pages. At the UNIX (%) prompt, typesource/www/htdocs/learn/usered/html-setup3. Press the ENTER key.In addition to your public html directory, you now have two shortcut com mands (type the command at the UNIX % prompt):* webpublish--If you create a subdirectory of your public html directory,you must make the files it contains available for readers. To do so, log intoCopland, change to the new directory using the "cd" command, then type"webpublish" at the UNIX prompt.* webdiskusage--You can find out how much space your files occupy in yourhome directory by typing this command, then pressing the ENTER key. Forinformation about quotas, read the IT Help Center disk quota information.4. Click the Minimize (underscore) button at the top right of the window tominimze it.HTML tagsBefore you write an HTML document, decide how you will structure it. Whatwill the major heading be? How many subordinate headings will you have; howmuch text will you include; will you use lists, and so on. You’ll present yourstructure to your audience through special codes called HTML tags.4October 2003
Basic HTML 1HTML documents consist of text, images, and HTML tags for labeling eachelement. Tags come in pairs (i.e., a beginning tag and an ending tag) and areenclosed by angle brackets (the “less than” and “greater than” signs). The formatfor an HTML tag is tag name text /tag name Note that the ending tag name is preceded by a slash (/). It is important to includethe ending tag with its slash character. Otherwise, the rest of your document willhave the properties of the tag you forgot to finish.Preparing an HTML documentIn this class, you will prepare an HTML document for viewing on the Web. Theprocedure for preparing any Web document is1. Type your text in a text editor: use Notepad in Windows, TextEdit on theMacintosh, or pico in UNIX. If you use a program like Microsoft Word, youmust save your file as a text file before you can use it on the Web. (A textfile contains only text; it does not contain any formatting codes [for layout,headings, etc.].)2. Save the file as a text file.3. View the Web page you’ve created in your Web browser.In the following exercise, you will begin your HTML file. The same HTML tagsare used for every browser.Exercise 2: Creating an HTML file1. To start Notepad,A. Click the “Start” button.B. Highlight “All Programs.”C. Highlight “Accessories.”D. Click “Notepad.”E. From the “Edit” menu in NotePad, select “Word Wrap.” (If “WordWrap” is already checked, you need do nothing.)Continued on next pageInformation Technologies5
Basic HTML 1Exercise, continued2. Type the following text. Press the ENTER key at the end of each line: html head title Preparing a Document for the World Wide Web /title /head body h1 Preparing a Document for the World Wide Web /h1 /body /html 3. From the “File” menu, select “Save.” When the “Save As” dialog boxappears, click the down arrow next to the “Save In:” box. Click (C:), thendouble click “Scratch.” Give your file the nameindex.html4. Open the browser. In the Applications folder, double-click the “Netscape”icon.5. From the File Menu, select “Open File.”6. Select the drive or folder where your HTML file is located.7. Select the name of the file you want to open:index.html8. Click “Open.” Your HTML file will appear in the browser window.9. Return to your text editor (Notepad) by clicking its name in the Taskbarat the bottom of the screen.Note: As you continue to create the document, check its appearance often. To dothis:1. Save the changes that you’ve made.2. From the appropriate menu or toolbar in your browser, select “Reloadcurrent page” to view the changes.There is no need to close either the editor or the browser as you work.6October 2003
Basic HTML 1The file you have just created contains the essential elements of every HTMLfile:*Every HTML file name has two parts, separated by a period. The first part isany name you want to give the file. The second part must be “html.”*Every HTML file begins and ends with the html and /html tags.The head section of your document contains its title (and may containother preliminary information). Information in the head section is meantfor the browser and is not generally displayed on the screen (except for the title which appears in the browser window at the very top of the screen).Text and images that you want to see displayed on the screen go into the body section of your document.Naming your home pageMost Web sites contain multiple files that are linked to a “home page” (yourmain or introductory page). The most efficient way to handle a home page is togive it the nameindex.htmlThe advantage to naming your home page “index.html” is that most browserswill display the “index.html” file if no specific HTML filename is given. Thus,people searching for your personal Web page on the “udel.edu” Web server onlyhave to know your username to be able to find your files, and people on theUniversity’s central Web server only have to know the name of the directory inwhich your files reside. They do not have to remember an HTML filename to getto your information.HeadingsThe organization of your document depends upon your effective use of headingsto produce manageable sections. There are six heading levels in HTML,numbered 1 through 6, from most important to least important: h1 Heading level 1 /h1 h2 Heading level 2 /h2 h3 Heading level 3 /h3 h4 Heading level 4 /h4 h5 Heading level 5 /h5 h6 Heading level 6 /h6 most importantleast importantHeadings are usually larger and bolder than regular HTML text. However, do notassume that the way each heading appears on your computer screen will be theInformation Technologies7
Basic HTML 1way it looks on every computer. Each browser can define how the headings look,and the user can often change settings too. For this reason, use headings to showhow your information is organized logically. This means that you would use alevel 3 heading after a level 2 heading and not before.The first heading of a document—which often repeats the text used for thetitle—should use an h1 tag. Most documents use only one h1 tag. Headingsare automatically followed by a blank line.ParagraphsTo indicate paragraphs in HTML, use the p and /p tags.1. The paragraph tag ( p ) indicates breaks between paragraphs by inserting ablank line between them on the browser page.2. Blank lines in your text file are ignored. Only a p tag produces a blankline on the browser page.3. Tabs and multiple spaces are collapsed into one space.4. Word wrapping can occur anywhere in your text document and doesn’taffect the appearance of your browser page. In other words, you could typewhole paragraphs or your entire HTML document on one line and still havethe page nicely formatted in the browser. (This isn’t recommended becauseit makes editing the text difficult.)5. To include short lines in your Web document with no extra spaces betweenlines (for example, lines in a mailing address or a poem), use the line break br / tag.To see how the paragraph and line break tags work in HTML, complete thefollowing exercise:Exercise 3: Adding paragraphs1. In your “index.html” file, between the /h1 and the /body lines, type thefollowing as it appears here, including the blank line. To make your text fileeasy to edit, press the ENTER key at the end of each line. p Creating HTML pages takes planning,but the results are worthwhile.Imagine the excitement of having your Web page seen bypeople all over the world. /p Continued on next page8October 2003
Basic HTML 1Exercise, continued p Keep your Web pages to a few screens each.You can link information together, so don’t worry aboutincluding everything at once. /p p Remember that readers do not always findyour home page first.A link from somewhere else can lead them tothe middle of your information,so try not to use words like br / back br / forward br / previous br / next br / to indicate navigation on your pages. /p 2. Save your text file.3. In the browser window, click “Reload current page” to see the text you haveadded.You might prefer to leave blank lines between paragraphs in your HTML textfile to make it more readable as you’re editing, but that’s optional. Rememberthat you will see blank lines on the browser screen only if you include a p tag.HTML listsAfter headings, lists are the next most important way of organizing informationfor your viewers. Lists are useful for creating tables of contents, step-by-stepinstructions, outlines, glossaries, etc. The most common HTML lists areType of listOrdered lists ol Unordered lists ul Definition lists dl Appearance on pagenumberedbulleteda term followed by a definitionNote: You can include a br / tag within a list item to move text to thefollowing line. The same indentation will be preserved, but no new bullet ornumber will be produced.Information Technologies9
Basic HTML 1Ordered listsOrdered lists ( ol ) number their items sequentially. Tags for an ordered list are ol li List item 1 /li li List item 2 /li li List item 3 /li /ol The list begins and ends with the ordered list tags ol and /ol . Each item inthe list is indicated by a “list item” li tag. This pattern is the same for mostlists with only the tag for the type of list changing.The ordered list tags above would produce the following when you view yourHTML document in a browser:1. List item 12. List item 23. List item 3Unordered listsUnordered lists ( ul ) use bullets to indicate items. Tags for an unordered listare ul li List item 1 /li li List item 2 /li li List item 3 /li /ul The unordered list begins and ends with the tags ul and /ul . Each item in thelist is indicated by a list item tag.The unordered list tags above would produce the following in your HTMLdocument: List item 1 List item 2 List item 310October 2003
Basic HTML 1Definition listsDefinition lists ( dl ) are a little different from other lists because they use anadditional tag. Tags for a definition list are dl dt Definition term /dt dd Definition /dd dt Definition term /dt dd Definition /dd /dl The list begins and ends with the definition list tags dl and /dl . There areseparate tags for the definition term dt /dt and for the definition itself dd /dd . The definition term consists of a single line, while the definition cancontain multiple lines or paragraphs.Definition lists are useful for glossaries and for any situation where you want toset off one element (the definition term) and expand upon it (the definition).The definition list tags above would produce something like the following inyour HTML document:Definition termDefinitionDefinition termDefinitionYou can “nest” lists and types of lists (put one inside the other). Nesting isanother way to show the organization of your material.The next exercise gives you practice using HTML lists.Exercise 4: Building a list1. In your “index.html” file, type the following text just above the /body tag: p Following are some HTML features to help you build agreat page: /p h2 HTML structural elements /h2 ol li Formatting tags /li Continued on next pageInformation Technologies11
Basic HTML 1Exercise, continued ul li Heading tags /li li Paragraph tags /li li List tags /li /ul /ol 2. Save your file and then click “Reload current page” in the browser to view it.Note: You’ll continue the ordered list in the next exercise.Customizing the look of your listsThe challenge in using lists and nested lists is to begin and end each list in theproper place. Failure to do so results in errors that become immediately apparentwhen you view your Web document. One way to keep things straight for yourselfis to indent successive lists so that like elements are under each other. Notice thatWeb browsers indent nested lists, making the structure clear.How lists appear depends upon the browser being used and upon how theindividual user has set up the browser. For example, the bullet that appears in abulleted list might be a filled-in circle on one computer, an open circle onanother, and a square on a third. Some browsers put definitions on separate lines,some do not. As the author, your concern is to indicate only what kind of list isbeing presented.You can exercise some control over how lists are numbered or over what kinds ofbullets are used by including modifiers with your HTML list tags. Thesemodifiers are called “attributes,” and they indicate exactly how the tag is to bemodified. For example, the “type” attribute, used with a list tag, allows you tospecify different numbering or bullet schemes. Attributes, in turn, can have“values” that further define them. Thus, if you give the “type” attribute a value of“A,” your ordered list will appear with capital letters. Values should be enclosedin quotation marks. Similarly, other HTML tags have associated attributes andvalues that let you control how your page looks. Directions for using the “type”attribute with list tags follow:Ordered listsTag: ol type “type of numbering you prefer” type “1”for numbers (default)type “A”for capital letterstype “a”for lowercase letterstype “I”for capital Roman numeralstype “i”for lowercase Roman numerals12October 2003
Basic HTML 1Unordered listsTag: ul type “type of bullet you prefer” type “disc”for a solid round bullettype “circle”for a hollow round bullettype “square”for a hollow square bulletWriting HTML with styleAnother way to set off text in your Web documents is through the use of styleslike bold, italics, and so on. To indicate that text is to have a certain style,enclose it in tags that define the style: b bold text /b i italic text /i tt typewriter text /tt bold textitalic texttypewriter textStyles can be combined with each other. To combine styles, nest one style withinanother. For example, b i bold italics /i /b bold italicsThe next exercise continues the ordered list and lets you see the effects of thestyle tags on the text they surround.Exercise 5: Using style tags1. In your “index.html” file, type the following text just above the /ol tag: li Style tags /li ul li b Bold text /b /li li i Italic text /i /li li tt Typewriter text /tt /li /ul 2. Save your file and then click “Reload current page” in the browser to view it.Information Technologies13
Basic HTML 1Other ways of setting off textPreformatted textIf you have text for which you want to retain line breaks and spacing withinlines, use the HTML preformatted text tags: pre preformatted text /pre Preformatted text is useful if you want to include a poem where spacing is animportant element, a computer program, directions for using commands, etc.Preformatted text appears in fixed-width characters (typewriter text) with linesand spaces as you typed them. Below is an example of how preformatted textwould appear in your text file: pre There was an old woman who lived in a shoe.She had so many children, she didn’t know what to do.She gave them some broth without any bread.She spanked them all soundly and put them to bed. /pre Here’s how it would appear on your Web page:There was an old woman who lived in a shoe.She had so many children, she didn’t know what to do.She gave them some broth without any bread.She spanked them all soundly and put them to bed.Long quotationsTo indicate long quotations in HTML, use the “blockquote” tag: blockquote p This is for long quotations. /p /blockquote Within the blockquote tags, include the tags you would usually use for formattingtext ( p /p , b /b , i /i ). How the blockquote appears depends uponthe browser with which it is viewed. Some browsers indent the quote whileothers italicize it. You can use multiple paragraphs within the blockquote tags.Horizontal rulesTo separate major sections of your HTML page or to divide text from graphics,use a horizontal rule tag: hr / 14October 2003
Basic HTML 1This tag has no text associated with it and stands alone. It will insert a rulecompletely across your HTML page.You can add attributes to the hr / tag to change its appearance and increase thegraphic interest of your page.The “width” attribute defines the width of the rule in pixels. You can also definethe width as a percentage of your screen. The “size” attribute defines the heightof the rule in pixels. The tags look like this: hr width “n” / where “n” is the number of pixels. hr width “n%” / where “n” is the percentage of the screen you wantyour rule to occupy. hr size “n” / where “n” is the number of pixels high your rule should be.Note: The pixel is a very small unit. Try this exercise to get an idea of how largeto make your measurements:Exercise 6: Adding a horizontal rule1. Just above the /body tag in your document, type the following: hr width “640” size “10” / 2. Save and reload your document.Including images in an HTML fileOne of the most exciting features of the Web is that it allows you to includeimages in your document. Images that are viewed within the browser page arecalled “inline images.” To create an inline image: Convert your photograph or other image to “gif” or “jpg” format. Scanningsoftware and other software programs allow you to do this easily. It is possible to include images located anywhere on the Web in yourdocuments; however, it is easiest to store the images in the same directoryor folder as your text file. Filenames for images are case-sensitive. This means that “sunset.gif” is notthe same as “SUNSET.gif.”Information Technologies15
Basic HTML 1 The tag for inline images is img src “filename.gif” alt “alternate text” / or img src “filename.jpg” alt “alternate text” / In this tag, “img” indicates that you are including an image, and“src ” identifies the image (“filename.gif” or “filename.jpg”). Be sure toinclude the quotes around the filename.The “alt” tag is used to include text that describes the image. Alternate textmakes Web content accessible to people with disabilities and to thosewhose browsers do not display graphics. You can place graphics either on their own lines on your Web page orinclude them right in your text.To include a graphic on a line by itself (for example, before or after aheading), type the image tag in the appropriate place.If the image occurs in the middle of text and you want extra space aroundthe image, include paragraph p /p tags before and after the image tag.You can place images right in your text by typing the image tag as part of aparagraph. Suppose in the text you’ve already typed, you want to put aspider web next to your first heading, “Preparing a Document for the WorldWide Web.” In your HTML file, immediately after the h1 tag, youwould type img src “spid.gif” alt “spider in a web” / The entire line would look like this: h1 img src “spid.gif” alt “spider in a web” / Preparing a Document forthe World Wide Web /h1 In the next exercise, you will include an inline image on your Web page.Exercise 7: Including an image1. In your HTML file, immediately after the h1 tag, type the following: img src “spid.gif” alt “spider in a web” / 2. Save the changes you’ve made to the file.3. In your Web browser, click “Reload current page” to view the image.16October 2003
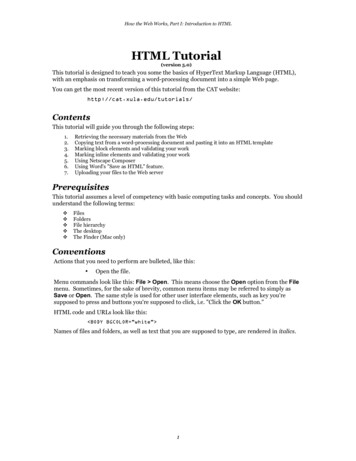
Basic HTML 1If you type the image tag as above, the bottom of the image is aligned with thebaseline of your text (this is the default). Your image would look similar to theone below:Preparing a Document for the World Wide WebYou can align the top of the image with the top of your text by using thefollowing options in your “img” tag: img align “top” src “spid.gif” alt “spider in a web” / Your page would look similar to this:Preparing a Document for the World Wide WebYou can align the center of the image with the baseline of your text by using thefollowing options in your “img” tag: img align “middle” src “spid.gif” alt “spider in a web” / Your page would look similar to this:Preparing a Document for the World Wide WebInformation Technologies17
Basic HTML 1You can also have text flow around images by aligning the image to the left orright of the page. The tags would look like this: img align “left” src “spid.gif” alt “spider in a web” / (image on the left; text to the right of it) img align “right” src “spid.gif” alt “spider in a web” / (image on the right; text to the left of it)In the next exercise, you will add an “align” attribute to the “img” tag and seehow it changes the look of your document.Exercise 8: Changing image placement1. In your HTML file, add align “left” to the image tag you’ve alreadycreated. The tag should look like this: img align “left” src “spid.gif” alt “spider in a web” / 2. Save the changes you’ve made to the file.3. In your Web browser, click “Reload current page” to view the image.Hypertext linksWhat makes hypertext “hyper” is its ability to link to other information. This canbe information in the same document, in another of your site’s documents, orfrom documents anywhere in the world. It can be text, graphics, sounds, movies,and more. Links appear on your Web page as highlighted (and sometimes,underlined) text.To create a link, you use the “anchor” tag. Anchors mark the beginning and endof a hypertext link. The tag looks like the one below: a href “filename.html” Interesting Web sites /a The first part of a link contains the opening anchor tag. In the tag18 “a” indicates the anchor. “href” (Hypertext Reference) indicates a link to another object(text, an image, etc.). The filename indicates the object being referred to. Instead of afilename, you can include a URL (an Internet address) that names aresource somewhere else on the Internet.October 2003
Basic HTML 1 The text after the opening tag (in the above example, “Interesting Websites”) will appear highlighted on your page. The link ends with the closing anchor tag /a .Note: Be sure that you don’t leave a space between your text and the closinganchor tag or press ENTER before typing the closing anchor tag. Doing sowill cause a blank underlined space after your linked text.Links to other documents in the same directory (folder)The easiest hypertext links are to other documents in the same directory (folder)as the document you are creating. For example, suppose you have discovered thatcertain characters will not work as regular text in your Web documents becausethey are part of HTML tags (e.g., “ ” and “ ”).In your page on preparing documents for the Web, you might want to add a linkto a document named “special.html” that shows how you can use specialcharacters in your Web documents. At the appropriate place in your text, youwould type a href “special.html” Special characters /a On your Web page, “Special characters” will be highlighted and clicking thosewords will take you to another document about using special characters.The next exercise will allow you to create a link to another HTML document. Inaddition, the link will be part of the list of HTML structural elements you havealready begun.Exercise 9: Linking to a document in the same directory1. In your HTML file, above the /ol tag, type li a href “special.html” Special characters /a /li 2. Save the changes to your HTML file.3. In your Web browser, click “Reload” to view the page.4. Click the “Special characters” link to see the page you have linked to.Note: You can find many more references for special characters listed e/special characters/.Information Technologies19
Basic HTML 1Links to other Internet resourcesYou can link to other resources anywhere on the Internet by creating a hypertextreference to a URL (Uniform Resource Locator—the Web’s addressing system).For example, suppose you know that there is a site that contains informationabout creating Web pages as well as tutorials to help you do so. You might wantto add the Internet address to your Web page. To do this, you would type a href “http://hotwired.lycos.com/webmonkey/” Webmonkey: WebDeveloper’s Resource /a Notice that the entire URL for Webmonkey is included between the quotationmark
Basic HTML 1 Introduction HyperText Markup Language (HTML) is the language used to create documents for the World Wide Web. A markup language consists of characters or symbols that you insert in a