Transcription
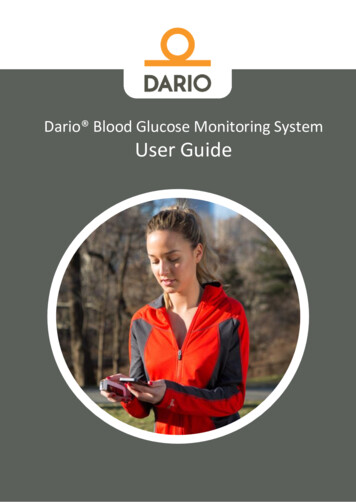
Dario Blood Glucose Monitoring SystemUser Guide
2016 LabStyle Innovation Ltd., ALL RIGHTS RESERVEDBASIC INFORMATIONPlease read this user guide thoroughly. If you have questions, you can contactour customer support toll-free in the U.S. at 1-800-895-5921, 9:00 AM – 5:00PM EST Monday through Friday or visit www.mydario.com.Please contact your health care provider for questions or concerns outside ofthe normal customer support hours.Manufacturer:LabStyle Innovation Ltd.9 Halamish St.North Industrial Park Caesarea 3890000, Israelwww.mydario.comDario is a trademark of LabStyle Innovation Ltd.European Patent application number 11780305.6United States: Product is covered by one or more patents and/or patentapplications – the list is detailed at the Dario website at www.mydario.com.6071-05 Rev.A2
Table of ContentsCHAPTER 1 INTRODUCTION AND IMPORTANT SAFETY INSTRUCTIONS .6Glucose Monitoring for a Mobile Age. 6Intended Use . 6System Limitations. 7Important Safety Instructions. 7Before Testing with the Dario System . 8Safety Definitions . 8Warnings. 9Cautions. 9Notes . 9Practices Used in This User Guide . 9Procedure Instructions . 9Symbols and Descriptions . 11General Precautions.12Additional Information .12CHAPTER 2 DARIO SYSTEM OVERVIEW AND FEATURES . 14Your Dario System at a Glance .14Dario Components.15Supported Platforms for the Dario App .18Dario System Welcome Kit Contents .19Getting Started with the Dario System .20Assembling the Dario System for the First Time .21Inserting the Test Strip Cartridge .21Inserting a Lancet .22Setting Lancet Depth (Optional) .24The Dario App .25Downloading and Installing the Dario App .25Creating Your Account and Personalizing Your Settings .27Setting Your Personal and Diabetes Profiles .29CHAPTER 3 CHECKING YOUR DARIO GLUCOSE METER . 30Dario Control Solution .30Control Solution Precautions.30Control Solution Test Principle .31Chemical Composition .31Checking Your Glucose Meter with Dario Control Solutions .32Removing the Glucose Meter from the Housing .32Removing a Test Strip from the Cartridge .33Performing a Control Solution Test .35CHAPTER 4 TESTING YOUR BLOOD GLUCOSE LEVEL . 403
Blood Glucose Testing Precautions .40Test Strip Precautions .41Factors That Interfere with Blood Glucose Testing.42Interpreting the Results.43Measurement Range.43Factors That May Lead to Inaccurate Results .44Step One: Inserting a New Lancet into the Lancing Device.45Step Two: Opening the Dario App .45Step Three: Inserting the Smart Mobile Device into the Disposable Cover .46Step Four: Removing the Glucose Meter from the Housing .46Step Five: Testing Your Blood Glucose .47Testing Information and Guidelines . 47Removing a Test Strip from the Cartridge . 49Performing a Glucose Test . 51Step Six: Returning the Meter to the Dario Housing .54Test Strip Limitations .54CHAPTER 5 CLEANING AND MAINTENANCE. 55Cleaning and Disinfection .55Step 1: Cleaning.55Step 2: Disinfection .56CHAPTER 6 TROUBLESHOOTING . 60Troubleshooting .60Problem Solving.64Test strip inserted but “Please insert a new strip” keeps appearing on the screen.64You cannot pierce skin with lancet. .64The lancet does not fit correctly into the lancing device. .64Cannot remove the used needle from the lancing device. .65Lancing device does not operate correctly. .65Lancet Depth Indicator lever is stuck. .65Lancing device release button does not work properly.65“Strip is used and should be replaced” message appears in the Dario App. .65I forgot my Dario password. .65My smart mobile device battery died. .66CHAPTER 7 TECHNICAL INFORMATION AND SPECIFICATIONS . 67How the Glucose Meter Works .67Compatibility.67Technical Specifications.67Compliance with Electrical and Safety Standards .68Disposing of Used Products.68CHAPTER 8 WARRANTY, REPAIRS AND SUPPLIES . 70Repair Policy .704
Manufacturer’s One Year Warranty .70Supplies and Accessories .71Contact Customer Support .715
CHAPTER 1INTRODUCTION AND IMPORTANT SAFETY INSTRUCTIONSGlucose Monitoring for a Mobile AgeCongratulations on your choice of the Dario Blood Glucose Monitoring System.The Dario System was created to make life easier for people with diabetes byproviding the right tools, information, and support in your pocket. It is a smartphone-based monitoring system, featuring a pocket-sized meter with anintegrated lancing device and test strips, combined with an easy-to-use mobileapplication.Living with diabetes is a daily challenge. But with the Dario System in yourpocket and the best support, you can thrive with diabetes.This user guide describes how to properly setup and use your new DarioSystem. It is recommended that you read this guide thoroughly in order tofamiliarize yourself with the system and its many features.Intended UseThe Dario Blood Glucose Monitoring System consists of the Dario BloodGlucose Meter, Dario Glucose Test Strips, Dario Glucose Control Solutions andthe Dario App as the display component of the Dario Blood Glucose MonitoringSystem. The Dario Blood Glucose Monitoring System is intended for thequantitative measurement of glucose (sugar) in fresh capillary whole bloodsamples drawn from the fingertips. The Dario Blood Glucose MonitoringSystem is intended to be used by a single person and should not be shared.The Dario Blood Glucose Monitoring System is intended for self-testing outsidethe body (in vitro diagnostic use) by people with diabetes at home to monitorthe effectiveness of diabetes control. The Dario Blood Glucose MonitoringSystem should not be used for the diagnosis or screening of diabetes or forneonatal use.The Dario Blood Glucose Test Strips are for use with the Dario Blood GlucoseMeter to quantitatively measure glucose (sugar) in fresh capillary whole bloodsamples drawn from the fingertip.6
The Dario Control Solutions are for use with the Dario Blood Glucose Meterand the Dario Blood Glucose Test Strips to check that the meter and test stripsare working together properly and that the test is performing correctly.System LimitationsThe Dario System should not be used for the following purposes: The diagnosis of, or screening for, diabetes.Testing the glucose levels of neonates (children younger than 4weeks of age).Testing glucose levels of arterial or venous blood.Testing glucose from sites other than the fingertip.Testing patients who are critically ill, in shock, or dehydrated.If you are taking acetaminophen containing drugs (e.g. Tylenol) orVitamin C (ascorbic acid) you may get inaccurate results with thissystem. If you have a disease or condition in which uric acid levelsin your blood may be elevated ( 11 mg/dL), such as gout, you mayget inaccurate results with this system. If you have very high levelsof triglyceride ( 810 mg/dL), you may get inaccurate results withthis system. This system should not be used when undergoingxylose absorption tests.Important Safety InstructionsThe meter and lancing device are for single-patient use. Do not share themwith anyone, including other family members. Do not use on multiple patients.All parts of the kit are considered bio-hazardous and can potentially transmitinfectious diseases even after you have performed disinfection.For important instructions for disinfecting your meter and lancing device, referto CHAPTER 5 CLEANING AND MAINTENANCE on page 55.The U.S. Food and Drug Administration (FDA) and the Centers for DiseaseControl and Prevention (CDC) have issued warnings and notifications regardingthe risk of bloodborne pathogen transmission when blood glucose monitoring7
systems have been used by more than one individual. Refer to the followingdocuments for more information: “FDA Public Health Notification: Use of Fingerstick Devices on Morethan One Person Poses Risk for Transmitting BloodbornePathogens: Initial Communication” (2010). You can find thisdocument at www.fda.gov.“CDC Clinical Reminder: Use of Fingerstick Devices on More thanOne Person Poses Risk for Transmitting Bloodborne Pathogens”(2010). You can find this document at www.cdc.gov.CAUTION: To ensure accurate results, wash your hands withwarm, soapy water and dry them before and after every test.Unwashed hands may lead to inaccurate results. Make sure thereis no grease, oil, or lotion on the fingertip. Use lancets only once.Do not use any lancet or lancing device that has been used byanother person.Before Testing with the Dario SystemPlease read this user guide carefully and thoroughly before testing your bloodglucose for the first time. These instructions provide the information that youneed for safe use and handling of your Dario.Incorrect use of this system may lead to an inaccurate glucose reading ordamage to your device.If you have any questions, contact customer support at 1-800-895-5921, 9:00AM – 5:00 PM EST Monday through Friday or visit www.mydario.com.Safety DefinitionsSafety instructions are provided for the protection of Dario System users. Thisuser guide includes three types of important messages: Warnings, Cautions,and Notes. Text marked with one of these symbols requires your attention toensure safe and accurate use of your Dario System.8
WarningsA Warning indicates precautions you need to take to preventpossible risk of injury.Do not proceed beyond a Warning message until you fullyunderstand the conditions and have taken the appropriatepreventive action.CautionsA Caution indicates precautions you need to take to preventdamage to your monitoring system.Do not proceed beyond a Caution message until you fullyunderstand and observe the indicated conditions.Notes!Notes provide additional information for the purpose ofclarification.Practices Used in This User GuideThe following sections describe the formats and symbols used throughout thisuser guide, on the Dario System packaging and inserts, and on actual systemparts.Procedure Instructions Procedure instructions are clearly identified and presented asnumbered steps.If relevant, a system response is written below the step in italics. You should perform all procedures in the order of the steps provided.!The examples and screen images used in this User Guide areprovided as examples only (unless stated otherwise).9
WordsBoldDescriptionNames of menus, buttons, and screens.ItalicsSystem response that occurs as a result of pressing abutton or performing a task.Bold ItalicsEmphasize important information.10
Symbols and DescriptionsThe following table lists and describes the symbols that appear throughout thisguide, on packaging or package inserts, or on the actual system parts.SymbolDescriptionSymbolDario logoDescriptionLabStyle Innovation Ltd.logoConsult instructionsfor useDo not use if seal isbroken or missingIn Vitro DiagnosticBatch codeExpiry date1MShelf life after you firstopened the packageDo not reuseTemperature limitationCatalog numberContentsManufacturer:LabStyle InnovationLtd.AuthorizedRepresentative in theEuropean Community:9 Halamish St.MDSS GmbHNorth Industrial ParkSchiffgraben 41Caesarea 389000030175 HannoverIsraelGermanyIntended for selftestingSterilized using GammaRadiationKeep away fromsunlightKeep dry11
General PrecautionsThis section provides information about potential hazards that may harm yourDario System or cause it to not function properly.Inspect the Dario System prior to use. Avoid using any part of the system withbroken seals or expired dates. Do not attach or use a component if it isdamaged in any way, as it may not work properly. The Dario System is not water-resistant and should not get wet. Ifit does get wet, wipe it with a clean, dry cloth.Blood glucose testing with the Dario System should only be donein temperatures between 50 F-95 F (10 C-35 C) and relativehumidity between 10-90%. Test results may not be correct if theroom temperature and/or humidity are outside this range.Modifications to the Dario System not expressly approved byLabStyle Innovation Ltd. will void your warranty and could result ininjury.Avoid testing with your Dario System in altitudes higher than10,000 feet (3,048 meters), as accuracy cannot be assured.Do not leave the meter in very hot or cold places. Do not leave itnear a heat source (radiator) or in a car in hot or cold weather.Do not store or use meter or test strips in an area where thehumidity is outside of the range 10-90%, such as a bathroom orkitchen.Additional InformationFor your safety, observe the following recommendations when monitoringyour blood glucose using the Dario System: It is recommended that you have a backup testing methodavailable. Failure to test could cause a delay in treatment decisionsand lead to a serious medical condition. Examples of backuptesting methods include a backup glucose meter device or testing12
by a laboratory. Ask your health care provider about other possiblebackup methods.Do not change your treatment based on a single result that isinconsistent with how you feel or if you believe that your testresult could be incorrect. Contact your health care provider forfurther advice.Never make changes to your diabetes control program or ignorephysical symptoms without consulting with your health careprovider.13
CHAPTER 2DARIO SYSTEM OVERVIEW AND FEATURESThis chapter provides an overview of the Dario System components anddescribes how to set up the Dario System for the first time.Your Dario System at a GlanceThe Dario System is a cloud-based diabetes management solution thatcombines software applications with a stylish all-in-one device. The all-in-onedevice features a lancing device, test strip cartridge, and a compact meter.Together with a smart mobile device, the Dario System puts everything in yourpocket that you need to monitor and understand your diabetes. Our goal is toprovide the right combination of tools, knowledge, and motivation that youneed to succeed.You can check your blood glucose with a small sample (0.3μl) of your bloodand receive results within (6) six seconds.You can check and track your blood glucose readings the same way you checkeverything else in life —on your mobile device.The Dario Glucose Meter connects to smart mobile devices with an easy-to-usemobile app. The Dario App provides real-time and actionable information sothat you always know where you stand and what to do next.The Dario System not only logs and tracks your glucose levels, but also food,activity, moods, and more. The Dario System can even alert your caregiverswhen you need special attention.14
Dario ComponentsThe Dario System components are shown in the image below and described inthe following table.15
ComponentGlucose Meter(A) Dario meter(B) Dario meterrelease panelDescriptionThe miniature glucose meter consists of thefollowing components: An audio connector that is plugged into theaudio jack port of your smart mobile device. A strip port for insertion of the test strip.The glucose meter receives its power from themobile device. It does not require batteries or anyother electrical source. When not in use, the metersnaps into its slot in the housing for protectedstorage.(J) Dario HousingThe Dario Housing (also referred to as the devicehousing or simply “housing”) is the main part of theDario all-in-one device. It holds all the parts in placeand consists of the lancing device, the meter slot,and the housing for the test strips cartridge.Lancing Deviceand CoverThe lancing device is built into the housing and usesdisposable Dario Lancets. The orange lancing devicecover prevents the user from unintentionalpunctures. You must change lancets after each use.For more information about using the lancing device,refer to CHAPTER 4 TESTING YOUR BLOOD GLUCOSELEVEL on page 40.(C) Lancet cover(orange)(D) Disposablelancet(E) Lancet releasebutton(D) Lancet loader(G) Lancet depthlever(H) Test stripcartridgeEach test strip cartridge holds 25 strips. Test stripsare sold separately in packages of 50 (2 cartridges inthe package) and 100 (4 cartridges in the package).The cartridge snaps into the modular Dario Housing.16
ComponentTest StripDescriptionThe Dario Test Strip is the only strip which is usedwith the Dario System. A new test strip is insertedinto the test strip port of the glucose meter prior toeach glucose measurement.LancetsThe Dario System uses a 30G lancet. To replace thelancet, remove the orange lancing device cover, pullout the used lancet, and replace it with a sterile one.Disposable coversTo avoid the risk of transmitting bloodbornepathogens, it is advised to use the disposable sleeveto cover your smart mobile device while taking theblood glucose test. When the test is concluded,remove the cover from your smart mobile deviceand dispose it together with the used lancet and teststrip in accordance with the instructions provided byyour health care provider for biohazardous waste.!It is recommended that you carry spare test strip cartridges andlancets in case of an emergency.17
Supported Platforms for the Dario AppThe Dario Glucose Meter uses smart phone technology to view and storeunlimited numbers of glucose test results. You can also track other diabetesinformation and view graphs and trends. You can even share your diabetesmanagement information with your health care provider. The Dario System iscompatible for use on iOS smart mobile devices. The Dario Glucose Metercurrently works with the following Apple iPhone devices:Supported iOS version – 8, 9, 9.3, 10Supported iOS phones – iPhone 4S, 5, 5S, SE, 6, 6 Plus, 6 S, 6 S Plus.For the latest list of compatible devices please refer towww.mydario.com/support/getting-started/.18
Dario System Welcome Kit ContentsAs soon as you receive your Dario System Welcome Kit:1.Carefully unpack the kit and verify that it contains the following parts: Dario System, which includes the lancing device and built in bloodglucose meter Dario 10 Sterile Lancets Dario 10 Disposable Covers (4.5”X 8.25”) Dario Blood Glucose Monitoring System Quick Guide Dario Blood Glucose Monitoring System User GuideThe Dario System also includes the following components which are notincluded in Dario System Welcome Kit and are sold separately: !2.3.4.Dario Test StripsDario 100 Sterile LancetsDario 100 Disposable Covers (4.5”X 8.25”)Dario Control Solution Level 1 and 2Super Sani Cloth Germicidal Disposable Wipes by PDI HealthcareOnce you remove the exterior packaging, you will find a whitepackage with a tamper-proof seal. If the tamper-proof seal isdamaged or missing, it is recommended that you return this DarioSystem to where you purchased it, as it has been previouslyopened.If anything is missing from the Welcome Kit, contact customer supporttoll-free in the U.S. at 1-800-895-5921, 9:00 AM-5:00 PM EST Mondaythrough Friday or visit www.mydario.com/support/contact.Test strips and lancets are available at your local pharmacy. Foradditional information, contact customer support toll-free in the U.S. at1-800-895-5921, 9:00 AM-5:00 PM EST Monday through Friday or visitwww.mydario.com/support/contact. Contact your health care providerfor questions outside of the customer support hours.Additional Dario accessories (e.g., control solution, disposable covers)can be ordered from your local representatives or the Dario App, or by19
contacting customer support toll-free in the U.S. at 1-800-895-5921,9:00 AM-5:00 PM EST Monday through Friday. For details on productavailability, refer to Supplies and Accessories on page 71.Getting Started with the Dario SystemYour Dario Glucose Meter works seamlessly with your smart mobile device.Simply download the Dario App on your compatible smart mobile device and itwill automatically synchronize with the Dario device each time it is connected.Your data is constantly synchronized to one place so that it is always with youon the go.Your data is saved under your username on your smart mobile devices and onthe Dario cloud. You have easy access to your data through the Dario App andat www.mydario.com.20
Assembling the Dario System for the First TimeTo set up the Dario System for the first time, you must complete the followingprocedures: !Insert a test strip cartridge, as described in Inserting the Test StripCartridge on page 21.Insert a lancet, as described in Inserting a Lancet on page 22.Set the lancet depth, if desired, as described in Setting LancetDepth (Optional) on page 24.Download and install the Dario App to your smart mobile device,as described in Downloading and Installing the Dario App on page25.Set up the Dario App on your smart mobile device using the DarioApp instructions or the instructions provided on the Dario websiteat www.mydario.com.Both ends of the Dario Housing have covers that are removable.The lancet cover is orange with the small opening. Be careful notto put the cartridge cover on the lancing end. This can damage thelancet and the lancing device.Inserting the Test Strip CartridgeTo insert the test strip cartridge:1.2.3.Remove the carbon paper from the device and open the white cover.Remove the new test strip cartridge from its pouch.Hold the test strip cartridge with the side that opens facing up, as shownin the image below.21
4.5.Insert the cartridge into the housing until it snaps into place.Return the housing cover by sliding it into place until it clicks, as shown inthe image below.!If the cover does not close properly, the cartridge may not havebeen inserted correctly. Ensure you have properly inserted thecartridge, as described in steps 3 and 4.Inserting a LancetTo insert a lancet:1.Remove the orange lancet device cover from the Dario Housing, asshown in the images below.22
2.Remove the used lancet, if one exists, by grasping and pulling it straightout of its housing.!3.Remove a new lancet from the packaging.!4.To avoid accidental injury, dispose of used lancet in accordancewith the instructions provided by your health care provider forbiohazardous waste.Do not use the lancet if the cap is missing or damaged.Insert a sterile lancet as far as it will go and ensure it is firmly set.23
5.Only use a lancet authorized by LabStyle InnovationLtd. (30G).If the lancet does not set into place or the lancetholder does not hold the lancet properly, insertanother sterile lancet.If the problem persists, you may need to replaceyour Dario Housing. Contact customer support tollfree in the U.S. at 1-800-895-5921, 9:00 AM-5:00 PMEST Monday through Friday or visitwww.mydario.com.Carefully twist off the lancet cap, as shown in the image below. Ensurethat you do not bend the lancet while removing the cap.Setting Lancet Depth (Optional)You can adjust the puncture depth of the lancet by moving the lever betweenthe numbers 1 and 4 (printed on the dial). 1 is the shallowest depth and 4 isthe deepest. It is recommended that you start with the lancet depth set to 1and adjust the level upwards if necessary.To set lancet depth:1.Move the lancing device lever so that the line on the lever is aligned withthe correct depth number, as shown in the image below.24
2.Replace the lancing device cover by sliding it into place until it clicks. Becareful not to touch or bend the lancet.The Dario AppThe Dario App is available on the iOS operating system. For full list ofcompatible devices, refer to the list of devices in Supported Platforms for theDario App on 18 or at www.mydario.com/support/getting-started.Your Dario Glucose Meter is operated from the Dario App displayed on thescreen of your smart mobile device. The mobile device displays and storesinformation received from the glucose meter. The Dario App also provides astep-by-step quick guide for operating the system. Additionally, instructionalvideos about the Dario App are located at www.mydario.com/support/gettingstarted.You can use the Dario App to conveniently store and manage your diabetesinformation, review trends, or share information with your health careprovider.Downloading and Installing the Dario AppYou can download and install the Dario App to your smart mobile device usingthe Apple App Store . The Dario App downloads and installs just like any otherapp on your smart mobile device. The Dario App is free of charge and iscustomized for your smart mobile device.!Downloading the Dario App from the Ap
quantitative measurement of glucose (sugar) in fresh capillary whole blood samples drawn from the fingertips. The Dario Blood Glucose Monitoring System is intended to be used by a single person and should not be shared. The Dario Blood Glucose Monito