Transcription
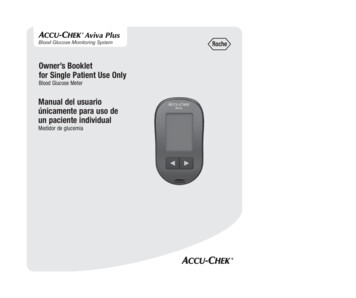
This file may not print or view at 100%.Die lines and color breaks do not print.Blood Glucose Monitoring System“Holding Area” text, box and rules do not print.Owner’s Bookletfor Single Patient Use OnlyRoche USA – 80213V1/1 – 07021933005 – BlackBlood Glucose MeterManual del usuarioúnicamente para uso deun paciente individualMedidor de glucemia80213 07021933005 CVR.indb 12/7/2020 9:13:07 AM
80213 07021933005 CVR.indb 22/7/2020 9:13:08 AM
ContentsImportant Safety Information.3Chapter 1: Your New System.7Chapter 2: Control Tests.13Chapter 3: The Accu‑Chek Softclix Lancing Device.17Chapter 4: Blood Glucose Tests.21Chapter 5: Meter Memory, Setup, and Data Transfer.27Chapter 6: Meter and Lancing Device Cleaning and Disinfecting.37Chapter 7: Maintenance and Troubleshooting.43Chapter 8: Technical Information.47Index.5580213 07021933005 EN.indb 18/13/2019 4:39:59 PMThis file may not print or view at 100%.Die lines and color breaks do not print.“Holding Area” text, box and rules donot print.Roche USA – 80213V2/1 – 07021933005 – BlackRoche USA – 80213V2/2 – 07021933005 – PMS 287 CVC
80213 07021933005 EN.indb 28/13/2019 4:39:59 PM
Important Safety InformationImportant Safety InformationThe Accu‑Chek Aviva Plus SystemThe Accu‑Chek Aviva Plus blood glucose monitoring system is intended to be used for the quantitativemeasurement of glucose (sugar) in fresh capillary whole blood samples drawn from the fingertips, forearm,upper arm, or palm. The Accu‑Chek Aviva Plus blood glucose monitoring system is intended to be used by asingle person and should not be shared.The Accu‑Chek Aviva Plus blood glucose monitoring system is intended for self‑testing outside the body(in vitro diagnostic use) by people with diabetes at home as an aid to monitor the effectiveness of diabetescontrol. The Accu‑Chek Aviva Plus blood glucose monitoring system should not be used for the diagnosis ofor screening of diabetes or for neonatal use. Alternate site testing should be done only during steady‑statetimes (when glucose is not changing rapidly).The Accu‑Chek Aviva Plus test strips are for use with the Accu‑Chek Aviva blood glucose meter toquantitatively measure glucose (sugar) in fresh capillary whole blood samples drawn from the fingertips,forearm, upper arm, or palm.This system is intended to be used by a single person and should not be shared.The Accu‑Chek Aviva Plus blood glucose monitoring system includes:Accu‑Chek Aviva meter with battery, Accu‑Chek Aviva Plus test strips*, Accu‑Chek Aviva control solutions*,Accu‑Chek Softclix lancing device* (with a black cap for fingertip testing and an AST cap**for alternate site testing), Accu‑Chek Softclix lancets*.*may be sold separately**available upon request from the Accu‑Chek Customer Care Service Center at 1‑800‑858‑8072WARNING C hoking hazard. Small parts. Keep away from children under the age of 3 years. K eep new and used batteries away from children. Ingestion or insertion into the bodymay cause chemical burns, perforation of soft tissues, and death. Severe burns mayoccur within 2 hours of swallowing. If you think a battery might have been swallowed orplaced inside any part of the body, seek medical attention immediately. If the battery compartment does not close securely, stop using the product and keep it awayfrom children. Contact the Accu-Chek Customer Care Service Center at 1-800-858-8072.NOTEThe term “blood glucose” is used when referring to “blood sugar.”380213 07021933005 EN.indb 38/13/2019 4:39:59 PM
Important Safety InformationNeed Help?Contact the Accu-Chek Customer Care Service Center toll-free at 1-800-858-8072. Hours of operation areMonday through Friday between 8:00 am and 8:00 pm eastern standard time (EST). We offer assistance in manylanguages. You can also visit accu-chek.com for diabetes management tools and product demonstrations.Please register your warranty online at accu-chek.com/register, so you receive the best customer servicepossible and product update news.480213 07021933005 EN.indb 48/13/2019 4:39:59 PM
Important Safety InformationAbout Testing Yourself or OthersWARNING DO NOT CHANGE YOUR THERAPY BASED ON A TEST RESULT THAT DOES NOT MATCH HOW YOU FEELOR IF YOU BELIEVE THAT YOUR TEST RESULT COULD BE INCORRECT. It is always a good idea to have a back‑up testing method available. Failure to test could cause adelay in therapy decisions and lead to a serious medical condition. Examples of back‑up testingmethods include a back‑up meter or testing by a laboratory. Ask your healthcare professional orpharmacist about other possible back‑up methods. If your blood glucose result does not match how you feel and you have followed the instructions inthis Owner’s Booklet, follow your healthcare professional’s instructions, or contact your healthcareprofessional.WARNING During normal testing, any blood glucose meter or lancing device may come in contact with blood.All parts of the kit are considered biohazardous and can potentially transmit infectious diseases frombloodborne pathogens, even after you have performed cleaning and disinfecting.1,2 The meter and lancing device should never be used by more than one person. Do not share themeter and lancing device with anyone, including family members, due to the risk of infection frombloodborne pathogens.1,2 Do not use on multiple patients! Cleaning and disinfecting the meter and lancing device destroys most, but not necessarily all,bloodborne pathogens.3 If the meter is being operated by a second person who is providing testing assistance to the user, themeter and lancing device should be cleaned and disinfected prior to use by the second person. Disinfect the meter and lancing device before allowing anyone else to handle them. Do not allowanyone else to test with the meter or lancing device. It is important to keep the meter and lancing device clean and disinfected. For instructions on how toclean and disinfect the meter and lancing device, see Chapter 6, Meter and Lancing Device Cleaningand Disinfecting. Wash hands thoroughly before and after handling the meter, lancing device, or test strips.NOTE Perform a control test when you open a new test strip box or if you think that a test result is incorrect.Performing a control test lets you know that the meter and test strips are working properly. Refer to the test strip and control solution package inserts for additional health‑related information.580213 07021933005 EN.indb 58/13/2019 4:39:59 PM
Important Safety InformationSpecial Information for Caregivers Do not use the meter system to measure blood glucose in people who are experiencing cardiovascularcollapse (severe shock) or decreased peripheral blood flow. Consult your healthcare professional to determine if it is appropriate for your child to be taught how to usethe meter system or any other medical products. Some people with diabetes do not experience symptoms of low blood glucose (hypoglycemia). Others, suchas children or people who are unconscious or have certain disabilities, may not be able to communicatetheir symptoms to caregivers. For these reasons, do not change any therapy without first talking to ahealthcare professional. Not for use on critically ill patients, patients in shock, dehydrated patients, or hyperosmolar patients.Before You Start TestingWARNING Carefully read and follow the instructions in the Owner’s Booklet and package inserts for the teststrips and control solution. It is very important to follow the instructions in order to avoid an incorrecttest result that leads to improper therapy. Inspect the test strip container before using the test strips for the first time. If you see any damageto the container cap or if anything prevents the cap from closing properly, do not use the test strips.Contact the Accu‑Chek Customer Care Service Center. Damaged test strips can cause inaccurateresults, which could lead to improper therapy. The meter, test strips, and control solution are only for use outside the body (in vitro). Do not eat thetest strips. Do not swallow or inject the control solution or use the control solution for any purposeother than testing the Accu‑Chek Aviva Plus system.NOTESet the time and date on the meter before you begin testing.680213 07021933005 EN.indb 68/13/2019 4:39:59 PM
Chapter 1: Your New SystemYour New System1The Accu‑Chek Aviva Meter12516341. Power/Set ButtonTurns meter on or off and sets options.2. DisplayShows results, messages, and test resultsstored in memory.5. Battery Door6. Infrared (IR) WindowTransfers data from meter to computer.3. Right Arrow and Left Arrow ButtonsPress to enter memory, adjust settings, andscroll through test results.4. Test Strip SlotInsert test strip here.780213 07021933005 EN.indb 78/13/2019 4:40:00 PM
1Your New System7811(for example)1097. Test Strip Container*10. Control Solution Bottle*8. Insert this end into meter.11. Battery9. Yellow WindowTouch blood drop or control solution here.*Some items may not be included in the kit. They are a separate purchase.880213 07021933005 EN.indb 88/13/2019 4:40:00 PM
Your New System1The Accu‑Chek Softclix Lancing Device1. Cap with Comfort Dial DepthSelectionFor fingertip testing.2. EjectorSlide to release lancet.3. Release ButtonPress to prick.5. Lancet6. AST CapFor Alternate Site Testing (availableupon request from the Accu‑ChekCustomer Care Service Center at1-800-858-8072).4. Priming ButtonPress to prime.NOTESome items may be sold separately.980213 07021933005 EN.indb 98/13/2019 4:40:01 PM
1Your New SystemUsing the Accu‑Chek Aviva Plus System Use only Accu‑Chek Aviva Plus test strips. Use the test strip immediately after removing it from the test strip container. Do not apply blood or control solution to the test strip before inserting it into the meter. Retest with a newtest strip. If a result appears before applying blood or control solution, do not act on that result. Close the test strip container tightly immediately after removing a test strip. Moisture can damage the teststrips and produce incorrect results. Store the unused test strips in their original container with the cap tightly closed. Discard the test strips if they are past the Use By date printed on the test strip container. If the Use Bydate is missing or cannot be read, do not use the test strips. Contact the Accu‑Chek Customer Care ServiceCenter at 1‑800‑858‑8072. Refer to the test strip package insert for test strip storage and system operating conditions. Do not remove test strips from the test strip container and put them into another container, such as aplastic bag, pocket, purse, wallet, etc. Do not reuse test strips. Once control solution or blood has been applied to a test strip, discard it. If a retestis necessary, use a new test strip. Perform a control test every time you open a new test strip box.WARNINGTo prevent inaccurate results: DO NOT expose test strips to heat, moisture, or humidity. Temperatures outside the required range, aswell as moisture and humidity, can damage the test strips and lead to inaccurate results. DO NOT bend, cut, or alter the test strips. DO NOT get dirt, food, or other material on the test strip.1080213 07021933005 EN.indb 108/13/2019 4:40:01 PM
Your New System1Button FunctionsHere are the functions of the power/set and arrow buttons on the meter. These functions are usedthroughout this booklet. For more information on using these buttons during meter setup, see Chapter 5,Meter Memory, Setup, and Data Transfer.Button(power/setbutton)FunctionActionTurn the meter on or off.Press and release .Enter the set‑up mode.Turn the meter on. Press and holdon the display.Set the chosen feature.Press and release .Exit the set‑up mode at anytime.Press and hold until the flashing test strip symbolappears on the display.Check the display segments.Check the display before each test to make sure allsegments are clear and look like the picture to the left.Turn the meter off. Press and hold to see the completedisplay.until set‑up appearsIf one of the segments is missing or looks different from thepicture, do not use the meter. Contact the Accu‑ChekCustomer Care Service Center at 1-800-858-8072.Adjust settings for time and(right arrow date, beeper, test reminders,and hypoglycemic alert.and leftarrowbuttons)Enter memory.Mark a blood glucose result.orPress and releasePress and holdor.to scroll faster.Press and releaseor.Press and releaseor.1180213 07021933005 EN.indb 118/13/2019 4:40:01 PM
1Your New System1280213 07021933005 EN.indb 128/13/2019 4:40:01 PM
Chapter 2: Control TestsControl Tests2When to Perform a Control TestPerforming a control test lets you know the meter and test strips are working properly. You should perform acontrol test when: you open a new test strip box. you left the test strip container open. you think the test strips are damaged. you want to check the meter and test strips. the test strips were stored in extreme temperatures, humidity, or both. you dropped the meter. your test result does not match how you feel. you want to check if you are performing the test correctly.About the Control Solution Use only Accu‑Chek Aviva control solution. Close the control solution bottle tightly after use. Write the date you open the control solution bottle on the bottle label. The control solution must bediscarded 3 months from the date the control solution bottle was opened (discard date) or on the Use Bydate on the bottle label, whichever comes first. Do not use control solution that is past the Use By or discard date. Refer to the control solution package insert for control solution storage conditions. The meter automatically recognizes the difference between the control solution and blood. The control results are not displayed in memory. The control solution can stain fabric. Remove stains by washing with soap and water. Control solution is available for purchase. To order the control solution, talk to your pharmacist or visitaccu‑chek.com to order online.1380213 07021933005 EN.indb 138/13/2019 4:40:01 PM
2Control TestsPerforming a Control TestYou need the meter, a test strip, and control solution Level 1 or Level 2. The control level is printed on thebottle label.1234orCheck the meter displayfor missing segments.All segments should looklike the picture.Check the Use By date on Select the control solutionto test. You will enter thethe test strip container.level later in the test.Do not use test stripspast the Use By date.56Remove the bottle cap.Wipe the tip of the bottlewith a tissue.Squeeze the bottle until atiny drop forms at the tip.Touch the drop to thefront edge of the yellowwindow of the test stripuntil you see flash. Donot put control solutionon top of the test strip.Insert the test strip intothe meter in the directionof the arrows.Place the meter on a flatsurface.7(for example)Press once to mark thecontrol result as a Level 1.Press a second time tomark the control result asa Level 2. Press to setthe control level in themeter.When you see flash,there is enough controlsolution in the test strip.The control result, thebottle symbol, and aflashing L appear on thedisplay. Do not removethe test strip yet.1480213 07021933005 EN.indb 148/13/2019 4:40:02 PM
Control Tests28Wipe the tip of the bottlewith a tissue. Cap thebottle tightly.OK and the control resultalternate on the display ifthe control result is inrange OR Err and thecontrol result alternate onthe display if the controlresult is not in range.Remove and discard theused test strip.NOTE Most people just test the Level 1 control. If you wish, you can also test a Level 2 control. A set ofLevel 1 and Level 2 control solutions is available for purchase. To order control solutions, talk to yourpharmacist or visit accu‑chek.com to order online. The ranges for Level 1 and Level 2 control solutions are printed on the test strip container label. After a successful test, the meter turns off 5 seconds after the test strip is removed.1580213 07021933005 EN.indb 158/13/2019 4:40:02 PM
2Control TestsUnderstanding Out‑of‑Range Control ResultsWARNING The control range applies only to a control result. It only indicates that the test strips and meter areworking properly. Do not use a control result to interpret blood glucose results. If the control result is out of range, do not use the meter until you solve the problem. Check this list tohelp solve the problem.Troubleshooting ChecksAction1. Were the test strips or control solutionsexpired?Discard the test strips or control solution if either ispast the Use By date. If the control solution wasopened more than 3 months ago, discard it. Repeatthe control test with an unexpired test strip and anunexpired control solution.2. Did you wipe the tip of the control solutionbottle before use?Wipe the tip of the bottle with a tissue. Repeat thecontrol test with a new test strip and a fresh drop ofcontrol solution.3. Were the caps on the test strip containerand the control solution bottle alwaysclosed tightly?Replace the test strips or control solution if you thinkeither was uncapped for some time. Repeat thecontrol test.4. Was the test strip used immediately after itwas removed from the test strip container?Repeat the control test with a new test strip and afresh drop of control solution.5. Were the test strips and control solutionsstored in a cool, dry place?Repeat the control test with a properly stored teststrip or control solution.6. Did you follow the directions?Read Chapter 2, Control Tests, and repeat the controltest.7. Did you choose the correct control solutionlevel, either 1 or 2, when you performedthe test?If you chose the wrong control solution level, you canstill compare the control result to the range printed onthe test strip container.8. Are you still unsure of the problem?Contact the Accu‑Chek Customer Care Service Centerat 1‑800‑858‑8072.1680213 07021933005 EN.indb 168/13/2019 4:40:02 PM
Chapter 3: The Accu‑Chek Softclix Lancing DeviceThe Accu-Chek Softclix Lancing Device3Using the Accu‑Chek Softclix Lancing Device The black cap is for fingertip testing only. Remove the cap by pulling it straight off. Do not twist the cap. The AST cap* is for testing other approved sites on the body, not the fingertip. Remove the cap by pulling it straight off. Do not twist the cap. The penetration depth indicator on the comfort dial shows the current depthsetting. The higher the number, the deeper the penetration. The best depth settingis the lowest number that lets you get enough blood for a test. Try different depthsettings to find the one that is right for you. For soft skin, we suggest a depth setting of 2. For thick skin, try a higher depthsetting. We suggest starting at a depth setting of 5½ for forearm or upper arm testing, anda depth setting of 3 for palm testing. Once you perform a successful blood glucosetest, you may want to find the lowest depth setting that provides enough bloodwith the least amount of pain.*Available upon request from the Accu‑Chek Customer Care Service Center at 1-800-858-8072.1780213 07021933005 EN.indb 178/13/2019 4:40:03 PM
3The Accu-Chek Softclix Lancing DeviceInserting a LancetYou must first insert a lancet into the lancing device to get it ready for use.12Remove the cap.Twist off the lancet’sInsert a new lancet until it protective cover.clicks firmly into place.3Slide the cap on until itstops by aligning thenotch on the cap with thenotch on the lancingdevice.1880213 07021933005 EN.indb 188/13/2019 4:40:03 PM
The Accu-Chek Softclix Lancing Device3Using the Accu‑Chek Softclix Lancing Device12Make sure you select thecorrect cap.34Press the priming buttonin as far as it will go, likea pen.The release button turnsyellow when the device isready.Adjust the lancet depth byturning the comfort dial.Obtain a blood drop. SeeChapter 4, Blood GlucoseTests.NOTE Do NOT press the release button while pressing the priming button. ALWAYS use a new, sterile lancet each time you test to avoid infection. NEVER reuse a lancet. NEVER share your lancing device with anyone.1980213 07021933005 EN.indb 198/13/2019 4:40:03 PM
3The Accu-Chek Softclix Lancing Device2080213 07021933005 EN.indb 208/13/2019 4:40:03 PM
Chapter 4: Blood Glucose TestsBlood Glucose Tests4WARNING The meter and lancing device should never be used by more than one person. Do not share themeter and lancing device with anyone, including family members, due to the risk of infection frombloodborne pathogens.1,2 Do not use on multiple patients! Blood glucose results can be displayed in either mg/dL or mmol/L. The back label of the metershows the unit of measurement. If the meter shows the wrong unit, contact the Accu‑Chek CustomerCare Service Center at 1-800-858-8072. If you do not know which unit of measurement is correctfor you, contact your healthcare professional. Using the wrong unit of measurement may causemisinterpretation of your actual blood glucose level and may lead to improper therapy.mg/dL or mmol/L isprinted herePerforming a Blood Glucose Test with Blood from Your FingertipRefer to the Important Safety Information before performing a blood glucose test.Before you perform your first blood glucose test, set up the meter correctly and perform a control test. Youneed the meter, a test strip, and a lancing device with a lancet inserted to perform a blood glucose test.1Check the meter displayfor missing segments.All segments should looklike the picture.80213 07021933005 EN.indb 212Wash your hands withwarm soapy water anddry thoroughly. Dirty orwet hands could affecttest results.3Adjust the comfort dial.4Check the Use By dateon the test strip container.Do not use test stripspast the Use By date.218/13/2019 4:40:03 PM
4Blood Glucose Tests56Insert the test strip intoWhen the blood dropthe meter in the direction symbol flashes, obtain aof the arrows.blood drop.The meter turns on andbeeps.9Touch the blood drop tothe front edge of theyellow window of the teststrip.Do not put blood on topof the test strip.The meter beeps andflashes when there isenough blood in the teststrip.78Place the lancing devicefirmly against the side ofyour fingertip.Press the yellow releasebutton to prick yourfinger.Gently squeeze yourfinger to assist the bloodflow.This helps you get ablood drop.1110The test result appearson the display.To assign a marker tothe test result, leave thetest strip in the meter.See Chapter 4, MarkingBlood Glucose Resultsand Setting thePost-Meal TestReminder.Otherwise, remove anddiscard the used teststrip.After a successful test,the meter turns itself off5 seconds after the teststrip is removed.Discard the used lancet.Remove the cap andpoint the lancet awayfrom you. Slide out theejector to release thelancet into a punctureproof container. Alwaysdiscard according tolocal regulations.12Wash hands thoroughlywith soap and water.2280213 07021933005 EN.indb 228/13/2019 4:40:04 PM
Blood Glucose Tests4Performing a Blood Glucose Test with Blood from Your Palm, Forearm, or UpperArm (Alternate Site Testing)WARNINGDo not use Alternate Site Testing to calibrate a continuous glucose monitoring system or to makeinsulin dosing calculations.You have the option of obtaining a blood sample from other sites on your body besides the fingertip.Alternate sites include the palm, forearm, and upper arm.Blood obtained from the fingertip can be used at any time to test blood glucose.If blood from an alternate site is used, there are certain times when testing is not appropriate. This isbecause your blood glucose level changes faster in your fingertip than in the alternate sites. Thesedifferences may cause you to misinterpret your actual blood glucose level, leading to improper therapyand potential adverse health effects.Read the next section before you try testing from alternate sites.You mayperform a palm,forearm, orupper arm testYou may NOTperform a palm,forearm, orupper arm test immediately before a meal. while fasting. up to 2 hours following a meal, when blood glucose values can rise quickly. after injecting bolus insulin, when blood glucose values can decrease rapidly. after exercise. if you are sick. if you think your blood glucose is low (hypoglycemia). if you sometimes do not notice when your blood glucose is low.If you are interested in AST, talk to your healthcare professional first.To obtain an AST cap and detailed AST instructions, contact the Accu‑Chek Customer Care Service Center at1‑800‑858‑8072.2380213 07021933005 EN.indb 238/13/2019 4:40:04 PM
4Blood Glucose TestsMarking Blood Glucose Results and Setting the Post‑Meal Test ReminderYou can mark a blood glucose result to indicate a special event. If you select a test result marker, it isautomatically stored in memory. When you review the test results in memory, these markers can help youremember what was different about the test result.SymbolFunctionPre‑Meal MarkerMarking blood glucose results with a pre‑meal marker provides more information aboutyour test results to help you and your healthcare professional in the management ofyour diabetes.Pre‑Meal Marker with Post‑Meal Test ReminderWhen a pre‑meal result is marked with a post‑meal test reminder, the meter beeps 1 or2 hours after you test to remind you to do a post‑meal test.Post‑Meal MarkerMarking blood glucose results with a post‑meal marker provides more informationabout your test results to help you and your healthcare professional in the managementof your diabetes. The post‑meal marker automatically appears with the test result if atest is performed 15 minutes before or after the post‑meal test reminder isprogrammed to beep. Set the post‑meal test reminder time to 1 or 2 hours in theset‑up mode. The meter will beep 1 or 2 hours after the pre‑meal test to remind you todo a post-meal test.General MarkerYou might want to use the general marker to mark an event such as an AST result orexercise.Here is how to mark a test result and initiate a post-meal test reminder:1. Perform a blood glucose test. The blood glucose result appears on the display.2. Leave the test strip in the meter. Press and release or to toggle through the test result markersand post-meal test reminder.3. When the marker or test reminder that you wish to select appears on the display, remove the test stripfrom the meter.2480213 07021933005 EN.indb 248/13/2019 4:40:05 PM
Blood Glucose Tests4Unusual Blood Glucose ResultsIf your blood glucose result does not match how you feel, follow these steps:1. Perform a control test. See Chapter 2, Control Tests.2. Repeat the blood glucose test. See Chapter 4, Performing a Blood Glucose Test with Blood from YourFingertip.If your blood glucose result still does not match how you feel, follow your healthcare professional’s instructionsor call your healthcare professional immediately.NOTEAlways follow your healthcare professional’s instructions. For example, if your healthcare professionalhas advised you to immediately treat a low blood glucose result (such as by eating something), thendo that first.WARNING Do not change your treatment because of one blood glucose result. NEVER ignore symptoms of low or high blood glucose.2580213 07021933005 EN.indb 258/13/2019 4:40:05 PM
4Blood Glucose TestsSymptoms of Low or High Blood GlucoseWARNINGThe meter is designed to provide a numerical value for blood glucose in the range of 20–600 mg/dL. Ifyou receive a numerical value below 20 mg/dL or above 600 mg/dL and it does not match how youfeel, contact the Accu‑Chek Customer Care Service Center toll‑free at 1‑800‑858‑8072.Being aware of the symptoms of low or high blood glucose can help you understand your test results anddecide what to do if they seem unusual.Low blood glucose (hypoglycemia): Symptoms of hypoglycemia may include, but are not limited to, anxiety,shakiness, sweating, headache, increased hunger, dizziness, pale skin color, sudden change in mood orirritability, fatigue, difficulty concentrating, clumsiness, palpitations, and/or confusion.High blood glucose (hyperglycemia): Symptoms of hyperglycemia may include, but are not limited to,increased thirst, frequent urination, blurred vision, drowsiness, and/or unexplained weight loss.If you are experiencing any of these symptoms, or other unusual symptoms, test your blood glucose fromthe fingertip. If your blood glucose result is displayed as LO or HI, follow your healthcare professional’sinstructions or contact your healthcare professional immediately. If your blood glucose result does not matchhow you feel, follow the steps under Chapter 4, Unusual Blood Glucose Results.Comparing Your Meter Result to a Laboratory ResultA common question is how the blood glucose results on the meter compare to the laboratory results. Yourblood glucose can change quickly, especially after eating, taking medication, or physical activity. If you testyourself in the morning, then go to your healthcare professional’s office for a blood glucose test, your testresults will probably not match, even if you are fasting. This is typically not a problem with the meter, it justmeans that time has elapsed and your blood glucose level has changed.Although you
The Accu‑Chek Aviva Plus blood glucose monitoring system is intended to be used for the quantitative measurement of glucose (sugar) in fresh capillary whole blood samples drawn from the fingertips, forearm, upper arm, or palm. The Accu‑Chek Aviva Plus blood