Transcription
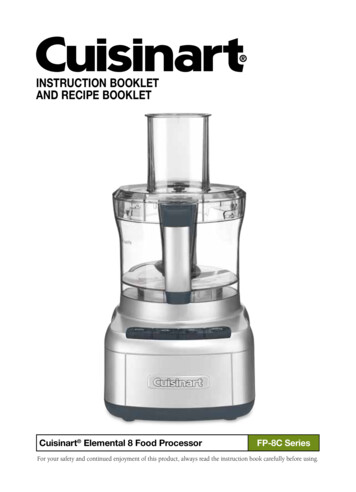
INSTRUCTION BOOKLETAND RECIPE BOOKLETCuisinart Elemental 8 Food ProcessorFP-8C SeriesFor your safety and continued enjoyment of this product, always read the instruction book carefully before using.
RECOMMENDED MAXIMUM WORK BOWL CAPACITYIMPORTANTSAFEGUARDSCleaningTo protect against risk of electrical shock,do not put base in water or other liquids.GeneralFOODCAPACITYSliced or shredded fruit, vegetables or cheese8 cups (2 L)Chopped fruit, vegetables or cheese2 cups (500 ml)Always follow these safety precautions when usingthis appliance.1. This appliance should not be used by or nearchildren or individuals with certain disabilities.Puréed fruit, vegetables or cheese3 cups (750 ml) cooked; 1½ cups (375 ml) puréedGetting ReadyChopped or puréed meat, fish or seafood¾ pound (375 g)1. Read all instructions.2. Blades and discs are sharp. Handle themcarefully.2. Do not operate this, or any other motor-drivenappliance, while under the influence of alcoholor other substances that affect your reactiontime or perception.Thin liquid (e.g., dressings, soups, etc.)4 cups (1 L)Cake batter8-inch (20 cm) cheesecake batter; 1 box [15.25 ounce (450 g)] cake mixCookie dough2½ dozen (based on average chocolate chip cookie recipe)White bread/pizza dough2.5 cups [625 ml (all-purpose or bread flour)]Nuts for nut butter2 cups (500 ml)3. This food processor is cUL listed for householduse. Use it only for food preparation as describedin the accompanying recipe and instruction book.Do not use this appliance for anything but itsintended use.3. Always unplug from outlet when not in use,before putting on or taking off parts, beforeremoving food and before cleaning. Tounplug, grasp plug and pull from electricaloutlet. Never pull cord.4. The use of attachments not recommended orsold by Cuisinart may cause fire, electricalshock or personal injury, or damage to yourfood processor.4. Do not use outdoors.IMPORTANT UNPACKINGINSTRUCTIONS6. Save the shipping cartons and packingmaterial. You will find them very useful if youneed to repack the processor for moving orother shipment.We recommend that you visit our website,www.cuisinart.ca for a fast, efficient way tocomplete your product registration.This package contains a Cuisinart Elemental8 Food Processor and the accessories for it:8-cup (1.9 L) work bowl, work bowl cover withpusher, metal chopping/mixing/dough blade,thin reversible metal slicing & shredding disc,medium reversible metal slicing & shreddingdisc, base with stem adapter and instruction/recipe book.CAUTION:THE CUTTING TOOLS HAVE VERY SHARPEDGES. To avoid injury when unpacking theparts, please follow these instructions.1. Place the box on a low table or on the floornext to the kitchen counter where you intendto keep the food processor. Be sure the boxis right side up.2. Open top flaps—there will be a rectangularblock of packing material that holds theprocessor parts, each fitted into a cavity.3. Remove the instruction/recipe book and themetal slicing & shredding disc accessoriesfrom one side.4. Lift out the packing material.5. Remove the base and bowl together andplace it on the counter or table. Read theinstructions thoroughly before using themachine.5. Do not let cord hang over edge of table orcounter, or touch hot surfaces.6. Do not operate any appliance with adamaged cord or plug, or after appliance hasbeen dropped or damaged in any way. Returnappliance to the nearest authorized servicefacility for examination, repair or electrical ormechanical adjustment.5. To avoid possible malfunction of work bowlswitch, never store processor with coverassembly in locked position.6. Maximum rating of 350 watts is based onattachment that draws greatest current.Other recommended attachments may drawsignificantly less current.Operation1. Keep hands as well as spatulas and otherutensils away from moving blades or discs whileprocessing food, to prevent the possibility ofsevere personal injury or damage to foodprocessor. A plastic scraper may be used, butonly when the food processor motor is stopped.7. Do not operate your appliance in an appliancegarage or under a wall cabinet. When storingin an appliance garage always unplug the unitfrom the electrical outlet. Not doing so couldcreate a risk of fire, especially if theappliance touches the walls of the garage or thedoor touches the unit as it closes.2. Avoid coming into contact with moving parts.Never push food down by hand when slicingor shredding. Always use pusher.NOTICE: If your food processor has a plasticcase, it has a polarized plug (one blade is widerthan the other). As a safety feature, this plug willfit in a polarized outlet only one way. If the plugdoes not fit fully in the outlet, reverse the plug. Ifit still does not fit, contact a qualified electrician.Do not attempt to defeat this safety feature.3. Make sure motor has completely stopped beforeremoving cover. (If machine does not stop within4 seconds after you remove the bowl coverassembly, call 1-800-472-7606 for assistance.Do not use the machine.)SAVE THESEINSTRUCTIONSFOR HOUSEHOLDUSE ONLY4. Never store any blade or disc on motor shaft. Toreduce the risk of injury, no blade or disc shouldbe placed on the shaft except when the bowl isproperly locked in place and the processor is inuse. Store blades and discs, as you would sharpknives, out of reach of children.5. Be sure cover and feed tube are securely lockedin place before operating food processor.6. Never try to override or tamper with coverinterlock mechanism.23
WARNING: RISK OF FIRE ORELECTRIC SHOCKCONTENTSImportant Unpacking Instructions. 2Important Safeguards. 3Parts. 5Assembly Instructions.6Machine Controls. 6Machine Functions. 6User Guide. 8Cleaning, Storage and Maintenance. 9For Your Safety. 9Technical Data.9Troubleshooting. 10Recipes. 12Warranty Information. 57 The lightning flash with arrowheadsymbol within an equilateral triangleis intended to alert the user to thepresence of uninsulated, dangerousvoltage within the product’s enclosurethat may be of sufficient magnitude toconstitute a risk of fire or electric shockto persons. The exclamation point within anequilateral triangle is intended to alertthe user to the presence of importantoperating and maintenance (servicing)instructions in the literatureaccompanying appliance.SPECIAL CORD SETINSTRUCTIONS NOTICEPARTSThe machine includes:1. Housing base with a fixed accessory adapterand convenient button controls7.2. 8-cup (1.9 L) work bowl3. Cover with feed tube4. Pusher that slides inside thefeed tube5. Metal chopping/mixing/dough blade6. Fine reversible slicing/shredding disc6.7. Medium reversible slicing/shredding disc8. BPA free (not shown)All materials that come in contact withfood or liquid are BPA freeIf you have a die-cast metal unit, for yourprotection it is equipped with a 3-conductor cord setthat has a molded 3-prong grounding-type plug, andshould be used in combination with a properly connected grounding-type outlet as shown in Figure A.5.If a grounding-type outlet is not available, an adapter, shown in Figure B, may be obtained so that a2-slot wall outlet can be used with a 3-prong plug.As shown in Figure C, the adapter must be groundedby attaching its grounding plug under the screw ofthe outlet cover plate.4.NOTE: Do not remove the grounding prong.CAUTION: Before using an adapter,it must be determined that the outlet coverplate screw is properly grounded. If in doubt,consult a licensed electrician. Never use anadapter unless you are sure it is properlygrounded.NOTE: Use of an adapteris not permitted in Canada.3.WARNING2.RISK OF FIRE OR ELECTRIC SHOCKDO NOT OPENWARNING: TO REDUCE THE RISK OF FIRE OR ELECTRIC SHOCK,DO NOT REMOVE COVER (OR BACK)NO USER-SERVICEABLE PARTS INSIDEREPAIR SHOULD BE DONE BY AUTHORIZED SERVICE PERSONNEL ONLY41.5
ASSEMBLYINSTRUCTIONSMACHINE CONTROLSHigh and Low Control ButtonsThe High and Low controls are buttons that allowthe machine to run until Off is selected.Before First Use1. Properly assemble and engage the machine.Before using your Cuisinart Elemental 8 FoodProcessor for the first time, wash the work bowl,work bowl cover, pusher, blade, and discs (seeCleaning Instructions on page 10).2. Add ingredients to the work bowl, either throughthe feed tube or directly into the bowl.3. Press the High or Low button. The blue LED lightwill illuminate and the motor will start.1. P lace the food processor base on a dry, levelcountertop with the controls facing you. Do notplug the unit in until it is fully assembled.4. Press the Off button when finished.Pulse Button2. W ith the bowl on the base, use the handle toturn the work bowl clockwise to lock it onto thehousing base.The Pulse control is a button that allows themachine to run only while it is being pressed. Thiscapability provides more accurate control of theduration and frequency of processing. Unless otherwise specified, a pulse should be about one second.CHOPPING/MIXING/DOUGH BLADE1. Place the work bowl on top, with the workbowl handle just to the right of center. Turn thework bowl clockwise to lock it onto thehousing base.1. With the machine properly assembled andengaged, and ingredients in the work bowl, pressthe Pulse button repeatedly as needed. The blueLED High light will illuminate upon activation.2. Carefully lift and place the blade over the workbowl accessory adapter. Blade should fit snuglyand rest on the bottom of the work bowl.MACHINE FUNCTIONSUsing the Chopping/Mixing/DoughBladeChopping3. Plug in the housing base.4. Add desired ingredients to work bowl.5. Place work bowl cover on work bowl, with thefeed tube just to the right of center. Turnclockwise to lock onto work bowl. For raw ingredients: peel, core and/or removeseeds and pits. Food should be cut into even,½ to 1-inch (1.25 to 2.5 cm) pieces. Foods cutinto same size pieces produce the most evenresults.6. Align pusher with the feed tube opening on thework bowl cover and slide down to the bottom.7. You are now ready to operate the machine. T o purée solids for a soup or sauce: Strain thesolids from the liquid and process the solidsalone. Add cooking liquid and process as needed.Using the Reversible Slicing/Shredding Discs The slicing disc makes whole slices. It slicesfruits and vegetables, cooked meat and semifrozen raw meat. The shredding disc shredsmost firm and hard cheeses. It also shredsvegetables like potatoes, carrots and zucchini. Always pack food in the feed tube evenlyfor slicing and shredding. The food will dictatethe amount of pressure: Use light pressure forsoft foods, medium pressure for medium foods,and firm pressure for harder foods. Alwaysprocess with even pressure. For round fruits or vegetables: Remove a thickslice on the bottom of the food so that it sitsupright in the feed tube. If food does not fit inthe feed tube, cut in half or quarters to fit.Process with even pressure. For small ingredients like mushrooms, radishesor strawberries: Trim the ends so the food sitsupright in the feed tube. When slicing or shredding cheese, be sure thatthe cheese is well chilled. To shred leafy vegetables like lettuce or spinach:Roll leaves together and stand them up in feedtube. Process with even pressure.NOTE: Always use pusher when slicingor shredding. Never put your hands inthe feed tube when unit is running. Pulse food in 1-second increments to chop. Forthe finest chop, either hold the pulse down orpress High or Low to run the machinecontinuously. Watch ingredients closely toachieve desired consistency and scrape the workbowl as necessary. Low speed is recommendedfor making doughs and batters. High speed isrecommended for most other chopping,processing and slicing/shredding tasks.REVERSIBLESLICING/SHREDDING DISCS1. Place the work bowl on top of the base, withthe work bowl handle just to the right of center.Turn the work bowl clockwise to lock it ontothe housing base.2. Choose desired disc.3. Carefully place disc over accessory adapter,with the side being used facing up.Puréeing T o purée fresh fruits or cooked fruits/vegetables:Ingredients should be cut into 1-inch (2.5 cm)pieces; a smooth purée is best achieved when allthe pieces are equal in size. Pulse to initially chopand then process High or Low until food ispuréed; scrape the work bowl as necessary. Donot use this method to purée cooked whitepotatoes.4. Place work bowl cover onto work bowl, withthe feed tube just to the right of center. Turnclockwise to lock onto work bowl.5. Align pusher with the feed tube opening on thework bowl cover and slide down to the bottom.6. Plug in the housing base.7. You are now ready to operate the machine.67
USER GUIDEYou can slice, shred and chop a multitude of vegetables and fruits in the Cuisinart Food Processor. What you may not knowis that the food processor is the perfect tool for a number of other tasks, such as softening butter, making bread crumbs,making baby food, etc. Here is a guide that will help you in preparing just about anything!FOODTOOLDIRECTIONSSoft Cheeses(ricotta, creamcheese, cottagecheese, etc.)Chopping/Mixing/Dough BladeHave cheese at room temperature. When applicable, cut into 1-inch(2.5 cm) pieces. Process until smooth, stopping to scrape down the sides of the bowlas needed. Perfect for making cheesecakes, dips, pasta fillings, etc.Firm Cheeses(Cheddar, Swiss,Edam, Gouda, etc.)Slicing/Shredding DiscCheese should be well chilled before slicing/shredding. Cut to fit feed tube. Use lightto medium pressure when slicing/shredding.Hard Cheeses(Parmesan,Romano, etc.)Chopping/Mixing/Dough BladeSlicing/Shredding DiscChill cheese(s). If using the metal blade, cut into ½-inch (1.25 cm) pieces. Pulse tobreak up and then process until finely grated. This will produce a nice grated cheese.If slicing or shredding, cut to fit feed tube. Use light to medium pressure when slicing/shredding.Baby FoodChopping/Mixing/Dough BladeAs for all fruit and vegetable purées, cut ingredients into 1/2 to 1-inch (1.25 to 2.5 cm)pieces. Steam ingredients until completely soft. Pulse to chop, then process untilcompletely smooth (add steaming liquid through the feed tube when processing ifnecessary). To ensure there are no lumps, press mixture through a fine mesh strainer.Keeps frozen in ice cube trays for individual 1-ounce (30 g) portions.ButterChopping/Mixing/Dough BladeSlicing/Shredding DiscFor creaming : Have butter at room temperature. Cut into 1-inch (2.5 cm) pieces.Process, scraping bowl as necessary. For compound (flavoured) butters, processflavouring ingredients, such as herbs, zest, vegetables, etc., before adding butter.For shredding/slicing: Freeze briefly. Use light to medium pressure to shred or slice.Shredded butter is great for preparing certain pastry doughs. Sliced butter is greatfor serving alongside corn on the cob or freshly made ng/Dough BladeBreak into pieces. Pulse to break up, and then process until desired consistency. Thiswill make perfect bread/cracker/chip crumbs for coating meats and fish. Processedcookies make delicious pie and cake crusts!Milk Shakes/SmoothiesChopping/Mixing/Dough BladeFor milk shakes, first add ice cream. While unit is running, add milk through the feedtube until desired consistency is achieved. For smoothies, add fruit first, then add theliquid through the feed tube while unit is running.Fresh HerbsChopping/Mixing/Dough BladeWash and dry herbs VERY well. Pulse to roughly chop. Continue pulsing until desiredconsistency is achieved.NutsChopping/Mixing/Dough BladePulse to chop to desired consistency. To make a nut butter, pulse to break up, andthen process until smooth, stopping to scrape down as needed."Ice Cream"Chopping/Mixing/Dough BladePut frozen fruit cut into 1-inch (2.5 c) pieces into the work bowl, with liquid (juice ormilk), any desired sweeteners, such as sugar, honey, simple syrup, and other flavors.Process until smooth.Whipped CreamChopping/Mixing/Dough BladeProcess well-chilled cream until cream begins to thicken. Add sugar as desired;process continuously until cream reaches desired consistency. This cream is denseand perfect as a whipped topping for cake or ice cream.Superfine SugarChopping/Mixing/Dough BladeProcess granulated sugar for about 1 minute until finely ground. Excellent for using inmeringues and other baked goods.Ground MeatChopping/Mixing/Dough BladeCut meat into ½-inch (1.25 cm) pieces. Pulse to chop, about 14 long pulses, or untildesired consistency is achieved. If a purée is desired, continue to process. Neverchop/purée more than 3/4 pound (375 g) at one time.CLEANING, STORAGEAND MAINTENANCEFOR YOUR SAFETY K eep your Cuisinart Elemental 8 FoodProcessor ready to use on the kitchen counter.When not in use, leave it unplugged. K eep the blade and discs out of the reachof children. A ll parts except the housing base are dishwashersafe, and we recommend washing them in thedishwasher on the top rack only. Due to intensewater heat, washing the work bowl, cover andaccessories on the bottom rack may causedamage over time. Insert the cover with the feedtube facing up to ensure proper cleaning. Insertthe work bowl and pusher upside down fordrainage. Remember to unload the dishwashercarefully wherever you have placed sharp bladesand discs. T o simplify cleaning, rinse the work bowl, cover,pusher and blade or disc immediately after useso food won’t dry on them. Be sure to positionthe pusher upside down for drainage. If foodlodges in the pusher, remove it by running waterthrough it, or use a bottle brush. I f you wash the blade and discs by hand, do itcarefully. When handling, use the plastic hubs.Avoid leaving them in soapy water where theymay disappear from sight. To clean the metalblade, fill the work bowl with soapy water, holdthe blade by its plastic center and move it rapidlyup and down on the center shaft of the bowl.Use of a spray attachment is also effective. Ifnecessary, use a brush. T he work bowl is made of SAN plastic. It shouldnot be placed in a microwave oven. T he housing base may be wiped clean with asoapy, non-abrasive material. Be sure to dry itthoroughly. I f the feet leave spots on the counter, spray themwith a spot remover and wipe with a dampsponge. I f any trace of the spot remains, repeat theprocedure and wipe the area with a dampsponge and nonabrasive cleaning powder.IMPORTANT: Never store any blade or disc on themotor shaft. No blade or disc should be placed onthe shaft except when the processor is about tobe used.MAINTENANCE: Any other servicing should beperformed by an authorized service representative. Like all powerful electrical appliances, a foodprocessor should be handled with care. Followthese guidelines to protect yourself and yourfamily from misuse that could cause injury. Handle and store metal blade and discs carefully.Their cutting edges are very sharp. Never put blade or discs on the motor shaft untilthe work bowl is locked in place. Always be sure that the blade or disc is down onmotor shaft as far as it will go. Always insert the metal blade in the work bowlbefore putting ingredients in bowl. When slicing or shredding food, always use thepusher. Never put your fingers or spatula intofeed tube. Always wait for the blade or disc to stopspinning before you remove the pusher assemblyor cover from the work bowl. Always unplug the unit before removing food,cleaning, or putting on or taking off parts. Always remove work bowl from base of machinebefore you remove the chopping/mixing/doughblade. Be careful to prevent the chopping blade fromfalling out of the work bowl when emptying thebowl. Remove it before tilting the work bowl.TECHNICAL DATAThe motor in your food processor operates on astandard line operating current. The appropriatevoltage and frequency for your machine are shownon a label on the bottom of the base.An automatic, temperature-controlled circuitbreaker in the motor ensures complete protectionagainst motor burnout. If the processor runs for anexceptionally long time when chopping, mixing orkneading a thick or heavy mixture in successivebatches, the motor may overheat. If this happens,the processor will stop. Turn it off and wait for themotor to cool before proceeding. It will usuallycool within 10 minutes. In extreme cases, it couldtake an hour.Safety switches prevent the machine from operatingwhen the work bowl or the cover is not locked intoposition. The motor stops within seconds when themotor is turned off; and when the pusher assembly isremoved, a fast-stop circuit also enables the motor tostop within seconds.Cuisinart offers a Limited Two-Year Warranty onthe entire machine.89
TROUBLESHOOTINGFood Processing1. Problem: The food is unevenly processed.Solution: The ingredients should be cut evenly into1/2 to 1-inch (1.25 to 2.5 cm) pieces beforeprocessing. Process in batches to avoid overloading.2. Problem: Slices are uneven or slanted.Solution: Place evenly cut food, cut side down, into thefeed tube. Apply even pressure on the pusher.3. Problem: Food falls over in feed tube.Solution: Feed tube should be packed full for best results.4. Problem: Some food remains on top of the disc.Solution: It is normal for small pieces to remain; cutremaining bits by hand and add to processedingredients.Dough Kneading1. Problem: Motor slows down.Solution: Amount of dough may exceed maximumcapacity of your food processor. Remove halfand process in two batches. Dough may be too wet (see number 8).If motor speeds up, continue processing. Ifnot, add more flour, 1 tablespoon (15 ml) at atime, until the motor speeds up. Process untildough cleans the sides of the work bowl.2. Problem: Blade doesn’t incorporate ingredients.Solution: Always start the food processor before addingliquid. Add liquid in a slow, steady stream, orthrough the drizzle hole in the pusher, allowing the dry ingredients to absorb it. If too muchliquid is added, wait until ingredients in the workbowl have mixed, then add remaining liquidslowly (do not turn off the machine). Pour liquidonto dough as it passes under feed tube opening; do not pour liquid directly onto bottom ofthe work bowl.3. Problem: Blade rises in work bowl.Solution: Excessively sticky dough can cause blade torise. Carefully reinsert blade and immediatelyadd 2 tablespoons (30 ml) of flour through thefeed tube while the machine is running.4. Problem: Dough doesn’t clean inside of thework bowl.Solution: A mount of dough may exceed maximumcapacity of your food processor. Remove halfand process in two batches. Dough may be too dry (see number 7). Dough may be too wet (see number 8).5. Problem: Nub of dough forms on top of bladeand does not become uniformly kneaded.Solution: Stop machine, carefully remove dough, divide itinto 3 pieces and redistribute them evenly in thework bowl.6. Problem: Dough feels tough after kneading.Solution: Divide dough into 2 or 3 pieces andredistribute evenly in bowl. Process10 seconds or until uniformly soft and pliable.7. Problem: Dough is too dry.Solution: W hile machine is running, add water,1 tablespoon (15 ml) at a time, until doughcleans the inside of the bowl.8. Problem: Dough is too wet.Solution: While machine is running, add flour,1 tablespoon (15 ml) at a time, until doughcleans the inside of the bowl.3. Problem: The motor slowed down duringoperation.Solution: This is normal as some heavier loads (e.g.,slicing/shredding cheese) may require themotor to work harder. Simply reposition thefood in the feed tube and try again. The maximum load capacity may have beenexceeded. Remove some of the ingredients andcontinue processing.4. Problem: The food processor vibrated/movedaround the countertop during processing.Solution: Make sure the rubber feet at the bottom of theunit are clean and dry. Also make sure that themaximum load capacity is not being exceeded. This is normal as some heavier loads (e.g.,slicing/shredding cheese) may require themotor to work harder.Technical1. Problem: The motor does not start.Solution: There is a safety interlock to prevent the motorfrom starting if it is not properly assembled.Make sure the work bowl and work bowl coverare securely locked into position. If the motor still will not start, check the powercord and outlet.2. Problem: The food processor shuts off duringoperation.Solution: The cover may have become unlocked; check tomake sure it is securely in position. A safety protector in the motor prevents themotor from overheating, which is caused byexcessive strain. Press the Off control buttonand wait 20 to 30 minutes to allow the foodprocessor to cool off before resuming.1011
Recipe Booklet8-CUP (1.9 L) FOOD PROCESSORBASICSBasic Fresh Breadcrumbs.14Dill Butter.15Vegetable Cream Cheese.16Salmon Cream Cheese.16Peanut Butter.17Basic Vinaigrette.17Tahini Dressing.18Caesar Dressing.19Mayonnaise.20Basil Pesto.21Simple Tomato Sauce.22Rémoulade.23Tomato Salsa.23Chunky Guacamole.24BREAKFAST & BRUNCHMorning Glory Muffins.25Zucchini Spice Bread.26Onion, Pepper and Potato Frittata.27APPETIZERSTen-Layer Nachos.28Refried Beans.29Hummus.30Tea Sandwiches – 2 varieties (Radish-Dill; Cucumber-Salmon).31Stuffed Breads – 2 varieties (Sausage; Broccoli Rabe).3312SOUPS/SALADS/SIDESGazpacho.36Creamy Sweet Potato Soup.37Spring Vegetable Minestrone.38Coleslaw.39Chopped Salad.40Shredded Brussels Sprouts.41Potato-Zucchini-Carrot Cakes.42ENTRÉESFalafel.43Pizza Margherita.44Mushroom, Leek and Gruyère Quiche.45Chicken Pot Pie.46Vegetable Stir-Fry.47Tacos Americanos.48Fish Sticks.49DOUGHS/BREADSPizza Dough.50Pâte Brisée .51Buttery Dinner Rolls.
Always unplug from outlet when not in use, before putting on or taking off parts, before removing food and before cleaning. To unplug, grasp plug and pull from electrical outlet. Never pull cord. 4. Do not use outdoors. 5. Do not let cord hang over edge of table or counter, or touch hot surfaces