Transcription
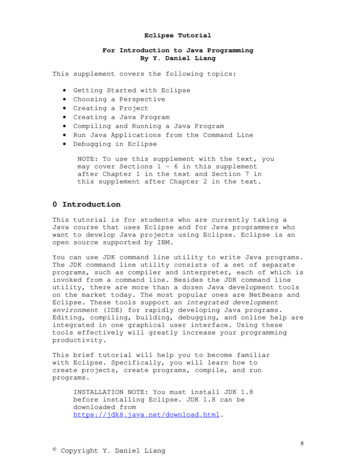
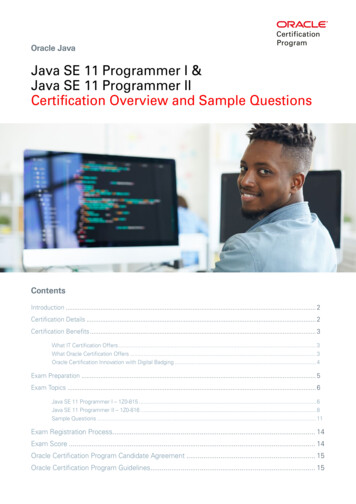
Using Eclipse for Java ProgrammingNOTE: Before using Eclipse for the first time, create a folder on yourdesktop named MyWorkspace. This folder will be used to store all ofyour Java projects.1. Start Eclipse. (Windows: Find it under All Programs in your start Menu.Macintosh: Find it under Go Applications in the Finder.)2. Select a workspace:(a) Click on Browse and select the folder MyWorkspace from yourDesktop. DO NOT USE ANY OTHER WORKSPACE.the Eclipse iconyour username should be here instead(b) Click OK. After some setup, you will see the Eclipse SDK window with aPackage Explorer tab:NOTE: The first timeyou start Eclipse, youwill see a Welcomescreen first. Click theX to close it for now.
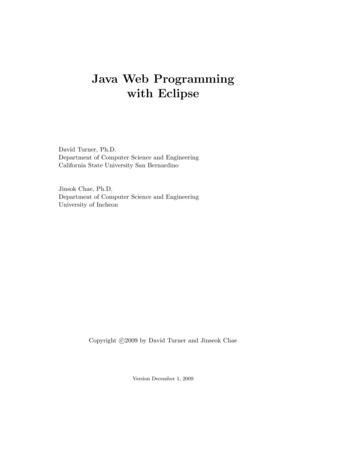
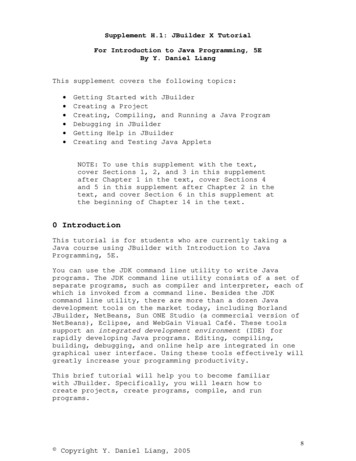
3. Each Java program we will write will be stored in its own project. From theEclipse menu bar at the top of the screen, choose File New Java Project You will see the following New Java Project window:If you are creatinga Java projectfrom scratch, youwill select the firstoption and go toStep 4.If you are creatinga Java projectfrom files given toyou, you will selectthe second optionand go to Step 6.4. If you are starting a brand new Java project without any initial program code:If you are starting aJava project using afolder with Javacode that is alreadywritten for you, goto Step 6 instead.(a) In the New Java Project window, give the project an appropriate namethat’s easy to identify. For example, type in MyFirstProgram as theProject Name. You will notice that the Location is automatically updatedto be a folder in your workspace with the same name.(b) For the “Contents” option, make sure you select “Create new project inworkspace”. Generally, you do not need to change any other options inthis window. You should be using Java compiler 1.5.0 for your work.(c) Click Finish. You will see the SDK display your project in the leftcolumn, as shown in the picture on the next page.
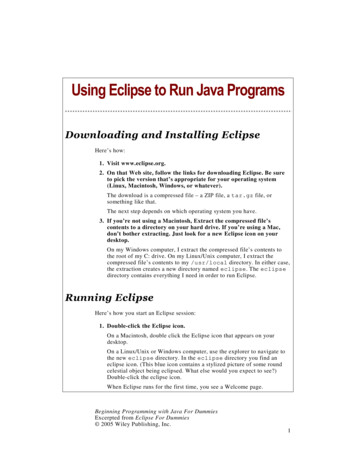
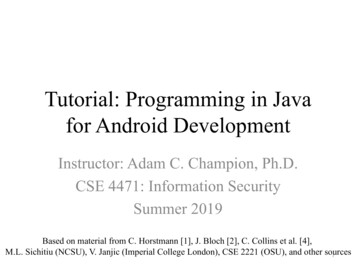
5. Each program has one or more classes, one of which must contain a mainmethod. To add a class to a project:(a) Be sure that the name of the project folder is highlighted (e.g. see pictureabove).(b) Then, from Eclipse’s menu bar at the top of your desktop, select New Class. (See next page for a picture.)(c) Type in the name of the class in the space provided (e.g.FavoriteFoodDisplayer).(d) Select the public modifier.(e) If this class will contain a main method, check off the appropriate boxunder “Which method stubs would you like to create?” (In this example,our class will have a main method.)
This warning can beignored for 15-100.Check this boxonly if your classrequires a mainmethod.(f) Click Finish. You will see this class appear in the Package Explorer inyour default package.Note that the class isstored in a file with thesame name as the classalong with an extension“.java”.
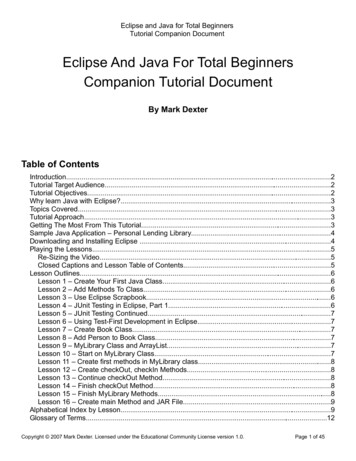
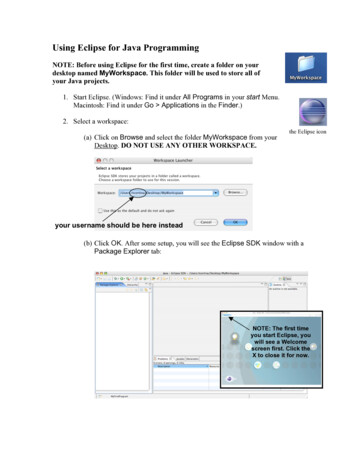
(g) Enter the following highlighted Java code exactly as it appears in themain method as shown below:This line is anautomaticallygenerated comment.You may erase thisline if you wish.If you make any syntax errors, you will see a red X appear to the left ofthe line with the error. Click on the X to get more info about the error ifyou need help.For example, if you leave the quotation marks out from the code above,you will see something like this:Syntax error(h) Periodically, save your work using File Save.(i) If your Java program requires more than one class, you can add additionalclasses to your project, repeating the instructions of this step.(j) When you are ready to run your program, continue with step 7.6. If you are creating a project using Java files that are already stored in afolder for you (for example, the folder is named MySecondProgram):If you are startinga Java projectfrom scratch, goback to Step 4.(a) IMPORTANT: Make sure the folder with the Java files is stored insideyour MyWorkspace folder before you go on to the following steps.(b) For the “Contents” option, select “Create project from existing source”. Clickthe Browse button to select the folder that contains the Java files that youwant to use to create the new project.(c) In the New Java Project window, enter the name of the same folder as theProject Name. (A message will appear as you are typing that will warn youto use the same name as the project folder.)(d) Click Finish. (See pictures on next page.)
REMEMBER:Drag the projectfolder into theMyWorkspacefolder FIRST.For an existingproject folder,choose thisoption.Make sure theproject name andfolder name arethe same.
7. If your program has no syntax errors, you can run your program as follows:(a) In the Package Explorer, you must highlight the Java file that has themain method in it.(b) Choose Run Run As Java Application.(c) If your program has no syntax errors, your program will run and the outputwill be displayed in the Eclipse SDK Console window in the bottom rightsection:Before you try to run yourprogram, you must make surethe Java class that has themain method is highlighted.NOTE: Just because your program has no syntaxerrors, this does not mean your program will runcorrectly! You could have logical or runtimeerrors that the compiler cannot pick up!8. To remove a project from your workspace, select the name of a project in thePackage Explorer (e.g. MySecondProgram), and then choose Edit Delete.You have the option of removing just the project name or all of the code fromyour workspace. (Think twice before you do this!)9. To exit out of Eclipse, choose File Exit.Written by Tom CortinaRevised August 2007
this window. You should be using Java compiler 1.5.0 for your work. (c) Click Finish. You will see the SDK display your project in the left column, as shown in the picture on the next page. If you are starting a Java project using a folder with Java code that is already written for you, go to Step 6 ins