Transcription
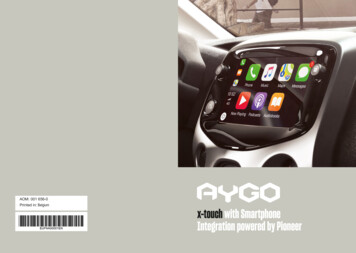
AOM: 001 656-0Printed in: Belgiumx-touch with SmartphoneIntegration powered by Pioneer
7-inch touchscreen tablet7-inch touchscreen tabletThe various functions and settingsdescribed will vary depending on the modeland configuration of your vehicle.Telephones that are connected viaMirrorLink may become hot. In suchinstances, the battery of the telephone isdischarged, for safety reasons.Multimedia system Bluetooth Telephone Mirror Screen GPS NavigationContentsGetting startedControls on the steering wheelMenusMirror Screen RadioDAB (Digital Audio Broadcasting) ly asked questionsFor safety reasons, any operations thatrequire sustained attention from the drivermust be performed while the vehicle isstationary.In order to preserve the battery, thesystem cuts off once power saving modeis activated, 20 minutes after the engine isstopped, on vehicles fitted with a “HandsFree Entry and Start” system.2334789111517201
7-inch touchscreen tabletGetting startedSmartphone voice commands via thesystem.Press this button briefly to activate thevoice command function.In the event of extended periods in thesunshine and in very hot temperatures,the system may go into stand-by modeto protect itself (completely switching offthe screen and sound) for a minimum of5 minutes. It will return to its original stateonce the temperature of the passengercompartment falls.In ACC mode or when starting the vehicle.Press once to turn off the sound andactivate stand-by mode (displays thetime and shortcuts).Press and hold to restart the system.Rotate to adjust the volume (eachsource is independent).Press once to access the menu wheel,then press the buttons displayed onthe touchscreen.Press a second time to return to thelast source activated. Rotate the knobto access a list or a higher or lowertrack number.Multiple fingers must not be used to pressthe buttons as such operations will not berecognised.The screen is a “capacitive” touchscreen.To maintain the screen, it is recommendedto use a soft, non-abrasive cloth (aglasses-cleaning cloth) with no additionalproduct, or a damp cloth.Do not used pointed objects on the screen.Do not touch the screen with wet hands.Audio source selection (depending on version):- Radios “FM”/“AM”/“DAB”*.- “USB” playback devices.- Telephone connected via Bluetooth andBluetooth multimedia streaming.- Media player connected to the auxiliarysocket (jack, cable not supplied).Shortcuts: certain information is displayed in asidebar on the left-hand side of the touchscreen.It is possible to access media, telephonefunctions or “Mirror Screen ” mode directly or tochoose the audio source directly.*Depending on the equipment.2
7-inch touchscreen tabletControls on the steeringwheelMenusAudio sourceSelect an audio source or a radiostation, or view photos or videos.Changing the multimedia source.Press and hold: activate/deactivate the“Mute” function of the radio or pausemedia source playback.Radio: scroll through the saved radiostations in ascending order.Media: next track.Accept an incoming call.When not communicating: press toenter the contact list, press a secondtime to scroll through the history.Reject the incoming telephone call.End the current telephone call.When not communicating: press toreturn to the radio screen or to theclock, if the radio is not active.TelephoneConnect a telephone using Bluetooth .Radio: scroll through the saved radiostations in descending order.Media: previous track.Increase the volume.Decrease the volume.3
7-inch touchscreen tabletConfigurationCalibrate the sound and brightnessand activate or deactivate certainparameters depending on use.Vehicle informationAccess the on-board computer.Select the desired parameter.Activate or deactivate the automatic launch ofCarPlay or Android Auto.The Wi-Fi connection is availableonly in MirrorLink mode.In CarPlay mode, MTP media isdeactivated.Smartphone connection viaCarPlay ConnectionDepending on the equipment/version.Configure the connection parameters.Launch a connected mode (CarPlay ,MirrorLink or Android Auto).Mirror Screen Connection via MirrorScreen Before connecting the USB cable, activatethe desired mode in the “Settings” menu.By default, the CarPlay and AndroidAuto modes are activated.Press “Settings”.Select “Connection”.4For safety reasons, and because it requiressustained attention from the driver, it isprohibited to use a smartphone whiledriving.Operations must be performed while thevehicle is stationary.
7-inch touchscreen tabletBy synchronising their smartphone, userscan view their smartphone applicationsthat are compatible with the CarPlay technology on the screen of the vehicle,having previously activated the CarPlay function on the smartphone.Principles and standards are changingconstantly; therefore, it is recommendedthat you update the operating system ofyour smartphone.To view the eligible smartphone models,visit the website for the company in yourcountry.Connect the USB cable. Thesmartphone is in charging mode whenconnected via the USB cable.Press “CarPlay” to display theCarPlay interface.When the CarPlay interface is displayed on thesystem screen, the menu bar is displayed on theleft-hand side of the screen by default.Depending on the driver position, you canchange the position of the menu bar, placing iton either the left- or right-hand side.Select “Steering wheel position” and thenselect the desired position.Disconnect and reconnect your smartphone inorder for this change to take effect.On connection of the USB cable, theCarPlay function deactivates the system’sBluetooth mode.Smartphone connection viaMirrorLink Available depending on country of purchase.For safety reasons, and because it requiressustained attention from the driver, it isprohibited to use a smartphone whiledriving.Operations must be performed while thevehicle is stationary.By synchronising their smartphone, userscan view their smartphone applicationsthat are compatible with the MirrorLink technology on the screen of the vehicle.Principles and standards are constantlychanging; therefore, in order for thecommunication process between thesmartphone and the system to work, youmust always unlock your smartphoneand update the operating system ofyour smartphone, as well as the dateand time of your smartphone and thesystem.To view the eligible smartphone models,visit the website for the company in yourcountry.For safety reasons, applications can beviewed only when the vehicle is stationary;once driving recommences, their display issuspended.The “MirrorLink ” function requires acompatible smartphone and applications.You have two options for connecting inMirrorLink mode.Press “Settings”.Select “Connection”.5
7-inch touchscreen tabletOption 1:It is recommended to activatethe Bluetooth function on yoursmartphone when connected to thesystem.Connect the USB cable. Thesmartphone is in charging mode whenconnected via the USB cable.Option 2:If you have a phone that is compatible with theMirrorLink Wi-Fi connection.On the system, activate the option “ConnectMirrorLink Wi-Fi”.Activate Wi-Fi connection sharing on yoursmartphone.Press “MirrorLink ” to launch thesystem application.On certain smartphones, it is necessary toactivate the “MirrorLink ” function.During the process, several pageswill be displayed on the screenconcerning the relationship betweencertain functions. Accept to launch andcomplete the connection.6Once the connection is established, a pageis displayed showing the applications alreadydownloaded in your smartphone that arecompatible with MirrorLink technology.Along the edge of the MirrorLink display,access to the selection of different musicsources remains available by using the buttonslocated in the bar at the top.The system menus can be accessed at any timeusing dedicated buttons.Depending on your network quality, therewill be a pause until the applications areavailable.Smartphone connection viaAndroid AutoFor safety reasons, and because it requiressustained attention from the driver, it isprohibited to use a smartphone whiledriving.Operations must be performed while thevehicle is stationary.By synchronising their smartphone, userscan view their smartphone applicationsthat are compatible with the AndroidAuto technology on the screen of thevehicle. Principles and standards areconstantly changing; therefore, in orderfor the communication process betweenthe smartphone and the system to work,you must always unlock your smartphoneand update the operating system ofyour smartphone, as well as the dateand time of your smartphone and thesystem.To view the eligible smartphone models,visit the website for the company in yourcountry.For safety reasons, applications can beviewed only when the vehicle is stationary;once driving recommences, their display issuspended.The “Android Auto” function requires acompatible smartphone and applications.Connect the USB cable. Thesmartphone is in charging mode whenconnected via the USB cable.
7-inch touchscreen tabletPress “Android Auto” to launch thesystem application.During this process, several pageswill be displayed on the screenconcerning the relationship betweencertain functions. Accept to launch andcomplete the connection.Along the edge of the Android Auto display,access to the selection of different musicsources remains available by using the buttonslocated in the bar at the top.The system menus can be accessed at any timeusing dedicated buttons.Depending on your network quality, therewill be a pause until the applications areavailable.RadioSelecting a stationPress “Audio source” to display theaudio source wheel.Select “FM”.Select the “Stations” tab and thenselect a station from among the savedradio stations.Select “FM”.Select “FM radio settings” and then“Refresh station list” to refresh thelist.Select the “Manual” tab to find astation.If necessary, change the audio sourceby pressingthe shortcut in the “Audio source”wheel in the bar at the top.Select “AM” or “DAB” (depending onequipment).The external environment (hills, buildings,tunnels, car parks, underground, etc.)may block reception, including in RDSfrequency following mode. This is a normalphenomenon in the propagation of radiowaves and is not, in any way, a result of afault with the audio system.Changing a frequencyPress “Audio source” to display theaudio source wheel.Press the step-by-step buttons to finda higher or lower frequency.ORPress the automatic buttons to find ahigher or lower frequency.ORRotate the knob positioned belowand to the right of the screen to find ahigher or lower frequency.Saving a stationSelect a station or a frequency (see the“Changing a frequency” section).Select the “Presets” tab and thenpress and hold one of the numberedlocations.7
7-inch touchscreen tabletActivate/Deactivate the RDSPress “Audio source” to display theaudio source wheel.Select “FM”.Select “FM radio settings”.Activate/Deactivate “Region codechange”.The RDS, if active, makes it possible tocontinue listening to a single station usingfrequency following. However, in certainconditions, there is no guarantee that itwill be possible to follow the radio stationthroughout the country, as radio stationsdo not cover 100% of the national territory.This is the reason for the loss of radioreception when on the move.DAB (Digital AudioBroadcasting) RadioDigital radioDigital radio allows:superior listening quality, together with thedisplay of additional information (albumcover, etc.) concerning what is currentlyplaying on the radio. Select “DAB” from theaudio source wheel.The various “multiplexes/ensembles”provide a selection of radio stations, inalphabetical order.Press “Audio source” to display theaudio source wheel.Select “DAB”.Select the “DAB radio settings” tab.Activate “L-Band”.Select the “Stations” tab and thenselect a station from among the savedradio stations.Select the “Manual” tab to find astation.8If the selected “DAB” station is notavailable, the “FM” band display will appearon the screen.110982765341 “DAB” band display.2 Display of the name and of the “Radiotext”for the current station.3 Next Multiplex.4 Next radio station.5 Display of the name and number of the“Multiplex” (also called an “Ensemble”)selected.6 Selection of radio station.7 Saved station.Short press: saved radio station selection.Long press: save a station.8 Previous radio station.9 Previous Multiplex.10 “DAB radio settings”.
7-inch touchscreen tabletDAB/FM followingDigital radio coverage does not extend to100% of the national territory.When the digital signal is of poor quality,the “DAB alternative frequency” optionmakes it possible to continue listeningto a single station, by switching to thecorresponding “FM” analogue radio station(where possible).If the “DAB” station selected is notavailable, or if the “L-Band” is inactive,the sound is cut off once the quality of thedigital signal becomes too low.MediaUSB portPress “Audio source” to display theaudio source wheel.Auxiliary (A/V) port, audioand video.Select “DAB”.Select the “DAB radio settings” tab.Activate “DAB alternative frequency”.If the “DAB alternative frequency”following is active, there is an interval ofa few seconds while the system switchesto analogue radio “”, sometimes there isalso a change in volume. Once the qualityof the digital signal returns to a goodlevel, the system switches back to “DAB”automatically.The system is composed of playlists(temporary memory), the creation of whichmay take between a few seconds andseveral minutes following initial connection.Reducing the number of non-musicfiles and the number of folders makes itpossible to reduce this waiting time. Theplaylists are updated each time a USB stickis connected or disconnected. However,the audio system memorises these listsand, provided they have not changed, theloading time may be reduced.Insert the USB stick into the USB port orconnect the USB device to the USB port using asuitable cable (not supplied).Audio playbackConnect the portable equipment (MP3 player,etc.) to the JACK input using an audio cable.Video playbackConnect the portable equipment using an audio/video cable that is suitable for playback of filesrecorded in PAL or NTSC format.9
7-inch touchscreen tabletSource selectionPress “Audio source” to display theaudio source wheel (FM, AM, DAB,USB, Bluetooth and A/V).Select the “USB” source.ORSelect the “A/V” auxiliary source.Then use the playback parameters at the bottomof the screen.Once the connection is re-established, thesystem remembers the most recent audioor media source used.The “MODE” button included on thesteering wheel controls makes it possibleto move directly to the next media, which isavailable if the source is active.Watch a videoFor safety reasons, and because it requiressustained attention from the driver, it is onlypossible to watch a video while the vehicleis stationary and the connection is active;once driving recommences, video playbackis suspended.The “Miracast” function requires acompatible smartphone and applications.On the system, activate the “Miracast WiFi” option.Activate Wi-Fi connection sharing on yoursmartphone.It is recommended to favour USBconnection when using the “Miracast”video function.Connect a device to the USB port or connectan audio/video cable to the auxiliary port that iscapable of playback of files recorded in PAL orNTSC format.Press “Settings”.10Using the system, select“Connection”.Select “Connect Miracast”During this process, several pages will bedisplayed on the screen concerning therelationship between certain functions.Accept to launch and complete the connection.To remove the device, press the pausebutton to stop the video and thenremove the device from the USB portor the auxiliary port.Information and adviceThe audio system can play files with thefollowing extensions:“.wma” Ver. 7 and Ver. 8, with a rate of between48 and 192 Kbps and Ver. 9, with a rate ofbetween 48 and 320 Kbps. “.aac”, with a rate ofbetween 16 and 320 Kbps.“.mp3 - MPEG1”, with a rate of between 32 and320 Kbps and “.mp3 - MPEG2”, with a rate ofbetween 8 and 160 Kbps.The sampling rates supported are 11, 22, 44 and48 KHz.Only use USB sticks in FAT32 (File AllocationTable) format.
7-inch touchscreen tabletIt is recommended to use filenames with fewerthan 20 characters, excluding special characters(e.g. « » ? . ; ù), so as to avoid any playback ordisplay problems.The system accepts portable USB MassStorage players or Apple players, viathe USB ports. The adapter cable is notsupplied.The device is managed using the audiosystem controls.Other devices, which are not recognisedby the system when connected, must beconnected to an auxiliary port using a Jackcable (not supplied).The system is capable of audio fileplayback via either the Bluetooth systemor the USB port.Connect the telephone: See the “Telephone”section and then the “Bluetooth” section.Chose the “Connect all” profile or the “Connectas audio player” profile.If playback does not begin automatically, it maybe necessary to launch audio playback usingthe telephone. Playback is controlled using thedevice or the buttons on the audio system.Once streaming is connected, thetelephone will be considered to be a mediasource.It is recommended to activate “Repeat”mode on the Bluetooth device.Apple device connectionThe software version of the audio systemmay be incompatible with the generation ofyour Apple device.TelephonePair a telephone usingBluetooth It is recommended to use the USB cablespecific to the portable device.Audio streamingStreaming makes it possible to listen to theaudio files on the telephone through thespeakers of the vehicle.The types of sorting available are thoseon the portable device connected (artists/albums/genres/tracks/playlists/audio books/podcasts).The default sorting used is sorting byartists. To change the sorting used, go backto the first level of the menu tree and thenselect the sorting desired (by playlists, forexample) and select, to proceed throughthe menu tree to the track desired.Connect the Apple device to the USB port usinga suitable cable (not supplied).Playback begins automatically.For safety reasons, and because it requiressustained attention from the driver,operations to pair mobile telephones tothe hands-free kit of the audio system viaBluetooth must be carried out while thevehicle is stationary.Playback is controlled using the controls of theaudio system.11
7-inch touchscreen tabletActivate the Bluetooth function of the telephoneand ensure that it is “visible to all” (telephonesettings).Press “Audio source” to display theaudio source wheel.Select “Bluetooth audio”.Select “Bluetooth setup”Select the “Add” tab on the system.A wait screen is displayed featuring theBluetooth parameters of the system, togetherwith a Bluetooth PIN by default.Once detected, select the name of the systemon your telephone.In the event of failure, it is recommendedthat you deactivate and then reactivate theBluetooth function on your telephone.Enter the PIN on the telephone and then acceptthe connection (depending on the telephone).The system shows that the services to be usedon the device are: “Telephone” and “Audioplayer”.12The system suggests connecting the telephone:- in “Connect all” mode,- in “Connect as telephone” mode (handsfree kit, telephone only),- in “Connect as audio player” mode(streaming: wireless playback of audio filesfrom the telephone).To change the connection type, Select“Telephone”.Select the “Setup telephone/messaging” tab.Select “Connect telephone”.Select the telephone from the list.Select your choice.Press “OK” to confirm.Within the Bluetooth setup, the systemallows the simultaneous connection of twodevices in telephone mode.It also allows the connection of severaldevices in audio mode, but only a singledevice in playback mode.The services available depend on thenetwork, the SIM card and the compatibilityof the Bluetooth devices used. Checkthe services to which you have access
Integration powered by Pioneer AOM: 001 656-0 Printed in: Belgium. . 20 minutes after the engine is stopped, on vehicles fitted with a “Hands-Free Entry and Start” system. Getting started 2 Controls on the steering wheel 3 .