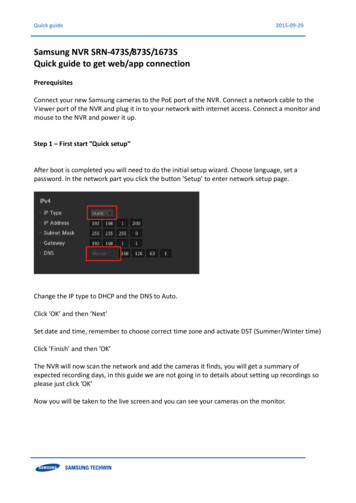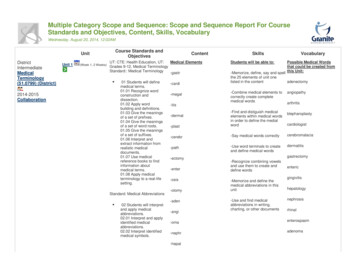
Transcription
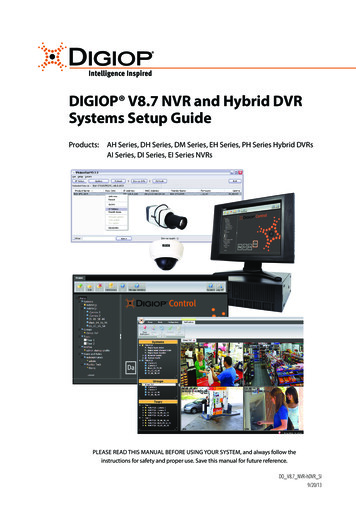
DIGIOP V8.7 NVR and Hybrid DVRSystems Setup GuideProducts:AH Series, DH Series, DM Series, EH Series, PH Series Hybrid DVRsAI Series, DI Series, EI Series NVRsPLEASE READ THIS MANUAL BEFORE USING YOUR SYSTEM, and always follow theinstructions for safety and proper use. Save this manual for future reference.DO V8.7 NVR-hDVR SI9/20/13
Revision HistoryDateReason for Change5/12/12Initial release.11/5/12Supports DIGIOP ELEMENTS V8.5 systems.1/18/13Includes R210 chassis hardware troubleshooting guidelines.5/14/13Supports DIGIOP ELEMENTS V8.6 systems.5/22/13Includes DIGIOP ELEMENTS systems pre-configured with the SV4000 Storage Vault. Includes GoMobile usage.9/16/13Includes DIGIOP DH, DI, DM series hardware chassis CAUTIONOperate this system only in environments where the temperature and humidity are within the recommended range.Operation in temperatures or at humidity levels outside the recommended range may cause electric shock and shorten thelife of the product. Refer to the specifications for each system component for more information.LEGAL NOTICEDIGIOP products are designed to meet safety and performance standards with the use of specific DIGIOP authorized accessories. DIGIOP disclaims liability associated with the use of non-DIGIOP authorized accessories.The recording, transmission, or broadcast of any person’s voice without their consent or a court order is strictlyprohibited by law.DIGIOP makes no representations concerning the legality of certain product applications such as the making,transmission, or recording of video and/or audio signals of others without their knowledge and/or consent. Weencourage you to check and comply with all applicable local, state, and federal laws and regulations beforeengaging in any form of surveillance or any transmission of radio frequencies.Microsoft, Windows, and Internet Explorer are either registered trademarks or trademarks of Microsoft Corporationin the United States and/or other countries. Dell, OptiPlex and PowerEdge are either registered trademarks orunregistered trade marks of Dell Inc in the United States and other countries.Other trademarks and trade names may be used in this document to refer to either the entities claiming the marksand names or their products. DIGIOP, Inc. disclaims any proprietary interest in trademarks and trade names otherthan its own.No part of this document may be reproduced or distributed in any form or by any means without the express writtenpermission of DIGIOP, Inc. 2013 DIGIOP, Inc. All Rights Reserved.9340 Priority Way West Drive, Indianapolis, IN 46240For Sales and Support, please contact your distributor.iiwww.digiop.com
Table of ContentsSECTION 1SECTION 2SECTION 3APPENDIX AAPPENDIX BSystems Overview. . . . . . . . . . . . . . . . . . . . . . . . . . . . . . . . . . . . . . . . . . . . . . . . . . . . . . . . . . . . . . . . . . . . 1Getting Started: Unpacking Your System . . . . . . . . . . . . . . . . . . . . . . . . . . . . . . . . . . . . . . . . . . . . . . . . 32.1 Unpacking the equipment. . . . . . . . . . . . . . . . . . . . . . . . . . . . . . . . . . . . . . . . . . . . . . . . . . . . . . . . . . . . . 32.2 System installation tips. . . . . . . . . . . . . . . . . . . . . . . . . . . . . . . . . . . . . . . . . . . . . . . . . . . . . . . . . . . . . . . 3System Setup. . . . . . . . . . . . . . . . . . . . . . . . . . . . . . . . . . . . . . . . . . . . . . . . . . . . . . . . . . . . . . . . . . . . . . . . 63.1 Check LAN for default IP address compatibility . . . . . . . . . . . . . . . . . . . . . . . . . . . . . . . . . . . . . . . . . . . 73.2 Determine the network settings for each IP device. . . . . . . . . . . . . . . . . . . . . . . . . . . . . . . . . . . . . . . . 83.3 Install and connect the IP camera/encoder to the LAN. . . . . . . . . . . . . . . . . . . . . . . . . . . . . . . . . . . . . 93.4 Repeat for all IP cameras. . . . . . . . . . . . . . . . . . . . . . . . . . . . . . . . . . . . . . . . . . . . . . . . . . . . . . . . . . . . . . 93.5 Install the NVR or hDVR hardware. . . . . . . . . . . . . . . . . . . . . . . . . . . . . . . . . . . . . . . . . . . . . . . . . . . . . . 93.5.1 Install and setup the monitor. . . . . . . . . . . . . . . . . . . . . . . . . . . . . . . . . . . . . . . . . . . . . . . . . . . . . . 93.6 Install analog cameras (hDVR systems only). . . . . . . . . . . . . . . . . . . . . . . . . . . . . . . . . . . . . . . . . . . . . . 93.7 Connect analog cameras, I/O sensors and alarms to hDVR. . . . . . . . . . . . . . . . . . . . . . . . . . . . . . . . . 103.7.1 Make I/O connections. . . . . . . . . . . . . . . . . . . . . . . . . . . . . . . . . . . . . . . . . . . . . . . . . . . . . . . . . . . 193.7.2 For new DIGIOP servers pre-configured with the SV4000 Storage Vault . . . . . . . . . . . . . . . . 193.8 Configure NVR/hDVR clock and network settings . . . . . . . . . . . . . . . . . . . . . . . . . . . . . . . . . . . . . . . . 193.9 Add cameras to the NVR/hDVR. . . . . . . . . . . . . . . . . . . . . . . . . . . . . . . . . . . . . . . . . . . . . . . . . . . . . . . . 203.9.1 Login to DIGIOP Control. . . . . . . . . . . . . . . . . . . . . . . . . . . . . . . . . . . . . . . . . . . . . . . . . . . . . . . . . 213.9.2 DIGIOP VIDEO SERVER - Edit Settings. . . . . . . . . . . . . . . . . . . . . . . . . . . . . . . . . . . . . . . . . . . . . . . 223.9.3 hDVRs only - configure hDVR capture board . . . . . . . . . . . . . . . . . . . . . . . . . . . . . . . . . . . . . . . . 233.9.4 hDVRs only - Add analog cameras . . . . . . . . . . . . . . . . . . . . . . . . . . . . . . . . . . . . . . . . . . . . . . . . 253.9.5 Add a “Discovered” IP cameras to the NVR/hDVR. . . . . . . . . . . . . . . . . . . . . . . . . . . . . . . . . . . . . 273.9.6 Add an IP camera not “Discovered”. . . . . . . . . . . . . . . . . . . . . . . . . . . . . . . . . . . . . . . . . . . . . . . . 303.10 Edit camera settings. . . . . . . . . . . . . . . . . . . . . . . . . . . . . . . . . . . . . . . . . . . . . . . . . . . . . . . . . . . . . . . . . 333.11 Recorder Events. . . . . . . . . . . . . . . . . . . . . . . . . . . . . . . . . . . . . . . . . . . . . . . . . . . . . . . . . . . . . . . . . . . . . 343.11.1 Trigger recording on sensor input (hDVRs only). . . . . . . . . . . . . . . . . . . . . . . . . . . . . . . . . . . . . . 343.12 Configure system notifications . . . . . . . . . . . . . . . . . . . . . . . . . . . . . . . . . . . . . . . . . . . . . . . . . . . . . . . . 353.13 DIGIOP DATA SERVER - Edit Settings. . . . . . . . . . . . . . . . . . . . . . . . . . . . . . . . . . . . . . . . . . . . . . . . . . . . 363.13.1 Add data devices . . . . . . . . . . . . . . . . . . . . . . . . . . . . . . . . . . . . . . . . . . . . . . . . . . . . . . . . . . . . . . . 373.14 Viewing video from your cameras with DIGIOP Connect. . . . . . . . . . . . . . . . . . . . . . . . . . . . . . . . . . 383.14.1 Install DIGIOP Connect . . . . . . . . . . . . . . . . . . . . . . . . . . . . . . . . . . . . . . . . . . . . . . . . . . . . . . . . . 383.14.2 Login to DIGIOP ELEMENTS through DIGIOP Connect. . . . . . . . . . . . . . . . . . . . . . . . . . . . . . . 393.14.3 Logout of DIGIOP Connect . . . . . . . . . . . . . . . . . . . . . . . . . . . . . . . . . . . . . . . . . . . . . . . . . . . . . . 413.15 Using the GoMobile smartphone app . . . . . . . . . . . . . . . . . . . . . . . . . . . . . . . . . . . . . . . . . . . . . . . . . . 42FAQ. . . . . . . . . . . . . . . . . . . . . . . . . . . . . . . . . . . . . . . . . . . . . . . . . . . . . . . . . . . . . . . . . . . . . . . . . . . . . . . 44Server Hardware Troubleshooting. . . . . . . . . . . . . . . . . . . . . . . . . . . . . . . . . . . . . . . . . . . . . . . . . . . . . 45NVR and hDVR Systems Setup Guideiii
APPENDIX CAPPENDIX DAPPENDIX EAPPENDIX FAPPENDIX GAPPENDIX HivB.1 Dell Optiplex XE hardware common error indications. . . . . . . . . . . . . . . . . . . . . . . . . . . . . . . . . . . . 45B.2 Dell Optiplex 790, Optiplex 990 hardware common error indications. . . . . . . . . . . . . . . . . . . . . . . . 48B.3 Dell Optiplex 7010/9010 common error indications . . . . . . . . . . . . . . . . . . . . . . . . . . . . . . . . . . . . . . 54B.4 Dell PowerEdge R210 chassis troubleshooting. . . . . . . . . . . . . . . . . . . . . . . . . . . . . . . . . . . . . . . . . . 59System Troubleshooting . . . . . . . . . . . . . . . . . . . . . . . . . . . . . . . . . . . . . . . . . . . . . . . . . . . . . . . . . . . . . 70C.1 Unit does not power up. . . . . . . . . . . . . . . . . . . . . . . . . . . . . . . . . . . . . . . . . . . . . . . . . . . . . . . . . . . . . . 70C.2 Troubleshooting Questions/Suggestions. . . . . . . . . . . . . . . . . . . . . . . . . . . . . . . . . . . . . . . . . . . . . . . . 70C.3 Auto Reboot occurs when the Server is running. . . . . . . . . . . . . . . . . . . . . . . . . . . . . . . . . . . . . . . . . . 70C.4 Auto Reboot occurs before the Server launches. . . . . . . . . . . . . . . . . . . . . . . . . . . . . . . . . . . . . . . . . . 71C.5 Unit powers on then shuts off. . . . . . . . . . . . . . . . . . . . . . . . . . . . . . . . . . . . . . . . . . . . . . . . . . . . . . . . . 71Troubleshooting DIGIOP and BLACK Brand (The Black Line) IP Cameras. . . . . . . . . . . . . . . . . . . . . 72D.1 IP Camera reset. . . . . . . . . . . . . . . . . . . . . . . . . . . . . . . . . . . . . . . . . . . . . . . . . . . . . . . . . . . . . . . . . . . . . 72D.2 Set camera to factory default network settings. . . . . . . . . . . . . . . . . . . . . . . . . . . . . . . . . . . . . . . . . . 72D.2.1 Checking your firmware . . . . . . . . . . . . . . . . . . . . . . . . . . . . . . . . . . . . . . . . . . . . . . . . . . . . . . . . . 73D.3 Support . . . . . . . . . . . . . . . . . . . . . . . . . . . . . . . . . . . . . . . . . . . . . . . . . . . . . . . . . . . . . . . . . . . . . . . . . . . 73Configuring the DIGIOP and Black Brand (The Black Line) IP Camera Address. . . . . . . . . . . . . . . . 74E.1 Install IPAdmin Tool . . . . . . . . . . . . . . . . . . . . . . . . . . . . . . . . . . . . . . . . . . . . . . . . . . . . . . . . . . . . . . . . . 74E.2 Configure the camera network settings. . . . . . . . . . . . . . . . . . . . . . . . . . . . . . . . . . . . . . . . . . . . . . . . . 74E.3 Configuring the camera network settings. . . . . . . . . . . . . . . . . . . . . . . . . . . . . . . . . . . . . . . . . . . . . . . 75E.4 Connect to the camera with IE . . . . . . . . . . . . . . . . . . . . . . . . . . . . . . . . . . . . . . . . . . . . . . . . . . . . . . . . 76TCP/IP Port Settings and the Firewall . . . . . . . . . . . . . . . . . . . . . . . . . . . . . . . . . . . . . . . . . . . . . . . . . . 78Power over Ethernet. . . . . . . . . . . . . . . . . . . . . . . . . . . . . . . . . . . . . . . . . . . . . . . . . . . . . . . . . . . . . . . . . 79G.1 PoE compatibility. . . . . . . . . . . . . . . . . . . . . . . . . . . . . . . . . . . . . . . . . . . . . . . . . . . . . . . . . . . . . . . . . . . 79G.2 Power classification . . . . . . . . . . . . . . . . . . . . . . . . . . . . . . . . . . . . . . . . . . . . . . . . . . . . . . . . . . . . . . . . . 79Device Log. . . . . . . . . . . . . . . . . . . . . . . . . . . . . . . . . . . . . . . . . . . . . . . . . . . . . . . . . . . . . . . . . . . . . . . . . 80www.digiop.com
SECTION 1: SYSTEM OVERVIEWSECTION 1Systems OverviewDIGIOP Network Video Recorder (NVR) and Hybrid Digital Video Recorder (hDVR) servers with the DIGIOP ELEMENTS video anddata management software feature state-of-the-art management for advanced analog and IP cameras with real-time data capture.DIGIOP ELEMENTS is a seamless suite of video and data intelligence products includes that combine raw video with informationfrom back-office systems with video analytics. It includes four components: DIGIOP Connect - DIGIOP Connect is a remote client that displays both video and data from multiple sources togetherin a unified easy-to-use dashboard. The software can be used to view live and recorded video, locally or across a LAN or theInternet. DIGIOP Control - DIGIOP Control is a web-based administration portal that enables you to configure your systems andmanage permissions from anywhere you have Internet access. It allows you to manage your video, data, and user informationacross your single- or multi-site system. Controls include: add and configure cameras, set user rights, establish global and locallevel permissions for systems, cameras, and data streams. DIGIOP Control also allows you to create groups and auto tours bycustomizing your dashboard to improve real time store visibility and performance. DIGIOP Core - An extensible video recording platform that provides real-time recording of analog and IP cameras. DIGIOP Core manages, records, and stores digital video and images, and controls camera PTZ. It also includes several surveillancemanagement features including system security and activity logging. Core software can be configured to display live video asit’s recorded, or to run in the background and archive video data for display using DIGIOP Connect. DIGIOP Data - A data management software that integrates external data with video recorded by DIGIOP Core. Thisinformation can be displayed and retrieved with DIGIOP Connect. DIGIOP Data integrates video with retail Point-of-Sale(POS), to school Time & Attendance, to healthcare Electronic Access Control (EAC), etc. to expand the potential of your system.There is no direct user interface to configure or control DIGIOP Data.In NVRs and hDVRs, analog cameras are added to the system and assigned to video channels by the video connector theyare attached to. IP cameras are added to the system through the DIGIOP Control interface, a web-based configuration andmanagement feature of the system.All DIGIOP IP cameras and encoders include an IPAdmin Tool, a Microsoft Windows-based application for configuring networksettings and firmware updates. Depending on your NVR or hDVR, IPAdmin Tool may be pre-installed.Local and Hosted-Enterprise ManagementThe DIGIOP ELEMENTS server can be managed either locally or by DIGIOP . With a locally managed NVR or hDVR server, theconfiguration settings are retained on the server. In a hosted enterprise environment, DIGIOP manages the servers and saves theserver configuration settings at DIGIOP . For hosted enterprise management, the NVR and hDVR servers must be accessible throughNVR and hDVR Systems Setup Guide1
SECTION 1: SYSTEM OVERVIEWthe Internet. The selection of using either local or hosted enterprise management is made through the Enterprise ConfigurationApplication in the Windows Start menu.IP CamerasAnalog CamerasRouterDIGIOP Core Video & Data ServersDIGIOP ControlNVR (IP and Data Devices) orhDVR (IP, Analog and Data Devices)IPAdmin ToolDIGIOP ConnectDIGIOP Control (remote access) Local SystemModemDIGIOP ConnectDIGIOP Control (remote access)2www.digiop.com
SECTION 2: GETTING STARTED: UNPACKING YOUR SYSTEMSECTION 2Getting Started: Unpacking Your SystemFor most installations, DIGIOP NVR and hDVR systems come with everything needed to install and operate your system.2.1 Unpacking the equipmentRemove the equipment from its packaging and place it on a flat, clean surface. Inspect each item. If any visible damage is present,contact your supplier for a replacement. Verify that your order is complete. Within your order you should find: The number of cameras you ordered. Each IP camera includes a power supply, a software CD, and a Quick Installation Guide.Depending on your camera model, other items may be included.NVR or hDVR server including:—— Mouse (standard USB)—— Keyboard—— Video input cable(s)—— Power cord—— PTZ control cable (on some systems)—— PTZ RS-232 cable (on some systems)—— Recovery DVD—— Application disk—— Hardware Quick Start Guide, Software Quick Start Guides—— Surge protection and anti-virus warning documentAccessories you orderedRefer to the user manual for the product for a list of specific items included with the product. The user manual may be provided onthe CD included with the product.NOTELarge systems may be shipped in several cartons.2.2 System installation tipsCamera placementUse the information included in the packaging of your camera to mount and connect the unit to power and video cable(s). Plan yourcamera installation carefully. Identify the locations where cameras will provide the best coverage, considering: Field of view – Cameras must be positioned so they can effectively view the entire area that must be monitored.Lighting – Is there enough light in the field for the camera to “see” clearly? Is there intense light from the sun or shiny objectsthat reflect onto the camera lens? These conditions may affect the video quality and camera performance.NVR and hDVR Systems Setup Guide3
SECTION 2: GETTING STARTED: UNPACKING YOUR SYSTEM Ease of installation – Must be able to install the camera at the location, considering mounting hardware requirements,temperature, dust, moisture, etc.DIGIOP recommends that you bench test all cameras and cables before installing them.Weatherproof camerasWeatherproof cameras can be mounted in any open area, such as on a telephone pole or on the side of a building. However, for bestresults, we recommend you mount your cameras in a sheltered area, such as under the eave or roof of a building. Point the camerain the direction you wish to observe. When routing cable near the camera, allow enough slack to form a “U” shaped drop to helpdirect moisture, that accumulates on the cable, away from the camera.NOTECable connections are not weatherproof.Cable runsLAN/power cables can be run almost anywhere, and are frequently routed above drop/acoustic ceilings because of the ease ofinstallation. For added security, we recommend you run your cables in areas with limited access to prevent tampering. Avoidrunning the cable near high voltage appliances such as fluorescent lighting. Electrical noise and magnetic fields produced by thesedevices may affect video signal quality.NVR/hDVR placementYour monitoring and recording equipment is central to the accurate capture of video evidence and constant surveillance. DIGIOP strongly suggests that it be installed in a secure location with access limited to authorized personnel. Additionally, NVRs andhDVRs generate heat and should be placed in a well ventilated area. Excessive heat will reduce the life span and reliability of theequipment.The monitor does NOT need to be on for recording to occur. NVRs and hDVRs will output and record video regardless of theoperational status of the monitor as configured.Uninterruptible power suppliesIt is strongly suggested that power to the system be routed through an uninterruptible power supply (UPS). These devices will keepyour security system running through most power outages, in addition to providing excellent voltage surge and drop protection.The UPS should support your video recorder and all cameras to ensure operation during power outages.!WARNING4Be sure to following all CAUTIONS and WARNINGS found with the system. Failure to do so may result in injury ordamage to the equipment.www.digiop.com
SECTION 2: GETTING STARTED: UNPACKING YOUR SYSTEMNotes: IP devices – systems are compatible with many IP devices such as DIGIOP and Observint Technologies BLACK and TheBLACK Line cameras and encoders, and many AXIS , Sony , Arecont , Canon , IQEye , ACTi , LG , 3S and other manufacturer’scameras and encoders.NTSC or PAL – systems are compatible with NTSC or PAL, respectively, analog cameras.Ground loops and power fluctuations – To ensure high-quality image capture and to prevent issues, check the systemfor ground loops and power fluctuations across the whole system.Low-light adjustments – Adjust the lighting, focus, or
DIGIOP Data integrates video with retail Point-of-Sale (POS), to school Time & Attendance, to healthcare Electronic Access Control (EAC), etc. to expand the potential of your system. . Refer to the user manual for the product for a list of specific items incl
