Transcription
1 P a g eNEXTIVA APPMac OS X Desktop User Guidenextiva.com/support
1 PageContentsNextiva App for Desktop . 3Getting Started . 3Installation. 3Sign In . 3Main Window . 4Communications Window . 5Start a Chat. 6Make an Audio or Video Call. 6Active Communications . 7My Room. 7Select Audio Devices. 8Contacts . 9Add. 9Edit. 10Filters. 10Presence . 11Chat. 12Chat View . 12File Transfer. 12Group Chat . 13Audio and Video Calls. 14Call from Your Computer . 14Call from Your Phone. 14Answer Call. 15Contact Name Lookup for Incoming Calls . 15Missed Call or Communication . 15Full Screen in Video Call Mode . 15Multi-party Sessions . 16Call Waiting . 16Call Transfer . 16Message Waiting Indication and Voicemail . 16Call Pull . 17Conference Moderator Controls . 17Headset Support . 17My Room. 18Communications History. 19Visual Voicemail . 19Preferences . 21Credentials . 21 Nextiva, All Rights Reserved
2 PageGeneral . 21Audio. 22Video. 22Proxy. 22Call Settings . 23Nextiva Anywhere . 23Nextiva Remote Office . 23Forward Calls . 24Do Not Disturb . 24Hide Number . 24Simultaneous Ring Personal. 24Active Call Distribution (ACD) States . 25Sign Out . 25Sign Out of the Nextiva App . 25Exit the Nextiva App . 25System Requirements . 26 Nextiva, All Rights Reserved
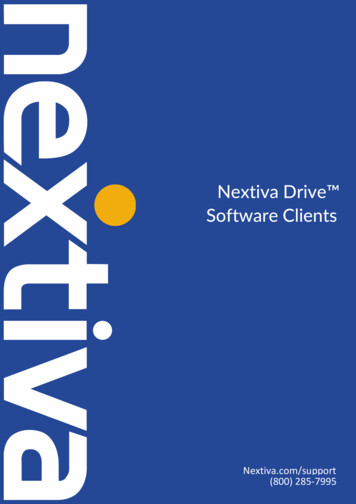
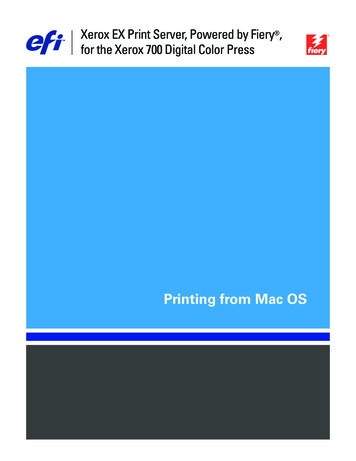
3 PageNextiva App for DesktopThe Nextiva App for Desktop is a native Mac client for unified communications that provides thefollowing communications features: Instant Messaging and PresenceVoice Calling (VoIP)Voice Calling (Desk phone)Video CallingNextiva Call Settings Active Call Distribution (ACD) StateControlVisual VoicemailDesktop SharingGetting StartedInstallation1. You can download the Nextiva App to your computer from Nextiva’s siteat tup.html.2. Double-click the disk image.3. Copy the application into the Applications folder.4. Launch the Nextiva App.Sign InWhen you first launch the Nextiva App, you will need to sign in (Figure 1-1).Figure 1-1: Sign In1. Enter your Nextiva username and password.2. If you would like the Nextiva App to remember your password, check the appropriate box.3. If you would like the Nextiva App to sign you in automatically on subsequent launches, check theappropriate box.4. Click Sign In.NOTE: If you choose automatic sign in, you are automatically signed in and taken to the contactlist upon subsequent Nextiva App launches. Otherwise, you will be presented with the Sign Inscreen.After logging in, a pop-up box may appear informing you about emergency calls. You may also see abanner in the main window related to emergency calls. Depending on your Nextiva settings, emergencycalls may not be allowed. In this case, calling an emergency number displays a pop-up box. Anotification message in the main window may also display. Nextiva, All Rights Reserved
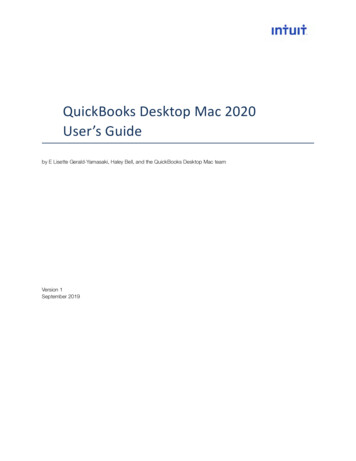
4 PageMain WindowWhen you start the Nextiva App for the first time, your Contacts list is empty (Figure 1-2). Use theSearch field to find people and add them to your Contacts list. Contacts can also be added manually byclicking the Add button. The dial pad is also integrated with the main window.My Information – View andupdate your information, forexample, your presence,avatar, and location.My Room – This is yourpermanent communicationroom. Participants can dial in toyour audio bridge.Contacts – View your contacts.Communications History –View previous chats and calls.Full Enterprise Directory –Show all contacts of thedirectory.Dial Pad – Make calls, it isintegrated with the main window.Chat – Start an instant messageconversation with a selectedcontact.Call – Make an IP audio call to aselected contact.Figure 1-2: Nextiva Main WindowCall from Phone – Make aClick-To-Dial call from your deskphone (or secondary device).Video Call – Make a video callto a selected client (VoIP).Menu – Open Call Settings,Preferences, and Help.Call settings menu– Use forquick access to call settingssuch as call forwarding.Add – Add a contact, group, orconference. Nextiva, All Rights Reserved
5 PageMy Information Click the avatar to update your status or location and enter a message.Double-click the avatar to upload a picture or use the right-click menu.Right-click the avatar to update your status.PresenceYou can set your presence to one of the statuses listed below (Figure 1-3):IconWhat it meansThe green presence icon indicates that the user is online and ready for communication.The yellow presence icon indicates that the user is online but has been idle or awayfrom their computer for more than ten minutes.The red presence icon indicates that the user is busy and does not want to bedisturbed.The grey presence icon indicates that the user is offline and the only available contactmethod is calling or chatting.This icon indicates that the contact is busy on a call. This is an automated presencestatus.Figure 1-3: Presence StatusesThe Nextiva App will automatically update your presence to Busy – In Call when you’re on an active call.LocationYour location is automatically determined by your public IP Address; however, you can manually set thetext to appear for your location and time zone using the location dialog box.Communications WindowAfter starting communication with one or more of your contacts, a Communications window is displayedfor chat and calls. The call window can also be integrated with the main window. From this window, youcan perform the following actions: Upgrade a chat to include audio, video, and desktop sharingEnd an audio or video callOpen the dial padMute your microphoneAdjust your speaker volumePlace a call on holdTransfer a call Nextiva, All Rights Reserved
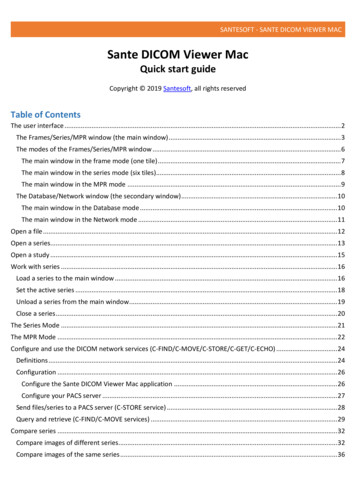
6 PageStart a ChatYou can start a chat using one of the following methods (Figure 1-4): Double-click a contact from the Contacts list or search results.Left-click one or more contacts from the Contacts list or search results, and click the Chat icon .Right-click one or more contacts from the Contacts list or search results, and select Chat.On the Communications History list, double-click a chat entry.In a Communications window, click the Chat icon .In a one-to-one chat, transfer files by clicking the Send File button in the Communications window oruse the drag-and-drop method so that they are moved to the Communications window.Figure 1-4: Chat WindowMake an Audio or Video CallYou can make an audio or video call using one of the following methods: Left-click one or more contacts from the Contacts list or search results, and click the Call , Call fromPhone , or Videoicon.Right-click one or more contacts from the Contacts list or search results, and select the Call, Call fromPhone, or Video option.Enter a phone number in the Search and Dial field, and then press ENTER to start an audio call or clickthe Call , Call from Phone , or Videoicon.Open the dial pad, enter a phone number, and then click the Call , Call from Phone , or Videoicon.On the Communications History list, double-click a call entry.In the Communications window, click the Call , Call from Phone , or Videoicon.When viewing a contact’s profile, click the Call , Call from Phone , or Videoicon.NOTE: If dialing a phone number that requires additional dual-tone multi-frequency (DTMF)tones (for example, a conference bridge), you can type the numbers on your keyboard while theCommunications window is active or open the dial pad in the Communications window. Nextiva, All Rights Reserved
7 PageActive CommunicationsActive communications appear at the top of the Contacts list in the main window. This area provides aneasy view to see the people with whom you are communicating. A separate call window can still beopened using an Active Communications menu. The following is also available in this area: Double-click an active communication toactivate this Communications window ifthe call window is shown separately. If thecall window is integrated, you can use amenu option to show it separately.See who has sent you a chat message, butonly after you accept the chat session.Before the chat session is established, thechat items are not visible in activecommunications but a history badge isvisible.End a call Mute the microphonePlace a call on holdMerge two calls or transfer by draggingand dropping calls onto each otherTransfer a callMake conference callsSee call recordingsPark and retrieve callsConferenceCall transferCall parkWhen enabled, you can use the buttons for faster access to these services.My RoomMy Room is always available and a permanent room you can use to chat with anyone that joins (Figure1-5).Figure 1-5: My Room Nextiva, All Rights Reserved
8 PageIf you assign a conference number to your profile in Preferences Credentials, then in your room, youand your attendees can click the Call iconto have the Nextiva App automatically dial in to theconference and enter the appropriate entry codes.If a conference bridge is not specified, you can initiate an N-way call in your room. The Nextiva App dialsout to all participants and takes everyone off hold after the last attendee answers.You can invite others to your room by dragging and dropping them from the Contacts list into the MyRoom communications window.Others join your room by right clicking your name on their Contacts list and selecting Join Room.Select Audio DevicesIf you have multiple audio devices available for your microphone or speakers, select the preferred audiodevice before starting a call.1.2.3.4.5.6.Select Nextiva App from the main menu.Select Preferences.Select Audio.Set a playback device (speakers).Set a recording device (microphone).Click OK.If Use default is selected, then the Nextiva App uses the default device set in the operating systempreferences.If you are using headsets, you can also select a separate device than the headset for alerting incomingcalls. Nextiva, All Rights Reserved
9 PageContactsContacts are the people with whom you communicate and, when the contact uses the Nextiva App, youcan see their presence and share your presence with them. There are three types of contacts: Contacts: Actual people with whom you communicate.Conferences: Audio or video conference bridges that you use to communicate with others.Groups: Containers of contacts and/or conferences.AddWhen you sign in for the first time, there are no contacts on your contact list. Add a new contact at anytime by selecting Add Contact from the menu or choose the Add Contact button from the main window.In the Add Contact dialog box, enter the contact’s information, and then click Add Contact. By default,your presence information is always shared with a new contact if an Extensible Messaging and PresenceProtocol (XMPP) address is provided (Figure 2-1).However, you can always share your presence information later by selecting Subscribe on the menu forthat contact on the contact list (right-click the contact or arrow button). Note that the contact mustaccept your subscription request for you to establish the presence relationship successfully.The newly added contact appears on your contact list.Add a conference contact by clicking the same button you did for Add contact, but choose the AddConference menu option. A conference contact is a special contact used for conference bridges to avoidremembering PIN codes and conference numbers, such as recurring conferences. Just create a contactfor the weekly conference, and then add a conference bridge number and PIN. Right-click the contact, orchoose it and click the Call button to join the conference.Choose the Add Group menu option to add a new group to the contact list.Figure 2-1: Add Contact and Add Conference Nextiva, All Rights Reserved
10 P a g eEditYou can edit a contact by selecting the contact first. After you select the contact, right-click anywhere inthe area of the selected contact and a menu of options appears. This principle is the same for normalcontacts, conference contacts, and groups. When the manual sync button (cloud icon) is visible, there isno automated syncing of the contact card details with server information. To sync the contact card data,click on the cloud icon. Unsubscribe removes the presence relationship between you and that contact. This means you donot see the contact’s presence inf
The Nextiva App for Desktop is a native Mac client for unified communications that provides the following communications features: Instant Messaging and Presence Voice Calling (VoIP) Voice Calling (Desk phone) Video Calling Nextiva Call Settings .