Transcription
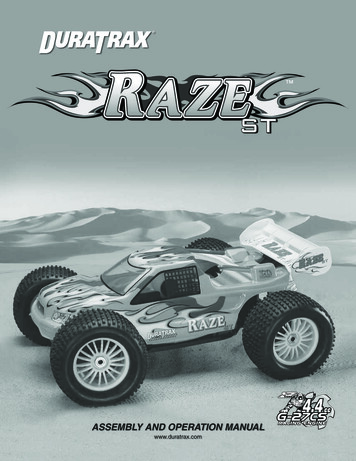
ASSEMBLY AND OPERATION MANUALwww.duratrax.com
ITEMSINCLUDEDThe following items are included with your Raze ST.ChassisBodyBody Clips (Qty 4)Decal SheetTransmitterTransmitter AntennaReceiver Antenna Tube250cc Fuel Bottle2 and 3 Toe-BlocksRide Height ClipsGlow StarterKwik-Pit Super StartInstruction ManualExploded View/Parts ListingEngine Tuning DVDYOU WILLNEEDWRENCHDTXR1170ALKALINE BATTIERSAFTER RUN OILHCAP3000ULTIMATE HEX DRIVER SETDTXR0292SPARE GLOW PLUGSDTXG3005AIR FILTER OILDTXC2465PHILLIPS HEAD SCREWDRIVERDTXR0124PLIERSDTXR0300ENGINE TUNING SCREWDRIVERDTXR0185220% O’DONNELL FUELODOP3320
THINGS TOKNOWSAFETY PRECAUTIONSWhen the safety precautions are followed,the Raze ST will provide years of enjoyment.Use care and good sense at all times whenoperating this radio controlled truck. Failureto use this vehicle in a safe, sensible mannercan result in injury or damage to property.You and you alone must insure that theinstructions are carefully followed and allsafety precautions are obeyed. Do not operate the Raze ST near people.Spectators should be behind the driver orat a safe distance away from the vehicle. Water can cause the electronics to shortout and can cause permanent damage. Always turn on the transmitter beforeturning on the receiver. Fully extend the transmitter antenna beforeoperating your vehicle. Before turning on your radio system, checkto make sure that no one else is runningon the same frequency. The engine and exhaust produce quite abit of noise. Do not run this vehicle whenor where it can disturb others. The engine and exhaust can become veryhot. Avoid touching any of these parts duringuse and until they have cooled down. Model engine fuel is poisonous. Make sureyou read and follow all of the precautionson the fuel container. Keep fuel out of thereach of children. Model engine fuel is flammable and whenignited has a flame that is difficult to see.Avoid sparks, flames, smoking, or anyother ignition source when fuel is near. The engine emits harmful fumes just like realvehicles. Do not operate this model indoors. Avoid running the truck in cold weather. Theplastic and metal parts can become brittleat low temperatures. In addition, greaseand oil become thick, causing prematurewear and poor performance.SPECIFICATION ANDDESCRIPTION CHANGESSTRESS-TECH PARTSGUARANTEEAll pictures, descriptions and specificationsfound in this instruction manual aresubject to change without notice. DuraTraxmaintains no responsibility for inadvertenterrors in this manual. Visit www.duratrax.com for the latest updates and informationfor your model.We have engineered the Raze ST to takethe rough and tumble abuse that makesR/C buggies fun. We are so confident ofthe quality and durability of the Stress-Techplastic parts that we will replace any StressTech plastic part you break during the first12 months you own the truck. Just send inthe part to us and we will send you a FREEreplacement. Please see the Raze ST partslist for the items covered under the StressTech guarantee.WARRANTY DuraTrax guarantees this kit to befree from defects in both material andworkmanship at the date of purchase.DuraTrax will warranty this kit for 90days after the purchase date. DuraTraxwill repair or replace, at no charge, theincorrectly made part. Make sure you save the receipt or invoiceyou were given when you bought yourmodel! It is your proof of purchase andwe must see it before we can honor thewarranty. Further, DuraTrax reserves theright to change or modify this warrantywithout notice. In that DuraTrax has no control over thefinal user assembly or material used forfinal user assembly, no liability shall beassumed nor accepted for any damageresulting from the use by the user of thefinal user-assembled product. By the actof using the user-assembled product, theuser accepts all resulting liability.To return your Raze ST for repairs coveredunder warranty you should send your truck to:Hobby Services3002 N. Apollo Drive Suite 1Champaign, Illinois 61822Attn: Service DepartmentPhone: (217) 398-0007 9:00 am-5:00 pmCentral Time M-FE-mail: hobbyservices@hobbico.comwww.hobbyservices.comTo receive your free replacement partplease send the following to the HobbyServices address listed under the warrantyon the left. 1. The broken part must be included. 2. The part number and description of thebroken part. 3. Copy of your dated invoice orpurchase receipt. 4. Your name, phone number andshipping address.REPAIR SERVICERepair service is available anytime. After the 90 day warranty, you can still haveyour Raze ST repaired for a small chargeby the experts at DuraTrax’s authorizedrepair facility, Hobby Services. To speed up the repair process, pleasefollow the instructions listed below. 1. Under most circumstances return theENTIRE vehicle. The exception wouldbe sending in a Stress-Tech part. Seethe instruction under the Stress-TechGuarantee. 2. Make sure the transmitter is turned off,all of the batteries are removed andthe fuel tank is completely empty. 3. Send written instructions which include:aIf the buyer is not prepared to accept theliability associated with the use of thisproduct, the buyer is advised to returnthis kit immediately in new and unusedcondition to the place of purchase.3list of all items returned, a THOROUGHexplanation of the problem, the serviceneeded and your phone number duringthe day. If you expect the repair to becovered under warranty, be sure toinclude a proof of date of purchase (yourstore receipt or purchase invoice).
FINISHINGTHE RAZE STTRANSMITTER PREPARATION Install eight “AA” batteries into transmitter, making sure thepolarity is correct. Insert the antenna into the top of the transmitter and tighten. Turn the transmitter on and check the battery light. If the LED glows constantly, then the batteries are acceptible.If the LED flashes, the batteries need to be replaced.RECEIVER BATTERY INSTALLATIONREMOVE Remove the receiver battery cover from thereceiver case.RECEIVER CASE Remove the receiver battery holder from thereceiver cover.RECEIVER BATTERY COVER Install (4) “AA” batteries.RECEIVERBATTERYHOLDER Reinstall the receiver battery holder to the coverusing the included tie-strap. Secure the receiver cover to the receiver case.TIE STRAP4
RECEIVER ANTENNA INSTALLATION Uncoil and straighten the antenna wire.GLOW STARTER BATTERYANTENNACAP Route the receiver antenna wire throughthe antenna tube. Install the tube into the antenna mount.ANTENNA TUBEXDO NOT CUT THEANTENNA WIRE!ANTENNAWIREFUELTUBINGANTENNA MOUNT Install the small piece of fuel tubing(included) onto the base of the antennatube/antenna mount to secure theantenna tube in place. Install a “C” battery (not included) into theglow starter. Install the antenna cap onto the top of theantenna tube to hold the assembly in place.AIR FILTER MAINTENANCEAIR FILTERBASEFOAMELEMENTAIR FILTERTOP The air filter comes pre-oiled. However, after runs in dusty conditions, clean and re-oil the foam element. Remove the air filter top and foam element. Clean the foam using soap and water. Apply air filter oil (DTXC2465) onto the foam element, squeezing the element until it is completely coated with the oil.TIP! Placing the element in a plastic bag will help keep your hands clean. Remove any excess oil with a paper towel. Reinstall, making sure the filter is properly seated on the base.5
TRANSMITTERANTENNARADIO SYSTEM CHECK!ALWAYS CHECK THE RADIOOPERATION BEFORE EACH RUNPOWER LEDSTEERINGDUAL RATESERVOREVERSINGSTEERINGTRIM1. Fully extend the transmitter antenna.2. Turn the transmitter on, then turn thereceiver on.3. The transmitter wheel will move thefront wheels of the car left or right. Ifthe wheels turn the incorrect direction,change the servo reversing switch.ON/OFFTHROTTLETRIM4. When running, adjust the steering trim so that the cartracks straight.BRAKE5. Pull the throttle trigger to make sure the carburetor opensfully and the throttle linkage functions without binding.6. Adjust the throttle trim until the carburetor is at the idleposition. Always adjust the idle speed with the idle stopscrew on the car, not the throttle trim.THROTTLE7. Push the trigger and roll the car to make sure the brakesare applied.! USE THE STEERING DUAL RATE KNOB TO INCREASEOR DECREASE THE TOTAL STEERING AMOUNT! Decal the body to your liking. Use thephotos on the box as a reference. Install the body onto the chassisusing four body clips.6MAKE SURE NOBODY ELSEIS ON YOUR CHANNEL
ENGINERUNNING THEENGINETUNING GUIDEHIGH-SPEED NEEDLEThe “high-speed” needleis sticking up from thecarburetor. This controlsthe fuel to air mixture ofthe carburetor. The needleis pre-set for break-in fromthe factory at 4-1/2 turnsout from fully closed. Oncethe engine is broken-in, thehigh-speed needle wouldtypically run from 4 to 4-1/4turns out from closed, depending on the weather, humidity andaltitude above sea level. To richen the mixture turn the needlecounterclockwise. To lean it, turn the needle clockwise.Before running the engine, read the manual and watch theassembly and engine tuning video that came with this kit.STARTING THE ENGINEIMPORTANT! Your radio system must ALWAYS be turnedon and the transmitter antenna fully extended when runningthe engine!1. Fill the fuel tank.2. Charge the 6-cell battery (not included) for the Kwik-PitSuper Start. Install the battery into the unit and connect itto the starter. Press the button on the starter to check thatit is functioning properly.3. Attach the glow starter to the glow plug.4. With the throttle at idle, start the engine using the Kwik-PitSuper Start.LOW-SPEED NEEDLEThe “low-speed” needle islocated on the side of thecarburetor. It controls thefuel mixture at low throttlesettings/idle and is presetfrom the factory at 121/2 turns from fully closedwhile holding the carburetoropen. Low speed needleadjustment should only bedone after break-in. Thereis a simple way of adjusting the low-speed needle correctlycalled the “pinch test.” With the engine at idle, pinch the fuelline and listen to how the engine speeds up or slows down.If the engine increases its speed for about 2 or 3 secondsand then loses speed, the needle is set correctly. If the engineloses RPM quickly, it is set too lean and the low-speed needleneeds to be opened (counterclockwise) to richen the mixture.Pinch again to check the mixture. If the engine takes longerthan 4 seconds to slow down, lean (clockwise) the low-speedneedle and then pinch again to check the mixture.IDLE STOP SCREWThe “idle stop” screw islocated on the backside ofthe carburetor.This increasesor decreases the idle speedwithout changing the fuelmixture. The barrel shouldbe approximately 1mm fromfully closed.Sometimes it is helpful to start the engine at around halfthrottle. When the engine starts, immediately return thethrottle to idle.IMPORTANT! FIXING A FLOODED ENGINEIf the engine is difficult to turn over with the Super Start,especially if it is brand new, loosen the glow plug a half turnbefore starting the engine. This allows some compression toescape, but the engine will still start. Make sure you tightenthe glow plug after the engine starts. If the Super Start is stillhaving problems turning the engine over, it is flooded – thereis too much fuel inside the engine. Remove the glow plug,then turn the truck upside down and run the Super Start for5 or 6 seconds. This will clear the engine of fuel, and you willnotice the engine turns over easier. Replace the glow plugand repeat the starting procedure.STOPPING THE ENGINEPinch the fuel tubing leading to the carburetor until the enginestops running. Never place your finger over the exhaust tostop the engine. This could result in serious burns on yourfinger. It also causes fuel to back up in the engine, makingit harder to start the next time you run your Raze ST.BARREL 1mmFROM FULLYCLOSEDIDLE STOP SCREWIMPORTANT! To insure long life and good performance fromyour engine, you MUST break-in the engine. The break-inperiod is critical for long life of the internal parts of the engine.This should be done over the first 5 tanks of fuel.7
Important! At this point, the engine will likely be running at afaster idle speed than needed (This is typical after break-in).Adjust the idle stop screw to lower the idle speed so that thewheels do not, or just barely, rotate when you lift the truck offthe ground.BREAK INPROCEDURESOME THINGS TO REMEMBER DURING BREAK-IN1. Run with the body off. This will keep the engine cooler.2. Keep the air cleaner on at ALL times3. Run on a smooth, hard surface. An empty parking lotis perfect.4. Use the same fuel that you will use for normal running.5. Resist the urge to accelerate and decelerate quickly.6. Break-in puts stress on the glow plug and can burn it out.Make sure you have an extra plug or two on hand.7. Do NOT overheat the engine (see page 9). You can check thehead temperature by using one of the temperature gauges thatare readily available (DuraTrax Flashpoint , DTXP3100).TUNING TIPSAfter break-in, run the truck where you plan to do most ofyour driving (grass, street, track, etc). Tune the high speedneedle so the engine makes good power without overheating.Using a temperature gauge, tune the engine so that it willconsistently stay under 230 F. Keep in mind, RC enginesusually take a minute or two to warm up. It is common not toreach full power right away. Never tune a cold engine!If needed, tune the low speed needle so that the truck idlesand accelerates smoothly and consistently. Note: You maysometimes experience “run-on” when running the truck.“Run-on” is when the engine does not drop back down to idleafter the trigger on the transmitter is released. To correct this,richen the low-speed needle using 1/8 turn increments untilthe engine idles normally when the trigger is released.TANK 1Your first tank of fuel should be running the Raze ST at avery rich needle valve setting. This allows the fuel to carry asmuch oil as possible into the engine to properly lubricate theinternal parts during the break-in.ENGINE CARENever store your Raze ST with fuel in the tank. We recommendthat after the final run of the day, you empty the fuel tank andthen run the engine at idle until all the fuel is out of the fuel linesand engine. Remove the air filter and glow plug. Then placetwo drops of Hobbico After Run Engine Oil (HCAP3000) in thecarburetor and two into the cylinder to help prevent corrosion.Run the Super Start a few times to circulate the oil.1. Open the high speed needle valve 4-1/2 turns from fullyclosed (counterclockwise). This is factory set already,but check it to make sure. When closing the high-speedneedle, close until you feel some resistance. DO NOTovertighten or you will damage the engine.2. Fill the fuel tank and start the engine.3. Run the truck on a smooth surface with the body off.4. Run back and forth at medium speeds, slowly acceleratingand decelerating the truck.5. Run the truck until the tank is almost out of fuel. Do notallow the tank to run out of fuel during break-in. This leansout the engine and can cause overheating.6. Stop the engine and allow it to cool. This normally takesaround 10-15 minutes.10 WAYS TO ENSURE LONG LIFE FROM YOUR ENGINE1. Keep your engine and air filter clean. Dirt will act asinsulation on an engine. It will not be able to shed heat aseasily. Clean and re-oil the element often.2. Do not over-lean your engine.3. Do not run your engine with little or no load. Don’t throttleup the engine to full throttle when the wheels are not incontact with the ground.4. Do not overheat the engine (see page 9).5. Do not use a fuel with a low oil content. Make sure you usea model car fuel from a reputable manufacturer, such asO’Donnell Fuels.6. Avoid using old fuels in the engine.7. Do not scratch the piston or cylinder sleeve. Avoid jammingsomething into the exhaust port when removing or reinstalling the clutch or flywheel. Use a special tool calledthe Ultimate Flywheel Wrench (DTXR1105) to keep thecrankshaft from moving.8. Do not use silicone sealer on the engine joints. Siliconesealer contains acetic acid, which is corrosive if it getsinside your engine.9. Do not allow any water to get inside the engine. This soundseasy, but temperature changes can cause condensationinside the engine. This is a good reason to use an after-runoil. Store your engine inside the house, not in a garage orshed where there will be temperature extremes.NOTE: If your engine does not stay running consistently, increasethe idle speed by turning the idle stop screw clockwise.TANK 2Lean the high-speed needle 1/12 turn from “tank 1” setting.Run the truck for the complete tank and then let cool.TANK 3Lean the high-speed needle another 1/12turn from “tank 2” setting. Run the truckfor the complete tank and then let cool.TANK 4Lean the high-speed needle another 1/12 turn from “tank3” setting. Run the truck for the complete tank and then letcool. You should notice the engine running much better atthis point.TANK 5Lean the high-speed needle another 1/12 turn from “tank 4”setting. Run the truck for the complete tank and then let cool.The engine is now ready to be performanced tuned.8
FUEL SYSTEMThe fuel line is susceptible to pinhole leaks. You usuallycannot see the hole in the fuel line, but if you see air bubblesin the line going to the carburetor, replace the fuel line.Another symptom of a leak in the fuel line is a surging engine.A properly tuned engine will surge when the air bubbles hitthe carburetor. It is basically leaning out the mixture.GENERALINFORMATIONGLOW PLUGThe glow plug is an item that will wearout and need replacement from timeto time. It is a good idea to removethe glow plug before your first run,connect the plug to the glow starter and see how well itglows. You should see a bright orange glow from the filament.If a coil or two will not glow or the plug will not glow at all,replace the plug. If the engine quits when you remove theglow starter, the plug might need to be changed, althoughthis may be because you are running too rich and need tolean your high-speed needle. Look at the glow plug whenyou are running the engine. If you see some bubbles comingfrom around the plug, replace the glow plug. The only realway to test a glow plug is to replace it. Make sure you have aspare plug or two on hand every time that you run the RazeST. We recommend the DuraTrax Gold Plug (DTXG3005).Dirt can get caught in the needle seat and cause aninconsistent running engine. If you suspect that some dirt haslodged itself in the carburetor, remove the needles and cleanthe carburetor with denatured alcohol or fuel. It can help touse compressed air to blow out the fuel passages as well.OVERHEATINGOne of the worst things you can do to your engine isoverheat it. The oils that lubricate the engine are carriedin the fuel. If your engine is set too lean, there will not beenough oil in the engine to lubricate the internal parts. Thiswill cause premature wear in the engine and cause damage.The easiest way of checking the temperature of the cylinderhead is by using one of the available temperature gauges(we recommend the DuraTrax Flashpoint TemperatureGauge, DTXP3100). This will give you a direct reading ofthe cylinder head temperature. Hold the temperature gaugedirectly on the cylinder head so the gauge is pointed directlyat the glow plug. Do not let the head temperature exceed230 Fahrenheit.AIR FILTERDirt can get into your carburetor and engine through the airfilter. Ensure that your air filter has a good seal to the topof the carburetor. Periodically wash the air filter foam element(using dish soap and water) and re-oil the filter with filter oil(DTXC2465). Any air filter that has a torn element or a badseal should be replaced immediately.FUELUse fuels that are specially formulated for car and truckengines like O’Donnell 20% Race Fuel (ODOP3320).Fuel can go bad. The main ingredient in modelfuel is methanol, which is basically alcohol.Alcohol will absor
THE RAZE ST TRANSMITTER PREPARATION † Install eight “AA” batteries into transmitter, making sure the polarity is correct. † Insert the antenna into the top of the transmitter and tighten. † Turn the transmitter on and check the battery
