Transcription
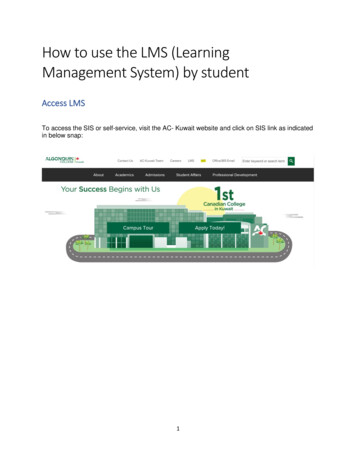
How to use the LMS (LearningManagement System) by studentAccess LMSTo access the SIS or self-service, visit the AC- Kuwait website and click on SIS link as indicatedin below snap:1
Logging InIn order to access most of the LMS features, you must log in.1. On the Login window, enter your Username.2. Enter your Password. If You Forget Your Password, refer to IT department to reset orprovide a new password.3. Press OK.2
LMS Home PageAfter logged in, you get the below LMS home page:Access the courseSelect the course you want to work on from the “course you are studying” on the right side ofthe window:3
Course Home PageThe Course Home page is displayed when a user clicks a link of a necessary course on theSharePoint LMS Organization Home Page.The Course Home page displays general description of a course and gives a user an access tothe basic modules of the course. To access the course modules, click a corresponding icon onthe Course Tools menu:NameAnnouncementsCalendarDescriptionAllows managing course announcementsAllows posting events to notify other users4
DocumentsLearning PathLinksQuizzesDrop BoxPlagiarismAssignmentsAttendanceDiscussion BoardChatConferenceGrade BookTrackingWiki Page LibrarySeating ChartReportsMailboxLearners &GroupsStaffRosterHelpAllows working with course documentsAllows managing course learning pathsAllows managing course linksAllows managing course quizzesAllows managing files for shared usageAllows checking items for plagiarismAllows setting course home tasksAllows registering student’s attendanceBrings users to the course forumBrings users to the course chat roomAllows entering Online Video ConferenceAllows setting grades for course studentsAllows tracking statistics within course modulesAllows creating documents users want to share with other course membersAllows creating a class seating chartAllows scheduling report on attendance and time spent by learners in eachcourse sectionAllows managing message sharingAllows managing the membership of course groupsContains information about course teachers, administrators, faculty staff etc.Contains information about course learnersDisplays online SharePoint LMS documentation5
AnnouncementsAnnouncements are intended for informational purposes: a user who needs to share someimportant messages with others should create an announcement that will be viewed by allcourse participants (Learners and a Teacher). The information will be displayed on the HomePage as well as on the Course Home page (if other is not specified by the Course Home pagesettings).To get to the Announcements section, enter the necessary course and click theAnnouncement icon in the left Tools menu. The list of available announcements will be shownin the main workspace area:The home page of this section displays the current month announcements list with a possibilityof their editing and deleting. To work with an announcement, move the mouse over the name ofthe announcement, click on the triangle and select the necessary option form the context menu.NOTE:For better representation, you can change the list view. From the View list, select thenecessary view (select Current to view up-to-date announcements, select All to view allannouncements).Column names at the top of the list are clickable and allow you to sort announcements inascending or descending order: Use the Title link to sort or filter announcements by title;Use the Modified link to sort or filter announcements by modification date;To remove filter criteria, click the necessary link in the column head, and then select theClear filter option from the context menu.The Actions and Settings buttons on the List tab allow performing actions and operationstypical for SharePoint.6
Adding AnnouncementsTo create a new announcement, do the following:1. Enter the necessary course;2. Go to the Announcements section;3. On the Items tab, click the New item button:7
4. Fill out the open form (fields marked with an asterisk are required to be filled):Fig. ‘Announcement creation form’ Title – type the name of the new announcement (the field is required).Body - type the full information of the announcement. Use the embedded Visual Editor toformat the description text.Keywords – specify words which will help learners find necessary documents (keywordsshould be entered in the site search field at the top of the page).Start Date- Specify the date from when the announcement will be valid. If the start date isnot specified, the announcement will become visible after you save the changes).Expires– Specify the date for the announcement to become invalid. If the date is notspecified, the announcement will be available for an indefinite period of time.5. If you want to attach a file to the announcement, click Attach File, and then browse thenecessary file in the opened form. Click Save to attach the file.6. Click Save at the bottom of the form to add the announcement.8
Viewing AnnouncementsTo view an announcement, do the following:1. On the Course level, go to the Announcements.2. Select the announcement you want to view and click the down arrow to open the dropdown menu:Fig. ‘Viewing Announcement’3. Select View Item in the drop-down list. A new page with the announcement will open:Fig.‘Announcement view form’The ribbon of the dialogue box comprises the rest of the menu options for managing theannouncement. The ribbon top buttons allow users to perform the following operations:9
Editing the announcement - click Edit Item to modify the announcement.Viewing the announcement version history - click Version History to view the history ofthe changes made to the announcement and/or view the previous versions.Managing permissions - click Manage Permissions to assign users and grouppermissions to this item.Deleting items - click Delete Item to delete the announcement.Making notifications - click Alert Me to manage notification settings.4. Click Close.Editing AnnouncementsTo edit the announcement, do the following:1. On the Course level, go to the Announcements.2. Specify the announcement you want to edit by placing the cursor on the announcementname.3. Click the down arrow to the right of the necessary announcement to open the drop-downmenu.4. Select Edit in the drop-down list.5. Modify the necessary fields.6. Click Save to save the changes.Deleting AnnouncementsTo delete an announcement, do the following:1. Click the down arrow to the right of the necessary announcement to open the drop-downmenu.2. Select Delete Item from the list.3. Confirm the deletion. The item will be sent to Recycle Bin of the site.10
DocumentsDocument Home PageThe Documents section of the system allows you to create a repository of files that can bedownloaded or viewed online by your learners.To work with course documents, enter the course and click the Documents link in the left Toolsmenu. The system will display a list of course folders and documents organized as a treestructure. Each folder or document in the list is characterized by its type, name when it wasmodified, person who last made changes to the document and description.11
View/Download a documentMethod 1:1. Enter the necessary course.2. In the left Tools menu, click Documents. The list of available documents will be shown inthe main workspace area.3. Click the name of the necessary document,The system will either display the document or offer it for downloading at the bottom of thewindow as attached below:12
4. Show the file in folder or open it.Method 2:1. Enter the necessary course.2. In the left Tools menu, click Documents. The list of available documents will be shown inthe main workspace area.3. Click on the three dots at the end of the file name then choose “Download a copy” asattached below:The system will either display the document or offer it for downloading at the bottom of thewindow as attached below:13
4. Show the file in folder or open it.14
Method 3:Repeat the above steps using the Files and Library tabs at the top allow performing actionsand operations typical for SharePoint like view or download the files.15
MailboxThe Mailbox option allows you to send and receive e-mail messages.To work with the mailbox, enter the necessary course and click the Mailbox icon in the leftTools menu. The system will show contents of your mailbox:TIP:For better representation, you can modify the list view. From the View list select whatmessages should be visible: all (my items), sent or received.Column names at the top of the list are clickable and allow you to sort messages in ascendingor descending order. In addition, you can filter messages by various criteria: Click the Subject, Created, From or To links and select the required value (allmessages that do not match the selected criteria will be hidden);Use the attachment column link to display messages with or without attachmentsonly.To remove filter criteria, choose the necessary link and select Clear filter from option.The Actions and Settings buttons at the top of the list allows performing actions and operationstypical for SharePoint.To preview a mailbox message, click its name in the list.16
Buttons at the top of the message allow performing the following operations:Click Reply to answer a letter;Click Edit Item to modify the message;Click Delete Item to move the message to the Recycle Bin;Click Alert Me to work with notification settings.To close the message and go back to the mailbox, click Close.17
Viewing MailboxTo view the mailbox, do the following:1. On the course level, go to Course Tools Mailbox;2. Once you have done it, the Mailbox items list will appear:By default, the Mailbox items list will show both sent and received item. To change the view ofthe Mailbox items list, do the following:1.2.3.4.On the course level, go to Course Tools Mailbox;Once you have done it, the Mailbox items list will appear;On the ribbon, go to the List menu;Go to Manage Views section, open My Items drop down and select the needed view:18
Received items – displays all messages that have been received by the user. To viewthe received items only, select Received from the drop down. The Received items listwill appear: Read items – displays all messages that have been read by the user. To view the readitems only, select Read from the drop down. The Read items list will appear:19
NOTE:It is impossible to mark the message as unread.All Received Messages are marked as Read (icon.) and Unread () with the correspondingColumn Read have filter that allow the user to filter the messages by Read/Unread. Sent items - displays all messages that have been sent by the user. To view the sentitems only, select Sent from the drop-down menu. The Sent items list will appear:20
NOTE: NOTE:All Messages sent by user are marked as Sent () with the corresponding icon.Replied items - displays all messages that have been answered by the user. To viewthe replied items only, select Replied from the drop-down menu. The Replied items listwill appear:Once the user sends a reply to the message, the icon of the messages changes to ”Replied”. AllReplied Messages are marked as Replied (21) with the corresponding icon.
Replied Messages are marked as Received and Read accordingly for the addressee.Messages can be filtered by the Replied/Unreplied status in the Replied Column:NOTE:As in existing aggregated SharePoint LMS web parts, Mailbox web part has the Disable Cacheproperty. If the property is checked cache in the web part will be disabled. If the property isunchecked data that is shown in the web part will be cached with cache timeout of 10 minutes.Sending MessagesIf you want to send a message to another system user:1. Enter the necessary course2. Click the Mailbox link in the Course Tools menu. The system will display contents ofyour mailbox.3. Click New Item above the list of messages. The following form will be opened:22
4. Fill out the form fields as described in below (fields marked with an asterisk are requiredto be filled out): Subject – Enter the subject of the message To - Enter the user for whom the message is intended. To check whether thisuser exists in the system, click the Check Names icon ( ). If a user with thisname does not exist, the system will display a red error message. If you do notknow exact name of the user for whom the message is intended, click theBrowse icon ( ) and search for the necessary user, select Learners orTeachers depended on whom you want to send to.Double click on the person name, or click the person name and then click onAdd button and once finished, click OK as shown below:23
Message – Enter the text of the massage. Use the embedded editor to format thetext.5. If you want to attach a file to the message, click the Attach file button in the top leftcorner and specify the path to the necessary file on your computer24
Click on Choose file button:25
Specify the location path and then select the desired file to attach and then click on Openbutton:The file will be added as below, click OK:Also, the file will appear in the new mailbox message window, you can delete it if you are notsure about it, if confirmed, click Save:26
After click Save, the message will be delivered, and it will be shown on the mailbox homepage as below:6. Click Spelling to check spelling7. When finished, click the Save to send out the message to the specified user; clickCancel to discard changes and navigate back to the list of messages.27
Replying to a MessageTo reply a message,1. Enter the necessary course.2. Click the Mailbox link in the Tools menu. The system will display contents of yourmailbox.3. Click the name of the message you want to reply to.4. Click the Reply button:5. Enter the text of the message. Note that you have the text of the original message includedinto the text field to enable user to track the conversation.28
6. Click Reply to save changes. Click Cancel to discard changes.29
QuizzesView QuizzesTo view the list of current Quizzes, do the following:1. Open the needed Course;2. On the Tools menu select Quizzes. The list of current quizzes will appear:The Quizzes page contains three sections: Quizzes, Surveys, and Questions Pools.The Quizzes section contains a list of quizzes, the Surveys section contains a list of surveys,and the Question Pools section contains a list of question pools.30
Start Answering the quizTo start the created quiz, do the following:1. On the course level, go to Course Tools Quizzes;2. Click the Quizzes icon;3. The list of Quizzes, Surveys and Question Pools will appear. Select the needed quiz byputting the cursor arrow on it:4. Click the drop-down arrow against the quiz name to open the Edit Content Block dropdown menu;5. From the drop-down menu, select Start:31
6. Once you click Start, the quiz is on;7. If you are allowed to take the attempt, the following message will appear: You are aboutto begin n. attempt. Press NEXT to begin.The form specifies the number of attempts allowed.NOTE:If the learner is not allowed to take an attempt, he sees a message: ‘You cannot start this quiz.Out of attempts. This quiz allows n. attempt(s)’:32
Click Cancel button to omit the attempt. Once you click the button, you will see the All Attemptslist.8. Once you click Next, the quiz form will appear:33
NOTE: Click Next to navigate between quiz question pages or just to skip some questions to finishthem later. Number of skipped questions will be displayed (Skipped: n.). Note please thatafter clicking the Next or Previous buttons all answered questions will be saved and you willnot be able to change them anymore (the answering field will be inactive):NOTE: When users answer Drop Down, True or False, Multiple Choice, Multiple Answer, Matching,Gap Fill, Hot Spot questions they can uncheck the answers clicking the Clear button:34
Note please that after clicking the Next or Previous buttons all answered questions will besaved (see previous NOTE).9. Complete the quiz questions and click the Next button to proceed. The following form willappear displaying user’s score, grade and number of skipped questions. Click the Finishbutton to submit the quiz. Note please, that after submitting the quiz a user won’t be ableto answer skipped questions:NOTE: To review the attempt, click the Review link:The following form will appear:35
After you have reviewed the quiz, click Close.10. Click finish to see the All Attempts list.36
AssignmentsView AssignmentsThe Assignments section allows users to set assignments within the course and view theresults of performing assignments.To access the Assignments section, click the Assignments link on the Course Tools menu. TheAssignments section is represented as Assignment Calendar by default.Assignment Calendar (the Calendar view) should be differentiated from the Assignment Tasks(the All Tasks view) which can be accessed through the View Learner’s Assignments link(available when moving the mouse cursor on the assignment name).37
Submit an AssignmentNote: If the due date is finished, you will not be able to submit the assignment.If you want to submit an assignment to the instructor:1. Enter the necessary course2. Click the Assignment link in the Course Tools menu. The system will display all theassignments assigned to you inside this course.3. Click the assignment you want to submit.4. Click on Edit Item from the view menu as shown below.38
5. Put your answer inside the description box or you may attach file.39
If you attach file, follow the below steps:Click on Choose file button:Specify the location path and then select the desired file to attach and then click on Openbutton:40
The file will be added as below, click OK:Also, the file will appear in the new mailbox message window, you can delete it if you are notsure about it, if confirmed, click Save:If you are sure about the file and confirm everything is ok, click the Submit button.Note: If you click the submit button to send the assignment, you will not be able to submit itagain.41
Discussion BoardThe Discussion Board section allows a user to leave some messages so that other courseparticipants can react to these messages in some way and leave their opinion about them.Discussion boards are created within the frames of separate courses. Only users who take partin the course can view its discussion boards and add their own messages to them. To accessthe course discussion board, enter the necessary course and click the Discussion Board iconin the Course Tools menu.Fig. ‘Discussion Board section’The Discussion Board tool has 3 levels: Discussion Board (contains categories to facilitate discussions filtering). Discussions (contains topics for discussion created inside discussion boards). Replies (discussion threads).Adding Discussion to Discussion BoardTo add a new discussion to the forum, do the following:1. Enter the necessary course.2. On the left Tools menu, click Discussion Board.3. Click a discussion board name, and then click Add new discussion (the open form as described below:42) and complete
Subject – type the subject of the discussion (the field is required). Body – describe the topic of the discussion.To attach a file, click the Attach File or Upload File link and browse the necessaryfile. Click OK.To check spelling, click the Spelling link.4. Select and enable the box of Question as shown below.5. Click Save.43
Insert Audio or Video file into Discussion BoardTo add audio or video file in a new discussion to the forum, do the following:1. Enter the necessary course.2. On the left Tools menu, click Discussion Board.3. Choose either Start New Discussion or View Discussion Board.4. If you select View Discussion Board, click New Discussion as shown below:If you click Start New Discussion, you will get the following window:44
45
Click inside the Body box in order to have the In
Help Displays online SharePoint LMS documentation . 6 Announcements Announcements are intended for informational purposes: a user who needs to share some important messages with others should create an announcement that will be viewed by all course participants (Learners and