Transcription
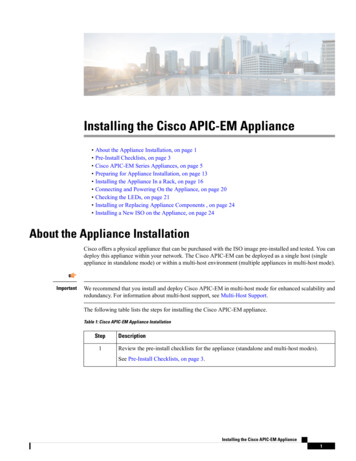
Installing the Cisco APIC-EM Appliance About the Appliance Installation, on page 1 Pre-Install Checklists, on page 3 Cisco APIC-EM Series Appliances, on page 5 Preparing for Appliance Installation, on page 13 Installing the Appliance In a Rack, on page 16 Connecting and Powering On the Appliance, on page 20 Checking the LEDs, on page 21 Installing or Replacing Appliance Components , on page 24 Installing a New ISO on the Appliance, on page 24About the Appliance InstallationCisco offers a physical appliance that can be purchased with the ISO image pre-installed and tested. You candeploy this appliance within your network. The Cisco APIC-EM can be deployed as a single host (singleappliance in standalone mode) or within a multi-host environment (multiple appliances in multi-host mode).ImportantWe recommend that you install and deploy Cisco APIC-EM in multi-host mode for enhanced scalability andredundancy. For information about multi-host support, see Multi-Host Support.The following table lists the steps for installing the Cisco APIC-EM appliance.Table 1: Cisco APIC-EM Appliance InstallationStep1DescriptionReview the pre-install checklists for the appliance (standalone and multi-host modes).See Pre-Install Checklists, on page 3.Installing the Cisco APIC-EM Appliance1
Installing the Cisco APIC-EM ApplianceAbout the Appliance InstallationStep2DescriptionReview information about the different types of appliances and their specifications, includingthe following: Physical Environmental Power Front and rear panelsSee Cisco APIC-EM Series Appliances, on page 5.3Review information about port usage for the controller.See Cisco APIC-EM Ports Reference, on page 11.4Prepare the appliance for installation.See Preparing for Appliance Installation, on page 13.5(Optional) Install the appliance in a rack.See Installing the Appliance In a Rack, on page 16.6Connect power to the appliance and power it on.See Connecting and Powering On the Appliance, on page 20.7Check the appliance LEDs.See Checking the LEDs, on page 21.8(Optional) Install and/or replace appliance components, if necessary.See Installing or Replacing Appliance Components , on page 24.9(Optional) Install a new ISO on the appliance, if necessary.See Installing a New ISO on the Appliance, on page 24.10Proceed to configure the Cisco APIC-EM in standalone or multi-host mode. Refer to thefollowing sections for information about the configuration wizard process: Configuring Cisco APIC-EM as a Single Host Using the Wizard Configuring Cisco APIC-EM in Multi-Host ModeInstalling the Cisco APIC-EM Appliance2
Installing the Cisco APIC-EM AppliancePre-Install ChecklistsPre-Install ChecklistsStandalone Mode ChecklistsReview the following checklists before beginning a single-host Cisco APIC-EM installation (standalonemode).NoteA host is defined as an appliance, physical server, or virtual machine with instances of a Grapevine root andclients running. The Grapevine root is located in the host OS and the clients are located within Linux containers.The clients run the services within the Linux containers. You can set up either a single-host deployment ormulti-host deployment (2 or 3 hosts) for your network. For high availability and scale, your multi-hostdeployment must contain three hosts. All inbound traffic to the controller in a single-host deployment isthrough the host IP address that you configure using the configuration wizard. All inbound traffic to thecontroller in a multi-host deployment is through a Virtual IP that you configure using the configuration wizard.Networking RequirementsThis Cisco APIC-EM installation requires that the network adapters (NICs) on the host (physical or virtual)are connected to the following networks: Internet (network access required for Make A Wish requests and telemetry collection) Network with NTP server(s) Network with devices that are to be managed by the Cisco APIC-EMNoteThe Cisco APIC-EM should never be directly connected to the Internet. It should not be deployed outside ofa NAT configured or protected datacenter environment.IP Address RequirementsEnsure that you have available at least one IP address for the network adapter (NIC) on the host.The IP address is used as follows: Direct access to the Grapevine root Direct access to the Cisco APIC-EM controller (for GUI access)NoteIf your host has 2 NICs, then you may want to have two IP addresses available and configure one IP addressfor each NIC.Installing the Cisco APIC-EM Appliance3
Installing the Cisco APIC-EM ApplianceMulti-Host Mode ChecklistsMulti-Host Mode ChecklistsReview the following checklist before beginning a multi-host Cisco APIC-EM installation (multi-host mode). You must satisfy the requirements for the single-host installation as described in the previous section foreach host. Additionally, you must establish a network connection between each of the hosts using either a switchor a router. Each host must be routable with the other two hosts. You must configure a virtual IP (VIP).You configure one or more NICs on each host using the configuration wizard. Each NIC that you configuremust point to a non-routable network (if all your networks are routable, then you only need one NIC).A VIP is required per non-routable network. For example, if you configure 2 NICs on all 3 hosts in amulti-host cluster and each NIC points to a separate, non-routable network, then you need to configure2 VIPs. The VIP provides an interface redundancy feature for your multi-host deployment. With a VIP,the IP address can float between the hosts.When deploying the controller in a multi-host configuration: You provide a VIP address when configuring the controller using the wizard. On startup, the controller will bring up the VIP on one of the hosts. All inbound requests into controller from the external network are made via this VIP (instead of thehost IP address), and the requests are routed to the services running on different hosts via thereverse-proxy service. If the host on which has the VIP fails, then Grapevine will bring up the VIP on one of the remainingtwo hosts. The VIP must reside in the same subnet as the three hosts. If you are planning to obtain a certificate issued for a multi-host environment, then it is importantto get the certificate issued against the virtual IP or the host name resolvable to the virtual IP. For a multi-host configuration with Cisco APIC-EM located behind a NAT within your network,note the following information and requirement: The Virtual IP address of the Cisco APIC-EM controller is intended as a destination addressfor HTTP(S) traffic such as Cisco PnP and PKI download requests. Any outbound connections initiated from the Cisco APIC-EM controller, such as during aDiscovery, Inventory Collection, etc., will use the host IP address of one of the three CiscoAPIC-EM hosts. Therefore, you need to PAT (Port Address Translation) the host IP addresses of the CiscoAPIC-EM hosts to a global public facing IP address for outbound connections from CiscoAPIC-EM controller.Multi-Host Deployment Virtual IPA multi-host deployment has three physical IP addresses and one virtual IP that floats across the IP addressesby design in order to provide high availability. This capability to float also means that any SSH client thatwants to connect to the virtual IP address will see different host-identity public SSH keys each time the virtualInstalling the Cisco APIC-EM Appliance4
Installing the Cisco APIC-EM ApplianceCisco APIC-EM Series AppliancesIP moves its residence from one host to another host. Most SSH clients will complain that the new host is nottrusted, since an entry already exists (as you might have accepted the key earlier for the older host whichowned that virtual IP address before). To prevent this inconvenience, you may want to add the host keys ofall the three hosts to your known hosts list as described below.For example on a Linux or Apple Mac OS client machine, run the ssh-keyscan command on each of thethree host physical IP addresses as follows: ssh-keyscan -t rsa 209.165.200.30# 209.165.200.30 SSH-2.0-OpenSSH 6.6.1p1 Ubuntu-2ubuntu2.3209.165.200.30 ssh-rsa 4xVcqpembKeCrdjakPaPAXqiAeKW9oimdv. ssh-keyscan -t rsa 209.165.200.31# 209.165.200.31 SSH-2.0-OpenSSH 6.6.1p1 Ubuntu-2ubuntu2.3209.165.200.31 ssh-rsa R0QLxunURDb pMeZrIIyd49xn9 X7XLjg. ssh-keyscan -t rsa 209.165.200.32# 209.165.200.32 SSH-2.0-OpenSSH 6.6.1p1 Ubuntu-2ubuntu2.3209.165.200.32 ssh-rsa ptGe sa3CBR6SNerXxpCmfT9AOXH8xuk3/CBX J6D6ob6jdzkR6yRuXVFi2OE u1Aqs7J8GO66FfdavU8.Next, change the IP address in the SSH key line of each output to the virtual IP address of the following andappend all three key lines to the /.ssh/known hosts file and save it.Assuming that 209.165.200.33 is the virtual IP address in the above multi-host example, you would add threelines in the /.ssh/known hosts file of your client machine as follows:209.165.200.33 CCqeZ1nWgFIqzAF ty8 X5Z/fhhmGe w2tQlMfrs9pcZDaEEmq/w1W uRohxLKs OHnHYAbMzC6O zafpft9Dp73pSd/vwaoB3DrvNec/PiEJYk R.After the above change, the client will have no trouble performing uninterrupted SSH into the virtual IPaddress of the hosts even with the IP address floating.Cisco APIC-EM Series AppliancesCisco provides a dedicated Cisco APIC-EM physical appliance that can be purchased from Cisco with theISO image preinstalled and tested. The following physical appliances are currently available for purchasefrom Cisco: Cisco APIC-EM Controller Appliance 10C-64G-2T (Part Number APIC-EM-APL-R-K9) Cisco APIC-EM Controller Appliance 20C-128G-4T (Part Number APIC-EM-APL-G-K9)Installing the Cisco APIC-EM Appliance5
Installing the Cisco APIC-EM ApplianceAppliance Scale LimitsThe following table describes the basic system configurations for these 9Physical CPU1 physical CPU2 physical CPUsCPU (cores)1020NoteNoteHyper-threading isenabled by default,therefore 20 logicalprocessors are availablefor this appliance.Hyper-threading isenabled by default,therefore 40 logicalprocessors are availablefor this appliance.RAM64 GB128 GBTotal Disk Space1.7 TB3.4 TBEthernet NICs2 (Gigabit Ethernet ports)2 (Gigabit Ethernet ports)Appliance Scale LimitsFor the latest, detailed information about the Cisco APIC-EM appliances and scale limits, see the CiscoApplication Policy Infrastructure Controller Enterprise Module Release Notes.Physical SpecificationsThe following table lists the physical specifications for the Cisco APIC-EM appliances.Table 2: Physical SpecificationsDescriptionSpecificationHeight1.7 in. (4.3 cm)Width16.9 in. (42.9 cm)Depth (length)29.8 in. (75.8 cm)Maximum weight (fully loaded chassis)SFF 8-drive: 37.9 lb. (17.2 Kg)LFF 4-drive: 39.9 lb. (18.1 Kg)Environmental SpecificationsThe following table lists the environmental specifications for the Cisco APIC-EM appliances.Installing the Cisco APIC-EM Appliance6
Installing the Cisco APIC-EM AppliancePower SpecificationsTable 3: Environmental SpecificationsDescriptionSpecificationTemperature, operating41 to 95 F (5 to 35 C)Derate the maximum temperature by 1 C per every305 meters of altitude above sea level.Temperature, non-operating–40 to 149 F (–40 to 65 C)(when the server is stored or transported)Humidity (RH), operating10 to 90%Humidity, non-operating5 to 93%Altitude, operating0 to 10,000 feetAltitude, non-operating0 to 40,000 feet(when the server is stored or transported)Sound power level5.4Measure A-weighted per ISO7779 LwAd (Bels)Operation at 73 F (23 C)Sound pressure level37Measure A-weighted per ISO7779 LpAm (dBA)Operation at 73 F (23 C)Power SpecificationsThe power specifications for the power supply are listed in the following section.NoteCautionYou can get more specific power information for your exact appliance configuration by using the Cisco UCSPower Calculator: http://ucspowercalc.cisco.comDo not mix power supply types in the appliance. Both power supplies must be identical.770 W AC Power SupplyThe following table lists the specifications for each 770 W AC power supply (Cisco part numberUCSC-PSU1-770W).Installing the Cisco APIC-EM Appliance7
Installing the Cisco APIC-EM ApplianceCisco APIC-EM Series Front and Rear PanelsTable 4: AC Power Supply SpecificationsDescriptionSpecificationAC input voltageNominal range: 100–120 VAC, 200–240 VAC(Range: 90–132 VAC, 180–264 VAC)AC input frequencyNominal range: 50 to 60Hz(Range: 47–63 Hz)Maximum AC input current9.5 A at 100 VAC4.5 A at 208 VACMaximum input volt-amperes950 VA at 100 VACMaximum output power per PSU770 WMaximum inrush current15 A (sub-cycle duration)Maximum hold-up time12 ms at 770 WPower supply output voltage12 VDCPower supply standby voltage12 VDCEfficiency ratingClimate Savers Platinum Efficiency (80Plus Platinumcertified)Form factorRSP2Input connectorIEC320 C14Cisco APIC-EM Series Front and Rear PanelsThe following figure displays the Cisco APIC-EM appliance front panel (APIC-EM-APL-G-K9 ).NoteThe Cisco APIC-EM appliance front panel (APIC-EM-APL-R-K9) shares a similar design.Installing the Cisco APIC-EM Appliance8
Installing the Cisco APIC-EM ApplianceCisco APIC-EM Series Front and Rear PanelsFigure 1: Cisco APIC-EM Appliance Front Panel (APIC-EM-APL-G-K9 )ComponentDescription1Drives (up to eight 2.5-inch drives)2Pull-out asset tag3Operations panel buttons and LEDs4Power button/power status LED5Unit identification button/LED6System status LED7Fan status LED8Temperature status LED9Power supply status LED10Network link activity LED11KVM connector (used with KVM cable that provides two USB 2.0, one VGA, and oneserial connector)The following figure displays the Cisco APIC-EM appliance rear panel (APIC-EM-APL-G-K9 ).NoteThe Cisco APIC-EM appliance rear panel (APIC-EM-APL-R-K9) shares a similar design.Installing the Cisco APIC-EM Appliance9
Installing the Cisco APIC-EM ApplianceSummary of Appliance Series FeaturesFigure 2: Cisco APIC-EM Appliance Rear Panel (APIC-EM-APL-G-K9 )ComponentDescription1PCIe riser 1/slot 12PCIe riser 2/slot 23Modular LAN-on-motherboard (mLOM) card slot4Grounding-lug hole (for DC power supplies)5USB 3.0 ports (two)61-Gb Ethernet dedicated management port7Serial port (RJ-45 connector)8Dual 1-Gb Ethernet ports (LAN1 and LAN2)9VGA video port (DB-15)10Rear unit identification button/LED11Power supplies (up to two, redundant as 1 1)Summary of Appliance Series FeaturesThe following table lists the Cisco APIC-EM appliance series features.Table 5: Cisco APIC-EM Appliance Series FeaturesFeatureDescriptionChassisOne rack-unit (1RU) chassis.ProcessorsUp to two Intel Xeon CPU E5-2650 v3 Series processors.Memory24 DDR4 DIMM sockets on the motherboard (12 each CPU).Baseboard managementBMC, running Cisco Integrated Management Controller (Cisco IMC)firmware.Depending on your Cisco IMC settings, Cisco IMC can be accessedthrough the 1-Gb dedicated management port, the 1-Gb Ethernet LOMports, or a Cisco virtual interface card.Installing the Cisco APIC-EM Appliance10
Installing the Cisco APIC-EM ApplianceCisco APIC-EM Ports ReferenceFeatureDescriptionNetwork and Management I/OSupported connectors:1 One 1-Gb Ethernet dedicated management port Two 1-Gb BASE-T Ethernet LAN ports One RS-232 serial port (RJ-45 connector) One 15-pin VGA2 connector Two USB3 3.0 connectors One front-panel KVM connector that is used with the KVM cable,which provides two USB 2.0, one VGA, and one serial (DB-9)connectorModular LOMDedicated socket that can be used to add an mLOM card for additionalrear-panel connectivity (up to four 1-Gb or 10-Gb Ethernet ports).PowerTwo power supplies: AC power supplies 770 W AC each.Do not mix power supply types or wattages in the server.Redundant as 1 1.CoolingSix hot-swappable fan modules for front-to-rear cooling.Storage APIC-EM-APL-R-K9: 4 SAS HDD of 900 GB each APIC-EM-APL-G-K9: 8 SAS HDD of 900 GB eachDisk Management (RAID)Hardware-based RAID at RAID Level 10VideoVGA video resolution up to 1920 x 1200, 16 bpp at 60 Hz, and up to256 MB of video memory.1The Intel X520 2 Port 10G PCI adapter (Part No. N2XX-AIPCI01) and 10G SFP (Part No.CDE2-SFP-1WSR ) is now supported for the Cisco APIC-EM Appliance Server.Cisco APIC-EM Ports ReferenceThe following tables list the Cisco APIC-EM ports that permit incoming traffic, as well as the Cisco APIC-EMports that are used for outgoing traffic. You should ensure that these ports on the controller are open for bothincoming and outgoing traffic flows.NoteEnsure that proper protections exist in your network for accessing port 22. For example, you can configure aproxy gateway or secure subnets to access this port.Installing the Cisco APIC-EM Appliance11
Installing the Cisco APIC-EM ApplianceCisco APIC-EM Ports ReferenceTable 6: Cisco APIC-EM Incoming Traffic Port ReferencePort NumberPermitted TrafficProtocol (TCP or PISAKMPUDP2500In order for deploying multiplehosts across firewalls in certaindeployments, the IPSec ISAKMP(Internet Security Association andKey Management Protocol) UDPport 500 has to be allowed to betraversed.160262SCEPTCPYou can configure the TLS version for this port using the Cisco APIC-EM. For more information, seethe Cisco Application Policy Infrastructure Controller Enterprise Module Administrator Guide.Table 7: Cisco APIC-EM Outgoing Traffic Port ReferencePort NumberPermitted TrafficProtocol (TCP or UDP)22SSH (to the network devices)TCP23Telnet (to the network devices)TCP53DNSUDPInstalling the Cisco APIC-EM Appliance12
Installing the Cisco APIC-EM AppliancePreparing for Appliance InstallationPort NumberPermitted TrafficProtocol (TCP or UDP)80Port 80 may be used for anoutgoing proxy configuration.TCPAdditionally, other common portssuch as 8080 may also be usedwhen a proxy is being configuredby the Cisco APIC-EMconfiguration wizard (if a proxy isalready in use for your network).NoteTo access Cisco supportedcertificates and trust pools, you canconfigure your network to allow foroutgoing IP traffic from thecontroller to Cisco addresses at thefollowing SNMP agentUDP443HTTPSTCPISAKMPUDP3500In order for deploying multiplehosts across firewalls in certaindeployments, the IPSec ISAKMP( (Internet Security Association andKey Management Protocol) UDPport 500 has to be allowed to betraversed.3You can configure the TLS version for this port using the Cisco APIC-EM. For more information, seethe Cisco Application Policy Infrastructure Controller Enterprise Module Administrator Guide.Preparing for Appliance InstallationThis section provides information about preparing for the Cisco APIC-EM series appliance installation.Unpack and Inspect the ApplianceCautionWhen handling internal appliance components, wear an ESD strap and handle modules by the carrier edgesonly.Installing the Cisco APIC-EM Appliance13
Installing the Cisco APIC-EM ApplianceInstallation GuidelinesTipNoteKeep the shipping container in case the appliance requires shipping in the future.The chassis is thoroughly inspected before shipment. If any damage occurred during transportation or anyitems are missing, contact your customer service representative immediately.Step 1Remove the appliance from its cardboard container
ionsfortheseappliances. Platform APIC-EM-APL-R-K