Transcription
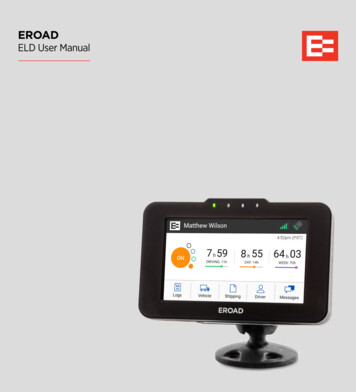
EROADELD User Manual
Content1Introduction12Driving Setup32.1 Logging in to the EROAD ELD32.1.1 Login Name Search32.2 Reviewing the Home Screen42.3 Changing Your Duty Status62.3.1 Duty Status62.3.2 Personal Conveyance Status72.3.3 Yard Moves Status82.4 Checking Hours of ServiceLEGAL NOTICE AND DISCLAIMERThe legislation and rules concerning the installation and operationof GPS driver aids such as the EROAD Electronic Logging Device(ELD) vary between States. You are required to familiarize yourselfwith the laws of the jurisdiction(s) in which the vehicle will be operated in prior to installing and using the ELD.2.4.1 Summary92.4.2 Rolling View92.5 Adding or Dropping Trailers2.5.1 Adding Trailers2.5.2 Dropping TrailersDriving laws place the responsibility on the driver to correctly installand use GPS driver aids. It is, therefore, the ELD’s owner’s and vehicle driver’s sole responsibility to install and use the ELD in a mannerthat complies with the law and will not cause accidents, personalinjury or property damage. The owner of the ELD and vehicle driverare solely responsible for observing safe driving practices.2.6 Entering a Shipping DocumentEROAD DISCLAIMS ALL LIABILITY FOR ANY USE OF THE ELD INA WAY THAT MAY CAUSE ACCIDENTS, DAMAGE OR VIOLATETHE LAW.TO THE MAXIMUM EXTENT PERMITTED BY LAW, ALL REPRESENTATIONS AND WARRANTIES (EXCEPT ANY WHICH MAY NOTLAWFULLY BE EXCLUDED) ARE EXPRESSLY EXCLUDED, INCLUDING WITHOUT PREJUDICE TO THE GENERALITY OF THE FOREGOING, THE IMPLIED WARRANTIES OF MERCHANTABILITY ANDFITNESS FOR A PARTICULAR PURPOSE. THIS LEGAL NOTICE ISIN ADDITION TO, AND NOT A SUBSTITUTE FOR, THE WARRANTYDISCLAIMERS AND LIMITATION OF LIABILITY CLAUSE CONTAINTED IN EROAD’S STANDARD TERMS.As EROAD is continuously improving its products, EROAD maymake changes to the ELD at any time which may not be reflectedin this document. Please contact your nearest EROAD office if yourequire any further assistance.Copyright 2017 EROAD Inc. All rights reserved. No part of thisUser Manual may be reproduced, distributed, or transmitted in anyform or by any means without the express written permission ofEROAD Inc.389910112.6.1 Adding a Shipping Document112.6.2 Deleting a Shipping Document122.7 Setting WMT Configuration (Oregon Only)132.8 Entering Fuel Gallons14Everyday Use153.1 Driving Mode153.1.1 Changing Views Between Drivers153.1.2 Exiting Driving Mode163.2 Adding a Co-Driver173.3 Changing Drivers183.4 Changing Vehicles193.5 Viewing and Sending Messages193.6 Reviewing Logs203.7 Correcting Logs213.7.1 Adding a Remark223.7.2 Deleting a Record23EROAD is a trademark of EROAD Inc. All rights reserved.3.7.3 Inserting a Missing Record24@2017 EROAD MN000820A-GMANUAL,EROAD,EBOX2,ELD DRIVER MANUAL,VER23.7.4 Editing an Existing Record26
143.8 Certifying Your Logs273.9 Finishing Your Day / Logging out28Advanced Log Edits294.1 Reviewing Suggested Motor CarrierCorrections294.1.1 Reviewing Suggested Edits at Login294.1.2 Reviewing Suggested Edits from the30Home Page54.2 Swapping Driving Time314.3 Claiming Unidentified Driving Time334.4 Emailing Logs to Yourself35Roadside Inspection375.1 Transferring Your Records385.1.1 Transfer Via Email385.1.2 Transfer Via Web Services395.2 Displaying Your Records67405.2.1 Viewing Header Information405.2.2 Viewing Graph Logs425.2.3 Viewing All Events435.2.4 Viewing Unidentified Driving Times44Issues456.1 Managing Malfunctions456.2 Resolving Data Diagnostics46Appendix477.1 Contacting EROAD477.2 Glossary487.3 Error Messages and Malfunctions501 IntroductionThe EROAD Electronic Logging Device (ELD) is designed tomake your job easier. This manual might be used by drivers,mechanics, fleet managers, dispatchers, or anyone accessingthe EROAD ELD.The EROAD ELD system includes the in-vehicle device and theDepot application. It gives you control to change duty statusand manage your logs, among other features.The EROAD ELD is installed in the cab of the truck. It measuresthe distance you travel, and captures location [via a globalpositional system (GPS)], route, and operational data fromthe truck.
232 Driving SetupThe records are stored via a cellular data network, whichinterfaces to EROAD’s Depot application. Users can accessDepot through a Web browser.Complete the following setup activities before you beginto drive.2.1 LOGGING IN TO THE EROAD ELDPerform the following tasks to login to the EROAD ElectronicLogging Device (ELD).1. Locate and tap your name on the Login screen.GPSCellularEngineECM LinkEROADELDCloud hostedEROAD DepotWeb browser2. (optional) Tap the Downarrow to see more names, ifyour name is not on the first screen. This scrolling feature isnot available for organizations with more than 1000 drivers.Note: See section 2.1.1, Login Name Search to perform asearch, if you cannot locate your name.Tip:The first-time appearance of an acronym orabbreviation is spelled out in this manual; afterward,it is abbreviated. See section 7.2, Glossary for acomplete list of acronyms and abbreviations used inthis manual.3. Enter your four-digit personal identification number (PIN)using the 10-key pad on the right.Note: The Welcome screen lists your special drivingcategories. It might prompt you to review unidentified trips,accept edits, or certify your logs.2.1.1 Login Name SearchPerform the following tasks to search for your login name, if itdoes not display on the login screen.1. Tap the Search icon on the Login screen (shown above)to locate your name quickly, if the driver list is long.2. Enter your name in the Name field.
453. Tap the Searchbutton , and then tap on your namewhen the list displays.Menu Option DescriptionAllows you to see a graphical representationof your duty status for a 24-hour period. Youcan cycle through previous days to check loghistory. Additional options include:4. Enter your four-digit personal identification number (PIN)using the 10-key pad as shown above. Contact your motorcarrier if you forgot your PIN or if your name is not onthe list.Tip:Driving time is applied to the active driver if the codriver does not login. View/Edit (section 3.6)Hours of Service (HoS) (section 2.4)Certify (section 3.8)Inspection (display or export log data)(section 5)Pending Edits (section 4.1)Unidentified (driver) (section 4.3)Issues (section 6)Email Logs (section 5.1.1)All Events (section 5.2.3)2.2 REVIEWING THE HOME SCREENAllows you to enter fuel quantity, connector drop trailers, and set the Weight Mile Tax(WMT) configuration (Oregon only).The first screen that displays on the EROAD ELD is calledthe Home screen. The menu options are represented by thefive icons that appear on the bottom row of the device. Theinformation displayed on the Home screen is illustrated below.Allows you to add a shipping document(such as a bill of lading).DriverNameCellularStrengthAllows you to view the active driver. You canview the driver’s name, email address andtime zone. The ELD lets you add a co-driveror logout using this sub menu.GPSCo-DriverNameCurrentTimeDutyStatusHours ofServiceCounterMainMenuThere are additional options available under each menu icon.The following table outlines additional options to help youmanage your trip. You can tap each icon to access moreoptions, which are briefly described in the following table.Allows you to scroll through the existingmessages, as well as send a new message.
672.3 CHANGING YOUR DUTY STATUSThere are four standard duty status options on the EROADELD. Your carrier might allow you to use the two optionalstatuses. Each status is color-coded.Duty Status IconDescriptionOFFOff duty, you are not working.SBSleeper berth; time spent in the berth.DDriving; your status changes to Drivingas soon as the vehicle is in motion (at5 miles per hour).ONOn duty, but you are not driving.OFF PCOff duty/personal conveyance; youare using the truck for personalconveyance. This time counts as offduty in your hours of service. (optionalper motor carrier)ON YMOn duty/yard move; you are movingaround the yard or off public roads.Your time counts as On Duty in yourhours of service. (optional per motorcarrier)2.3.1 Duty StatusPerform the following steps to change your duty status.1. Tap the large circle on the left side of the Home screen.Your duty status is listed in the middle of the circle.Example: Tap Onappears.2. Tap the new duty status that you want. The Home screenappears with the new duty status that you selected.The Change Duty Status screen2.3.2 Personal Conveyance StatusThis is a special driving category that might be provided byyour carrier. This duty status counts as Off Duty in your hoursof service. You must add a remark in your logs when you usethis duty status.Note: See section 3.7.1, Adding a Remark to learn more aboutadding a remark.1. Tap the large circle on the left side of the Home screen. TheChange Duty Status screen appears(as shown in section 2.3.1., Duty Status above).2. Tap the OFF - Personal Conveyancestatus. The Homescreen appears with the changed status.The EROAD ELD is designed to prompt the driver about theOff - Personal Conveyance duty status if the vehicle is shutoff while in this status. The Continue Personal Use screendisplays when the ignition is activated in the vehicle.3. Tap the Yesbutton to continue the OFF – PersonalConveyance status or tap the Nobutton to end thisduty status.Note: Your duty status changes to OFFduty, if thisprompt is ignored
892.3.3 Yard Moves StatusThis is a special driving category that might be provided byyour carrier for moving material around a yard or via privatedriveways. Add a remark in your logs when using this dutystatus.2.4.1 SummaryThis tab section shows your 14-hour driving window, 11-hourdriving limit, and the duty cycle (either 60/7 or 70/8). Thescreen displays the remaining time against each of these limits.1. Tap the large circle on the left side of the Home screen. TheChange Duty Status screen appears (as shown in section2.3.1., Duty Status above).2. Tap the On Yard Movestatus. The Home screen appearswith the changed status.Note: Your duty status is set to ONif the engine ispowered off while you are in the On Yard Move duty status.2.4 CHECKING HOURS OF SERVICEThe EROAD ELD provides an electronic method for trackingyour hours of service (HoS) in your efforts to comply withfederal and state driving and duty-hour requirements. It helpsensure that you are operating safely and efficiently. Usersmay tap the counters on the home screen to jump to the HoSscreen. The HoS screen provides two views – Summary andRolling View. These views are described in more detail in thefollowing sections.1. Tap the Logs icon2.4.2 Rolling ViewThis tab section tracks your eight-day rolling period, listsremaining hours today, and recaps total hours during the eightday rolling period. The bar graph color changes to red if youexceed your required hours of service. Tap the Rolling View tab to view your eight-day rollingperiod.on the Home screen menu.Tip:Tap the Backarrow at the top of the screen toreturn to the previous screen.2. Tap the HoS iconon the Logs menu.2.5 ADDING OR DROPPING TRAILERSThe EROAD ELD lets you easily add or drop trailers. You needto enter the trailer number in the EROAD ELD each time youconnect a trailer to your vehicle.2.5.1 Adding TrailersPerform the following steps to add a trailer.1. Tap the Vehicle iconon the Home menu.
10112. Tap the Trailers iconon the Vehicle menu. The Trailersscreen displays your list of trailers.2. Tap the Trailersicon on the Vehicle menu. The Trailersscreen displays your list of trailers.3. Tap the Add Trailer3. Tap the Dropicon beside the trailer ID that you wantto drop. A confirmation message displays that the trailernumber was removed.button.4. Enter the trailer ID in the Add Trailer field.5. Tap the Addbutton. The Connected Trailers screendisplays a confirmation message.Note: You can connect from one up to three trailers.2.6 ENTERING A SHIPPING DOCUMENTThe EROAD ELD allows you to quickly enter a shippingdocument (such as a bill of lading). The following sectionsdescribe how to add or delete a shipping document.2.6.1 Adding a Shipping DocumentPerform the following steps to add a shipping document.1. Tap the Shippingicon on the Home menu. TheShipping Docs screen appears.2.5.2 Dropping TrailersPerform the following steps to drop a trailer.1. Tap the Vehicleicon on the Home menu.2. Tap the Add Documenticon.
12133. Enter the document ID in the Edit Document field.2.7 SETTING WMT CONFIGURATION (OREGON ONLY)4. Tap the Saveappears.The EROAD ELD lets you easily change your vehicle weightconfiguration for use with EROAD’s Weight-Mile Tax(WMT) reporting. Perform the following steps to set yourconfiguration. This applies to drivers operating in the Stateof Oregon.button. A confirmation message1. Tap the Vehicle iconon the Home menu.2.6.2 Deleting a Shipping DocumentPerform the following steps to delete a shipping document.1. Tap the Shippingicon on the Home menu. TheShipping Docs screen appears.2. Tap the Configicon on the Vehicle menu. The Configscreen appears and lists various configuration weight orsingle trip permit options.2. Tap the Editicon beside the document number thatyou want to delete.3. Tap the configuration button that applies to your trip.4. Tap the Save3. Tap the Deletebutton on the Edit Document screen,as shown in section 2.6.1, Adding a Shipping Document. Aconfirmation prompt appears.4. Tap the Deletebutton in the confirmation prompt.button.
14152.8 ENTERING FUEL GALLONS3 Everyday UsePerform the following steps to enter fuel gallons.1. Tap the Vehicle iconon the Home menu.Certain tasks are performed daily. This chapter describes howto add a co-driver, change drivers, review and correct logs,insert missing records, add remarks, delete records, certify yourlogs, and log out of the EROAD ELD.3.1 DRIVING MODEYour duty status automatically changes to Drivingas soonas your vehicle reaches five miles per hour. The ELD drivingmode only displays a minimal amount of information, forsafety reasons.2. Tap the Fuelicon on the Vehicle screen.Tip:Safety is essential. A driver cannot access any other screen whiledriving. A co-driver can view logs while the vehicle is inmotion.3. Enter the number of gallons using the key pad.3.1.1 Changing Views Between Drivers4. Tap the EnterA co-driver can review his/her logs while the vehicle is inmotion by changing views between drivers. Perform thefollowing steps to change views.button.1. Tap the Co-Drivericon.2. Co-Driver: enter your PIN at the prompt. The Home screendisplays, where you can view and certify your logs.5. Tap the Backarrow to return to the Home screen.
16173.1.1.1 Changing Views Alternative ProcessPerform the following steps to change views from the Driverview (default) to the Co-Driver view.2. Tap the duty status that applies to the change (such as Onor Off). You are returned to the Home screen.1. Tap the Driver iconon the Home menu. The Logged-inDriver screen appears.3.1.2.1 Exiting Driving Mode Alternative Process2. Tap the Co-Driver Viewicon.The screen on the EROAD ELD automatically changes if yourvehicle is stationary for five minutes. You have 60 seconds torespond to the prompt, otherwise, your status changes to OnDuty if you ignore the prompt. Tap the Drivingbutton if you are still driving or tapthe On Dutybutton if you are not driving.Note: Use the duty status icon to change your duty status, ifneeded. See section 2.3.1, Duty Status for more information.3. Co-driver: Enter your PIN at the prompt. The co-driver’sdriver profile screen displays.Note: This process can be applied in reverse if you beginfrom the Co-Driver View.Tip: EROAD ELD logs are secure and preventunauthorized access to another driver’s logs. You must enter your PIN number at theprompt, if you begin from an opposite view.60-SecondCounter3.2 ADDING A CO-DRIVERBoth the active driver and co-driver must be logged into theEROAD ELD, when driving with a co-driver. Co-driver login canbe accomplished using the following steps.1. Tap the Driver icon3.1.2 Exiting Driving ModePerform the following steps to exit driving mode when youstop driving.1. Tap on the Drivingduty status icon that appears next toyour name when you stop driving.on the Home menu.
18192. Tap the Add Co-Drivericon on the Driver menu. TheCo-Driver Login screen appears.2. Tap the Switch Driver3. Tap the co-driver’s name.Note: Tap the Downarrow to see the rest of the list ortap the Search icon to find your name.3. Enter the active driver’s PIN.4. Co-Driver, enter your four-digit PIN number.See section 2.1, Logging in to the EROAD ELD for moreinformation about the login screens.Note: See section 4.2, Swapping Driving Time if you made amistake and recorded driving time for the wrong driver.Tip:Driving time is applied to the active driver if theco-driver does not login.3.3 Changing DriversThe Active Driver must change his duty status to On Duty, Sleeper Berthor OFFbefore changing driverson the EROAD ELD, when a co-driver is present. Performthe following steps before the vehicle is in motion when youchange drivers.1. Tap the Driver iconon the Home menu. The LoggedIn Drivers screen displays the Active Driver’s name on theleft side and the Co-Driver’s name on the right side of thescreen.4. Tap the Yesicon.button. A confirmation message appears.3.4 Changing VehiclesPerform the following steps if you must move from one vehicleto another vehicle.1. Tap Onor Offat the Home screen in the firstvehicle to change your duty status.See section 2.3.1, Duty Status for more information.2. Perform the logout procedure in the first vehicle.See section 3.9, Finishing Your Day / Logging out formore information.3. Perform the login procedure on the EROAD ELD in thesecond vehicle and set your duty status.See section 2.1, Logging in to the EROAD ELD and section2.3.1, Duty Status for more information.3.5 Viewing and Sending MessagesMotor carriers can send messages to drivers through Depot.Drivers can view and send messages using the Messages iconon the Home menu. An orange light illuminates on the ELDwhen a message is unread. Unread messages are highlighted in orange. Read messages are highlighted in gray. Replies are highlighted in blue.Tip:The vehicle must be stopped before you reply orsend a message.
2021Perform the following steps to view and send a message.1. Tap the Messages iconon the home screen. The alerton the icon indicates a message is unread.2. Tap the New Message2. Tap the Leftarrow by the date to view the previous day.You can view up to seven days of prior activity.3. Tap the Rightarrow by the date to return to the currentdate. Your total hours for each duty status are listed on theright side of the graph.button to send a reply.A Certifiedicon displays under your name, if the logshave been certified. An Uncertifiedicon appears, if youstill need to certify your logs.Note: See section 3.8, Certifying Your Logs for moreinformation.3. Enter the message in the text field using the key pad.4. Tap the Sendbutton to send the message.3.7 CORRECTING LOGSOccasionally, you might have to correct your logs. Perform thefollowing steps to access a log for correction.1. Tap the Logs icon3.6 REVIEWING LOGSThe EROAD ELD lets you quickly verify that your logs areaccurate and complete. Perform the following steps to reviewyour logs.1. Tap the Logs iconon the Home menu. The Logs screendisplays activity for the current day.2. Tap the View/Editon the Home menu.icon on the Logs screen.
22233. Tap the Duty Status on the graph that you want to correct,or tap the leftarrow or rightarrow below the graphto locate the duty status that needs correction.5. Tap the Remarkappears.icon. The Add a Remark screen4. Tap the Editicon on the lower right side of the screen.The log entry for that day appears on screen.6. Enter your comments in the Add Remark field.7. Tap the Donebutton.There are several menu options on the Edit screen that can beused to modify your logs, which are described in the followingtable. Instructio
4.4 Emailing Logs to Yourself 35 5 Roadside Inspection 37 5.1 Transferring Your Records 38 5.1.1 Transfer Via Email 38 5.1.2 Transfer Via Web Services 39 5.2 Displaying Your Records 40 5.2.1 Viewing Header Information 40 5.2.2 Viewing Graph Logs 42 5.2.3 Viewing All Events 4


