Transcription
A myCampus Registration Guide for Students
TABLE OF CONTENTSAccessing myCampusNavigating myCampus and Self ServiceRegistration StatusAdding, Dropping and Searching for ClassesParts of TermAttributesCampus CodesOnline ClassesCorrespondence ClassesRegistration ErrorsHoldsWeek at a GlanceStudent Detailed ScheduleCourse CatalogActive RegistrationRegistration HistoryLocating Your Academic Advisor3–45–789 – 1415161718192021222324252627 - 282
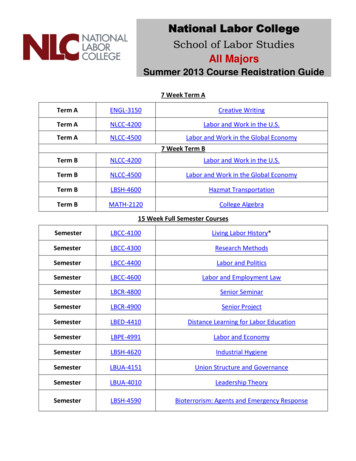
ACCESSING MYCAMPUS Students can access myCampus by going to the direct link in their web browser: http://mycampus.astate.edu Students can also access myCampus by going to the A-Z index on the ASU homepage (http://www.astate.edu) andclicking on the myCampus link located on that page.(Screenshot of ASU Homepage, arrow pointing to A-Z index link)(Screenshot of A-Z Index, click M and then myCampus to reach the myCampus login page)3
Once you have accessed the myCampus login page, enter the first part of your ASU email (usually a combination ofyour first and last names) and password. If you have forgotten your password, click the Forgot Password linkunderneath the login fields. IMPORTANT: In order to access the myCampus portal you must be admitted as a student. If you have been awayfrom the university for more than 1 year you will need to readmit. You can start the readmission process here: Applyfor Readmission If you have any questions regarding this process, please contact the Office of Admissions, Records &Registration at (870) 972-2031 or admissions@astate.edu4
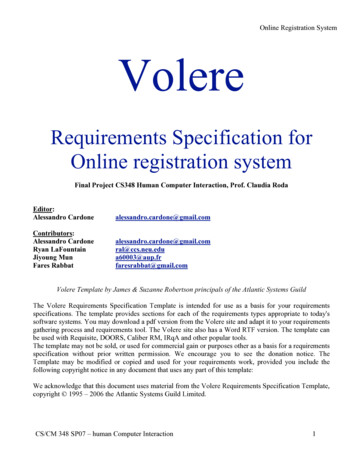
NAVIGATING MYCAMPUS AND SELF SERVICE Once you are logged into the myCampus portal, you should notice a list of icons on the left-hand side of your screen.You will click the icon labeled SSB (Self Service) to access the registration pages (see screenshot below). When you click the SSB icon, a new page should open (if it does not, please check your pop up blockers). This newpage will be the main menu of Self Service.5
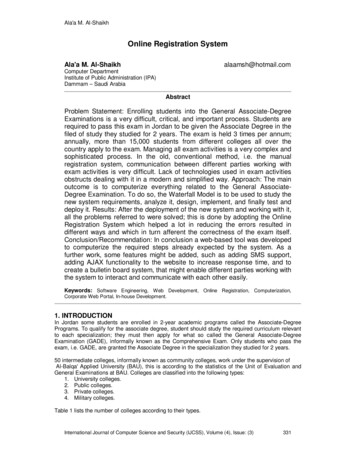
On the main menu of Self Service you will see several links and tabs (screenshot below). To begin registration, clickthe Student tab or link. The Student and Financial Aid menu will be shown next. Click on Registration to continue the registration process.6
The Registration menu will display several links that pertain to your registration (see screenshot below). You first must select a term that you would like to perform registration tasks. Once you select a term, when you click links on the Registration page they will display information for that selectedterm. Once you have selected a term, Self Service will retain this term for all registration queries and searches. In order toselect a different term, you will need to click the Select Term link to choose a new term.7
The Registration Status link will show you basic information about the term selected. It will identify any problemsyou may have during registration including holds, academic standing and status. It will also identify any permits youhave been granted, your earned hours and curriculum information. It is a good idea to check this link beforeregistration each term.8
The Add or Drop Classes link allows you to register or drop courses by Course Reference Number (CRN). If you do notknow the CRNs, you can add courses by clicking the Look Up Classes link. If you receive the message below when clicking on the Add or Drop classes link it means you have not been clearedby your academic advisor or your class (Sr., Jr., So., Fr.) is not scheduled to register at that time. Please remember tovisit with your academic advisor to get registration clearance and check registration dates for your class. Clicking the Look Up Classes link will bring up a search option to look up courses by Subject. You can select onesubject or multiple subjects (hold CTRL down to select multiple subjects).9
Once you select a Subject, click the Course Search button. This will bring up all courses that are currently scheduledduring the selected term. You can click the View Sections button to see the specific sections that are scheduled of each course. In order toregister for the course click the checkbox and the click the Register button at the bottom of the page.10
The Look Up Classes link also has an Advanced Search option that can be selected by pushing the correspondingbutton. The selection of that button brings up the menu below and allows you to search using any of the listedcriteria. Once a search is performed, the results will look like the results listed above and registration can be doneusing the same method as well.11
Once you receive your search results, you can register for selected classes by clicking the checkbox and submittingthe registration via the Register button as described above.12
If there were any issues registering for a course, you will get a message similar to the one in the screenshot below.This means you did not register for the class. If you receive an error like the one below, please ensure you areregistering for the correct section. If you received the error and believe you should be able to register for the section,please contact the department of the course so that they can instruct you on what you need to do in order to registerfor the course. If your registration was successful, you’ll see a message similar to the one in the screenshot below. You may notice that when searching for classes that the checkbox is replaced by letters or empty space. Letterswhere the checkboxes normally are (ex. SR, C) indicate that the course is no longer available for registration. Anempty space means you are currently registered for that specific course.13
DROPPING COURSES In order to drop classes from your schedule, you can use the Add or Drop Classes menu described in the registrationsection above. Students can drop using the drop-down menu that is listed next to their courses or they can enterspecific CRNs of courses that they are listed in to drop them from their schedule Students need to be aware of all drop deadlines as after these dates students will no longer be allowed to dropcourses. Once fee assessment begins (2nd week of class in Spring and Fall terms, 3rd day of class for Summer terms) inorder to withdraw from the university (drop all classes) you must visit with the Wilson Advising Center.14
PARTS OF TERM As noted above, students can search using the part of term (POT) search criteria in the Advanced Search option.POTs are used to designate periods of a semester in which courses occur. This search method is best used to findcourses that occur outside of full term courses in Fall and Spring terms. This would include first and second sessioncourses, correspondence courses and for those students in online degree programs those POTs as well. This searchfunction becomes useful in the Summer terms as most courses occur in first or second session POTs and is useful infinding courses for students. There have been terms in the past that have been combined with other terms to make scheduling more effective andefficient for students and the institution. These terms are the May and August Interim terms. These have now beencombined with the Summer term and these make up POTs within the Summer term. You can use the POT searchfeature to find courses specifically in these POTs for the Summer term.15
ATTRIBUTES Some courses are marked with attributes which denote special features of those courses. These courses can besearched for using the Attribute search feature listed above. There are a number attributes that are assigned tocourses and can be used in the search feature. Some of the typical attributes students may search for are those ofHonors sections and Structure Learning Assistance (SLA) among others. The screenshots below indicate how to viewcourse attributes after a search is done. The attribute can be seen on the far right hand side of the course.16
CAMPUS CODES Students should also be aware of the various campus codes assigned to courses. This information is displayed whensearching for courses under the “Cmp” header. Here are some of the more common campus codes used for eebeCorrespondenceEACCANCNewportMountain HomeCodeSLSDJHNHWHVVHGCHPHCampusMSCCOnline ProgramsJonesboro High SchoolNettleton High SchoolWestside High SchoolValley View High SchoolGreene County Tech High SchoolParagould High School17
ONLINE COURSES Using the Instructional Method search feature students can search for courses outside of those that are typicallyconsidered traditional. This includes online (WEB) and web assisted (WEBA) courses. Online (WEB) – Courses denoted as WEB are purely online courses and do not have any mandatory ‘in-class’ or‘online’ meeting times. Web-Assisted (WEBA) – A course which is classified with a Web-assisted (WEBA) instructional method could havemandatory meeting times that may be either in-class or online in a virtual community. Web-assisted classes may alsohave optional outside meeting times (e.g. Instructors that offer students office hours or optional ‘in-class’ meetingsessions on campus should also be coded as WEBA). Any classes that require exams to be proctored in person or at aspecific online location with mandatory times are also classified as WEBA (e.g. Exams are scheduled to run at acertain time and students cannot choose when to start). Students MUST attend these scheduled times just like atraditional class time. However, the majority of the course will be online. Instructors that offer students office hourson campus should also be coded as WEBA. When searching for these courses online, the location of the course should indicate whether they are WEB or WEBAcourses as noted by the screenshot below.18
CORRESPONDENCE COURSES A correspondence course is a home study course offered by a school under which instructional and examinationmaterials are provided to students who are not physically attending classes There are several ways to distinguish correspondence courses from other courses. The section (Sec) number willbegin with the letter C, the Campus (Cmp) and the Attribute will be Correspondence.19
REGISTRATION ERRORS If you receive a message that says ‘Registration Add Errors’, you can find out what the error is under theStatus section of the course you attempted to register for.The following are a few different types of errors that can occur along with who to contact when you receive theerror: Pre-Req and Test Score Error – Contact the department where the course is housedInstructor Signature Error – Contact the instructor of the course for an overrideMajor Restriction Error - Contact the department where the course is housedCampus Restriction Error - Contact the department where the course is housedDepartment Error - Contact the department where the course is housedLevel Restriction – This is used to limit Undergraduate students to Undergraduate courses and Graduatestudents to Graduate courses. Check the level of the course you are trying to register for.20
HOLDS If you encounter an error message which states “You may not add or drop classes due to holds on your record” itindicates that a department has placed on a hold on your account. Yu can view what type of hold as well as thedepartment and number to contact to find out more information about the hold by clicking the View Holds link. Once you click the view holds link, more detailed information will be displayed regarding the hold including the holdtype, department who placed the hold (Originator) and the numbers where these departments can be contacted.You must contact the originating department to have the hold modified or removed from your account.21
WEEK AT A GLANCE The Week at a Glance feature allows you to view your schedule one week at a time. You enter a date in aMM/DD/YYYY format and the system will display your schedule for that week. The schedule will be displayed Monday – Sunday and show the courses you are currently registered in for theselected term. It will display the course information, meeting times, building and room of the courses on yourschedule.22
STUDENT DETAILED SCHEDULE The student detail schedule link displays all of the student’s courses but in a much more detailed format. Using thisdisplay you can view detailed course information including all information that was displayed on the Week at aGlance menu as well as the instructor, dates, credits, level and campus of the course. The instructor will also have email icons (as pointed out by the red arrows). Clicking these icons will allow you toemail the instructor of the course.23
COURSE CATALOG The course catalog link allows students to look up course information which includes a description, credits and levelof the course The course is hyperlinked and clinking on this link will display more detailed information regarding the course24
ACTIVE REGISTRATION This link will display ALL currently registered courses, including upcoming terms. Mid-Term grading can also beviewed here, provided your instructor issues one (mid-term grades are not required on Junior and Senior levelstudents) The course is hyperlinked on this page and clicking it will allow you to view the syllabus, required textbooks andmaterials and registration information regarding the course.25
REGISTRATION HISTORY A complete listing of all registration since the Fall 2006 term is viewable on this screen alongwith grading for each course26
LOCATING YOUR ACADEMIC ADVISOR In order for you to view your academic advisor, you will need to access the Student Records menu. On the StudentMenu, click the Student Records link. On the Student Records page, click the link that says View Student Information27
Your academic advisor will be listed next to the Primary Advisor field on the Student Information page You can also view other information on this page as noted by the screenshot below28
Adding, Dropping and Searching for Classes 9 – 14 Parts of Term 15 Attributes 16 Campus Codes 17 Online Classes 18 Correspondence Classes 19 Registration Errors 20 Holds 21 Week at a Glance 22 Student Detailed Schedule 23 Course Catalog 24 Active Registration 25 Regis