Transcription
Virtual Office Account ManagerPhone System Setup Guide8x8 Virtual OfficePhone System Setup GuideMay 2013Effective May 10, 2013, the Privileges tab in the top navigation bar of the Account Manager was renamed My Account. Privilegesand User Profiles can now be found in the My Account tab.
ContentsIntroduction . . . . . . . . . . . . . . . . . . . . . . . . . . . . . . . 3System Requirements. . . . . . . . . . . . . . . . . . . . . . . 4Supported Operating Systems. . . . . . . . . . . . . . . . . . . . . . . . . . . . . . . . . . . . . . . . . 4Required Plug-ins. . . . . . . . . . . . . . . . . . . . . . . . . . . . . . . . . . . . . . . . . . . . . . . . . . . . . . 4Supported Browsers. . . . . . . . . . . . . . . . . . . . . . . . . . . . . . . . . . . . . . . . . . . . . . . . . . . 4Required Firewall Ports . . . . . . . . . . . . . . . . . . . . . . . . . . . . . . . . . . . . . . . . . . . . . . . . 4Minimum System Requirements . . . . . . . . . . . . . . . . . . . . . . . . . . . . . . . . . . . . . . . 4Bandwidth Recommendations. . . . . . . . . . . . . . . . . . . . . . . . . . . . . . . . . . . . . . . . . 4Login Procedure. . . . . . . . . . . . . . . . . . . . . . . . . . . . 5Account Manager Home Page. . . . . . . . . . . . . . . . 6Call Logs. . . . . . . . . . . . . . . . . . . . . . . . . . . . . . . . . . . . . . . . . . . . . . . . . . . . . . . . . . . . . . . . 7Billing Summary. . . . . . . . . . . . . . . . . . . . . . . . . . . . . . . . . . . . . . . . . . . . . . . . . . . . . . . . 7Phone System Setup. . . . . . . . . . . . . . . . . . . . . . . . . . . . . . . . . . . . . . . . . . . . . . . . . . . 7Corporate Directory. . . . . . . . . . . . . . . . . . . . . . . . . . . . . . . . . . . . . . . . . . . . . . . . . . . . 8Account Updates. . . . . . . . . . . . . . . . . . . . . . . . . . . . . . . . . . . . . . . . . . . . . . . . . . . . . . . 8How Do I?. . . . . . . . . . . . . . . . . . . . . . . . . . . . . . . . . . . . . . . . . . . . . . . . . . . . . . . . . . . . . . 9Configuring Your 8x8 Phone Service. . . . . . . . . . 9Phone System Setup. . . . . . . . . . . . . . . . . . . . . . 10Number Transfer. . . . . . . . . . . . . . . . . . . . . . . . . . . . . . . . . . . . . . . . . . . . . . . . . . . . . 10Request a Number Transfer. . . . . . . . . . . . . . . . . . . . . . . . . . . . . . . . . . . . . . . . . . 11User Profiles . . . . . . . . . . . . . . . . . . . . . . . . . . . . . . . . . . . . . . . . . . . . . . . . . . . . . . . . . 14Using the User Profile Configuration Tool. . . . . . . . . . . . . . . . . . . . . . . . . . . . 15Assigning a User to an Extension. . . . . . . . . . . . . . . . . . . . . . . . . . . . . . . . . . . . 16Configuring Extensions. . . . . . . . . . . . . . . . . . . . . . . . . . . . . . . . . . . . . . . . . . . . . . 17Configuring Individual Extensions. . . . . . . . . . . . . . . . . . . . . . . . . . . . . . . . . . . .18Call Forwarding. . . . . . . . . . . . . . . . . . . . . . . . . . . . . . . . . . . . . . . . . . . . . . . . . . . . . . . 23Extension User Call Forwarding Basic Setup. . . . . . . . . . . . . . . . . . . . . . . . . 25Email Notification to Extension Users. . . . . . . . . . . . . . . . . . . . . . . . . . . . . . . 28Call Routing. . . . . . . . . . . . . . . . . . . . . . . . . . . . . . 29Ring Groups. . . . . . . . . . . . . . . . . . . . . . . . . . . . . . . . . . . . . . . . . . . . . . . . . . . . . . . . . . 29Virtual and Toll-Free Numbers. . . . . . . . . . . . . . . . . . . . . . . . . . . . . . . . . . . . . . . 33Auto Attendant. . . . . . . . . . . . . . . . . . . . . . . . . . . . . . . . . . . . . . . . . . . . . . . . . . . . . . 35About Auto Attendant Profiles . . . . . . . . . . . . . . . . . . . . . . . . . . . . . . . . . . . . . . 38Why Create More Than One Profile?. . . . . . . . . . . . . . . . . . . . . . . . . . . . . . . . . .38Additional Features. . . . . . . . . . . . . . . . . . . . . . . 44Music and Message on Hold . . . . . . . . . . . . . . . . . . . . . . . . . . . . . . . . . . . . . . . . . 44Allowing Extension User Access. . . . . . . . . . . . . . . . . . . . . . . . . . . . . . . . . . . . . 45Account Manager Privileges and Roles. . . . . . 45Add New Administrator . . . . . . . . . . . . . . . . . . . 46
Virtual Office Account ManagerPhone System Setup GuideIntroductionNow that you’ve activated your phones (see the Preparing Your Network and Installing Your Phones guide), the next step in setting up your new8x8 phone service is to log into your online 8x8 Account Manager. The 8x8 Account Manager is the simple way for phone system administratorsto manage their company’s 8x8 Virtual Office phone system.Using the 8x8 Account Manager, phone system administrators can perform tasks such as: Creating and editing User Profiles Assigning users, configuring and managing extensions Managing phone system features such as the Auto Attendant, Ring Groups, Music-on-Hold, and more Transferring phone numbers to 8x8 service Updating your payment methods Checking order status Opening and tracking support cases3
Virtual Office Account ManagerPhone System Setup GuideSystem RequirementsSupported Operating Systems Windows 7, Vista and XP Mac OS 10.5.4 (Leopard ) or newerRequired Plug-ins Flash Player 10.0 or higherSupported BrowsersMicrosoft Windows EnvironmentMac OS EnvironmentLinux Environment Firefox 3.0 and higher Firefox 3.5 and higher Firefox 3.0 and higher Google Chrome 1.0 and higher Google Chrome 1.0 and higher Google Chrome 1.0 and higher Internet Explorer 7.0 and higher Safari 3.0 and higher Opera 9.5 and higher Opera 9.5 and higher Safari 4.0 and higherRequired Firewall PortsFirewall Ports to be Open 80 TCP (http) 443 TCP (https)Minimum System RequirementsWindows XP Pentium 4 1.3 GHz / AMD Athlon XP1500 or newer 512 MB of RAMBandwidth Recommendations Cable modem, DSL or better Minimum: 1.5 Mbps down / 384 kbps up4Windows 7 and Vista Pentium 4 1.3 GHz / AMD Athlon XP1500 or newer 1 GB of RAMMac Powercomputer G4/G5 or newer 512 MB of RAM
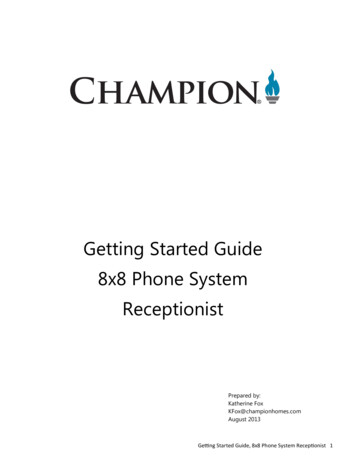
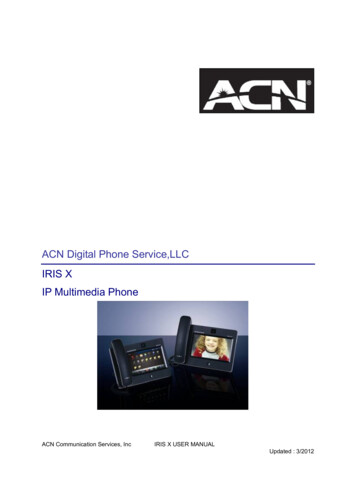
Virtual Office Account ManagerPhone System Setup GuideLogin Procedure1. Go to www.8x8.com.2. Click Sign-In.3. Select Account Manager.4. Enter your 8x8 login and password.5
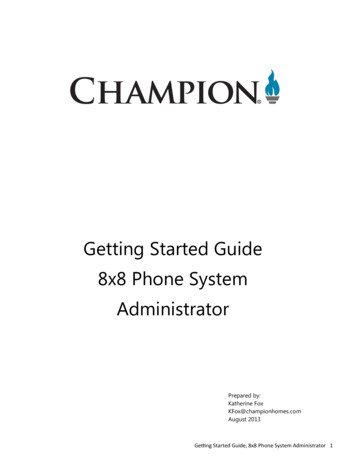
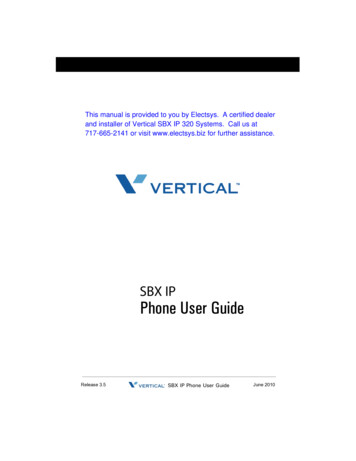
Virtual Office Account ManagerPhone System Setup GuideAccount Manager Home PageOn the Account Manager home page your username and email address is displayed at the top center, your company name and main number isdisplayed in the top right corner.The home page provides a snapshot of your Virtual Office system. At a glance you can see the status of different tasks and select variousoptions.6
Virtual Office Account ManagerPhone System Setup GuideCall LogsDisplays the number of incoming and outgoing calls based on the selected interval.Billing SummarySummarizes your current charges for 8x8 Virtual Office phone service.Phone System SetupWhen you first purchase 8x8 Virtual Office, an 8x8 technical installation representative will walk you through all your setup tasks over thephone. If you do not have a scheduled appointment and need assistance you can request an appointment. To schedule or view appointmentdetails, click Installation Appointment(s).7
Virtual Office Account ManagerPhone System Setup GuideCorporate DirectoryAll your numbers in one convenient location. You’re able to easily search for users’ contact information, detect users’ presence or availability andcall or chat with users.Account UpdatesOrder Status provides the status of orders placed in the last 30 days at a glance. To view the status of earlier orders, click View All and thenselect or search for the desired order.Number Transfer Status displays pending number transfer requests. To view the status of all number transfers, click View All.8x8 Network Alerts displays information about any 8x8 system or network updates.8
Virtual Office Account ManagerPhone System Setup GuideHow Do I?Quick access to popular Help topics. You can also access help information using the Help link at the top of each page.Configuring Your 8x8 Phone ServiceMost systems can be set up in 3 steps:1. Phone System Setup Initiating number transfer Activating phones and creating User Profiles Assigning users, and configuring extensions2. Routing Calls Creating Ring Groups Editing Virtual and Toll-Free Numbers (add-on option) Setting up the Auto Attendant3. Additional Features Selecting your music and message on hold optionsTo get started, click Setup Features in the Phone System Setup box on the home page.9
Virtual Office Account ManagerPhone System Setup GuidePhone System SetupNumber TransferWith 8x8, you can transfer your existing phone numbers to your new 8x8 Virtual Office phone service. Using the Account Manager, you cancheck the status of numbers being transferred, continue or cancel current number transfer requests and begin the number transfer process foradditional phone numbers.10
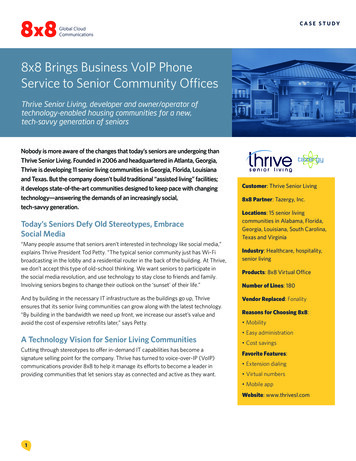
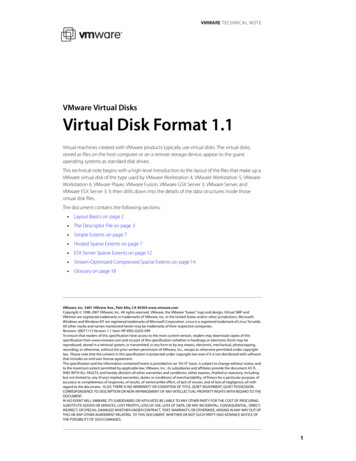
Virtual Office Account ManagerPhone System Setup GuideRequest a Number TransferTo request a number transfer:1. Click Phone System on the top navigation bar2. Under the Phone System menu on the left, click Number Transfer. You are now on the Number Transfer main page.3. Click Print Number Transfer Checklist and review instructions to ensure you have all required information ready before you start thenumber transfer process.4. When you have gathered all required information, click the Begin Number Transfer button.5.Answer the four questions on the Begin Number Transfer page.6. Click Continue.11
Virtual Office Account ManagerPhone System Setup Guide7. Enter the number of service locations for the phone numbers.To continue, click Next.Note: At any time if you want to complete the number transfer request later, click Save for Later.8. Enter the service address and service provider information for the number you want to transfer.To continue, click Next.12
Virtual Office Account ManagerPhone System Setup Guide9. Enter or cut and paste the numbers you want to transfer.Note: you must separate the numbers with commas, tabs or line breaks.To continue, click Next.10. Click the drop-down arrow to select a temporary number for each of the numbers you are transferring. Use theand delete phone numbers.To continue, click Next.11. Review the information you provided to ensure it is correct. To edit any of the information, click Back.To continue, click Next.13andbuttons to add
Virtual Office Account ManagerPhone System Setup Guide12. Review the Letter of Authorization carefully. We recommend you print it for your records using the provided button. If you agree to allterms in the letter, click I Agree.Click the Phone System icon to return to the Phone System Setup pageUser ProfilesA User Profile is required to give a user access to your 8x8 system. A User Profile must be created before assigning a user to an extension orgranting administrative privileges to your Account Manager.You only need to create one User Profile per individual. A User Profile can be assigned to multiple extensions or features. It is important that auser’s profile remains current, especially the user’s email address. The following User Profile fields are mandatory: First Name Last Name Email Address Username Note: When creating a new User Profile, by default the Username is the email address. The system administrator has theflexibility to change the Username to something other than the email address.In addition to the above mandatory fields, the following fields are available and can be used or not used at the phone system administrator’sdiscretion: Nickname- When this field is used, the nickname replaces the first name Job Title Department Location 3 customizable fields14
Virtual Office Account ManagerPhone System Setup GuideUsing the User Profile Configuration Tool1. Click My Account on the top navigation bar.2. Click User Profiles3. To hide or unhide available User Profile fields in the User Profile chart, click Edit Viewable/Hidden Fields4. Check or uncheck the fields to display5. Click SaveCustomizable FieldsPhone system administrators can create up to three customizable fields.To use the customizable field(s): Click Edit Viewable/Hidden Fields Check the box next to a Custom Field Name the field by typing in the adjacent Header Label box Click SaveCreate and Edit User ProfilesYou can create User Profiles one at a time or in bulk.To create an individual User Profile:1. Click Create New User Profile2. Enter user information. Mandatory fields are: First Name, Last Name, Email Address and User Name (by default User Name is emailaddress).3. Click SaveNote: For phone extensions that will not be assigned to a specific individual but instead will be located in a specific area like the front lobby,conference room, etc., create a User Profile for each area. Example: Enter “Front” as a First Name and “Lobby” as the Last Name, andenter the email address for the person responsible for maintaining the extension settings (usually the Primary System Administrator)To edit a User Profile, click Edit in the Action Column for the User Profile you want to edit.To create or edit multiple User Profiles:1. Click Download CSV TemplateNote: If using customizable fields, before downloading the template make sure that you have labeled the field by following theCustomizable Fields instructions above.2. Download and open the file3. Enter information for new User Profiles or edit information for current profiles.Important: Do not make any changes to the 8x8 Internal ID column4. Once you have made all your changes save the file to your computer hard drive15
Virtual Office Account ManagerPhone System Setup Guide5. On the User Profile page click Upload CSV Template, then Proceed6. Click Add, then locate the file you just saved and click Open, then Upload7. Verify that the new information is correct and then click SubmitDisabling a User ProfileTo disable a User Profile click Disable in the Action Column. Disabling a User Profile will remove the profile from all extensions or features theUser Profile has been assigned to. (Caution: Once a User Profile has been disabled you can enable it once again. However, you will manually haveto reassign the User Profile to an extension or other feature.) To maintain historical reporting, you are unable to delete a User Profile completelyfrom your system.Assigning a User to an ExtensionIf you have not already installed and activated your phones, please see the Preparing Your Network and Installing Your Phones guide. To assign auser to an extension, you must first create a User Profile. Once the User Profile is created:1. Click Phone System on the top navigation bar2. From the Phone System home page click View All Extensions3. Click the Edit link next to the extension you want to edit4. You are now on the Edit Extensions landing page. Use the Expandand Collapseicons to view and edit the Extension Informationpane5. Click Select User Profile link6. Click the Select link next to the User Profile you want to assign to the extension7. You can continue to configure the extension using the Configure Individual Extension directions below or click Save at the bottom of thepage to update user profile assignment.To remove a User Profile from an extension, click Clear User Profile. Clearing a User Profile will reset the extension back to the defaultunassigned state. Note: clearing a User Profile only removes the user from the extension and the User Profile will still be active and available toother features that it is assigned to. To disable a User Profile and to remove it from all your system features, see “Disabling a User Profile” onpage 16 in the User Profile section of this guide.16
Virtual Office Account ManagerPhone System Setup GuideConfiguring ExtensionsIf you have not already installed and activated your phones, please see the Preparing Your Network and Installing Your Phones guide. To beginconfiguring your extensions, click Manage on the Extensions box.You can configure extensions one at a time or multiple extensions simultaneously. Configurable features are as follows:FeatureDescriptionExternal Caller ID First NameName displayed for outgoing callsExternal Caller ID Last NameName displayed for outgoing callsVoicemail PasswordVoicemail password to access the extension’s voicemailsTime ZoneFor phone display and voicemail timestampE911 Service AddressProvides a specific address for emergency response teams when the user dials 911Allow International CallsIf selected, extension user can make international callsHide in Auto Attendant DirectoryIf selected, the extension will not be listed in the Auto Attendant when callers access the corporatedirectory or dial-by-name optionAllow Music-on-Hold SelectionIf selected, users can choose their own Music-on-Hold from the music libraryAllow Social Networkinglf selected, allows users to communicate with Facebook and Twitter contactsPermanent Caller ID BlockingIf selected, outbound calls display as anonymous (for individual extensions only)Enable Inbound Caller IDIf selected, the phone displays the name and number of the inbound caller (for individual extensions only)Display Number for Outgoing Calls Phone number displayed on outgoing calls17
Virtual Office Account ManagerPhone System Setup GuideConfiguring Individual ExtensionsSelecting and editing individual extensions is available through Manage Extensions.Once you have selected a User Profile for an extension, you can continue configuring the extension using the steps below.Use the Expandand Collapseicons to view and edit the following panes:Note: the panes displayed will vary depending on whether the selected extension is Basic, Virtual, Fax, Shared, Unlimited, Unlimited Pro,etc. If you are editing a shared extension, see the Shared Lines section for additional details. Extension Information Extension Settings Voicemail Settings Virtual Office Pro Information Call Forwarding Extension Membership Display Communication PreferencesEnabling/Disabling Virtual Office OnlineBy default Virtual Office Online is enabled for all unlimited, global and metered Virtual Office extensions. Virtual Office Online and Virtual OfficeDesktop are web-based tools that allow extension users to manage and use their phone features online, including accessing the corporatedirectory and call forwarding settings, from any computer. A username and password is required to log into these features.18
Virtual Office Account ManagerPhone System Setup GuideExtension InformationThe Extension Information pane lets you assign a User Profile to an extension, enable or disable Virtual Office Online and edit extension caller IDsettings.1. Click the Expandicon to display the Extension Information pane.2. Enter, select or deselect these options for individual extensions: Assign User Profiles Extension Caller ID Phone Number External Caller ID First Name External Caller ID Last Name Time Zone3. Click Save Changes at the bottom of the screen.19
Virtual Office Account ManagerPhone System Setup GuideExtension SettingsIn this pane, you can configure extension settings including time zone, e911 service address and calling options.1. Use the Expandicon to display the Extension Settings pane2. Enter, select, or deselect the following: Time Zone Preferred Codec E911 Service Address Allow International Calls Hide in Auto Attendant Directory Allow Music On Hold Selection Allow Social Networking Enable Inbound Caller ID Permanent Caller ID Blocking Display Number for Outgoing Calls3. Click Save Changes at the bottom of the screen20
Virtual Office Account ManagerPhone System Setup GuideVoicemail SettingsIn this pane, you can edit the ex
Using the 8x8 Account Manager, phone system administrators can perform tasks such as: Creating and editing User Profiles Assigning users, configuring and managing extensions Managing phone system features such as the Auto Attendant, Ring Groups, Music-on-Hold, and more T