Transcription
Manual 4aPulmonary FunctionSeptember 14, 2011 - Version 1.02xPrepared by the ARIC Pulmonary Function Expert TeamStudy website - http://www.cscc.unc.edu/aric/
Pulmonary FunctionTABLE OF CONTENTS1. BACKGROUND . 32. EQUIPMENT AND SUPPLIES . 32.1. Advantages of the Sensor Medics Zero Return Spring .42.2. Initial Equipment Setup .42.3. Daily Leak and Calibration Checks .62.4. How to Clean the Spirometer .72.5. How to Clean the Hoses .83. HOW TO TEST PARTICIPANTS . 83.1.Spirometry Instructions and Preparation . 84. BRONCHODILATOR TESTING . 154.1.How to Give Albuterol. 175. HOW TO PRINT A REPORT. 175.1.Copy File . 185.2.Send File for Review . 196. QUALITY ASSURANCE . 216.1.Training . 216.2.Certification . 216.3.Site Visits . 226.4.The Need for Spirometry QC . 226.5.Implementation of QC Procedures. 227. SAFETY PROCEDURES . 27MOP 4: Pulmonary Function ver. 1.02Page 2
1.BACKGROUNDSpirometry is the simplest, most effective, and least expensive test for assessment of pulmonaryfunction. Spirometry is done for the ARIC since it provides an objective test for detecting asthma andCOPD, which are the most common chronic lung diseases. Simply asking a person about respiratorysymptoms is not adequately sensitive or specific for diagnosing asthma or COPD. Lung function is alsoa major independent predictor of morbidity and mortality from all causes.The important spirometry measurements are the forced vital capacity (FVC), which is greatest volumeof air exhaled from a maximal inspiration to a complete exhalation; the forced expiration volume in onesecond (FEV1), which is the volume of air exhaled in the first second of the FVC maneuver; and theratio between these two values: FEV1/FVC. Two professional societies publish widely recognizedspirometry guidelines: the American Thoracic Society (ATS) and the European Thoracic Society (ERS),and a combined ATS ERS spirometry guideline was published in 2005. The authors of this manualwere members of the spirometry guidelines committee. The instruments and methods in this manualconform to these guidelines and exceed their accuracy and repeatability recommendations. Thespirometers, software, and quality assurance program are the same as used by the 4th National HealthAnd Nutrition Examination (NHANES IV) occurring concurrently with the ARIC. This standardizationof methods makes the results of these two large government-funded studies directly comparable.Spirometry results are very dependent on an adequate effort by the participant performing the test. Theparticipant must completely inhale and forcefully exhale throughout the entire expiratory maneuver. Ifthe participant does not produce an adequate effort, the results are not valid. It is therefore essential thatyou explain, demonstrate, and evaluate each maneuver to coach the best possible effort from theparticipant. Although the OMI software provides technical feedback to the technician, the technicianstill must instruct and demonstrate the test procedures to the participant. In addition, the technician mustobserve the results (flow-volume curves, volume-time curves, test values, and computer qualityassessments) to determine the best coaching instructions to provide to the participants. This requiresthat the technician be familiar with what constitutes a valid test including unacceptable maneuvers aswell as provide appropriate coaching instruction. There is no substitute for a well-motivated and welltrained technician.The testing room is quiet and private, without distractions. No other tests are conducted in the roomduring spirometry testing. The ambient temperature in the testing room is maintained between 65-78ºF.Ask for air conditioning if the room becomes uncomfortable due to high humidity or high temperatures.2.EQUIPMENT AND SUPPLIESSensorMedics model 1022 dry-rolling seal volume spirometer is fitted by OMI with a digitalvolume encoder, temperature sensor, and RS232 serial computer interface.OMI spirometry software (version 5.05.11) is installed on a notebook computer with WindowsXP.Calibration syringe, 3.00 liters, Han Rudolph model # 5530Spirometer hoses, 3 feet longDisposable mouthpieces, nose clipsAlbuterol metered-dose inhalers (MDIs) and spacersMOP 4: Pulmonary Function ver. 1.02Page 3
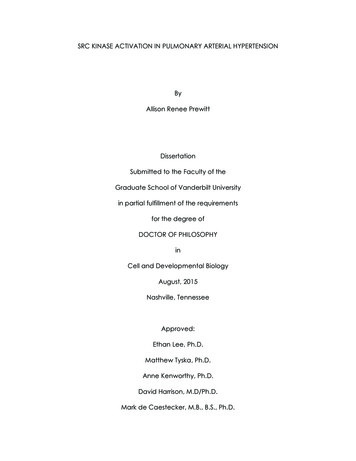
Note: Although this spirometry system is much larger than spirometers commonly used for clinicalpractice (office spirometers), it is more accurate. The volume accuracy of this system is better than 1.5percent, which exceeds the ATS-ERS recommendation accuracy within 3%.2.1.Advantages of the Sensor Medics Zero Return SpringThe spirometer’s piston is returned to the zero position at the end of each maneuver by the zeroreturn spring, reducing the time required to test a participant.Any leak in the spirometer or between the participant and his/her mouthpiece is easily detectedbecause of the obvious loss in volume as a result of the positive pressure (0.4 cmH2O) generatedby the return springThere is a clear indication when the participant comes off the mouthpiece.The spirometer is always stored with minimal volume in the spirometer, which eliminates thedevelopment of a “blip” due to seal memory within the measuring volume.2.2.Initial Equipment Setup1. Set up the equipment and connect cables on a solid desk or table.2. Connect the power cords to a grounded electrical socket.3. Turn on the spirometer.4. Power up the laptop computer.5. Use the OMI Setup Program (desktop icon).- Double click on “OMISetup” windows icon.- The initial password to enter the setup program is ‘omisetup’- There are three screens showing user, spirometer and other information. Details aregiven in the appendix.Setup Screen 1.MOP 4: Pulmonary Function ver. 1.02Page 4
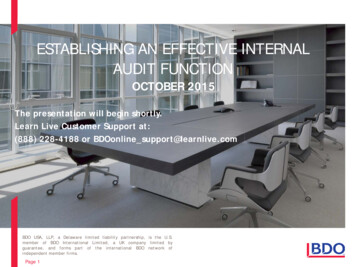
Setup Screen 2. Please don’t change the settings on this screen, which have been standardizedfor this study.MOP 4: Pulmonary Function ver. 1.02Page 5
Setup Screen 3. Do not change the setting (also standardized for this study):2.3.Daily Leak and Calibration ChecksPerform a leak and calibration check before each day of testing.Double click “OMIWSP.exe” windows icon.Enter your initialsSelect “Calibration”Select Leak Test from pull-down “Calibration” menu.A leak test is performed by checking that the negator (return spring) is engaged and thenadding 3 liters of air into the spirometer with a calibrating syringe.6. Click on “Start Timing”. The computer then monitors the spirometer volume for 60 secondsand determines if the volume is maintained. A progress bar shows the time left untilcompletion of the leak test.7. The result of the leak test are written to a calibration/leak test log file, including the date andtime of the test, by clicking on the “Save” button. A warning is displayed if a leak largerthan the 20ml is observed.8. Select “Perform Cal/Leak Check” button on the main screen or in the “Calibration” menu.9. Check that the “Current Volume” is zero.10. Fill the calibrating syringe and connect it securely to the spirometer hose.11. Click on “OK” or type any key, inject the full 3-liters from the syringe into the spirometer,and then pull back on the syringe. (NOTE: When injecting air from the syringe, do not1.2.3.4.5.MOP 4: Pulmonary Function ver. 1.02Page 6
“slam” the syringe at the end of the injection by pushing the air out too vigorously as thismay cause erroneous calibrations.)12. The computer determines the volume injected. You then verify the calibrating syringe’svolume and the computer compares this volume with the volume measured by thespirometer. The computer displays the difference between the syringe and spirometerdetermined volume in both absolute volume and as a % Error.13. Detach the calibration syringe and store it near the spirometer.14. View Calibrations: The “View Calibrations” menu item allows you to view all previouscalibration results.2.4.How to Clean the SpirometerOPTIONALSince we are only performing expiratory maneuvers (no inhalating from spirometer) and areusing filters, you do not need to routinely clean the inside of the spirometer.Should you choose to clean the spirometer, directions follow:1. Wear gloves. Unplug the power cord. Disassemble the spirometer for cleaning. Remove thesnout plate by rotating the three thumbscrews counterclockwise until the snout plate is free.It is not necessary to remove the blue adaptor from the snout for cleaning. Carefully reachinside the cylinder and slowly push back the piston.2. Wipe the snout plate, O-ring and cylinder wall with a germicidal disposable cloth provided.Do not use alcohol, acetone, other volatile agents or abrasive cleaners on the rolling seal.3. Allow the interior of the spirometer to dry thoroughly (perhaps overnight) before reattachingthe snout plate.4. Examine the O-ring for any irregularities. If damaged, replace it. Lubricate the O-ringlightly with stopcock grease provided. Fit the O-ring into the groove on the back of the snoutplate.MOP 4: Pulmonary Function ver. 1.02Page 7
5. Position the snout plate so that the three thumbscrews are aligned with the three holes on thespirometer housing. Tighten “finger-tight” as over-tightening can cause the spirometer toleak.2.5.How to Clean the HosesYou will need to clean and disinfect the hoses and accessories at daily intervals. Tubing will be cleanedand disinfected daily using a solution of Detergezyme and water according to the following protocol:1. Add one ounce of Detergezyme to every gallon of water (can be cold or warm but not hot) inthe 5-gallon bucket.2. Rinse hoses after use in this solution. Hoses that are not rinsed after use (i.e., saliva ormucous has dried) should be soaked in this solution for 10 minutes (IT’S ONLYNECESSARY TO SUBMERGE HOSES FOR 10 MINUTES IF THEY’VE DRIED (E.G.LEFT OVER THE WEEKEND WITHOUT CLEANING)).3. Ideally, re-rinse hoses with water.4. Hang hoses up to dry using clothes pegs.3.HOW TO TEST PARTICIPANTSThe Spirometry Exclusion Criteria at the end of the manual should have already been applied to everyparticipant. However, if no information is available when the pre-bronchodilator testing is completed,you may be asked some exclusion questions before a decision about administering the bronchodilator isrendered by the spirometry software. Anyone meeting exclusion criteria will not start spirometry. So,check the itinerary document (Baseline Examination Checklist Form) and ask the clinic personnel toconfirm that the patient is not excluded from spirometry before proceeding. The albuterol exclusions(checked by spirometry software) must be checked before administering the bronchodilator (albuterol).The accuracy of spirometry depends on your skills, which influence the effort exerted by the studyparticipant. Consequently, it is crucial that the examination protocol be observed consistently. Theparticipant must be carefully prepared and “coached”.3.1.Spirometry Instructions and PreparationTight clothing, such as a tie, vest, or belt, which might restrict maximal breathing efforts, should beloosened. Dentures, if they are loose, should be removed and placed in a clean denture cup, since theyprevent a tight seal from being formed around the mouthpiece. If dentures are not loose, leave them inplace.1. Wash your hands before starting.2. If the participant Personal Information form has been previously completed, you may use thefollowing procedures to automatically fill the Client Information Screen below:a) Log onto the ARIC data management system REPORTS page.b) Select PFT demographic reportc) Enter the ID number of the participantd) When the demographic information is displayed, press the “Ctrl” and then “a” keys,and all the information on the screen should be selected.e) Press “Ctrl” and then “c” keys and the information from the screen should now besaved to the computer’s clipboard.MOP 4: Pulmonary Function ver. 1.02Page 8
f) Later when you paste the information into the Client Information screen, verify thatthe ID, height and other information was correctly copied to the screen.g) Note: If height information is not available, you may need to stand the participantnext to the tape measure on the wall and manually estimate the participant’s height.5. Select “Perform/Review Test” main heading and/or “Select/Add Participant” button2. Bring up Participant Screen3. You can “Use Selected Match” or choose to enter a “New Participant”. To search for aparticipant (e.g., a participant who may be returning for a bronchodilator test), select to searchon ID or Last Name; then start typing the ID or Last Name in the search field. The bottom gridwill display the closest match to the partial ID or Last Name as it is entered. Before anyparticipant is tested, demographic information must be collected and stored in the database.MOP 4: Pulmonary Function ver. 1.02Page 9
4. Edit/Enter participant information. Verify that the information entered is correct and click“OK”. Be sure to select your site using the drop-down box or Location.6. Attach a clean breathing hose and new filter-mouthpiece using the beige hose adapter. Acardboard mouthpiece may be used if the subject can obtain a better seal around a cardboardmouthpiece.7. Explain the purpose of the examination and the need for extra effort from the participant to getmaximal results. Say “I want to measure how much and fast you can breathe out.”8. Demonstrate a deep inspiration, exaggerate body language, eyes wide, shoulders back, ontiptoes. Demonstrate proper placement of the mouthpiece stick out your tongue and place themouthpiece on top of it. Blast out.9. Ask the participant to sit during the examination. Encourage them to sit up straight. Makemake sure that they main good head alignment – ie: chin not thrust forward.10. Place nose-clip on their nose. It may be removed between trials. If the nose-clip falls off or isuncomfortable, the participant may hold his nose during FVC maneuver.11. Have the participant do a trial exhalation. The following instructions may be helpful:a) “Take a great big breath of air as far as you can inhale.”b) “Put the mouthpiece into your mouth and seal your lips tightly around it.” Shouldthe subject require the cardboard mouthpiece, check to make sure the subject does notbite down on it – this is not an issue with the plastic filter-mouthpieces which arerigid.c) “Blast your air into the tube as hard and fast as you can.” (The exhalation should bemade with the lips tight around the mouthpiece with maximal force and speed.)d) “Keep on blowing out the same breath of air, until I tell you to stop.”12. Review the procedure and correct any problems from the trial.13. Proceed with Examination.MOP 4: Pulmonary Function ver. 1.02Page 10
MOP 4: Pulmonary Function ver. 1.02Page 11
Click “Perform FVC Test”Select “Proceed with Testing” and a “Volume-Time and Flow-Volume Graph” screen appears. Awindow prompts “Start Test?” When ready, click “OK.”The message “Wait, Checking Spirometer” appears in red on the screen. AFTER THE MESSAGEDISAPPEARS, instruct the participant to take a deep breath, place the mouthpiece in his/her mouth, andBLAST the air out! Watch participant.Continue to coach the participant to exhale until the “Plateau Achieved” message is displayed and thebar on the left side turns green. Help the participant to move the mouthpiece away from their face (toreduce the risk of cross-contamination).MOP 4: Pulmonary Function ver. 1.02Page 12
Indicate standing or sitting, and your impression of the participant’s effort.Press “Calculate Curve”.A result screen is then displayed, including Trial Number, FVC, FEV1, and PEF (peak flow). After thesecond and successive trials, differences from the largest observed values, and the 6-item acceptabilitycode are displayed. All of the flow-volume and volume-time curves are also displayed superimposed.The last maneuver is highlighted in dark blue and the best curve is lime green. All of the remainingcurves are black. Any deleted or unacceptable curves are red. The quality assessment informationshould be used to judge whether a curve should be accepted or rejected. Click on the quality code boxfor a description of the acceptability codes. A reproducibility message is displayed.The Quality code box - A more detailed view of the maneuver values is shown below. The largestvalues for FVC, FEV1, and PEF are indicted by “BEST” to the right of the value in the “%Vary”column. They are also are lime in color. An important goal of testing is to match the largest and secondlargest FVC and FEV1 within 150 ml of each other. To facilitate comparison, the columns immediatelyafter the FVC and FEV1 liter values (“%Vary” column) are in milliliters. Verify that at least one FVCand one FEV1 value is less than 150 ml (colored yellow). This is called repeatability (formerly calledreproducibility).To obtain the best test session quality grade (an A), the largest and second largest FEV1, and the largestand second largest FVC must match within 100 ml. A scroll-bar on the right can be used to scroll up ordown when more than 8 maneuvers have been done (but this will rarely be necessary).MOP 4: Pulmonary Function ver. 1.02Page 13
For the experienced technologists:How to over-riding the acceptability criteria: Click on the quality code box (extreme right column), anda popup window is displayed, allowing you to over-ride any acceptability code or reject a curve. Thereproducibility criteria are then re-applied and a message as to whether the test is reproducible isdisplayed. For acceptability codes, a red bar indicates the criterion is unacceptable. Click on the“Reject Curve” button if you wish to reject a curve, “Set Cough” button if you feel the computer did notcorrectly detect a cough, “Clear Cough” button if you feel the computer incorrectly label the curve ashaving a cough. Any code that is “over-ridden” is colored in blue instead of red.Criteria for an acceptable maneuver: no hesitation or fals
spirometers, software, and quality assurance program are the same as used by the 4th National Health And Nutrition Examination (NHANES IV) occurring concurrently with the ARIC. This standardization of methods makes the results of these