Transcription
Acronis Cyber CloudIntegration with Kaseya VSAINTEGRATION GUIDERevision: 3/25/2021
Table of contents1 Introduction32 System requirements43 Configuring the integration64 Managing customers74.1 Create a new Acronis customer tenant and link to a Kaseya VSA organization4.2 Link an existing Acronis customer tenant to a Kaseya organization5 Installation of Acronis Cyber Protect agents712155.1 Manual installation of an Acronis Cyber Protect agent155.2 Automatic installation of a cyber protection agent166 Updating cyber protection agents187 Protecting devices198 The Default Protection Plan209 Importing protection plans229.1 Importing plans from the Protection Plan Templates tab229.2 Importing plans from the device side menu249.3 How to Create a Custom Protection Plan2410 Operations with Protection Plans2510.1 Manually start a non-scheduled backup2510.2 Manually stop a running backup2610.3 Revoke a protection plan2710.4 Disable a protection plan2811 Monitoring Backup and Protection Status2912 Recovery3113 Ticketing322 Acronis International GmbH, 2003-2021
1 IntroductionThis document describes how to install and use the Acronis Cyber Protect plugin for Kaseya VSA. Theintegration with Acronis Cyber Protect enables managed service providers to easily back up andprotect devices directly from the Kaseya VSA interface without going to the Acronis Cyber Protectweb interface.Once the plugin is installed and configured, the data protection properties become automaticallyavailable for all servers and workstations in any location.The service providers can:lProvision new Acronis Cyber Protect customerslRemotely install, update and uninstall the protection agent on the deviceslEasily apply and revoke the pre-defined protection plan at customer or device levellMonitor protection status for errors and warningslLeverage the native Kaseya VSA reporting, ticketing and alerting functionality for handling backupeventsService providers can create unique protection plans from the Acronis Cyber Protect web interface.Those protection plans are then synchronized and available for import and further usage in theKaseya VSA interface.Recovery is performed exclusively via the Acronis Cyber Protect web interface.Terminology conventionsIn this document, the Acronis Cyber Protect plugin will be referred to as "Acronis plugin" and theAcronis Cyber Protect web interface as "Acronis Cyber Protect console" or “Management console”.3 Acronis International GmbH, 2003-2021
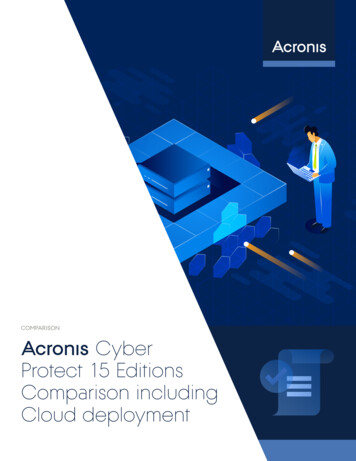
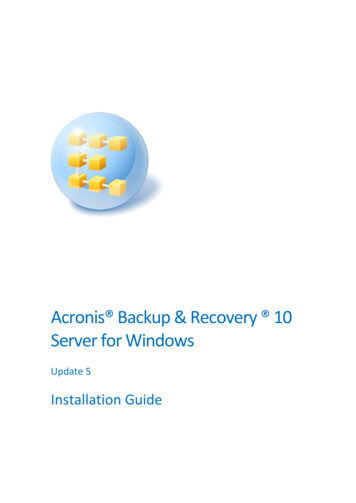
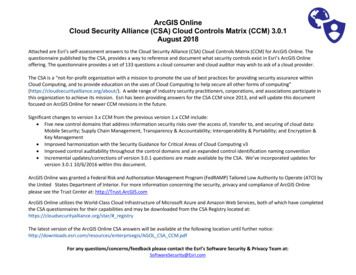
2 System requirementsAcronis pluginThe Acronis plugin can be installed on Kaseya VSA R95 or later.Acronis agentsAgents are applications that perform data backup, recovery, protection and other operations onAcronis-managed devices. An agent can be installed on any Windows operating system, supported byKaseya VSA (find a full list /reqs/index.asp#home.htm).For a complete list of Acronis-supported operating systems, refer to the Acronis Clouddocumentation.Network requirementsThe diagram below illustrates the network connections necessary for the Acronis plugin.User rightsIn Kaseya VSA, two levels of access rights exist to differentiate between administrator and generaltechnician users.1. Administrator accessIn order to have full access to the plugin, including installation, the administrator'sConnectWise.Automate user class must have the Core Plugin Manager permission set toAccess.2. Technician accessFor technicians, who should not have access to the Plugin Manager, but do need the fullfunctionality of the Acronis integration, make sure that their user class has the Plugin AcronisCyber Cloud permission set to Access.4 Acronis International GmbH, 2003-2021
Apart from the administrator, it is not necessary for any other user, to have Plugin Manageraccess in order to use the integration.5 Acronis International GmbH, 2003-2021
3 Configuring the integrationTo configure the integration using Acronis Cyber Protect1. Go to Cyber Protect Console Settings Integration and click on Kaseya.2. On the screen that opens, get the installer token and download the VSAZ installer.3. Install the VSAZ file in the following directory:Kaseya VSA System License Manager Third Party Install4. Follow the on-screen instructions to complete and activate the installation.6 Acronis International GmbH, 2003-2021
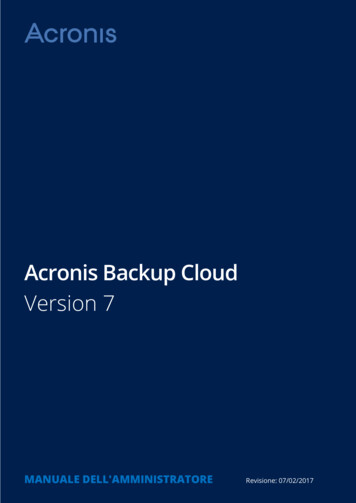
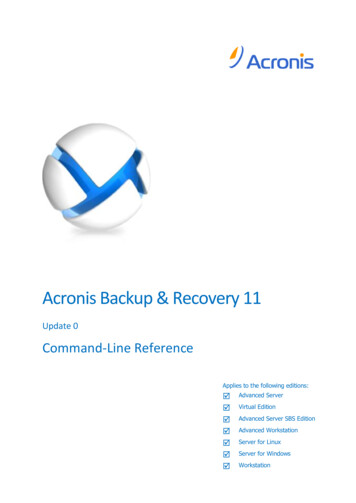
4 Managing customersTo enable device protection, you must link Kaseya VSA organizations to Acronis Cyber Protectcustomers. Do this by either:lCreating a new Acronis customer tenantIf you do not have a customer in Acronis Cyber Protect to link to, then you can create such fromwithin the Kaseya VSA module. The login and password of the newly created tenant will be usedautomatically when clicking Go to Acronis Cyber Protect console in the Kaseya VSA interface.lLinking an existing Acronis customer tenant to Kaseya VSA organizationIf you already have a customer tenant in Acronis Cyber Protect, select and link them to a KaseyaVSA organization.4.1 Create a new Acronis customer tenant and link to aKaseya VSA organization1. Click the Add organization button in the Kaseya VSA module.2. Select the following option: Create a new customer in Acronis Cyber Cloud.7 Acronis International GmbH, 2003-2021
3. In the Mapping step, select the Kaseya organization that you would like to create a new Acroniscustomer for. You can create multiple customers (up to 20) by selecting more than oneorganization.The integration module will suggest a name for the Acronis customer by appending the “KSA”suffix after the Kaseya organization name. You are allowed to change the name at this step.8 Acronis International GmbH, 2003-2021
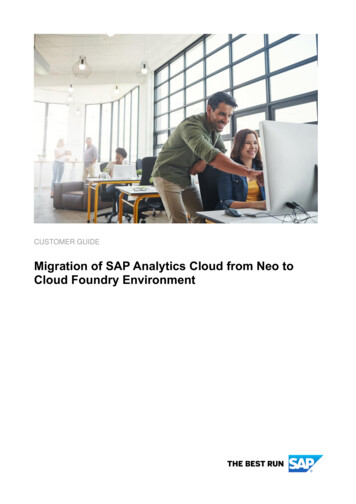
4. Choose an Acronis Cyber Protection edition for the new Acronis customers.NoteThe same Cyber Protection edition will be applied to all new customers created within the samesession.9 Acronis International GmbH, 2003-2021
5. To create an Administrator, provide an email address. The integration will generate individual loginand password for each Acronis customer and use these credentials to install Acronis agents fromwithin Kaseya VSA.10 Acronis International GmbH, 2003-2021
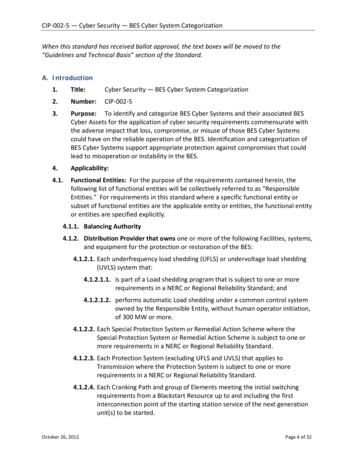
6. Finally, a Summary screen will appear with information about the newly created Acroniscustomer tenants and the Kaseya organizations they were connected to.You will have two options to choose from:a. Install Acronis agents automatically – enable this checkbox to allow the integration toinstall Acronis agents automatically to all devices that don’t have Acronis installed yet.b. Apply default protection plan – the Acronis Cyber Protect default protection plan will beautomatically applied to all devices without plans.11 Acronis International GmbH, 2003-2021
4.2 Link an existing Acronis customer tenant to aKaseya organization1. Click the Add organization button in the Kaseya VSA module.2. Select the Link an existing Acronis Cyber Cloud customer option.12 Acronis International GmbH, 2003-2021
3. In the Mapping step, select a Kaseya organization and map it to an Acronis customer. You cancreate up to 20 mappings at once.4. Add an email address for Administrator login, which will be used only to install agents from theintegration. A new administrator account will be created for integration usage and existingAdministrator logins will remain unchanged.13 Acronis International GmbH, 2003-2021
5. At the end, you’ll see a Summary screen with information about the newly created Acroniscustomer tenants and the Kaseya organization they are mapped to.There will be two options to choose from:a. Install Acronis agents automatically – by enabling this checkbox, you allow the integrationto install Acronis agents automatically to all devices that don’t have Acronis installed yet.b. Apply default protection plan – the Acronis Cyber Protect default protection plan will beautomatically applied to all devices where necessary.14 Acronis International GmbH, 2003-2021
5 Installation of Acronis Cyber Protect agentsAn Acronis Cyber Protect agent must be installed on every device that you want to back up andprotect. There are two installation methods:llManualoInstalling the agent at a customer leveloInstalling the agent at a device levelAutomaticoInstalling the agent at a customer level5.1 Manual installation of an Acronis Cyber Protect agentThis method allows you to install agents on any device within an organization.To install the Acronis Cyber Protect agents at a customer level1. Go to the Acronis Cyber Protect module in Kaseya VSA.2. Click on a customer.3. All devices for this customer will be displayed in the Devices table.4. Select all devices that you want to install the agent on. To identify which devices do not have cyberprotection agents, sort the Acronis agent column in the Devices table.5. Click on Install Acronis Agent.15 Acronis International GmbH, 2003-2021
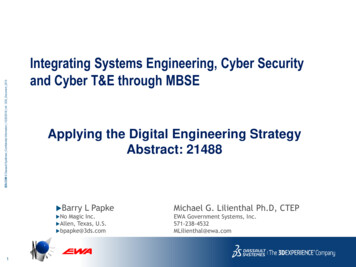
To install a cyber protection agent at a machine level1. Select a customer from the Organizations tab.2. Double-click the machine, then a side panel appears.3. Click on Install agent.5.2 Automatic installation of a cyber protection agentThere are two ways to install cyber protection agents at a customer level:When creating or linking Acronis customers1. Execute steps 1 through 4, as already described in either of the workflows: Create a newAcronis customer tenant or Link an existing Acronis customer tenant with a Kaseyaorganization.2. On the Summary screen, select the Install Acronis agents automatically checkbox. Then acyber protection agent will be silently installed on any machine added to the customer later.16 Acronis International GmbH, 2003-2021
From the Organizations list1. In your Acronis Cyber Protect module, choose an organization from the Organizations list.2. In the side panel that appears next, under Settings, enable the Install Acronis agents on newdevices automatically option.17 Acronis International GmbH, 2003-2021
6 Updating cyber protection agentsUpdating is done similarly to installation from the Acronis Cyber Protect module.1. To identify the agents that require an update, the Acronis Agent column status in the Devicestable should be marked as Update Available.2. Select all machines, for which you want to update agents and click Update Acronis agent at thetop left of the table.18 Acronis International GmbH, 2003-2021
7 Protecting devicesAcronis Cyber Protect provides backup and cyber protection for devices through the usage ofprotection plans.A protection plan is a set of rules that specify how a device will be protected, as well as how theAcronis Cyber Protect agent will monitor for suspicious activities on the device, and act when a threatis detected.A protection plan can be applied to a single or multiple devices.An Active Protection plan is the currently assigned set of rules.The Acronis Cyber Protect plugin for Kaseya comes with a built-in Default Protection Plan, but youcan also configure and use your own protection plans.19 Acronis International GmbH, 2003-2021
8 The Default Protection PlanThe default plan shipped with the plugin is a general purpose backup and protection plan that will suitmost situations and is provided to MSPs to be able to have devices working protected right away.This built-in Default Protection Plan has the following settings:lBackup ModuleEntire machine to Cloud Storage. According to this plan, a machine is backed up to the cloudstorage daily from Monday to Friday at 11:00 pm.lAntivirus and Antimalware ProtectionSelf-protection, Real-time protection and Scheduled scan are turned on. Server-side protection isoff. Quarantined files are removed after 30 days.lMicrosoft Security Essentials SettingsFull scan at 12:00 pm only on FridaylWindows Defender AntivirusFull scan at 12:00 pm only on Friday. Real-time protection is turned on.lURL FilteringURL Filtering is on. Website access: always ask userlVulnerability AssessmentProducts to check every day at 10 am (UTC): Microsoft products, other third-party productslPatch ManagementPatch Microsoft as well as other third-party products. Schedule: every Monday at 4:00 pm.lData Protection MapRun weekly at 3:30 pm, Monday through Friday for 66 extensions.You can use this default plan or configure and apply your own variant as default one.20 Acronis International GmbH, 2003-2021
The default plan will be applied automatically on every device that does not have a protection planyet, if you enable Apply default plan on new devices automatically by following these steps:1. In your Acronis Cyber Protect module, choose an organization from the Organizations list.2. In the side panel that appears next, under Settings, enable the Apply default plan on newdevices automatically option.21 Acronis International GmbH, 2003-2021
9 Importing protection plansIn this section, find a description on how to import and apply a protection plan in Kaseya VSA.A custom protection plan appears in Kaseya VSA only after it has been imported from Acronis CyberCloud.ImportantBefore importing a protection plan, verify that the Using policy rules selection method is chosen inthe Items to back up section of this plan.There are two ways to import a protection plan in Kaseya VSA.9.1 Importing plans from the Protection Plan Templatestab1. Go to the Acronis Cyber Protect module in Kaseya VSA Protection Plan Templates.2. Click Import plan.3. Select the Acronis customer from which you want to import a plan. All available plans for thiscustomer will be displayed.22 Acronis International GmbH, 2003-2021
4. Choose the protection plan you want to import and optionally, rename it.5. After you have imported the plan, you can make it the Default Protection Plan. Do this byclicking the three dots next to the plan row, then select Set as default from the pop-up menu.As described above, the default protection plan is the one applied when the Apply default planon new devices automatically option in Organizations Settings is activated.23 Acronis International GmbH, 2003-2021
9.2 Importing plans from the device side menu1. Go to the Acronis Cyber Protect module in Kaseya VSA.2. Navigate to Organizations.3. Choose an organization, then select a device.4. On the side panel that appears next, click Import plan.5. Select an Acronis customer, then a protection plan.6. After the plan is imported, it will be available for all organizations in your Kaseya VSA module.7. You can set the plan as the default one by clicking on the three dots next to the plan row, thenselect Set as default from the pop-up menu.As described above, the default protection plan is applied when the Apply default plan on newdevices automatically option in Organizations Settings is activated.9.3 How to Create a Custom Protection PlanYou can create your own plans in the Plans section of the Acronis Cyber Protect console.Any protection plan created in the console becomes immediately available for import in the KaseyaVSA interface.For more information about the protection capabilities, refer to the Acronis Cyber Protectdocumentation.24 Acronis International GmbH, 2003-2021
10 Operations with Protection Plans10.1 Manually start a non-scheduled backup1. Click on the device you want to back up.2. If more than one plan has been assigned to a device, you will need to select the one you want tomanually run the backup for.3. Expand the Backup section and click Run now.25 Acronis International GmbH, 2003-2021
10.2 Manually stop a running backup1. Double-click a device with a backup in progress.2. Select the protection plan that shows a Backing up status.3. Click Cancel to stop the currently running backup process and remove the incomplete backup filefrom storage. The next backup will run as scheduled.26 Acronis International GmbH, 2003-2021
10.3 Revoke a protection plan1. Double-click the device you want to revoke the protection plan for.2. Select the protection plan you want to revoke.3. Click on the three dots to invoke the pop-up menu.4. Select Revoke from the available options.The selected plan will be revoked. Any other plans, applied to this device, will continue to run asscheduled.27 Acronis International GmbH, 2003-2021
10.4 Disable a protection plan1. Double-click the machine.2. Select the protection plan you want to revoke.3. Click on the three dots to invoke the pop-up menu.4. Select Disable from the available options.You can always enable a previously disabled plan.28 Acronis International GmbH, 2003-2021
11 Monitoring Backup and Protection StatusMonitoring at customer or machine levelFor each machine that has a backup module enabled in the protection plan, the following parameterscan be tracked from the side menu Protect tab:lThe last backup date and timelThe next backup date and time29 Acronis International GmbH, 2003-2021
Monitoring in the Devices tableFor each device that has a backup module enabled in the protection plan, the following parameterscan be tracked in the Devices table for each customer:lThe last backup date and timelThe next backup date and timeYou can also see a number of active alerts for each device.Monitoring in the Organizations tableFor each customer, you can see the total number of devices available as well as how many of themare Protected. A device is considered ‘protected’ if it has both an Acronis Cyber Protection agentinstalled and a protection plan applied.30 Acronis International GmbH, 2003-2021
12 RecoveryTo recover data to a device:1. Double-click the device you would like to recover.2. On the side panel that opens next, click Recovery. This will take you to the Acronis Cyber Cloudconsole and the recovery points for this device will be displayed.3. Follow the instructions in the Acronis Cyber Protect Help about:a. File recoveryb. Device recovery31 Acronis International GmbH, 2003-2021
13 TicketingAcronis alerts generate tickets in your favorite Kaseya ticketing solution:lTicketing tab in Kaseya VSAlService Desk in Kaseya VSAlService Desk in Kaseya BMS32 Acronis International GmbH, 2003-2021
Mar 25, 2021 · 4.1 Create a new Acronis customer tenant and link to a Kaseya VSA organization 7 . Network requirements . Acronis Cyber Protect agent will monitor for suspicious activities on the device, and act when a threat is detected.