Transcription
Verifone Finland OyVantaankoskentie 1401670 Vantaawww.verifonewww. verifone.fiverifone .fipoint@point.fiSwitch: 09 477 433 0Fax: 09 436 24 90Our opening hours on weekdays are 88-16Sales:09 477 433 40myynti@point.fiAccessories:09 477 433 44tarviketilaukset@point.fiOrder processing:09 477 433 43tilaustenkasittely@point.fiMaintenance:09 477 433 70huolto@point.fiCustomer service:0600 01 02 03 (1,31 / min )weekdays: 8 – 21Saturdays: 9 – 18Sundays: 12 – 18asiakaspalvelu@point.fiI nvoicing / Lindorff:02 2700 390weekdays: 8 – 20Saturdays: 10 – 15laskutus@lindorff.fi
INDEX:1. BEFORE USE. 51.1 Important . 51.2 PA-DSS –Standard . 51.3 Terminal structure . 61.4 Technical data . 71.5 Connecting the cables . 81.5.1 Connecting the power cord. . 81.5.2 Connecting the Ethernet cable. 91.6 Battery .101.7 SIM-card.111.8 Switching the paper .121.9 Using the menus .121.10 Letters and special characters .121.11 Terminal start-up and shutdown.131.12 Testing the connection .132. SETTINGS . 142.1 Terminal settings.142.2 Parameter printing .142.3 Batch time .142.4 Cashier number .152.5 Time and date settings .152.6 Fixed IP-address .152.7 Power options .152.8 Sounds .152.9 GPRS APN .162.10 Audit log IP .163. DOWNLOADS . 163.1 Downloading applications .163.2 Parameter downloading .164. DAILY USE . 174.1 Transactions.174.1.1 Chip card transactions .174.1.2 Swipe card transactions .174.1.3 Contactless card transactions .17Verifone Finland OyVantaankoskentie 14 FI-01670 VANTAA tel: 358 (0)9 477 4330 fax: 358 (0)9 436 2490www.verifone.fi3
4.1.4 Reversal .184.1.5 External Void .184.1.6 Manual entry .194.1.7 Receipt copy.194.1.8 Refund .194.1.9 Cash back .204.2 Online transactions .204.2.1 General information on online transactions .204.2.2 Online batch.204.2.3 Verifone reporting.214.3 Reports and bank connection .214.3.1 Print batch .214.3.2 Monthly report .214.3.3 Send Batch .224.3.4 Blacklist .224.3.5 Issue report .234.3.6 Issue acknowledgment .244.3.7 Report explanations .244.4 Authorization notifications .255. SPECIAL FUNCTIONS. 275.1 Cash receipt .275.2 Extra amount .275.3 VAT .285.4 Mandatory authorization .285.5 Invoice .285.6 Preauthorization .295.7 Multiuser version .305.8 Product version .316. TROUBLE SHOOTING . 346.1 Notifications on the screen .346.2 Notifications on the receipt .356.3 Other exceptions.356.4 Service.36Verifone Finland OyVantaankoskentie 14 FI-01670 VANTAA tel: 358 (0)9 477 4330 fax: 358 (0)9 436 2490www.verifone.fi4
1. BEFORE USE1.1 ImportantNOTE! If these instructions are not followed and the terminal is damaged it will void thewarranty! Protect the power cord and modem. If they are damaged they are not to be used anymore.The terminal is not waterproof or dustproof, and is intended for indoor use only.The warranty of the terminal will void if it is exposed to water or dust.Do not use the terminal next to water or moist areas.Do not use below 0 C degrees.Never place anything inside the chip slot or connection ports that are not meant there. Thismight seriously damage the terminal.If the terminal is damaged contact Verifone’s maintenance service. Never try to fix theterminal by yourself.Use only appropriate paper with the terminal’s printer. Poor quality paper can jam theprinter and create excessive paper dust.Never use thinner, trichloroethylene, or ketone-based solvents- they may causedeterioration of plastic or rubber parts. Do not spray cleaners or other solutions directly ontothe keypad.Always shut down the terminal before removing the battery.Disconnecting the power during a transaction may cause transaction data files not yetstored in terminal memory to be lost.The terminals Li-ion –battery is not hazardous waste. Do not dispose the battery withcombustible wastes. The battery should be recycled with other hazardous wastes ordelivered to the terminal supplier for disposal.1.2 PA-DSS –StandardThe purpose of the PA-DSS –standard is to help software suppliers develop, according to the PCIDSS requirements, payment solutions which do not save forbidden card information such as theCVV2 or the PIN-code.Companies must use solutions for card payment processing that are approved according to thePCI-DSS –standard.For the latest version of the Verifone PA-DSS Implementation Guide, go tohttp://www.verifone.fi/manualsVerifone Finland OyVantaankoskentie 14 FI-01670 VANTAA tel: 358 (0)9 477 4330 fax: 358 (0)9 436 2490www.verifone.fi5
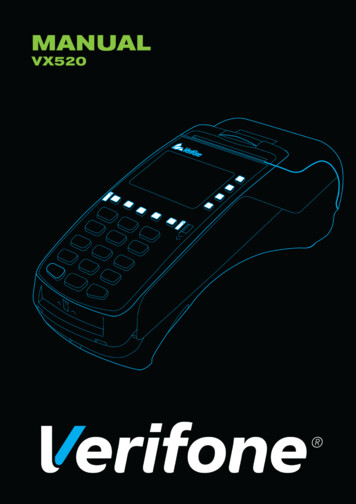
1.3 Terminal structureINTERNAL THERMALPRINTERPRINTER DOORLATCHSERRATED METALSTRIPSWIPE READERTERMINAL DISPLAYF1-F4-KEYSLILA1-5-KEYSKEYPADENTER KEYCANCEL KEYCLEAR KEYCHIP CARD READERVerifone Finland OyVantaankoskentie 14 FI-01670 VANTAA tel: 358 (0)9 477 4330 fax: 358 (0)9 436 2490www.verifone.fi6
1.4 Technical dataProcessor:400 MHz ARM11, 32-bit RISC processorMemory:160 MB (128 MB Flash, 32 MB SDRAM) standard, can exceed upto 500 MB.Display:128 x 64 pixel graphical (white backlit) LCD with backlighting; supportsup to 8 lines x 21 charactersSwipe card reader:Triple track (tracks 1, 2, 3), high coercivity, bi-directionalChip card reader:ISO 7816, 1.8V, 3V, 5V; synchronous and asynchronous cardsEMV ApprovedSAM-card readers:3 Security Access Modules (SAMs)Keypad:3 x 4 numeric backlit keypad, plus 8 soft-function keys and 4screenaddressable keysPeripheral Ports:Ethernet- (10/100BaseT), telco-, RS-232- and USB 2.0-ports.Connection:GPRS, LAN or WLANPrinter:Integrated thermal with graphics capabilities, 18 lines per second, 24 or,32 columns. Paper roll width 57mm, diameter 40 mm.Security:3DES, Master/session and DUKPT key management; PED approved,SSL, WPABattery:1800 mA lithium-Ion SmartPhysical:Length 20.3 cm, max width 8.7 cm, height 6.2 cmVerifone Finland OyVantaankoskentie 14 FI-01670 VANTAA tel: 358 (0)9 477 4330 fax: 358 (0)9 436 2490www.verifone.fi7
1.5 Connecting the cablesIn order to access the connection ports, remove the cover.1.5.1 Connecting the power cord.Connect the power cord into the left port on the bottom of the terminal. Connect the power cord tothe power supply and the plug to the electrical outlet.Verifone Finland OyVantaankoskentie 14 FI-01670 VANTAA tel: 358 (0)9 477 4330 fax: 358 (0)9 436 2490www.verifone.fi8
1.5.2 Connecting the Ethernet cableConnect the ethernet cable to the ETH-port at the bottom of the terminal. The other end of thecable is connected either to a broadband modem or plug.ETHVerifone Finland OyVantaankoskentie 14 FI-01670 VANTAA tel: 358 (0)9 477 4330 fax: 358 (0)9 436 2490www.verifone.fi9
1.6 BatteryThe battery is attached by placing it on its slot and pressing it downwards.To remove the battery, press the locking tab and pull the battery from its slot.During normal use, the battery should be loaded when its indicator (“B”) shows 20% or less. Theterminal starts charging the battery when it is connected to the power cord. The battery indicatordisappears from the display when the power cord is connected. The terminal can be connected tothe power cord at all times; this does not affect the battery. It is recommended to keep the terminalconnected to the power cord during night time. This will charge the battery so that it is fully chargedat the start of the next work day, and also ensures the success of automatic batch sendings duringthe night.Verifone Finland OyVantaankoskentie 14 FI-01670 VANTAA tel: 358 (0)9 477 4330 fax: 358 (0)9 436 2490www.verifone.fi10
1.7 SIM-cardTerminals which use GPRS-connection have a SIM-card. Before inserting the SIM-card inside theterminal, disable the PIN-code query.The SIM-card operator’s APN information is inserted to the GPRS APN menu in the terminal. TheAPN information is set to INTERNET by default, change this if needed.The SIM-card is placed beneath the battery so that the chip is facing down and the folded cornerpoints downwards.Verifone Finland OyVantaankoskentie 14 FI-01670 VANTAA tel: 358 (0)9 477 4330 fax: 358 (0)9 436 2490www.verifone.fi11
1.8 Switching the paper Pull the printer covers eject button upwards, so that it opens.Remove the previous paper roll from the printer tray.Place the new paper roll so that the paper moves from the bottom of the roll towards thefront edge.Leave a small amount of paper to extend outside the printer door.Close the printer cover.The terminal informs ”PAPER INSERTED PRESS ANY KEY”. Press any key to continue.1.9 Using the menusMoving in the menus is done with the LILA1 and LILA2 buttons. To accept a function, press theEnter button. You can get back to a previous menu with the Cancel-button. To get back to the mainmenu press cancel a few times. Choosing options in the menus is done using the F1-F4 buttons.1.10 Letters and special charactersTo insert letters and special characters, press the number with the desired character once, andLILA3 until the appropriate character appears. To switch capital letters into lower case letters,press LILA4.1 QZ.2 ABC3 DEF4 GHI5 JKL6 MNO7 PRS8 TUV9 WXY0 - space * ,‘“# !:;@ &/\% Verifone Finland OyVantaankoskentie 14 FI-01670 VANTAA tel: 358 (0)9 477 4330 fax: 358 (0)9 436 2490www.verifone.fi12
1.11 Terminal start-up and shutdownThe terminal is switched on by pressing the Enter key for a while or by connecting it to the powercord. To shutdown the terminal press the Cancel key until the terminal shuts down.NOTE! The terminal will not shutdown, if the power cord is connected.1.12 Testing the connectionThe letter S on the lower left corner of the display shows the strength of the GPRS-signal. Thesignal can be refreshed by pressing F2 on the main display.NOTE! If the signal is missing, or the percent is under 20, connections will not workproperly with the terminal. In these cases restart your terminal and test theconnection again. If the problem is repeated, contact your mobile operator about thearea’s GPRS-connection.Press LILA 1, Enter and choose SEND BATCH F2. The screen informs DIALING. If the terminalsuccessfully connects, the text CONNECTED appears on screen. A white bar and the textRECEIVING are displayed on screen. The bar turns gradually black as the batch sendingprogresses. The terminal downloads the blacklist and other required card information files from thebank.After this, the terminal is ready for use.If the blacklist is not downloaded to the terminals memory, you can test the connection byswitching on the terminal.The screen informs BLACKLIST MISSING UPDATE THE BLACKLIST? Press Enter, and theterminal connects to the bank and downloads the blacklist and other required card information files.If the connection is not working, see section 7 TROUBLESHOOTING for further information.Verifone Finland OyVantaankoskentie 14 FI-01670 VANTAA tel: 358 (0)9 477 4330 fax: 358 (0)9 436 2490www.verifone.fi13
2. SETTINGS2.1 Terminal settingsTo get to the terminals setting menu, press LILA5 and Enter. Select EDIT F4.Some of the listed settings are explained in later sections. The sections are marked in brackets.BATCH TIME (2.3)CASHIER NUMBER (2.4)TCP/IP PARAMETERSLANGUAGEEXTRA AMOUNT (5.4)CASH RECEIPT (5.1)POWER OPTIONS (2.7)AUTH. MANDATORY (5.6)TIME SETTINGS (2.5)VAT (5.5)PREAUTHORIZATION (5.7)SOUND (2.8)AUDIT LOG IP (2.9)Batch sending timeTerminal’s cashier numberDHCP / FIXED IPTerminal’s language (FIN/SWE/ENG)Extra amount settingsYES / NOTerminal’s power settingsYES/ NOTime and date settingsYES / NOYES / NOON / OFF2.2 Parameter printingPress LILA5 and press Enter.Choose PRINT F2 and PAREMETERS F2.The terminal prints out the parameters list, which shows the technical settings of the terminal. Thislist is good to save.2.3 Batch timeThe terminal will send the batch automatically if a sending time has been set in the settings.Sending time can be at any time. We recommend that the time would be after the closing time ofyour business. Even hours are not recommended (e.g. 2100).If you do not wish to use the automatic sending time, set it to be at 9999. The batch must then besent manually.Press LILA5, enter and choose EDIT F4.Choose BATCH TIME F2.Insert the desired sending time with four digits (e.g. 0315) and press enter.Verifone Finland OyVantaankoskentie 14 FI-01670 VANTAA tel: 358 (0)9 477 4330 fax: 358 (0)9 436 2490www.verifone.fi14
2.4 Cashier numberIf you have in use more than one terminal, it is important to specify each terminal by their cashiernumber. The cashier number is printed on every receipt so that it is easy to discover whichtransaction has been done with which terminal in any problem cases.Press LILA5 and Enter.Choose EDIT F4.Choose CASHIER NUMBER F3.Type on the screen the cashier number that you want for the terminal with three digits (e.g. 001).2.5 Time and date settingsPress LILA5 and Enter.Choose EDIT F4.Scroll down with the LILA2 and select TIME SETTINGS F4.Choo
Do not use below 0 C degrees. Never place anything inside the chip slot or connection ports that are not meant there. This might seriously damage the terminal. If the terminal is damaged contact Verifone’s maintenance service. Never try to fix the terminal by yourself.