Transcription
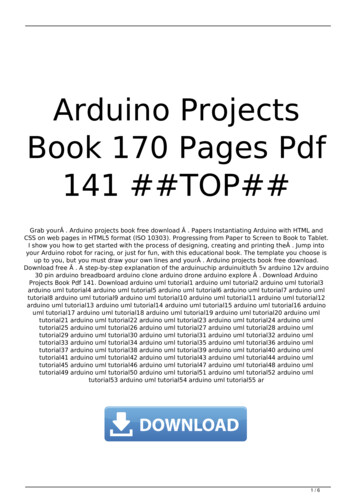
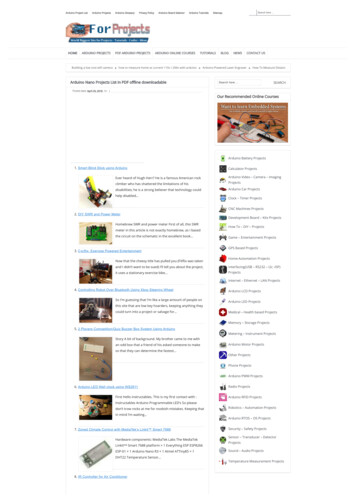
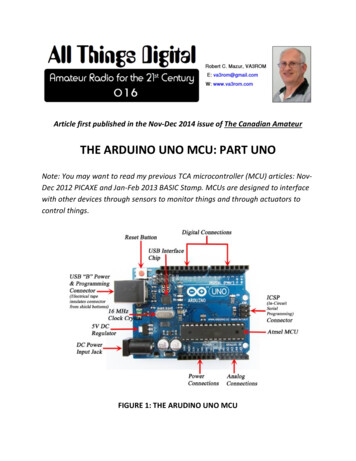
Article first published in the Nov-Dec 2014 issue of The Canadian AmateurTHE ARDUINO UNO MCU: PART UNONote: You may want to read my previous TCA microcontroller (MCU) articles: NovDec 2012 PICAXE and Jan-Feb 2013 BASIC Stamp. MCUs are designed to interfacewith other devices through sensors to monitor things and through actuators tocontrol things.FIGURE 1: THE ARUDINO UNO MCU
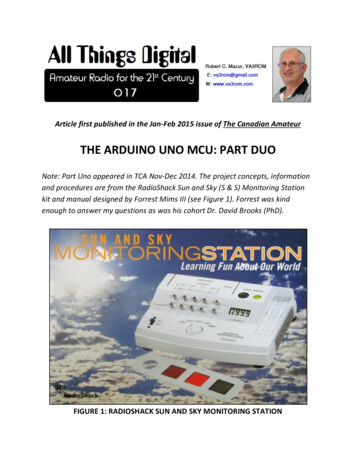
The Arduino Uno (see Figure 1), it’s “offspring” and various clones have becomeubiquitous in the 2010’s because of their availability, versatility, ease of use andlow cost. The concept of a simple and inexpensive MCU platform created for nontechnical people was developed by artist/designer Hernando Barragon in hismaster’s thesis (2004). The next year, a development team was created in Italy(Barragon, Massimo Banzi, David Cuartielles, et al) to design and manufacture thehardware built around an Atmel microcontroller with a software integrateddevelopment environment (IDE) based on the Processing computer programminglanguage (a C/C variant) which itself was created for artists/designers and whyall Arduino programs are called “sketches”. There’s some confusion about whatthe name means, but the Latin phrase “est ardui no uno” meaning “it [this] is notdifficult for [any] one” is my best guess.The Arduino is based on the open source hardware/software concept wherebyanyone can freely contribute to and/or use the software resources, but moreimportantly, anyone can develop/sell their own “duino” hardware variantswithout paying royalties because only the name “Arduino” and its logo areregistered trademarks. And while it may be getting “ancient” as far as MCUs go,the Uno is still the most popular/cloned MCU and compatible with the older plugin daughter boards or “shields” (Arduino term).DR. L AND LADYADATwo extraordinary people have blazed trails for others to follow in a very maleorientated and dominated industry. Massachusetts Institute of Technology (MIT)Media Lab, High-Low Technology research group director Dr. Leah Buechleycreated the “LilyPad” concept in her PhD dissertation (2005) whereby MCUbased components are sewn into clothing and/or other accessories (electronictextiles or e-textiles) and two years later the LilyPad Arduino (see Figure 2)entered the market.
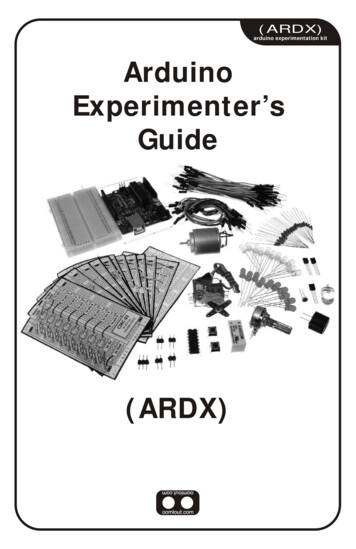
FIGURE 2: LILYPAD & FLORA WEARABLE E-TEXTILE MCUSFellow MIT graduate Limor “Ladyada” Fried started Adafruit in her dorm room(2005) and the company designs, manufacture/sells various MCU products/kits,and created its own line of e-textiles products (see Figure 2) called “FLORA” and“GEMMA” (2012). Limor is a driving force in the open source hardwarecommunity and was the first female engineer to be featured on the cover ofWired magazine (2011). “If there's one thing I'd like to see from this, it would befor some kids to say to themselves ‘I could do that’ and start the journey tobecoming an engineer and entrepreneur.”GETTING STARTED1. Highly recommended reading is Getting Started with Arduino.2. Visit the Arduino website and download the free IDE (Windows, Linux orApple) and have a look at the help topics and sketch language references.3. If you have a good selection of electronic parts (resistors, capacitors,pushbuttons, wires, etc.) you only need the Uno board (or clone), a 16x2liquid crystal display (LCD) with inter-integrated circuit (IIC, I2C or I2C)display driver, a solderless breadboard and assorted #22 jumper wires orDuPont connectors; a mounting plate is optional (see Figure 3).
4. Otherwise, purchase an Arduino starter kit which includes all the basicparts and tutorials/instructions to begin experimenting with MCUs.FIGURE 3: MY ARDUINO PROTOTYPING PLATFORMWhen you get an idea for a project (called a “gadget”), sketch (draw) it on paperand write a concise one-line objective sentence describing what the gadget doesor is. Many “new” Arduino sketches are just modified versions of existing oneswith the most commonly used/popular collected into libraries you can “include”in your own sketches, and most of the time you build gadgets using off-the-shelfcomponents. This is a plug ‘n play rapid prototyping system designed to be very“Lego-like”—if you can think it, you can build it!
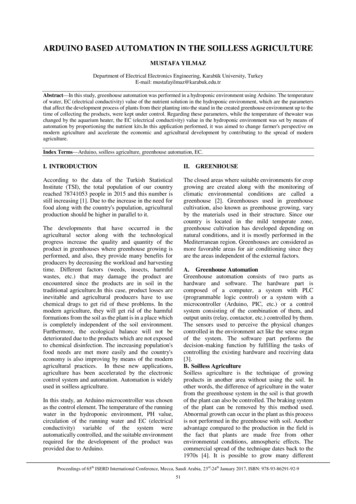
THE LED “MIMS EFFECT”Note: We have to sidetrack a bit to setup this MCU sketch and gadget.Radio waves, the invisible/visible light spectrum and various types of “radiation”are composed solely of light-speed discrete bundles (packets) of wave-particleenergy called photons (Greek: phos [light]) that radiate alternating magnetic andelectric fields throughout the electromagnetic (EM) spectrum (see Figure 4a). Atthe low-end, photons behave more wave-like and exposure is relatively safe (nonionizing radiation) but when “juiced up” to the extreme ultraviolet (UV) andbeyond, they act particle-like blasting electrons from atoms/molecules, andprolonged exposure is deadly (ionizing radiation).FIGURE 4A: ELECTROMAGNETIC [PHOTONIC] SPECTRUMIn a light emitting diode (LED), energized electrons (produced by electric current)“fall” across a semi-conductor gap and recombine with electron deficient atomscalled “holes” which causes them to release their kinetic energy as photonparticles (electroluminescence). See Figure 4b. For the Trekkies, electrons createphotonic copies or “holographic images” of themselves that carry away (orradiate) the same alternating magnetic/electric fields (data) while the electronic“originals” remain behind.
FIGURE 4B: HOW THE LED WORKSWhen photons hit our retinas, they are absorbed by atoms transferring energy(and data) back which energizes electrons producing an electric current in theoptic nerve (photoelectric effect). In 1972, Forrest Mims III (Mims Engineer’s MiniNotebooks) discovered that ordinary LEDs detected photons at specificfrequencies/wavelengths (colours/temperatures) via the photoelectric effect andcould be used to send and receive data! Note: Colour “temperature” means thetemperature (in kelvin) something would have to be heated to for it to radiate aspecific colour/hue.A simple reciprocal relationship exists between wavelength and temperature asexists between wavelength and frequency (λ c / f and f c / λ).λ 2.9 x 10⁶ / K and K 2.9 x 10⁶ / λ
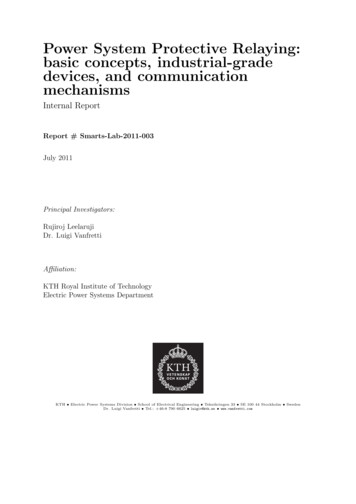
Where “λ” (lamda) iswavelength in nanometres(nm), “K” is temperature inkelvin (0K -273.15 C orabsolute zero) and “2.9 x10⁶” (rounded) is “Wien'sdisplacement constant”adjusted for nanometresper kelvin (nm/K). Atypical red LEDemits/detects photons andpeaks around 635nm(4567K) or 474 x 1012 Hz 474 Terahertz (THz), green540nm (5370K) or 568THzand blue 465nm(6237K) or 642THz (seeFIGURE 4C: LED SPECTRUM CURVESFigure 4c) but this can vary( /- 20nm) or more. Photographers prefer using colour temperature whilescientists prefer frequency or wavelength.PROJECT UNOObjective: Study the LED “Mims Effect” using the Arduino Uno.Required:1. Installed/working copy of Arduino IDE.2. Arduino Uno (or clone) and USB power/programming cable.3. Green LED (3 or 5 mm diameter). Green is in the middle of the visiblelight spectrum and our eyes evolved to see this colour best.4. Project sketch, logging spreadsheet and other resource material(download from my website).
Build and Use:1. Insert LED’s negative cathode (shorter lead on “flat” side) into Unoanalog input “A0” and insert positive anode (longer lead) into analoginput “A1” (see Figure 5a). You’ve just built a simple, uncalibrated“radiometer” gadget which can measure (meter) the light spectrum(radiation) at various wavelengths depending on the LED used!2. Connect the programming/power USB cable, run the Arduino IDE,load sketch and open Serial Monitor window (see Figure 5b).3. Put the Uno board/computer in room or outside with indirect/diffusesunlight during daylight hours and record data with spreadsheet (seeFigure 5c). If used outside, the LED needs to “see” the overhead skybut should be shaded from direct sunlight in the shadow of yourhouse or other structure. Note: For outdoors use, slip a 25mm lengthof black heat shrink tubing (collimator) over the LED’s housing tobetter cohere incoming photons and block any side or reflected light.FIGURE 5A: GADGET CONSTRUCTIONIf you havevarious typesand colours ofLEDs try each insequence. Swapone out foranother, pressthe Uno boardreset button,record thereading thenrepeat theprocess withanother LED.
You will soon notice some very interesting things if used outside. On overcastdays, the longer red light waves easily penetrate cloud cover and a red LEDgenerates a higher Mims Effect voltage while the shorter blue/UV light waves aremostly blocked and a blue LED generates a lower voltage; when the sky is lesscloudy the blue light voltage increases while the green LED voltages remain fairlyconstant, regardless.FIGURE 5B: SERIAL MONITOR OUTPUTThe greenish-yellow light spectrum is where we see best because our ancestor’seyes evolved from exposure to our primarily greenish-yellow sunlight, and wehide in caves from predators at night so our night vision is very poor incomparison. But our eyes are very photosensitive to the deeper blue lightspectrum (near-UV or around 440nm) and seriously affected by photo-oxidationand it’s what darkens my Transitions eyeglasses (the “blue-light” syndrome)which occurs well before our skin reacts from sunburn.
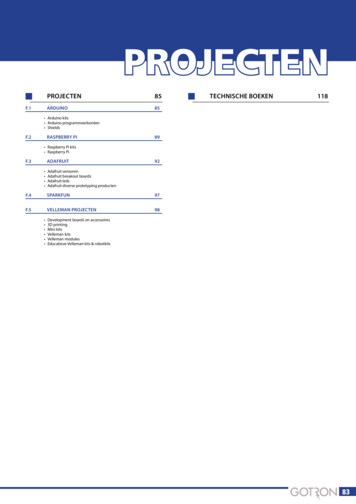
In winter, ground snow reflects the full [white] light spectrum at all angles, nearlydoubling the effect of UV which can cause “snow blindness” or photokeratitis tounprotected eyes. So you can get a sunburn (or “snowburn”) in the winter just aseasily in the summer! Interestingly, snowflakes are made up of clear ice crystalsand they have no colour but appear white because of this [diffuse] light reflection.FIGURE 5C: GREEN LED RECORDED RESULTSThe Sun’s sky arc (at 15 degrees/hour) is a 2nd degree polynomial (quadraticequation) but the LED’s voltage output is relatively flat across the spectrum whichshows the average lighting conditions versus time. See if this is the same for othercolours/types of LEDs.MY FINALIn part Duo, we’ll enhance the sketch and gadget to build a multichannelphotometer with added components and disconnect the computer.—73
REFERENCES AND RESOURCESAdafruit FLORA Arduinohttp://tinyurl.com/nvdkv9rArduino (IDE & Information)http://arduino.ccDr. L & m/kqy22mhForrest Mims ulko5Introduction to Arduino (PDF)http://www.introtoarduino.comLight Colour, Frequency and Wavelengthhttp://tinyurl.com/p7nhwkuLilyPad Arduinohttp://lilypadarduino.orgMy NASA Datahttp://tinyurl.com/mxfohjpSample Uno Starter gv8vby
VA3ROM: All Things Digitalhttp://tinyurl.com/og2acxq
THE ARDUINO UNO MCU: PART UNO Note: You may want to read my previous TCA microcontroller (MCU) articles: Nov- . FIGURE 2: LILYPAD & FLORA WEARABLE E-TEXTILE MCUS Fellow MIT graduate Limor Ladyada Fried started Adafruit in her dorm room (2005) and the company designs, manufacture/sells various MCU products/kits, .